Page 131 of 408
Features of your vehicle
52
4
Your vehicle is equipped with dual-diago-
nal braking systems. This means you still
have braking on two wheels even if one
of the dual systems should fail. With only
one of the dual systems working, more
than normal pedal travel and greater
pedal pressure are required to stop the
car. Also, the car will not stop in as short
a distance with only a portion of the
brake system working. If the brakes fail
while you are driving, shift to a lower gear
for additional engine braking and stop the
car as soon as it is safe to do so.
To check bulb operation, check whether
the parking brake and brake fluid warning
light illuminates when the ignition switch
is in the ON position.TPMS (Tire Pressure Monitoring
System) indicator (if equipped)
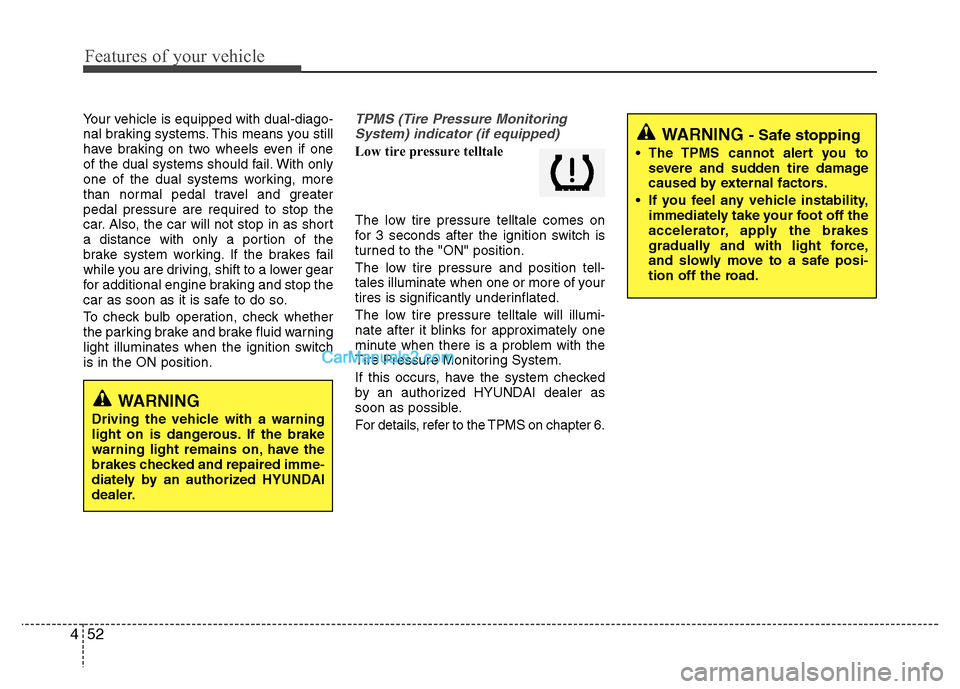
Low tire pressure telltale
The low tire pressure telltale comes on
for 3 seconds after the ignition switch is
turned to the "ON" position.
The low tire pressure and position tell-
tales illuminate when one or more of your
tires is significantly underinflated.
The low tire pressure telltale will illumi-
nate after it blinks for approximately one
minute when there is a problem with the
Tire Pressure Monitoring System.
If this occurs, have the system checked
by an authoriz ed HYUNDAIdealer as
soon as possible.
For details, refer to the TPMS on chapter 6.
WARNING
Driving the vehicle with a warning
light on is dangerous. If the brake
warning light remains on, have the
brakes checked and repaired imme-
diately by an authorized HYUNDAI
dealer.
WARNING - Safe stopping
The TPMS cannot alert you to severe and sudden tire damage
caused by external factors.
If you feel any vehicle instability, immediately take your foot off the
accelerator, apply the brakes
gradually and with light force,
and slowly move to a safe posi-
tion off the road.
Page 139 of 408
Features of your vehicle
60
4
If an indicator stays on and does not
flash or if it flashes abnormally, one of the
turn signal bulbs may be burned out and
will require replacement.
✽ ✽
NOTICE
If an indicator flash is abnormally quick
or slow, bulb may be burned out or have
a poor electrical connection in the cir-
cuit.
D190700AFD
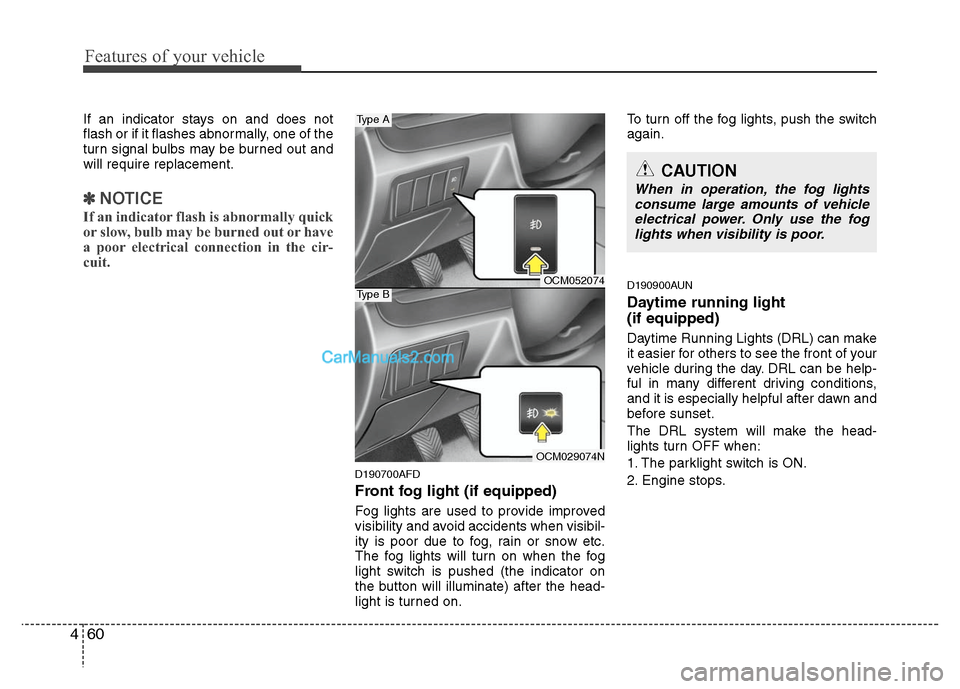
Front fog light (if equipped)
Fog lights are used to provide improved
visibility and avoid accidents when visibil-
ity is poor due to fog, rain or snow etc.
The fog lights will turn on when the fog
light switch is pushed (the indicator on
the button will illuminate) after the head-
light is turned on. To turn off the fog lights, push the switch
again.
D190900AUN
Daytime running light
(if equipped)
Daytime Running Lights (DRL) can make
it easier for others to see the front of your
vehicle during the day. DRL can be help-
ful in many different driving conditions,
and it is especially helpful after dawn and
before sunset.
The DRL system will make the head-
lights turn OFF when:
1. The parklight switch is ON.
2. Engine stops.
CAUTION
When in operation, the fog lights
consume large amounts of vehicleelectrical power. Only use the foglights when visibility is poor.
OCM052074
OCM029074N
Type A
Type B
Page 284 of 408
Driving your vehicle
50
5
E140405AFD
Turn signals when towing a trailer
When you tow a trailer, your vehicle has
to have a different turn signal flasher and
extra wiring. The green arrows on your
instrument panel will flash whenever you
signal a turn or lane change. Properly
connected, the trailer lights will also flash
to alert other drivers you’re about to turn,
change lanes, or stop.
When towing a trailer, the green arrows
on your instrument panel will flash for
turns even if the bulbs on the trailer are
burned out. Thus, you may think drivers
behind you are seeing your signals
when, in fact, they are not. It’s important
to check occasionally to be sure the trail-
er bulbs are still working. You must also
check the lights every time you discon-
nect and then reconnect the wires.
Do not connect a trailer lighting system
directly to your vehicle’s lighting system.
Use only an approved trailer wiring har-
ness.
An authorized HYUNDAI dealer can
assist you in installing the wiring harness.
E140406AFD
Driving on grades
Reduce speed and shift to a lower gear
before you start down a long or steep
downgrade. If you don’t shift down, you
might have to use your brakes so much
that they would get hot and no longer
operate efficiently.
On a long uphill grade, shift down and
reduce your speed to around 45 mph (70
km/h) to reduce the possibility of engine
and transaxle overheating.
If your trailer weighs more than the max-
imum trailer weight without trailer brakes
and you have an automatic transaxle,
you should drive in D (Drive) when tow-
ing a trailer.
Operating your vehicle in D (Drive) when
towing a trailer will minimize heat build up
and extend the life of your transaxle.
WARNING
Failure to use an approved trailer
wiring harness could result in dam-
age to the vehicle electrical system
and/or personal injury.
Page 320 of 408
7
Engine compartment / 7-2
Maintenance services / 7-3
Owner maintenance / 7-4
Scheduled maintenance service / 7-6
Explanation of scheduled maintenance items / 7-11
Engine oil / 7-14
Engine coolant / 7-15
Brake fluid / 7-18
Power steering fluid / 7-19
Washer fluid / 7-20
Parking brake / 7-21
Air cleaner / 7-22
Climate control air filter / 7-24
Wiper blades / 7-26
Battery / 7-29
Tires and wheels / 7-32
Fuses / 7-45
Light bulbs / 7-55
Appearance care / 7-63
Emission control system / 7-69
California perchlorate notice / 7-72
Maintenance
Page 374 of 408
755
Maintenance
LIGHT BULBS
G220000AFD
Use only the bulbs of the specifiedwattage.
✽
✽ NOTICE
After heavy, driving rain or washing,
headlight and taillight lenses could
appear frosty. This condition is caused by
the temperature difference between the
lamp inside and outside. This is similar
to the condensation on your windows
inside your vehicle during the rain and
doesn’t indicate a problem with your
vehicle. If the water leaks into the lamp
bulb circuitry, have the vehicle checked
by an authorized HYUNDAI dealer.
WARNING - Working on
the lights
Prior to working on the light, firmly
apply the parking brake, ensure
that the ignition switch is turned to
the “LOCK” position and turn off
the lights to avoid sudden move-
ment of the vehicle and burning
your fingers or receiving an electric
shock.
CAUTION
Be sure to replace the burned-out
bulb with one of the same wattagerating. Otherwise, it may causedamage to the fuse or electric wiring system.
CAUTION
If you don’t have necessary tools,the correct bulbs and the expertise,consult an authorized HYUNDAIdealer. In many cases, it is difficultto replace vehicle light bulbsbecause other parts of the vehicle must be removed before you canget to the bulb. This is especiallytrue if you have to remove the head-light assembly to
get to the bulb(s).
Removing/installingthe headlight
assembly can result in damage to the vehicle.
Page 375 of 408
Maintenance
56
7
G220100AUN
Headlight, position light, turn sig-
nal light, front fog light bulb
replacement
(1) Headlight (High)
(2) Headlight (Low)
(3) Position light / Front turn signal light
(Front side marker)
(4) Front fog light (if equipped)
G220101ACM
Headlight bulb
OCM070029
OHD076046
WARNING- Halogen bulbs
Halogen bulbs contain pressur- ized gas that will produce flying
pieces of glass if broken.
Always handle them carefully, and avoid scratches and abra-
sions. If the bulbs are lit, avoid
contact with liquids. Never touch
the glass with bare hands.
Residual oil may cause the bulb
to overheat and burst when lit. A
bulb should be operated only
when installed in a headlight.
(Continued)
(Continued)
If a bulb becomes damaged orcracked, replace it immediately
and carefully dispose of it.
Wear eye protection when chang- ing a bulb. Allow the bulb to cool
down before handling it.
Page 376 of 408
757
Maintenance
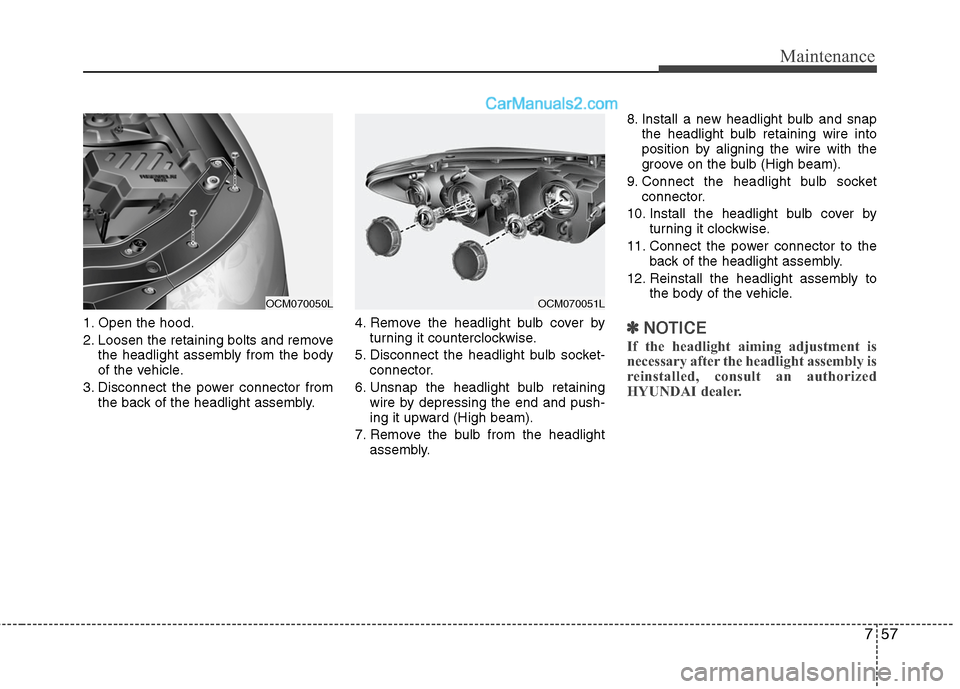
1. Open the hood.
2. Loosen the retaining bolts and removethe headlight assembly from the body
of the vehicle.
3. Disconnect the power connector from the back of the headlight assembly. 4. Remove the headlight bulb cover by
turning it counterclockwise.
5. Disconnect the headlight bulb socket- connector.
6. Unsnap the headlight bulb retaining wire by depressing the end and push-
ing it upward (High beam).
7. Remove the bulb from the headlight assembly. 8. Install a new headlight bulb and snap
the headlight bulb retaining wire into
position by aligning the wire with the
groove on the bulb (High beam).
9. Connect the headlight bulb socket connector.
10. Install the headlight bulb cover by turning it clockwise.
11. Connect the power connector to the back of the headlight assembly.
12. Reinstall the headlight assembly to the body of the vehicle.✽ ✽NOTICE
If the headlight aiming adjustment is
necessary after the headlight assembly is
reinstalled, consult an authorized
HYUNDAI dealer.
OCM070051L
OCM070050L
Page 377 of 408
Maintenance
58
7
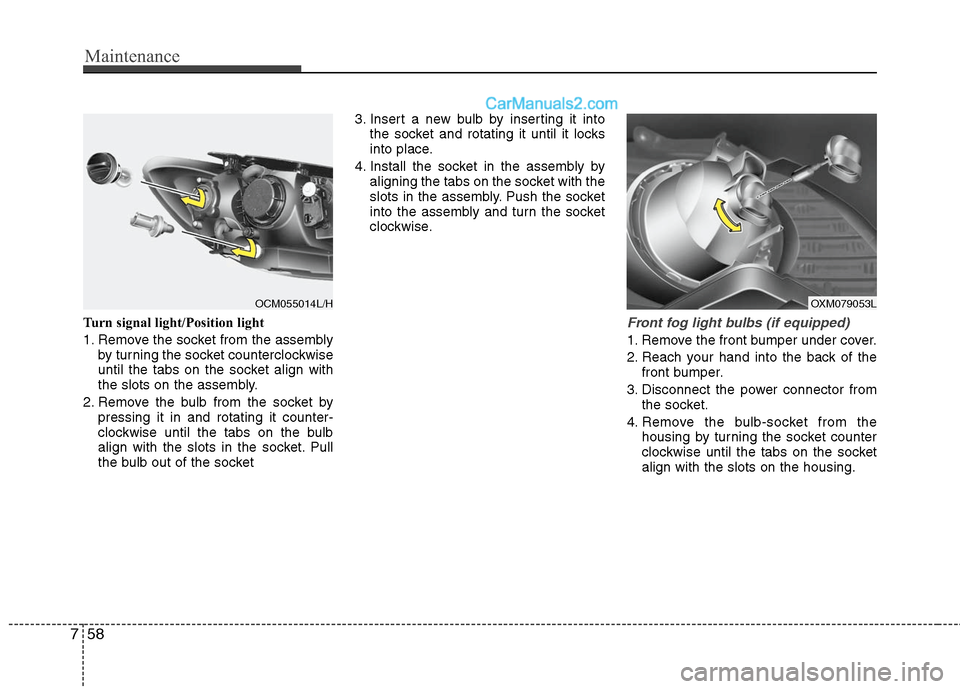
Turn signal light/Position light
1. Remove the socket from the assembly
by turning the socket counterclockwise
until the tabs on the socket align with
the slots on the assembly.
2. Remove the bulb from the socket by pressing it in and rotating it counter-
clockwise until the tabs on the bulb
align with the slots in the socket. Pull
the bulb out of the socket 3. Insert a new bulb by inserting it into
the socket and rotating it until it locks
into place.
4. Install the socket in the assembly by aligning the tabs on the socket with the
slots in the assembly. Push the socket
into the assembly and turn the socket
clockwise.Front fog light bulbs (if equipped)
1. Remove the front bumper under cover.
2. Reach your hand into the back of thefront bumper.
3. Disconnect the power connector from the socket.
4. Remove the bulb-socket from the housing by turning the socket counter
clockwise until the tabs on the socket
align with the slots on the housing.
OXM079053L
OCM055014L/H