2010 Hyundai Santa Fe mirrors
[x] Cancel search: mirrorsPage 80 of 408
4
Keys / 4-2
Remote keyless entry / 4-3
Theft-alarm system / 4-5
Door locks / 4-7
Tailgate / 4-11
Windows / 4-13
Hood / 4-17
Fuel filler lid / 4-19
Sunroof / 4-22
Steering wheel / 4-26
Mirrors / 4-28
Instrument cluster / 4-40
Rearview camera / 4-56
Hazard warning flasher / 4-56
Lighting / 4-57
Wipers and washers / 4-61
Interior light / 4-63
Defroster / 4-66
Manual climate control system / 4-67
Automatic climate control system / 4-76
Windshield defrosting and defogging / 4-83
Storage compartment / 4-86
Interior features / 4-89
Exterior features / 4-98
Audio system / 4-99
Features of your vehicle
Page 107 of 408
Features of your vehicle
28
4
Inside rearview mirror
Adjust the rearview mirror so that the
center view through the rear window is
seen. Make this adjustment before you
start driving.
D140101AUN
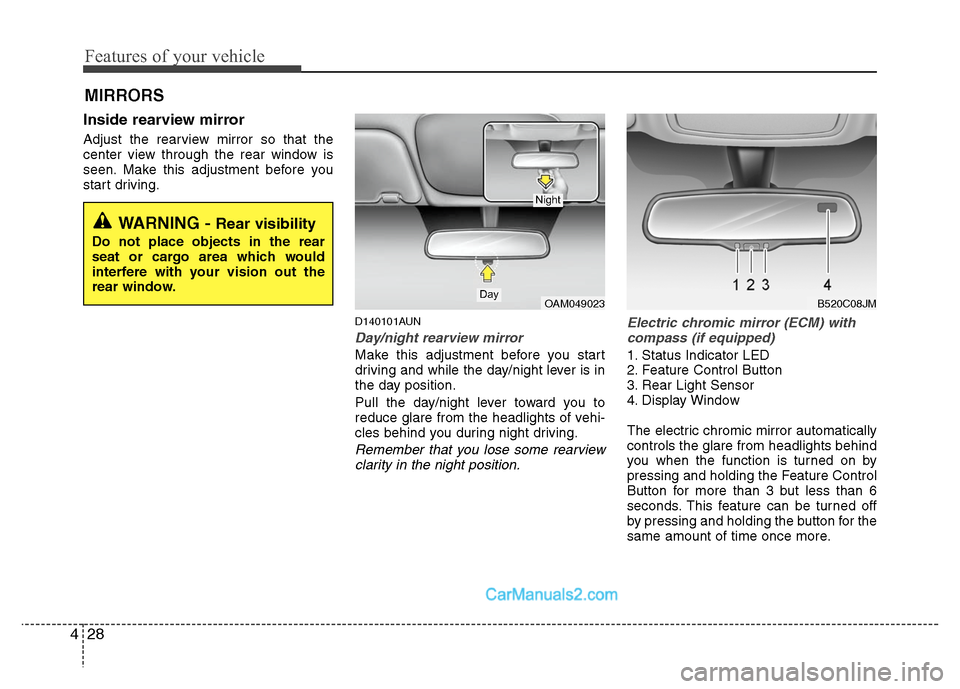
Day/night rearview mirror
Make this adjustment before you start
driving and while the day/night lever is in
the day position.
Pull the day/night lever toward you to
reduce glare from the headlights of vehi-
cles behind you during night driving.
Remember that you lose some rearview
clarity in the night position. Electric chromic mirror (ECM) with
compass (if equipped)
1. Status Indicator LED
2. Feature Control Button
3. Rear Light Sensor
4. Display Window
The electric chromic mirror automatically
controls the glare from headlights behind
you when the function is turned on by
pressing and holding the Feature Control
Button for more than 3 but less than 6
seconds. This feature can be turned off
by pressing and holding the button for the
same amount of time once more.
MIRRORS
WARNING - Rear visibility
Do not place objects in the rear
seat or cargo area which would
interfere with your vision out the
rear window.
OAM049023Day
Night
B520C08JM
Page 111 of 408
Features of your vehicle
32
4
Automatic-Dimming Night Vision
Safety™ (NVS®) Mirror
The NVS®Mirror in your vehicle is the
most advanced way to reduce annoying
glare in the rearview mirror during any
driving situation. For more information
regarding NVS
®mirrors and other appli-
cations, please refer to the Gentex web-
site:
www.gentex.com Automatic-dimming function
Your mirror will automatically dim upon
detecting glare from the vehicles travel-
ing behind you. The auto-dimming func-
tion can be controlled by the Dimming
ON/OFF Button:
1. Pressing the button turns the auto-
dimming function OFF which is indicat-
ed by the green Status Indicator LED
turning off.
2. Pressing the button again turns the auto-dimming function ON which is
indicated by the green Status Indicator
LED turning on.
✽ ✽NOTICE
The mirror defaults to the ON position
each time the vehicle is started.
Z-Nav™ Compass Display
The NVS™ Mirror in your vehicle is also
equipped with a Z-Nav™ Compass that
shows the vehicle Compass heading in
the Display Window using the 8 basic
cardinal headings (N, NE, E, SE, etc.).
Compass function
The Compass can be turned ON and
OFF and will remember the last state
when the ignition is cycled. To turn the
display feature ON/OFF:
1. Press and release the button to
turn the display feature OFF.
2. Press and release the button again to turn the display back ON.
Additional options can be set with press
and hold sequences of the button and
are detailed below.
There is a difference between magnetic
north and true north. The compass in the
mirror can compensate for this difference
when it knows the Magnetic Zone in
which it is operating. This is set either by
the dealer or by the user. The operating
Zone Numbers for North America are
shown in the figure on the following sec-
tion.
CAUTION
The NVS®Mirror automatically
reduces glare during driving condi- tions based upon light levels moni-tored in front of the vehicle andfrom the rear of the vehicle. Theselight sensors are visible throughopenings in the front and rear of themirror case. Any object that wouldobstructs either light sensor willdegrade the automatic dimming control feature.
Page 117 of 408
Features of your vehicle
38
4
D140200AUN
Outside rearview mirror
Be sure to adjust mirror angles before
driving.
Your vehicle is equipped with both left-
hand and right-hand outside rearview
mirrors. The mirrors can be adjusted
remotely with the remote switch. The mir-
ror heads can be folded back to prevent
damage during an automatic car wash or
when passing in a narrow street.
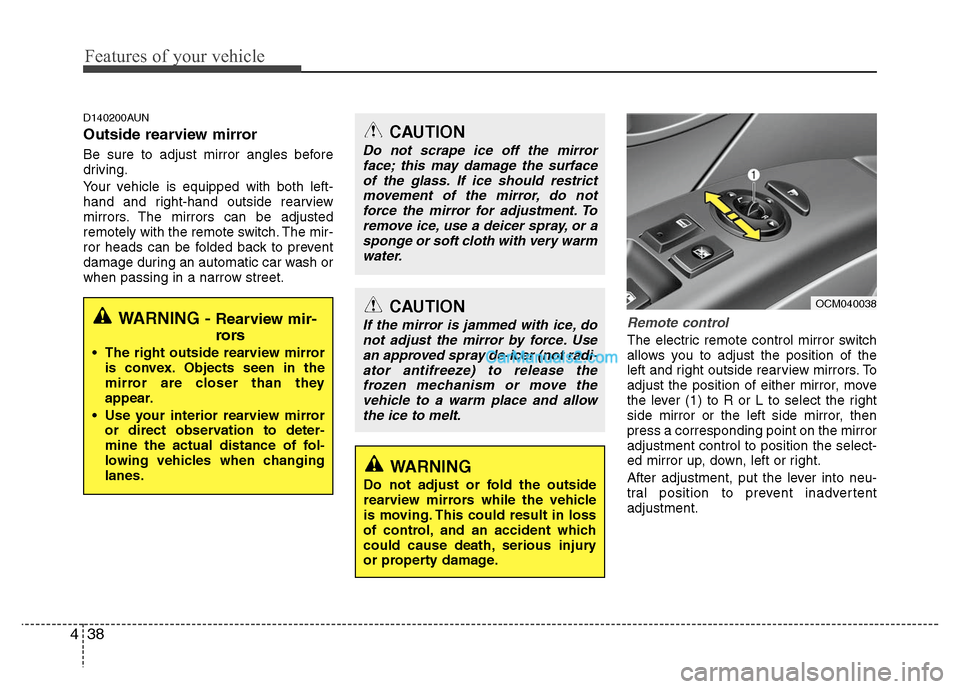
Remote control
The electric remote control mirror switch
allows you to adjust the position of the
left and right outside rearview mirrors. To
adjust the position of either mirror, move
the lever (1) to R or L to select the right
side mirror or the left side mirror, then
press a corresponding point on the mirror
adjustment control to position the select-
ed mirror up, down, left or right.
After adjustment, put the lever into neu-
tral position to prevent inadvertent
adjustment.
CAUTION
If the mirror is jammed with ice, do
not adjust the mirror by force. Use an approved spray de-icer (not radi-ator antifreeze) to release the frozen mechanism or move thevehicle to a warm place and allow the ice to melt.
WARNING
Do not adjust or fold the outside
rearview mirrors while the vehicle
is moving. This could result in loss
of control, and an accident which
could cause death, serious injury
or property damage.
OCM040038
CAUTION
Do not scrape ice off the mirrorface; this may damage the surfaceof the glass. If ice should restrictmovement of the mirror, do notforce the mirror for adjustment. Toremove ice, use a deicer spray, or a sponge or soft cloth with very warmwater.
WARNING - Rearview mir-
rors
The right outside rearview mirror is convex. Objects seen in the
mirror are closer than they
appear.
Use your interior rearview mirror or direct observation to deter-
mine the actual distance of fol-
lowing vehicles when changing
lanes.
Page 118 of 408
439
Features of your vehicle
D140202AFD
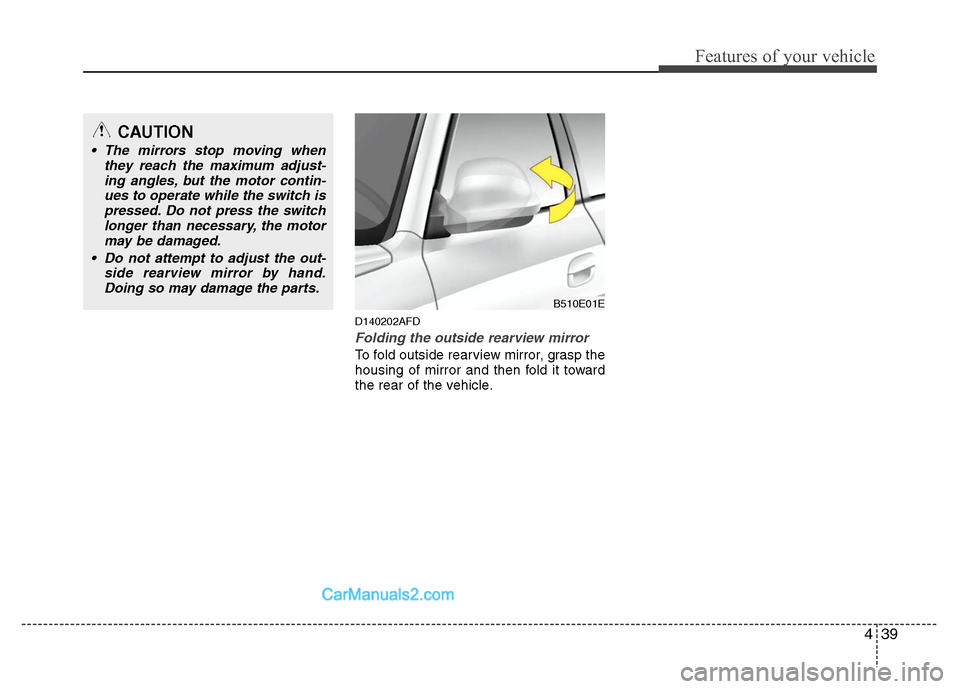
Folding the outside rearview mirror
To fold outside rearview mirror, grasp the
housing of mirror and then fold it toward
the rear of the vehicle.
B510E01E
CAUTION
The mirrors stop moving whenthey reach the maximum adjust-ing angles, but the motor contin-ues to operate while the switch ispressed. Do not press the switch longer than necessary, the motormay be damaged.
Do not attempt to adjust the out- side rearview mirror by hand.Doing so may damage the parts.
Page 162 of 408
483
Features of your vehicle
For maximum defrosting, set the tem-perature control to the extreme
right/hot position and the fan speed
control to the highest speed.
If warm air to the floor is desired while defrosting or defogging, set the mode
to the floor-defrost position.
Before driving, clear all snow and ice from the windshield, rear window, out-
side rear view mirrors, and all side win-
dows.
Clear all snow and ice from the hood and air inlet in the cowl grill to improve
heater and defroster efficiency and to
reduce the probability of fogging up the
inside of the windshield.
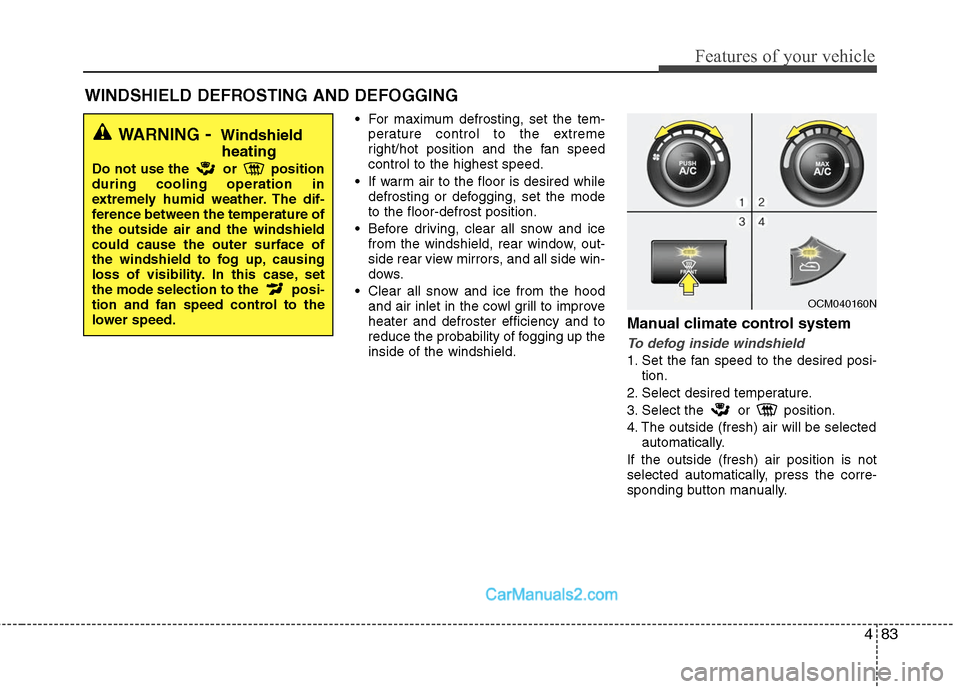
Manual climate control system
To defog inside windshield
1. Set the fan speed to the desired posi- tion.
2. Select desired temperature.
3. Select the or position.
4. The outside (fresh) air will be selected automatically.
If the outside (fresh) air position is not
selected automatically, press the corre-
sponding button manually.
WINDSHIELD DEFROSTING AND DEFOGGING
WARNING- Windshield heating
Do not use the or position
during cooling operation in
extremely humid weather. The dif-
ference between the temperature of
the outside air and the windshield
could cause the outer surface of
the windshield to fog up, causing
loss of visibility. In this case, set
the mode selection to the posi-
tion and fan speed control to the
lower speed.
OCM040160N
Page 237 of 408
53
Driving your vehicle
E020100AUN
Before entering vehicle
• Be sure that all windows, outside mir-ror(s), and outside lights are clean.
Check the condition of the tires.
Check under the vehicle for any sign of leaks.
Be sure there are no obstacles behind you if you intend to back up.
E020200AUN
Necessary inspections
Fluid levels, such as engine oil, engine
coolant, brake fluid, and washer fluid
should be checked on a regular basis,
with the exact interval depending on the
fluid. Further details are provided in
Section 7, “Maintenance”.
E020300AUN
Before starting
Close and lock all doors.
Position the seat so that all controls areeasily reached.
Adjust the inside and outside rearview mirrors. Be sure that all lights work.
Check all gauges.
Check the operation of warning lights
when the ignition switch is turned to
the ON position.
Release the parking brake and make sure the brake warning light goes out.
For safe operation, be sure you are famil-
iar with your vehicle and its equipment.
BEFORE DRIVING
WARNING
All passengers must be properly
belted whenever the vehicle is mov-
ing. Refer to “Seat belts” in section
3 for more information on their
proper use.
WARNING
Always check the surrounding areas
near your vehicle for people, espe-
cially children, before putting a vehi-
cle into D (Drive) or R (Reverse).
CALIFORNIA PROPOSI-
TION 65 WARNING
Engine exhaust and a wide variety
of automobile components and
parts, including components found
in the interior furnishings in a vehi-
cle, contain or emit chemicals
known to the State of California to
cause cancer and birth defects and
reproductive harm. In addition, cer-
tain fluids contained in vehicles
and certain products of component
wear contain or emit chemicals
known to the State of California to
cause cancer and birth defects or
other reproductive harm.
Page 274 of 408
Driving your vehicle
40
5
✽
✽
NOTICE
The ESC system should be turned OFF
prior to rocking the vehicle.E110300AUN
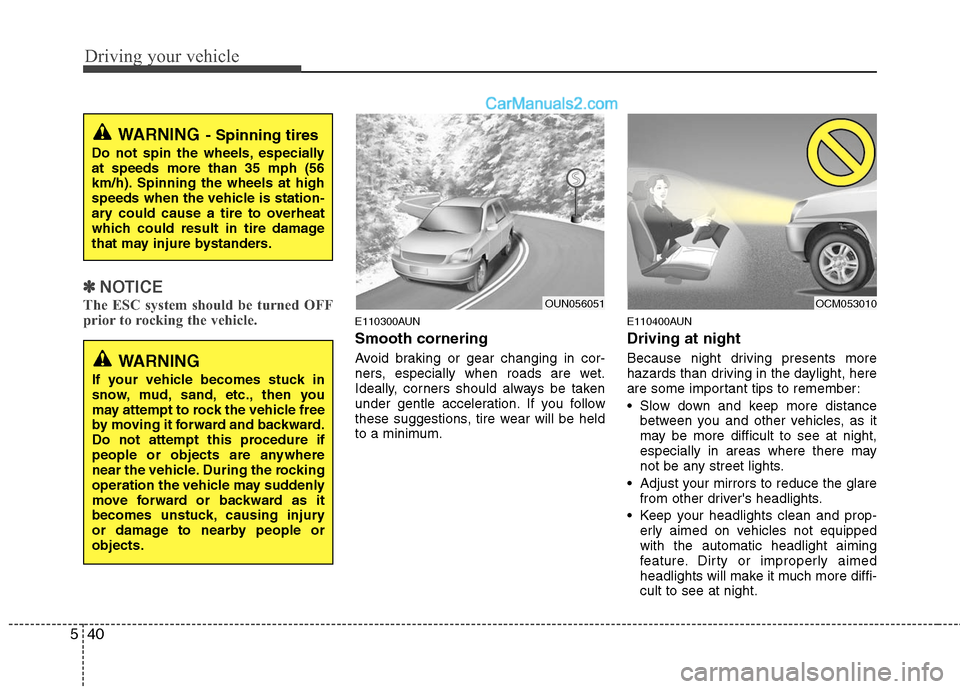
Smooth cornering
Avoid braking or gear changing in cor-
ners, especially when roads are wet.
Ideally, corners should always be taken
under gentle acceleration. If you follow
these suggestions, tire wear will be held
to a minimum.
E110400AUN
Driving at night
Because night driving presents more
hazards than driving in the daylight, here
are some important tips to remember:
Slow down and keep more distance
between you and other vehicles, as it
may be more difficult to see at night,
especially in areas where there may
not be any street lights.
Adjust your mirrors to reduce the glare from other driver's headlights.
Keep your headlights clean and prop- erly aimed on vehicles not equipped
with the automatic headlight aiming
feature. Dirty or improperly aimed
headlights will make it much more diffi-
cult to see at night.
WARNING- Spinning tires
Do not spin the wheels, especially
at speeds more than 35 mph (56
km/h). Spinning the wheels at high
speeds when the vehicle is station-
ary could cause a tire to overheat
which could result in tire damage
that may injure bystanders.
WARNING
If your vehicle becomes stuck in
snow, mud, sand, etc., then you
may attempt to rock the vehicle free
by moving it forward and backward.
Do not attempt this procedure if
people or objects are anywhere
near the vehicle. During the rocking
operation the vehicle may suddenly
move forward or backward as it
becomes unstuck, causing injury
or damage to nearby people or
objects.
OUN056051
OCM053010