2010 Hyundai Santa Fe battery
[x] Cancel search: batteryPage 172 of 408
493
Features of your vehicle
D281300AHM
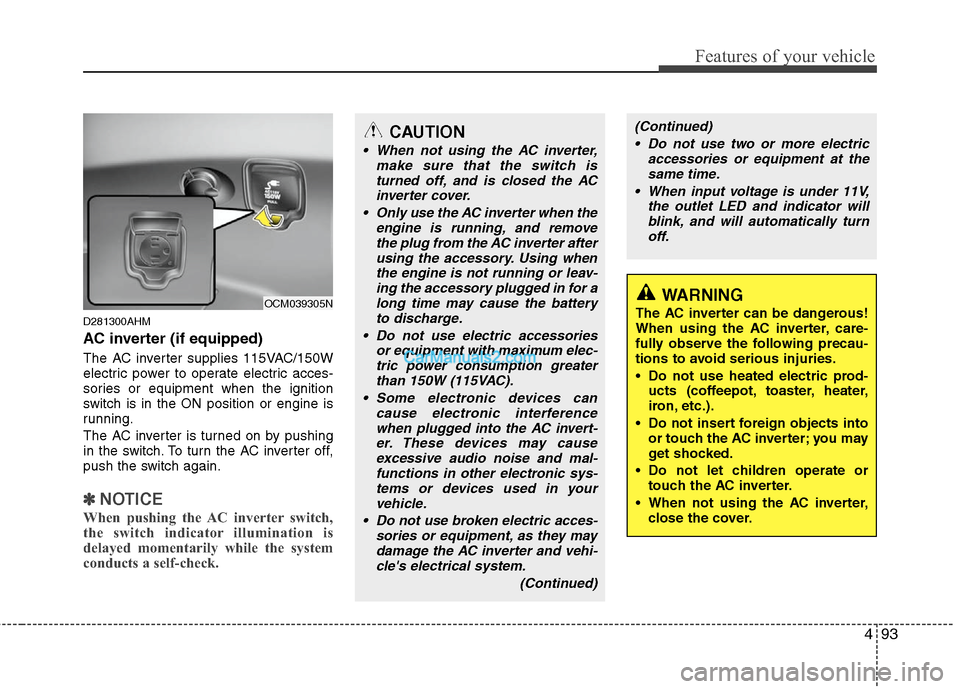
AC inverter (if equipped)
The AC inverter supplies 115VAC/150W
electric power to operate electric acces-
sories or equipment when the ignition
switch is in the ON position or engine is
running.
The AC inverter is turned on by pushing
in the switch. To turn the AC inverter off,
push the switch again.
✽ ✽NOTICE
When pushing the AC inverter switch,
the switch indicator illumination is
delayed momentarily while the system
conducts a self-check.
OCM039305NWARNING
The AC inverter can be dangerous!
When using the AC inverter, care-
fully observe the following precau-
tions to avoid serious injuries.
Do not use heated electric prod-
ucts (coffeepot, toaster, heater,
iron, etc.).
Do not insert foreign objects into or touch the AC inverter; you may
get shocked.
Do not let children operate or touch the AC inverter.
When not using the AC inverter, close the cover.
CAUTION
When not using the AC inverter, make sure that the switch isturned off, and is closed the ACinverter cover.
Only use the AC inverter when the engine is running, and removethe plug from the AC inverter after using the accessory. Using whenthe engine is not running or leav-ing the accessory plugged in for along time may cause the batteryto discharge.
Do not use electric accessories or equipment with maximum elec-tric power consumption greaterthan 150W (115VAC).
Some electronic devices can cause electronic interferencewhen plugged into the AC invert-er. These devices may causeexcessive audio noise and mal-functions in other electronic sys-tems or devices used in yourvehicle.
Do not use broken electric acces- sories or equipment, as they maydamage the AC inverter and vehi-cle's electrical system.
(Continued)
(Continued) Do not use two or more electric accessories or equipment at thesame time.
When input voltage is under 11V, the outlet LED and indicator willblink, and will automatically turn off.
Page 173 of 408
Features of your vehicle
94
4
D280600AUN
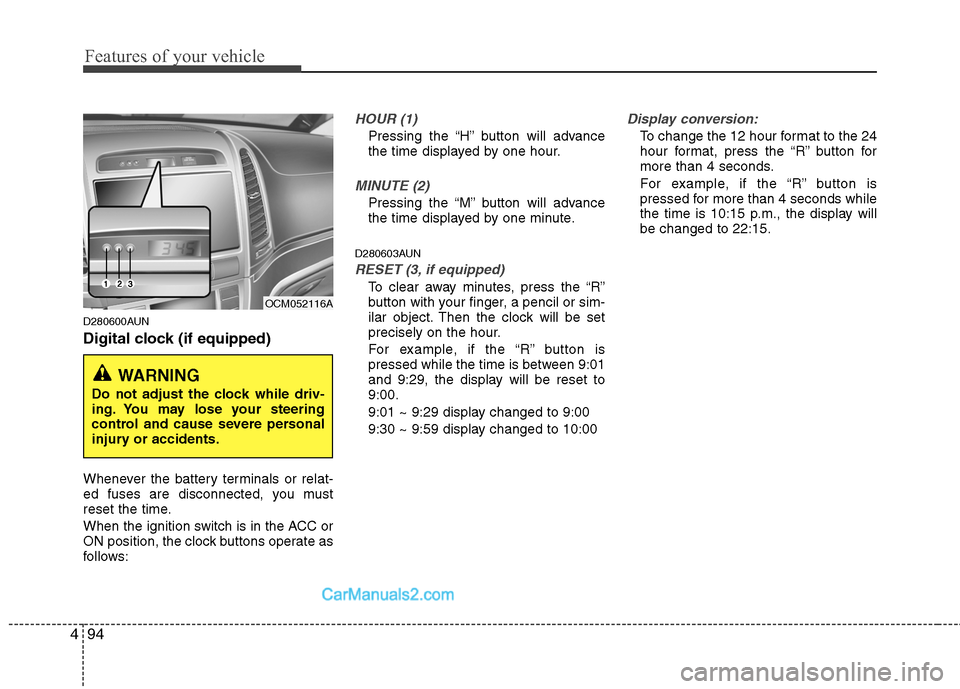
Digital clock (if equipped)
Whenever the battery terminals or relat-
ed fuses are disconnected, you must
reset the time.
When the ignition switch is in the ACC or
ON position, the clock buttons operate as
follows:
HOUR (1)
Pressing the “H” button will advance
the time displayed by one hour.
MINUTE (2)
Pressing the “M” button will advance
the time displayed by one minute.
D280603AUN
RESET (3, if equipped)
To clear away minutes, press the “R”
button with your finger, a pencil or sim-
ilar object. Then the clock will be set
precisely on the hour.
For example, if the “R” button is
pressed while the time is between 9:01
and 9:29, the display will be reset to
9:00.
9:01 ~ 9:29 display changed to 9:00
9:30 ~ 9:59 display changed to 10:00
Display conversion:
To change the 12 hour format to the 24
hour format, press the “R” button for
more than 4 seconds.
For example, if the “R” button is
pressed for more than 4 seconds while
the time is 10:15 p.m., the display will
be changed to 22:15.
WARNING
Do not adjust the clock while driv-
ing. You may lose your steering
control and cause severe personal
injury or accidents.
OCM052116A
Page 199 of 408
Features of your vehicle
120
4
✽
✽
NOTICE FOR USING iPod
DEVICE
• Some iPod models might not sup- port the communication protocol
and the files will not be played.
(iPod models supported: Mini, 4G,
Photo, Nano, 5G)
• The order of search or playback of songs in the iPod can be different
from the order searched in the
audio system.
• If the iPod crashes due to its own trouble, reset iPod. (Reset: Refer to
iPod manual)
• iPod may not operate normally on low battery.
(Continued)
When the iPod cable is connected, the system can be switched to theAUX mode even without the iPoddevice and can cause noise.Disconnect iPod cable when youare not using the iPod device.
When the iPod is not used at audio system, iPod cable has tobe separate from iPod device.Origin display of iPod may not bedisplayed.CAUTION IN USING
iPod DEVICE
You need the power cable exclu-
sive for iPod in order to operateiPod with the buttons on the audiosystem. The PC cable provided byApple may cause malfunction anddo not use it for vehicle use.
When connecting the device with iPod cable, push in the jack fullynot to interfere with communica-tion.
When adjusting the sound effects of iPod and the audio system, thesound effects of both devices willoverlap each and might causereduce or distort the quality of thesound.
Deactivate (turn off) the equalizer function of iPod when adjustingthe audio system’s volume, andturn off the equalizer of the audiosystem when using the equalizerof iPod.
(Continued)
Page 212 of 408
4133
Features of your vehicle
✽
✽NOTICE
The RSE requires a few seconds of set
up time after the ignition switch is
turned ON or to ACC mode.
Your RSE system is already set up and
ready for use, and can be turned on by
pushing the POWER/VOLUME knob on
the RSE control panel or the POWER
ON/OFF button on the remote
controll. The vehicle's ignition must be
turned on or in accessory power mode.
The RSE system can also be turned OFF
by the Audio Unit.
Components
Your RSE consists of several compo-
nents:
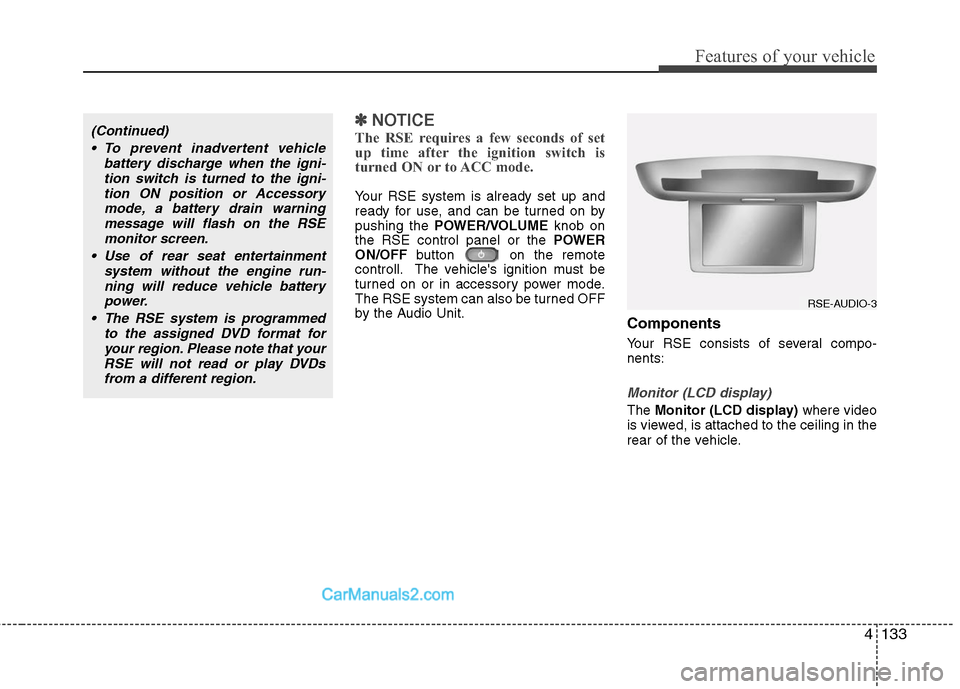
Monitor (LCD display)
The Monitor (LCD display) where video
is viewed, is attached to the ceiling in the
rear of the vehicle.
(Continued)
To prevent inadvertent vehicle battery discharge when the igni-tion switch is turned to the igni-tion ON position or Accessorymode, a battery drain warningmessage will flash on the RSEmonitor screen.
Use of rear seat entertainment system without the engine run-ning will reduce vehicle battery power.
The RSE system is programmed to the assigned DVD format foryour region. Please note that yourRSE will not read or play DVDsfrom a different region.
RSE-AUDIO-3
Page 215 of 408
Features of your vehicle
136
4
Audio via Vehicle Speakers
To hear the audio from the RSE through
the vehicle's speakers, the RSE button
(located in the front radio control) must
be selected. Regardless of whether RSE
audio is selected for the vehicle speakers
or not, when the RSE audio is playing it
can be heard in the headphones.
Volume Control
You can adjust the volume of the audio
heard in the vehicle speakers from the
RSE control panel or the remote control.
From the RSE control panel, rotate the
POWER/VOLUME knob. From the
remote control, press " VOL +" to
increase the volume and " VOL -" to
decrease the volume.
Adjusting the volume in this way will not
affect the wireless headphone volume. To
adjust the headphones, turn the VOL
control wheel on the headphones.
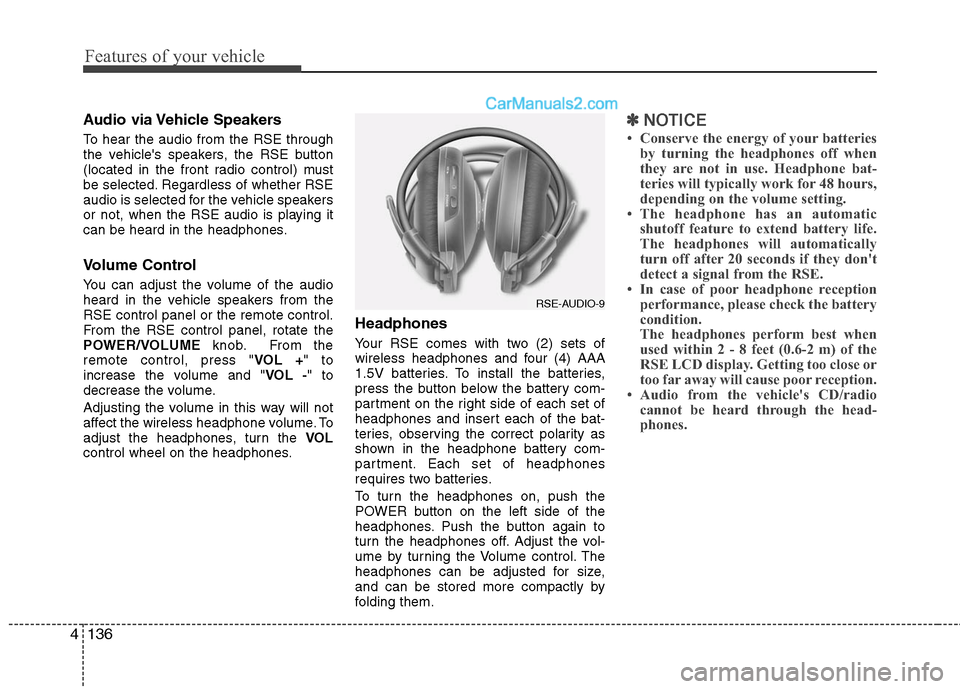
Headphones
Your RSE comes with two (2) sets of
wireless headphones and four (4) AAA
1.5V batteries. To install the batteries,
press the button below the battery com-
partment on the right side of each set of
headphones and insert each of the bat-
teries, observing the correct polarity as
shown in the headphone battery com-
partment. Each set of headphones
requires two batteries.
To turn the headphones on, push the
POWER button on the left side of the
headphones. Push the button again to
turn the headphones off. Adjust the vol-
ume by turning the Volume control. The
headphones can be adjusted for size,
and can be stored more compactly by
folding them.
✽ ✽ NOTICE
• Conserve the energy of your batteries
by turning the headphones off when
they are not in use. Headphone bat-
teries will typically work for 48 hours,
depending on the volume setting.
• The headphone has an automatic shutoff feature to extend battery life.
The headphones will automatically
turn off after 20 seconds if they don't
detect a signal from the RSE.
• In case of poor headphone reception performance, please check the battery
condition.
The headphones perform best when
used within 2 - 8 feet (0.6-2 m) of the
RSE LCD display. Getting too close or
too far away will cause poor reception.
• Audio from the vehicle's CD/radio cannot be heard through the head-
phones.
RSE-AUDIO-9
Page 216 of 408
4137
Features of your vehicle
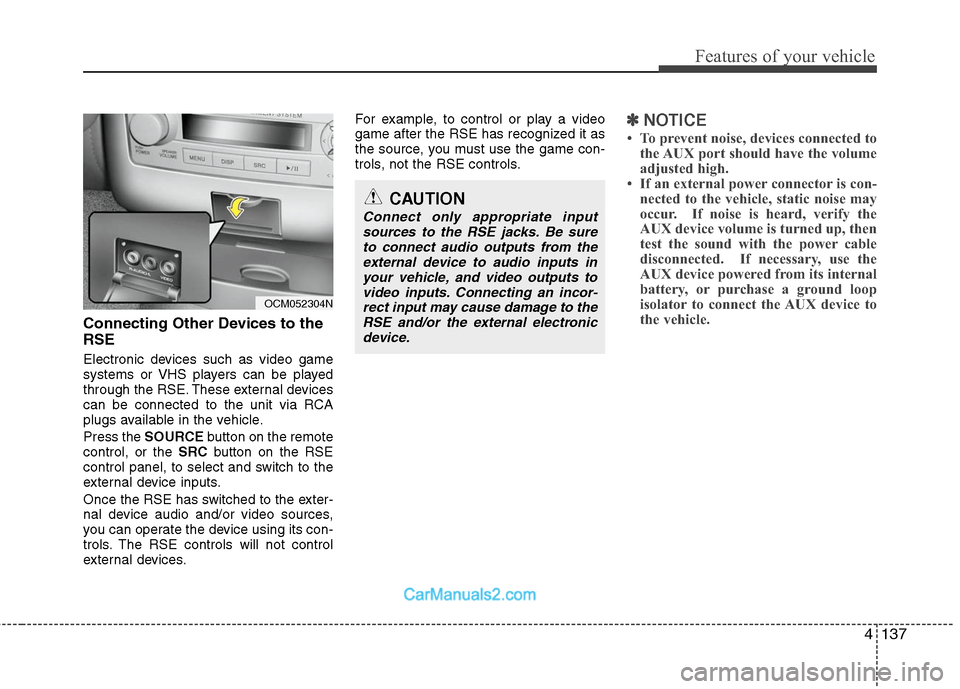
Connecting Other Devices to the
RSE
Electronic devices such as video game
systems or VHS players can be played
through the RSE. These external devices
can be connected to the unit via RCA
plugs available in the vehicle.
Press the SOURCE button on the remote
control, or the SRCbutton on the RSE
control panel, to select and switch to the
external device inputs.
Once the RSE has switched to the exter-
nal device audio and/or video sources,
you can operate the device using its con-
trols. The RSE controls will not control
external devices. For example, to control or play a video
game after the RSE has recognized it as
the source, you must use the game con-
trols, not the RSE controls.
✽ ✽
NOTICE
• To prevent noise, devices connected to
the AUX port should have the volume
adjusted high.
• If an external power connector is con- nected to the vehicle, static noise may
occur. If noise is heard, verify the
AUX device volume is turned up, then
test the sound with the power cable
disconnected. If necessary, use the
AUX device powered from its internal
battery, or purchase a ground loop
isolator to connect the AUX device to
the vehicle.
OCM052304N
CAUTION
Connect only appropriate input
sources to the RSE jacks. Be sureto connect audio outputs from theexternal device to audio inputs in your vehicle, and video outputs tovideo inputs. Connecting an incor- rect input may cause damage to theRSE and/or the external electronicdevice.
Page 217 of 408
Features of your vehicle
138
4
RSE Lock Function
Front seat passengers can use the RSE
Lock function to prevent rear seat pas-
sengers from operating the RSE. To lock
the RSE, press and hold the CD/AUX
button on the vehicle radio for more than
2 seconds.
"Lock" will appear on the RSE LCD dis-
play, as well as on the RSE control panel.
None of the RSE control panel or remote
controller buttons will function while the
RSE is locked. Rear seat passengers will
still be able to eject or insert a disc in the
player, as well as power on/off the sys-
tem.
Press and hold the CD/AUX button again
to turn off the RSE lock.
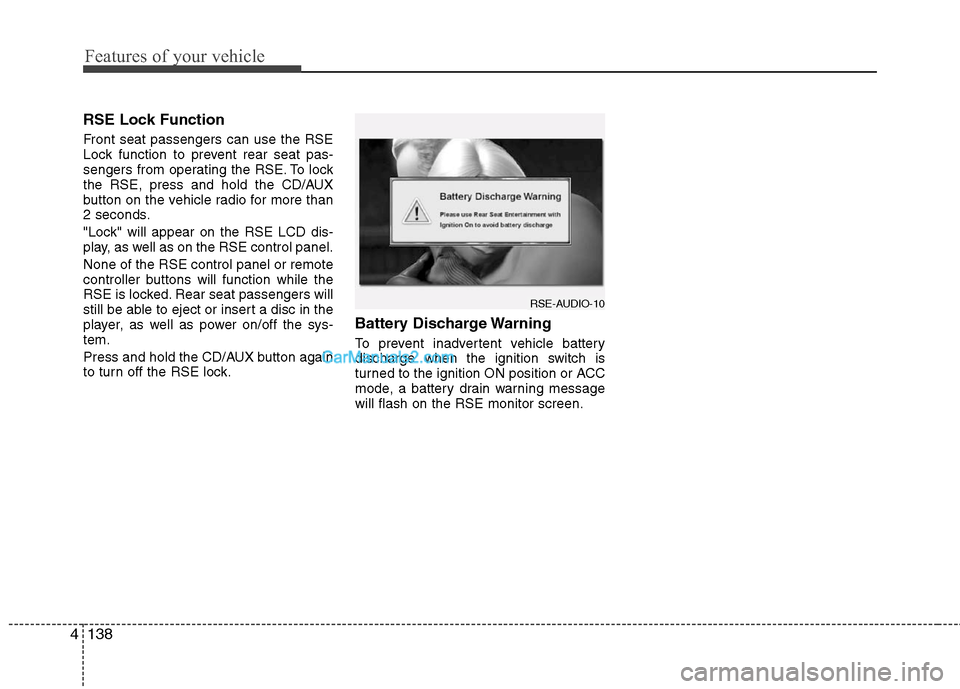
Battery Discharge Warning
To prevent inadvertent vehicle battery
discharge when the ignition switch is
turned to the ignition ON position or ACC
mode, a battery drain warning message
will flash on the RSE monitor screen.
RSE-AUDIO-10
Page 233 of 408
Features of your vehicle
154
4
6. S.Title - Subtitles, Folders +
The S.TITLE button allows you to display
or remove language subtitles while play-
ing DVDs. If no language subtitles are
available, the display will show an invalid
icon. Press the S. TITLEbutton repeat-
edly to cycle through all of the available
languages.
Pressing the S. TITLE(or FOLD+ ) button
during MP3 normal play will immediately
bring the player to the first file of the next
folder.
Pressing the S. TITLE(or FOLD+ ) button
during CD or VCD play will do nothing.
7. Menu
Pressing the MENUbutton during DVD
play will present the DVD menu.
Pressing the MENUbutton during MP3
disc play will display the Song List on the
monitor.
Pressing the MENUbutton during CD or
VCD play has no effect.
Press the button again to return to the
program. After five seconds with no but-
ton press, the menu will automatically
close and the program begin playing.
8. Title/PBC
While viewing a DVD, press the TITLE
button on the remote control to jump to
the top menu. Press the < REW / FF >or
PREV / NEXT buttons to highlight
the desired selection, then press ENTER
to make your selection.
Press TITLE again to return to the DVD.
While viewing a VCD, pressing the
TITLE/PBC button will switch the PBC
function on and off.
9. Return
While viewing any operation, pressing
the RETURN button will exit the current
operation on screen display and resume
last play.
10. Speaker Volume "VOL +" and "VOL -"
If the audio from the RSE is being played
through the vehicle speakers, you can
adjust the volume of the speakers with
the " VOL + " and " VOL -" buttons.
Adjusting the volume in this way will not
adjust the wireless headphone volume.
To adjust the headphones, roll the VOL
control wheel.
Batteries
The remote control requires a CR2025
battery (included).