2010 Hyundai H-100 Truck wheel
[x] Cancel search: wheelPage 135 of 207
3
WHAT TO DO IN AN EMERGENCY
13
!
!
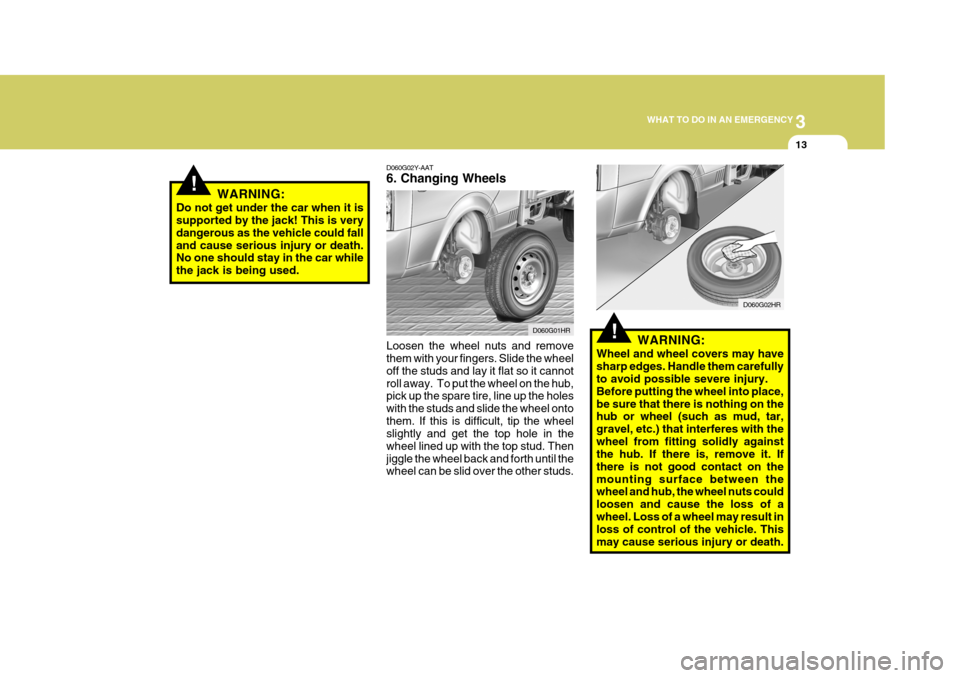
D060G02Y-AAT 6. Changing Wheels Loosen the wheel nuts and remove them with your fingers. Slide the wheel off the studs and lay it flat so it cannotroll away. To put the wheel on the hub, pick up the spare tire, line up the holes with the studs and slide the wheel ontothem. If this is difficult, tip the wheel slightly and get the top hole in the wheel lined up with the top stud. Thenjiggle the wheel back and forth until the wheel can be slid over the other studs. D060G02HR
WARNING:
Wheel and wheel covers may have sharp edges. Handle them carefully to avoid possible severe injury. Before putting the wheel into place,be sure that there is nothing on the hub or wheel (such as mud, tar, gravel, etc.) that interferes with thewheel from fitting solidly against the hub. If there is, remove it. If there is not good contact on themounting surface between the wheel and hub, the wheel nuts could loosen and cause the loss of awheel. Loss of a wheel may result in loss of control of the vehicle. This may cause serious injury or death.
D060G01HR
WARNING:
Do not get under the car when it is supported by the jack! This is very dangerous as the vehicle could falland cause serious injury or death. No one should stay in the car while the jack is being used.
Page 136 of 207
3 WHAT TO DO IN AN EMERGENCY
14
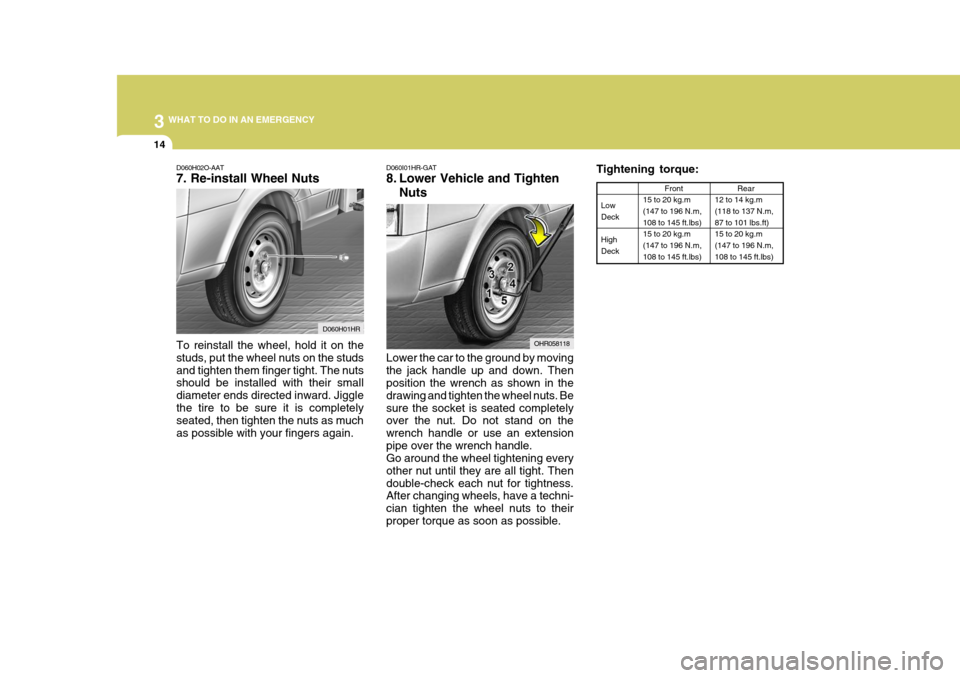
Tightening torque:
Low Deck High Deck Front
15 to 20 kg.m(147 to 196 N.m, 108 to 145 ft.lbs) 15 to 20 kg.m(147 to 196 N.m, 108 to 145 ft.lbs)
Rear
12 to 14 kg.m (118 to 137 N.m, 87 to 101 lbs.ft) 15 to 20 kg.m(147 to 196 N.m, 108 to 145 ft.lbs)
D060I01HR-GAT
8. Lower Vehicle and Tighten
Nuts
Lower the car to the ground by moving the jack handle up and down. Then position the wrench as shown in the drawing and tighten the wheel nuts. Besure the socket is seated completely over the nut. Do not stand on the wrench handle or use an extensionpipe over the wrench handle. Go around the wheel tightening every other nut until they are all tight. Thendouble-check each nut for tightness. After changing wheels, have a techni- cian tighten the wheel nuts to theirproper torque as soon as possible. OHR058118D060H02O-AAT 7. Re-install Wheel Nuts To reinstall the wheel, hold it on the studs, put the wheel nuts on the studsand tighten them finger tight. The nuts should be installed with their small diameter ends directed inward. Jigglethe tire to be sure it is completely seated, then tighten the nuts as much as possible with your fingers again.
D060H01HR
Page 137 of 207
3
WHAT TO DO IN AN EMERGENCY
15EMERGENCY COMMODITY
D060J01A-AAT After changing wheels If you have a tire gauge, remove the valve cap and check the air pressure. If the pressure is lower than recom- mended, drive slowly to the nearestservice station and inflate to the cor- rect pressure. If it is too high, adjust it until it is correct. Always reinstall thevalve cap after checking or adjusting tire pressure. If the cap is not replaced, air may leak from the tire. If you lose avalve cap, buy another and install it as soon as possible. After you have changed wheels, al-ways secure the flat tire in its place and return the jack, jack handle, and tools to their proper storage locations. OHR058103
NOTE: If your vehicle is equipped with double cab, first pull the cushion of rear seat forward (Refer to "RearSeat Cushion Under Box" on page 1-11) to take out the fire extinguisher.
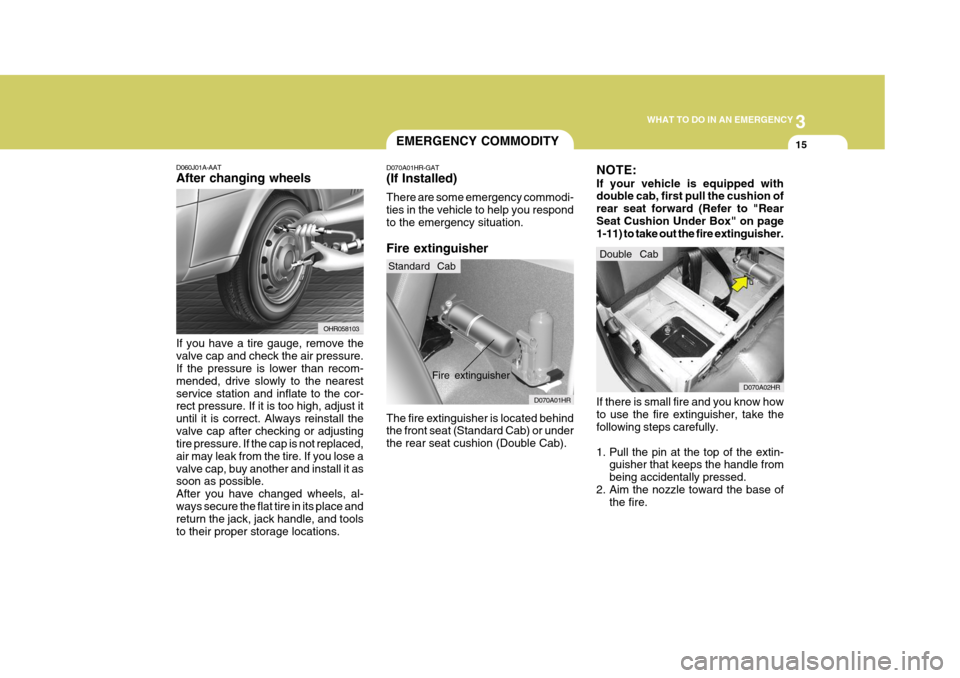
D070A01HR-GAT (If Installed) There are some emergency commodi- ties in the vehicle to help you respondto the emergency situation. Fire extinguisher The fire extinguisher is located behind the front seat (Standard Cab) or under the rear seat cushion (Double Cab).
D070A01HR
Fire extinguisher
Standard Cab
D070A02HR
Double Cab
If there is small fire and you know how to use the fire extinguisher, take the following steps carefully.
1. Pull the pin at the top of the extin- guisher that keeps the handle from being accidentally pressed.
2. Aim the nozzle toward the base of the fire.
Page 138 of 207
3 WHAT TO DO IN AN EMERGENCY
16
Tire Pressure Gauge (If Installed) You can easily check the tire pressure with a tire pressure gauge that is foundin OVM tool bag. Tires normally lose some air in day-to-day use, and you may have to add a few pounds of airperiodically and it is not usually a sign of a leaking tire, but of normal wear. Always check tire pressure when thetires are cold because tire pressure increases with temperature. To check the tire pressure, take the following steps;
1. Unscrew the inflation valve cap thatis located on the rim of the tire.
2. Press and hold the gauge against the tire valve. Some air will escape as you begin and more will escape if you don't press the gauge in firmly.
3. A firm non-leaking push will activate the gauge.
4. Read the tire pressure on the gauge
to know whether the tire pressure is low or high.
5. Adjust the tire pressures to the speci-
fied pressure. See page 8-3.
6. Reinstall the inflation valve cap.IF YOUR VEHICLE MUST BE TOWED
D080A02HR-GAT If your vehicle has to be towed, it should be done by your Hyundai dealeror a commercial tow truck service. This will help assure that your vehicle is not damaged in towing. Also, profes-sionals are generally aware of local laws governing towing. In any case, rather than risk damage to your car, itis suggested that you show this infor- mation to the tow truck operator. Be sure that a safety chain system is usedand that all local laws are observed. It is recommended that your vehicle be towed with a wheel lift and dollies orflatbed equipment with all the wheels off the ground.
! CAUTION:
o Your vehicle can be damaged if towed incorrectly!
o Be sure the transmission is in neutral.
o When the engine will not start, be
sure the steering is unlocked by placing the key in the "ACC" po- sition.
3. Stand approximately 2.5 m (8 ft)
away from the fire and squeeze the handle to discharge the extinguisher. If you release the handle, the dis- charge will stop.
4. Sweep the nozzle back and forth at the base of the fire. After the fireappears to be out, watch it carefullysince it may re-ignite.
Triangle Reflector Placed the triangle reflector on the road to warn oncoming vehicles during emergencies, such as when the ve- hicle is parked by the roadside due toany problems. First Aid Kit There are some items such as scis- sors, bandage and adhesive tape and etc. in the kit to give first aid to aninjured person.
Page 139 of 207
3
WHAT TO DO IN AN EMERGENCY
17
!
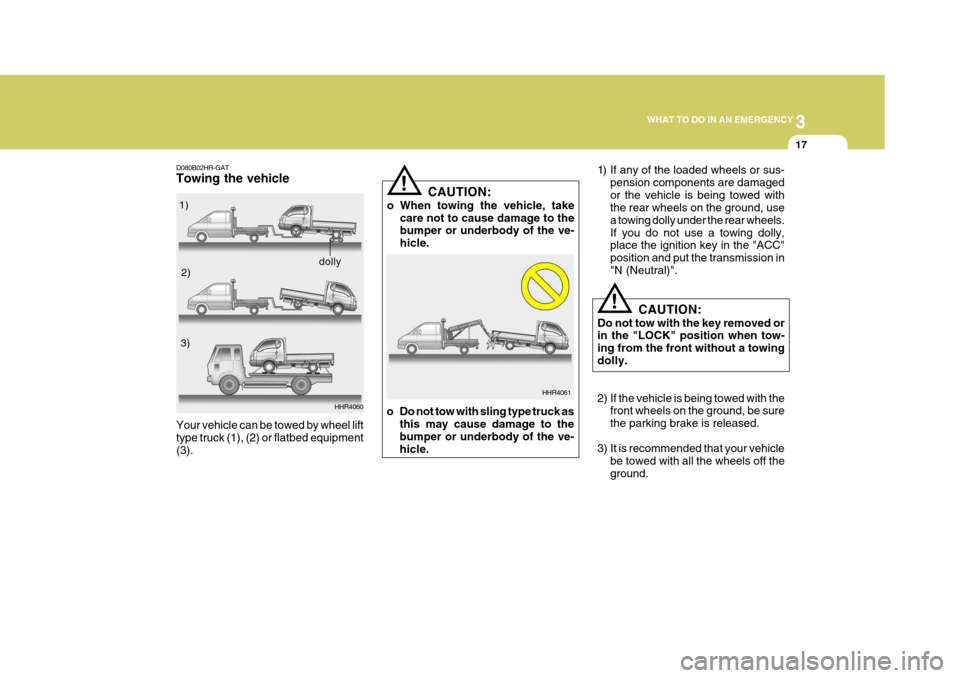
D080B02HR-GAT Towing the vehicle
HHR4060
Your vehicle can be towed by wheel lift type truck (1), (2) or flatbed equipment(3).
!
1) If any of the loaded wheels or sus-
pension components are damaged or the vehicle is being towed with the rear wheels on the ground, use a towing dolly under the rear wheels.If you do not use a towing dolly, place the ignition key in the "ACC" position and put the transmission in"N (Neutral)".
HHR4061
1)
2)
3)
dolly CAUTION:
Do not tow with the key removed or in the "LOCK" position when tow- ing from the front without a towingdolly.
2) If the vehicle is being towed with the front wheels on the ground, be sure the parking brake is released.
3) It is recommended that your vehicle be towed with all the wheels off theground.
CAUTION:
o When towing the vehicle, take care not to cause damage to the bumper or underbody of the ve- hicle.
o Do not tow with sling type truck as this may cause damage to thebumper or underbody of the ve-hicle.
Page 140 of 207
3 WHAT TO DO IN AN EMERGENCY
18IF YOU LOSE YOUR KEYS
D120A01A-AAT If you lose your keys, many Hyundai dealers can make you a new key if you have your key number. If you lock the keys inside your car andyou cannot obtain a new key, many Hyundai dealers can use special tools to open the door for you.
Nor should it be attempted if the wheels,drive train, axles, steering or brakesare damaged. Before towing, be sure the transmission is in neutral and the key in "ACC" (with the engine off) or inthe "ON" position (with the engine run- ning). A driver must be in the towed car to steer it and operate the brakes.
CAUTION:
If the car is being towed with all four wheels on the ground, it can be towed only from the front. Be sure that the transmission is in neutral. Do not tow at speeds greater than50 km/h (25 mph) and for more than 25 km (15 miles). Be sure the steering is unlocked byplacing the key in the "ACC" posi- tion. A driver must be in the towed vehicle to operate the steering andbrakes.
!
D080D01HR-GAT EMERGENCY TOWING
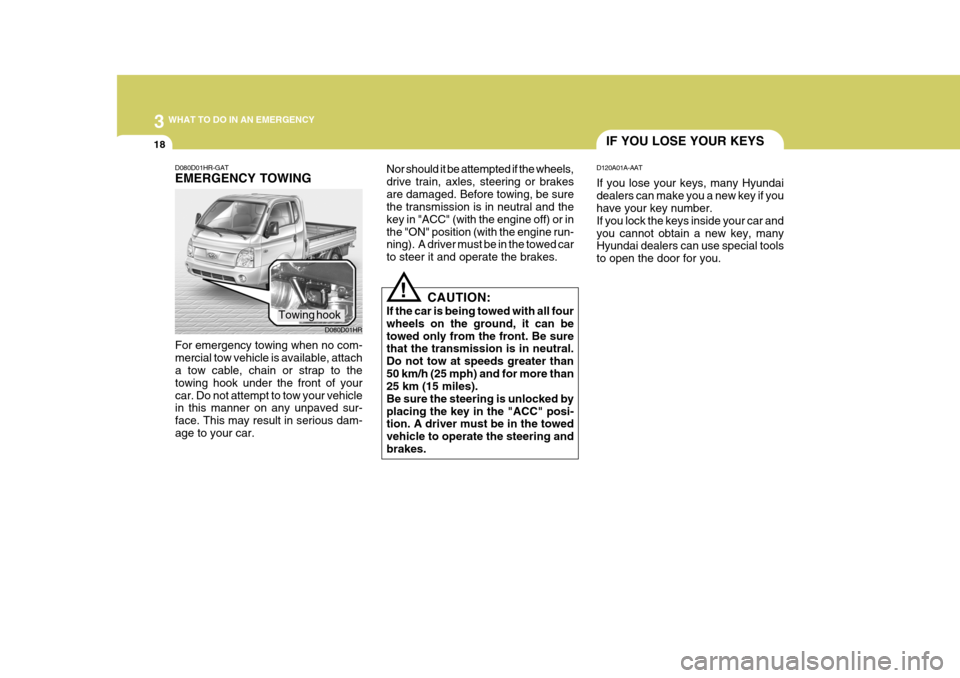
For emergency towing when no com- mercial tow vehicle is available, attach a tow cable, chain or strap to the towing hook under the front of yourcar. Do not attempt to tow your vehicle in this manner on any unpaved sur- face. This may result in serious dam-age to your car. D080D01HR
Towing hook
Page 144 of 207
44CORROSION PREVENTION AND APPEARANCE CARE
4WASHING AND WAXING
E030A04HR-GAT Washing Your Hyundai Never wash your car when the surface is hot from being in the sun. Alwayswash your car in the shade. Wash your car frequently. Dirt is abra- sive and can scratch the paint if it is notremoved. Air pollution or acid rain may damage the paint and trim through chemical action if pollutants are al-lowed to remain in contact with the surface. If you live near the ocean or in an area where road salts or dust controlchemicals are used, you should pay particular attention to the underside of the car. Start by rinsing the car toremove dust and loose dirt. In winter, or if you have driven through mud or muddy water, be sure to thoroughly clean theunderside as well. Use a hard direct stream of water to remove accumula- tions of mud or corrosive materials.Use a good quality car-washing solu- tion and follow the manufacturer's di- rections on the package. These areavailable at your Hyundai dealer or auto parts outlet. Don't use strong house- hold detergents, gasoline, strong sol-vents or abrasive cleaning powders as these may damage the finish. Use a clean sponge or cloth, rinse it frequently and don't damage the finishby rubbing too hard. For stubborn spots, dampen them frequently and remove them a little at a time.To clean whitewall tires, use a stiff brush or soapy steel-wool scouring pad. To clean plastic wheel covers, use aclean sponge or soft cloth and water. If you find any nicks or scratches in the paint, use touch-up paint to cover them to prevent corrosion. To protect the paintwork of the car against corrosion,you must clean your Hyundai (at least once a month). Give special attention to the removal of salt, mud and othersubstances on the underside of the splashboards of the car. Make sure that the outlets and the underside of thedoors are open. Paint damage can be caused by small accumulation of tar, industrial precipitation, tree resin, in-sects and bird droppings, when not removed immediately. If water alone is not strong enough to remove the accu-mulated dirt, use a mild car washing solution. Be sure to rinse the surface after washing to remove the solution.Never allow the solution to dry on the painted surfaces.
CAUTION:
!
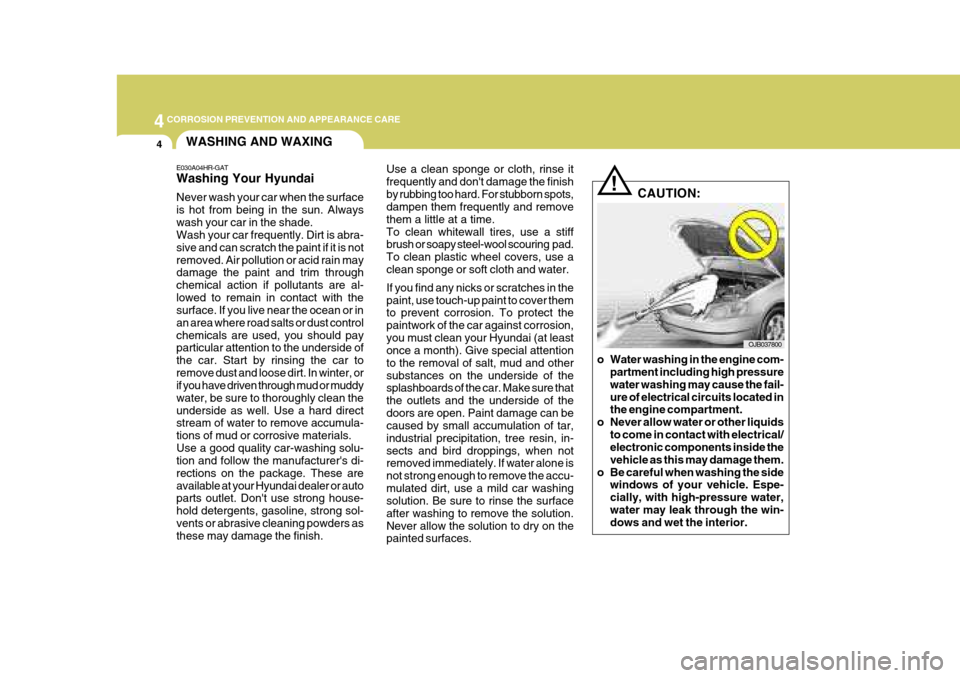
o Water washing in the engine com- partment including high pressure water washing may cause the fail-ure of electrical circuits located in the engine compartment.
o Never allow water or other liquids to come in contact with electrical/electronic components inside the vehicle as this may damage them.
o Be careful when washing the side windows of your vehicle. Espe-cially, with high-pressure water,water may leak through the win- dows and wet the interior.
OJB037800
Page 145 of 207
4
CORROSION PREVENTION AND APPEARANCE CARE
5
4
CORROSION PREVENTION AND APPEARANCE CARE
5
E030D01A-AAT When to Wax Again You should polish and wax the car again when water no longer beads ona clean surface but spreads out over a larger area. E030E01A-AAT Maintaining Bumpers Special precautions must be observed to preserve the appearance of the bumpers on your Hyundai. They are:
o Be careful not to spill battery elec- trolyte or hydraulic brake fluid on the bumpers. If you do, wash it off im- mediately with clear water.
o Be gentle when cleaning the bumper surfaces. They are made of softplastic and the surface can be dam- aged if mistreated. Do not use abra-sive cleaners. Use warm water and mild soap or car-washing solution.
o Do not expose the bumpers to high temperatures. For example, if youhave your car repainted, do not leave the bumpers on the car if thecar is going to be placed in a high- temperature paint booth.
E030B01A-AAT Spot Cleaning Don't use gasoline, strong solvents or corrosive cleaning agents. These candamage the finish of the car. To re- move road tar, use turpentine on a clean, soft cloth or commercially avail-able bug and tar remover. Be gentle. To remove dead insects or tree sap, use warm water and mild soap or car-washing solution. Soak the spot and rub gently. If the paint has lost its luster, use a commercial car-cleaningpolish.
E030C01A-AAT Polishing and Waxing Always wash and dry the car before polishing or waxing or using a combi- nation cleaner and wax. Use a good quality commercial product and followthe manufacturer's directions on the container. Polish and wax the bright trim pieces as well as the paint.CLEANING THE INTERIOR
E040A01A-AAT To Clean the Vinyl Upholstery To clean the vinyl upholstery, first re- move loose dirt and dust with a vacuumcleaner. Then apply a solution of mild soap or detergent and water using a clean sponge or soft cloth. Allow this tostay on the surface to loosen the dirt, then wipe with a clean damp sponge or cloth. If all the dirt stains are not re-moved, repeat this procedure until the upholstery is clean. Do not use gaso- line, solvent, paint thinner or otherstrong cleaners. E040B01HR-AAT To Clean the Leather Upholstery
CAUTION:
When cleaning leather products (steering wheel, seats etc.), use neu- tral detergents or low alcohol con- tent solutions. If you use high alco-hol content solutions or acid/alka- line detergents, the color of the leather may fade or the surface may getstripped off.
!
o To prevent damage to the plastic
parts, do not clean with chemical solvents or strong detergents.