2010 Hyundai H-100 Truck warning light
[x] Cancel search: warning lightPage 126 of 207
3 WHAT TO DO IN AN EMERGENCY
4
!
IF THE ENGINE OVERHEATS
D030A01HR-GAT If your temperature gauge indicates overheating, you experience a loss of power, or hear loud pinging or knock- ing, the engine is probably too hot. Ifthis happens to you, you should:
1. Pull off the road and stop as soon as it is safe to do so.
2. Place the gear selector lever in neu-
tral and set the parking brake. If the air conditioning is on, turn it off.
3. If engine coolant is running out un-
der the car or steam is coming outfrom the hood, allow the engine to idle. Do not open the hood until the engine coolant has stopped runningor the steaming has stopped. If there is no visible loss of engine coolant and no steam, leave the enginerunning, lift up the passenger's seat
(Refer to "To Inspect the Engine
Compartment Under the Passenger's
Seat" on page 1-13.) and check to be sure the engine cooling fan is oper- ating. If the fan is not running, turnthe engine off.
6. Carefully remove the jumper cables
in the reverse order of attachment.
If you do not know why your batterybecame discharged (because the lightswere left on, etc.), have the charging system checked by your Hyundai dealer. 4. Check to see if the water pump drive
belt is missing. If it is not missing,check to see that it is tight. If the drive belt seems to be satisfactory, check for coolant leaking from theradiator, hoses or under the car. (If the air conditioning had been in use, it is normal for cold water to bedraining from it when you stop).
WARNING:
While the engine is running, keephair, hands, and clothing away from moving parts such as the fan and drive belts to prevent injury.
HHR4002
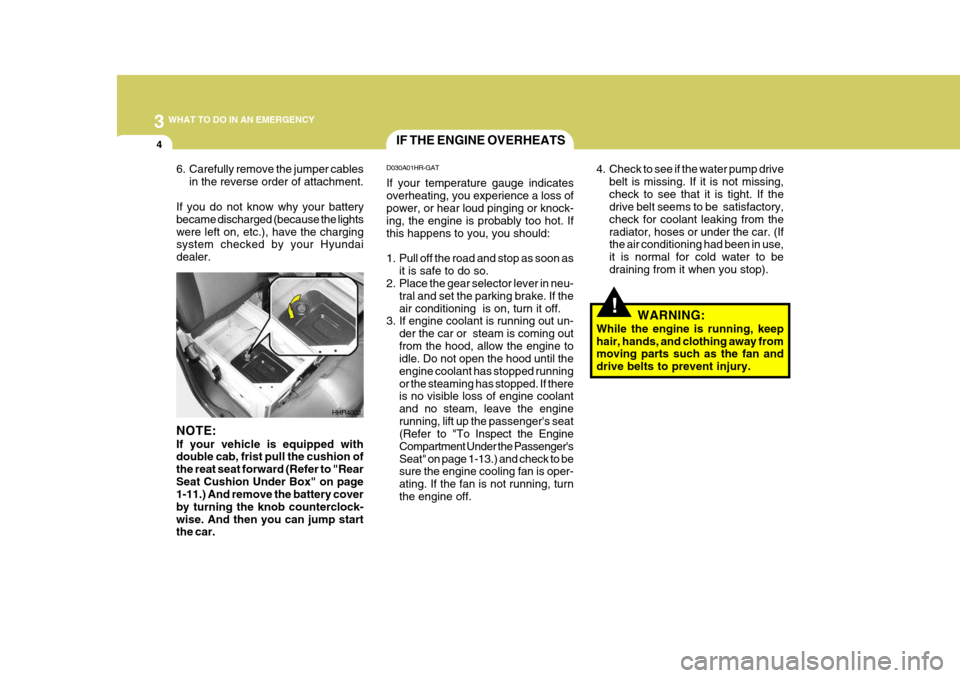
NOTE: If your vehicle is equipped with double cab, frist pull the cushion of the reat seat forward (Refer to "RearSeat Cushion Under Box" on page 1-11.) And remove the battery cover by turning the knob counterclock-wise. And then you can jump start the car.
Page 135 of 207
3
WHAT TO DO IN AN EMERGENCY
13
!
!
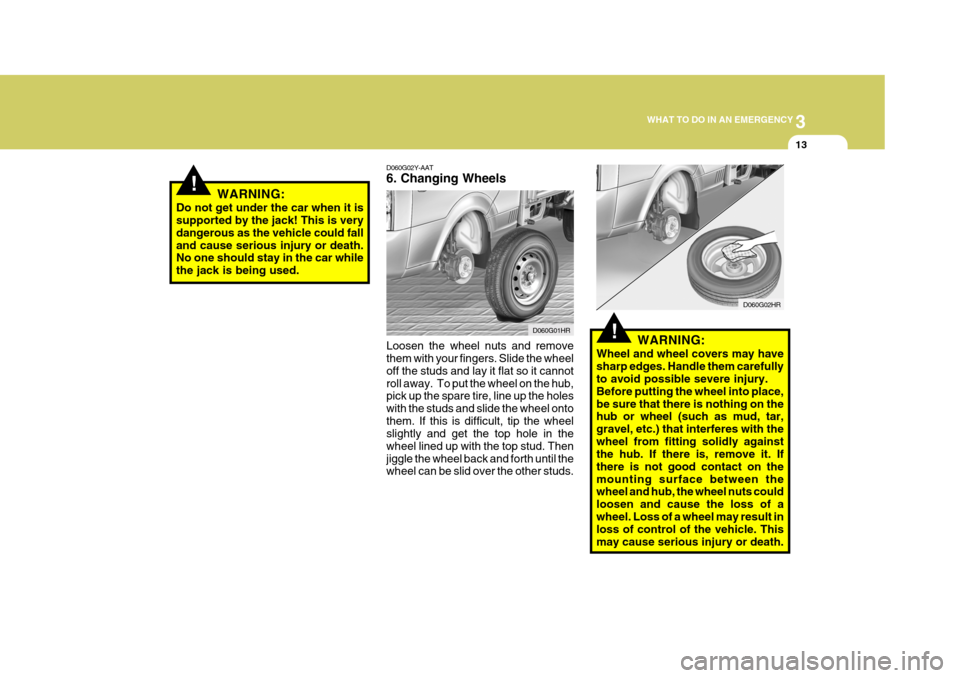
D060G02Y-AAT 6. Changing Wheels Loosen the wheel nuts and remove them with your fingers. Slide the wheel off the studs and lay it flat so it cannotroll away. To put the wheel on the hub, pick up the spare tire, line up the holes with the studs and slide the wheel ontothem. If this is difficult, tip the wheel slightly and get the top hole in the wheel lined up with the top stud. Thenjiggle the wheel back and forth until the wheel can be slid over the other studs. D060G02HR
WARNING:
Wheel and wheel covers may have sharp edges. Handle them carefully to avoid possible severe injury. Before putting the wheel into place,be sure that there is nothing on the hub or wheel (such as mud, tar, gravel, etc.) that interferes with thewheel from fitting solidly against the hub. If there is, remove it. If there is not good contact on themounting surface between the wheel and hub, the wheel nuts could loosen and cause the loss of awheel. Loss of a wheel may result in loss of control of the vehicle. This may cause serious injury or death.
D060G01HR
WARNING:
Do not get under the car when it is supported by the jack! This is very dangerous as the vehicle could falland cause serious injury or death. No one should stay in the car while the jack is being used.
Page 182 of 207
6 DO-IT-YOURSELF MAINTENANCE
24
!
CHECKING THE BATTERY
G210A01A-AAT
WARNING:
Batteries can be dangerous! When working with batteries, carefully ob-serve the following precautions to avoid serious injuries. D010B01HR
The fluid in the battery contains a strong solution of sulfuric acid, which is poi- sonous and highly corrosive. Be careful not to spill it on yourself or the car. If youdo spill battery fluid on yourself, imme- diately do the following:
NOTE: See page 6-38 for the fuse panel descriptions. G200C01HR-GAT Power Connector
4. Insert the power connector in the
opposite direction.
NOTE:
o If the power connector is pulled up from the fuse panel, the warn- ing chime, audio, clock and inte-rior lamps, etc., will not operate. The following items must be reset after replacement.- Digital Clock
o Even though the power connector
is pulled up, the battery can stillbe discharged by operation of the headlights or other electrical de- vices.
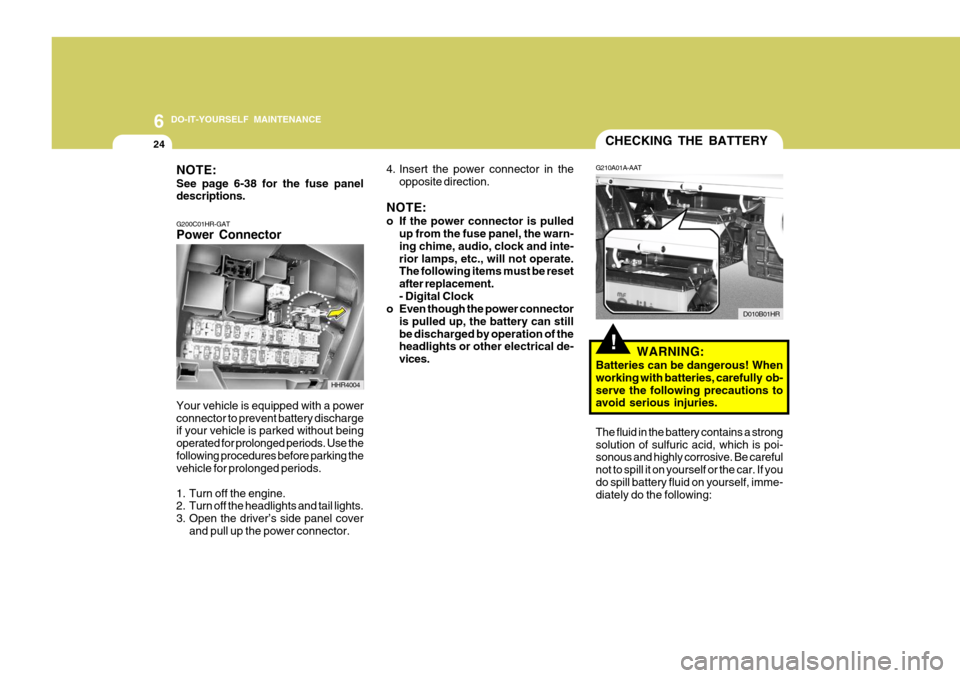
Your vehicle is equipped with a powerconnector to prevent battery discharge if your vehicle is parked without being operated for prolonged periods. Use thefollowing procedures before parking the vehicle for prolonged periods.
1. Turn off the engine.
2. Turn off the headlights and tail lights.
3. Open the driver’s side panel cover and pull up the power connector.
HHR4004
Page 183 of 207
6
DO-IT-YOURSELF MAINTENANCE
25
!
o If battery fluid is on your skin, flush
the affected areas with water for at least 15 minutes and then seek medi- cal assistance.
o If battery fluid is in your eyes, rinse out your eyes with water and getmedical assistance as soon as pos- sible. While you are being driven toget medical assistance, continue to rinse your eyes by using a sponge or soft cloth saturated with water.
o If you swallow battery fluid, drink a large quantity of water or milk fol-lowed by milk of magnesia, eat a rawegg or drink vegetable oil. Get medi- cal assistance as soon as possible.
While batteries are being charged (ei-ther by a battery charger or by the vehicle's alternator), they produce ex-plosive gases. Always observe these warnings to prevent injuries from oc- curring:
o Charge batteries only in a well ven- tilated area.
o Do not permit flames, sparks or smoking in the area.
o Keep children away from the area.G210B01HR-GET Checking the Battery Keep the battery clean. Any evidence of corrosion around the battery posts orterminals should be removed using a solution of household baking soda and warm water. After the battery terminalsare dry, cover them with a light coating of grease.
WARNING:Always read the following instructions carefully when handling a battery. Keep lighted cigarettes andall other flames or sparks away from the battery. Hydrogen, which is a highlycombustible gas, is always present in battery cells and may explode if ignited.Keep batteries out of the reach of children because batteries contain highly cor-rosive SULFURIC ACID. Do not allow battery acid to con- tact your skin, eyes, cloth-ing or paint finish. If any electrolyte gets intoyour eyes, flush your eyes with clean water for at least 15 minutes and get immedi-ate medical attention. If pos- sible, continue to apply water with a sponge or clothuntil medical attention is re- ceived. If electrolyte gets on yourskin, thoroughly wash the contacted area. If you feel a pain or a burn-ing sensation, get medical attention immediately. Wear eye protection whencharging or working near a battery. Always provide ventilationwhen working in an en- closed space. An inappropriately disposedbattery can be harmful to the environment and human health. Dispose the batteryaccording to your local law(s) or regulation.
Page 186 of 207
6 DO-IT-YOURSELF MAINTENANCE
28
!WARNING:
o Do not smoke or have any other open flame near the vehicle while bleeding the fuel system.
o Be sure to carefully clean away
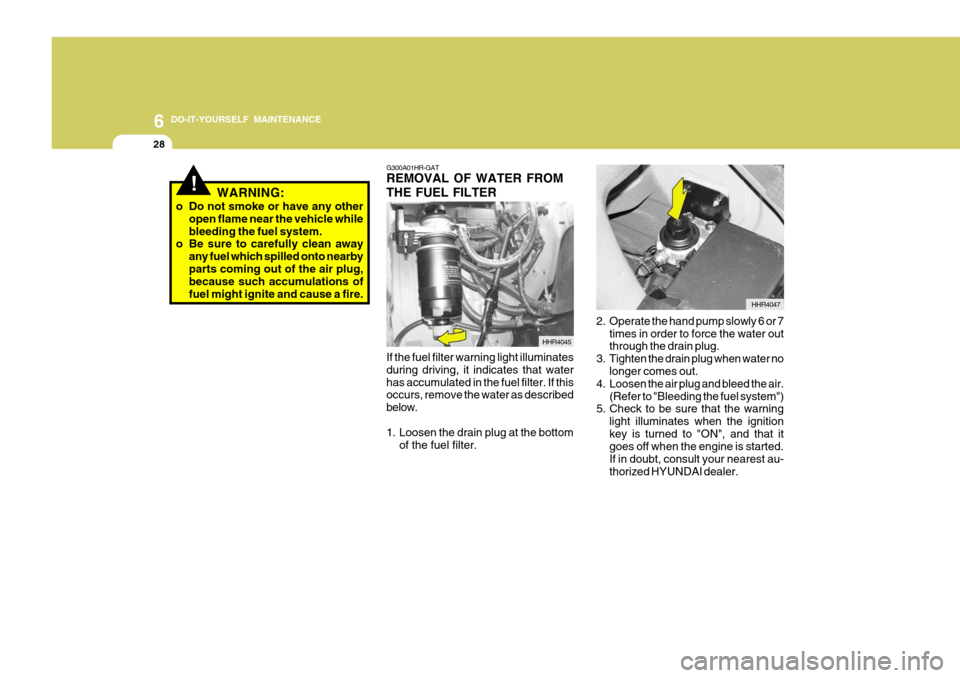
any fuel which spilled onto nearbyparts coming out of the air plug, because such accumulations of fuel might ignite and cause a fire. G300A01HR-GAT REMOVAL OF WATER FROM THE FUEL FILTER
HHR4045
If the fuel filter warning light illuminates during driving, it indicates that waterhas accumulated in the fuel filter. If this occurs, remove the water as described below.
1. Loosen the drain plug at the bottom of the fuel filter. HHR4047
2. Operate the hand pump slowly 6 or 7 times in order to force the water out through the drain plug.
3. Tighten the drain plug when water no longer comes out.
4. Loosen the air plug and bleed the air. (Refer to "Bleeding the fuel system")
5. Check to be sure that the warning
light illuminates when the ignition key is turned to "ON", and that it goes off when the engine is started. If in doubt, consult your nearest au-thorized HYUNDAI dealer.
Page 187 of 207
6
DO-IT-YOURSELF MAINTENANCE
29
!WARNING:
o Do not smoke or have any other open flame near the vehicle while bleeding the fuel system.
o Be sure to carefully wipe away any
water drained out in this manner,because the fuel mixed in the wa- ter might be ignited and result in a fire.
HEADLIGHT AIMING ADJUSTMENT
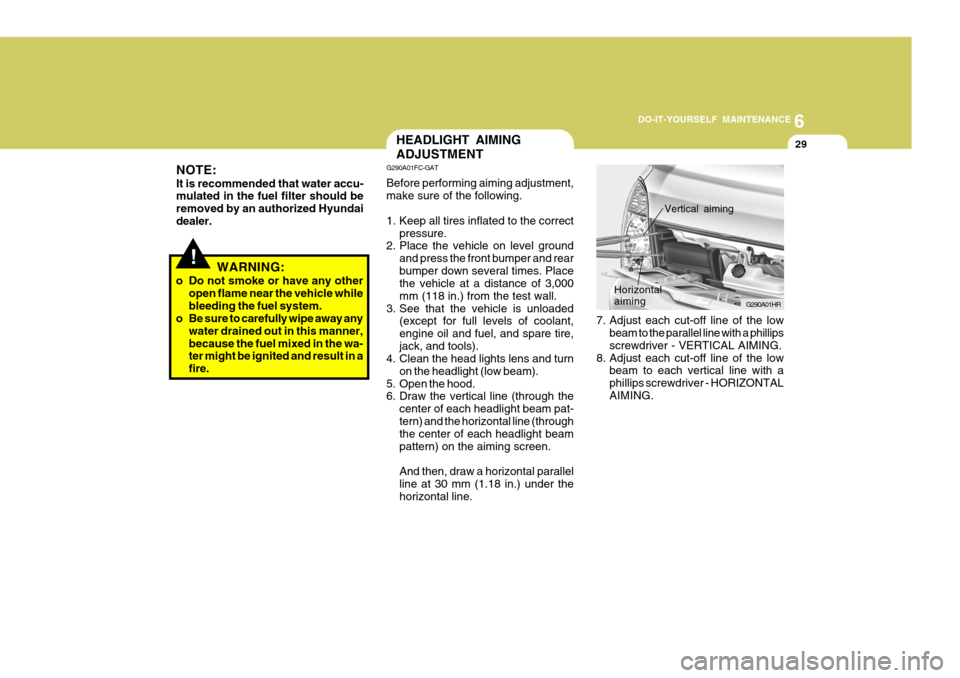
7. Adjust each cut-off line of the lowbeam to the parallel line with a phillips screwdriver - VERTICAL AIMING.
8. Adjust each cut-off line of the low beam to each vertical line with a phillips screwdriver - HORIZONTALAIMING. G290A01HR
Horizontal aiming
Vertical aiming
G290A01FC-GAT Before performing aiming adjustment, make sure of the following.
1. Keep all tires inflated to the correct
pressure.
2. Place the vehicle on level ground
and press the front bumper and rear bumper down several times. Place the vehicle at a distance of 3,000 mm (118 in.) from the test wall.
3. See that the vehicle is unloaded (except for full levels of coolant,engine oil and fuel, and spare tire,jack, and tools).
4. Clean the head lights lens and turn
on the headlight (low beam).
5. Open the hood.
6. Draw the vertical line (through the
center of each headlight beam pat- tern) and the horizontal line (through the center of each headlight beam pattern) on the aiming screen. And then, draw a horizontal parallel line at 30 mm (1.18 in.) under thehorizontal line.
NOTE: It is recommended that water accu- mulated in the fuel filter should be removed by an authorized Hyundaidealer.
Page 190 of 207
6 DO-IT-YOURSELF MAINTENANCE
32
!
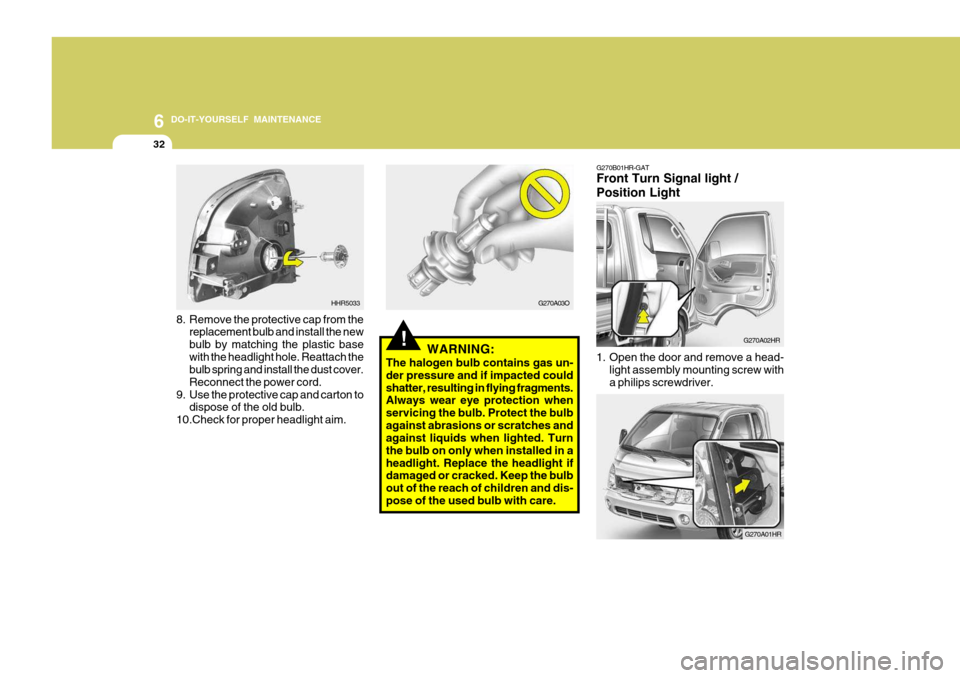
8. Remove the protective cap from the
replacement bulb and install the new bulb by matching the plastic basewith the headlight hole. Reattach the bulb spring and install the dust cover. Reconnect the power cord.
9. Use the protective cap and carton to dispose of the old bulb.
10.Check for proper headlight aim. HHR5033
WARNING:
The halogen bulb contains gas un-der pressure and if impacted couldshatter, resulting in flying fragments. Always wear eye protection when servicing the bulb. Protect the bulbagainst abrasions or scratches and against liquids when lighted. Turn the bulb on only when installed in aheadlight. Replace the headlight if damaged or cracked. Keep the bulb out of the reach of children and dis-pose of the used bulb with care. G270A03O
G270B01HR-GAT Front Turn Signal light / Position Light
G270A02HR
1. Open the door and remove a head- light assembly mounting screw with a philips screwdriver.
G270A01HR
Page 198 of 207
6 DO-IT-YOURSELF MAINTENANCE
40
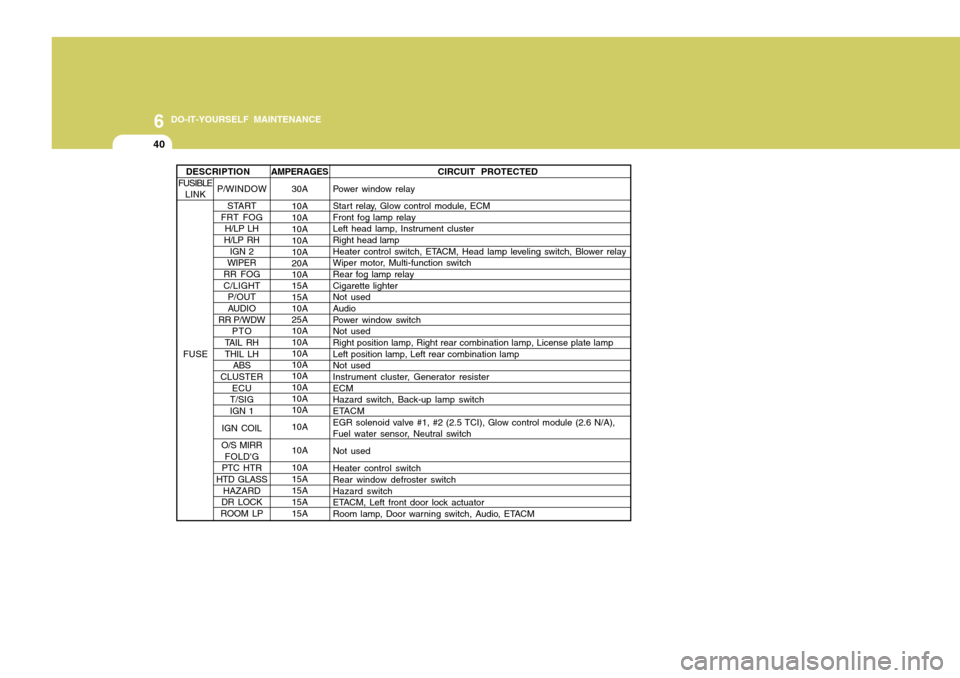
AMPERAGES30A 10A 10A10A 10A 10A 20A 10A 15A 15A 10A 25A 10A 10A 10A 10A 10A 10A 10A 10A 10A 10A 10A 15A15A15A15A CIRCUIT PROTECTED
Power window relay
Start relay, Glow control module, ECM Front fog lamp relayLeft head lamp, Instrument cluster Right head lamp
Heater control switch, ETACM, Head lamp leveling switch, Blower relay
Wiper motor, Multi-function switch Rear fog lamp relay Cigarette lighterNot used Audio
Power window switchNot used Right position lamp, Right rear combination lamp, License plate lamp Left position lamp, Left rear combination lampNot used
Instrument cluster, Generator resister ECMHazard switch, Back-up lamp switch
ETACM
EGR solenoid valve #1, #2 (2.5 TCI), Glow control module (2.6 N/A),
Fuel water sensor, Neutral switch Not usedHeater control switch Rear window defroster switch Hazard switch
ETACM, Left front door lock actuator
Room lamp, Door warning switch, Audio, ETACM
P/WINDOW START
FRT FOG
H/LP LH
H/LP RH IGN 2
WIPER
RR FOG C/LIGHT P/OUT
AUDIO
RR P/WDW
PTO
TAIL RH THIL LH ABS
CLUSTER ECU
T/SIG IGN 1
IGN COIL
O/S MIRR FOLD'G
PTC HTR
HTD GLASS HAZARD
DR LOCK
ROOM LP
DESCRIPTION
FUSIBLE LINK
FUSE