2010 Hyundai H-100 Truck set clock
[x] Cancel search: set clockPage 98 of 207
1FEATURES OF YOUR HYUNDAI
72
FM/AM
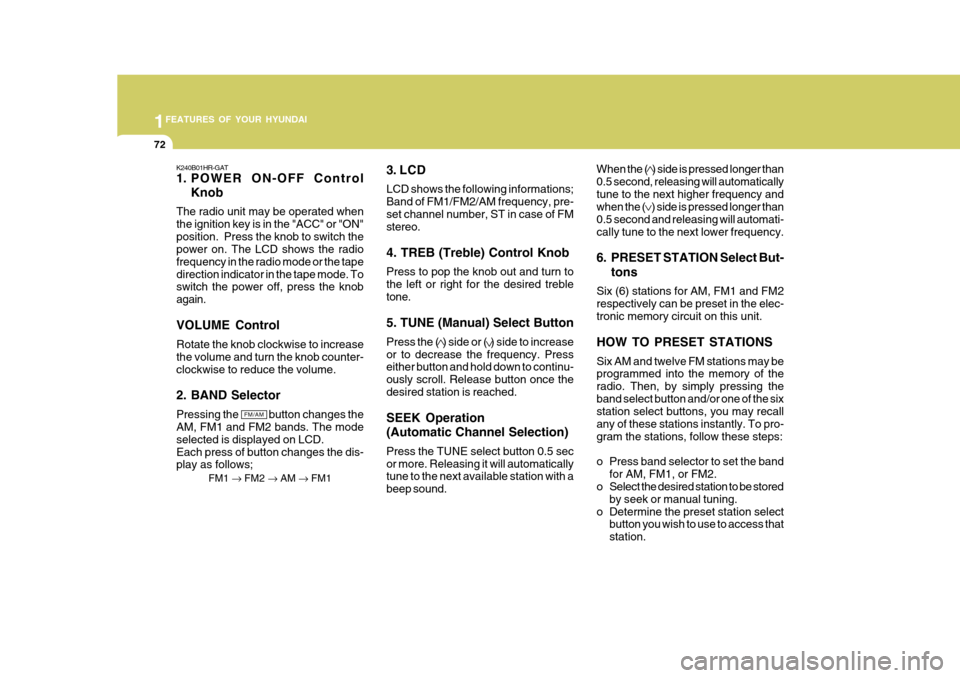
K240B01HR-GAT
1. POWER ON-OFF Control
Knob
The radio unit may be operated when the ignition key is in the "ACC" or "ON"position. Press the knob to switch the power on. The LCD shows the radio frequency in the radio mode or the tapedirection indicator in the tape mode. To switch the power off, press the knob again. VOLUME Control Rotate the knob clockwise to increase the volume and turn the knob counter-clockwise to reduce the volume. 2. BAND Selector Pressing the button changes the AM, FM1 and FM2 bands. The mode selected is displayed on LCD.Each press of button changes the dis- play as follows; FM1 � FM2 � AM � FM1 3. LCD LCD shows the following informations; Band of FM1/FM2/AM frequency, pre-set channel number, ST in case of FM stereo. 4. TREB (Treble) Control Knob Press to pop the knob out and turn to the left or right for the desired trebletone. 5. TUNE (Manual) Select Button Press the ( ) side or ( ) side to increase or to decrease the frequency. Press either button and hold down to continu- ously scroll. Release button once thedesired station is reached. SEEK Operation (Automatic Channel Selection) Press the TUNE select button 0.5 sec or more. Releasing it will automatically tune to the next available station with a beep sound. When the ( ) side is pressed longer than0.5 second, releasing will automaticallytune to the next higher frequency and when the ( ) side is pressed longer than 0.5 second and releasing will automati-cally tune to the next lower frequency.
6. PRESET STATION Select But-
tons
Six (6) stations for AM, FM1 and FM2 respectively can be preset in the elec- tronic memory circuit on this unit. HOW TO PRESET STATIONS Six AM and twelve FM stations may be programmed into the memory of the radio. Then, by simply pressing theband select button and/or one of the six station select buttons, you may recall any of these stations instantly. To pro-gram the stations, follow these steps:
o Press band selector to set the band for AM, FM1, or FM2.
o Select the desired station to be stored
by seek or manual tuning.
o Determine the preset station select button you wish to use to access that station.
Page 99 of 207
1
FEATURES OF YOUR HYUNDAI
73
o Press the station select button for more than two seconds. A select button indicator will show in the dis- play indicating which select button you have depressed. The frequencydisplay will flash after it has been stored into the memory with beep sound. You should then release thebutton, and proceed to program the next desired station. A total of 18 stations can be programmed by se-lecting one AM and two FM stations per button.
o When completed, any preset station may be recalled by selecting AM,FM1 or FM2 band and the appropri- ate station button.
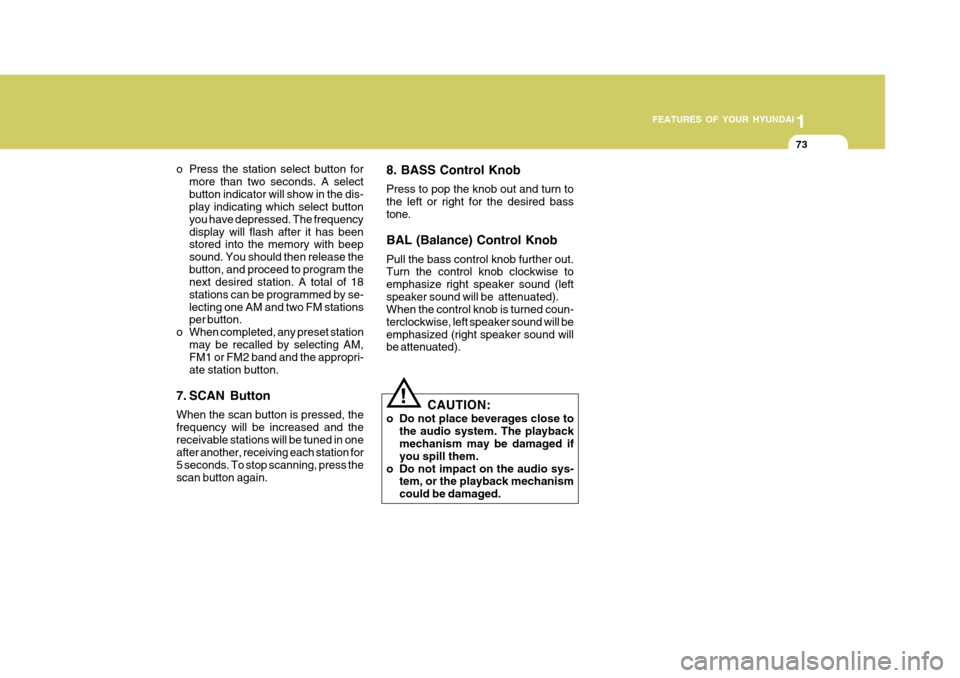
7. SCAN Button When the scan button is pressed, the frequency will be increased and thereceivable stations will be tuned in one after another, receiving each station for 5 seconds. To stop scanning, press thescan button again. 8. BASS Control Knob Press to pop the knob out and turn to the left or right for the desired basstone. BAL (Balance) Control Knob Pull the bass control knob further out. Turn the control knob clockwise to emphasize right speaker sound (leftspeaker sound will be attenuated). When the control knob is turned coun- terclockwise, left speaker sound will beemphasized (right speaker sound will be attenuated).
!
CAUTION:
o Do not place beverages close to the audio system. The playback mechanism may be damaged if you spill them.
o Do not impact on the audio sys- tem, or the playback mechanismcould be damaged.
Page 126 of 207
3 WHAT TO DO IN AN EMERGENCY
4
!
IF THE ENGINE OVERHEATS
D030A01HR-GAT If your temperature gauge indicates overheating, you experience a loss of power, or hear loud pinging or knock- ing, the engine is probably too hot. Ifthis happens to you, you should:
1. Pull off the road and stop as soon as it is safe to do so.
2. Place the gear selector lever in neu-
tral and set the parking brake. If the air conditioning is on, turn it off.
3. If engine coolant is running out un-
der the car or steam is coming outfrom the hood, allow the engine to idle. Do not open the hood until the engine coolant has stopped runningor the steaming has stopped. If there is no visible loss of engine coolant and no steam, leave the enginerunning, lift up the passenger's seat
(Refer to "To Inspect the Engine
Compartment Under the Passenger's
Seat" on page 1-13.) and check to be sure the engine cooling fan is oper- ating. If the fan is not running, turnthe engine off.
6. Carefully remove the jumper cables
in the reverse order of attachment.
If you do not know why your batterybecame discharged (because the lightswere left on, etc.), have the charging system checked by your Hyundai dealer. 4. Check to see if the water pump drive
belt is missing. If it is not missing,check to see that it is tight. If the drive belt seems to be satisfactory, check for coolant leaking from theradiator, hoses or under the car. (If the air conditioning had been in use, it is normal for cold water to bedraining from it when you stop).
WARNING:
While the engine is running, keephair, hands, and clothing away from moving parts such as the fan and drive belts to prevent injury.
HHR4002
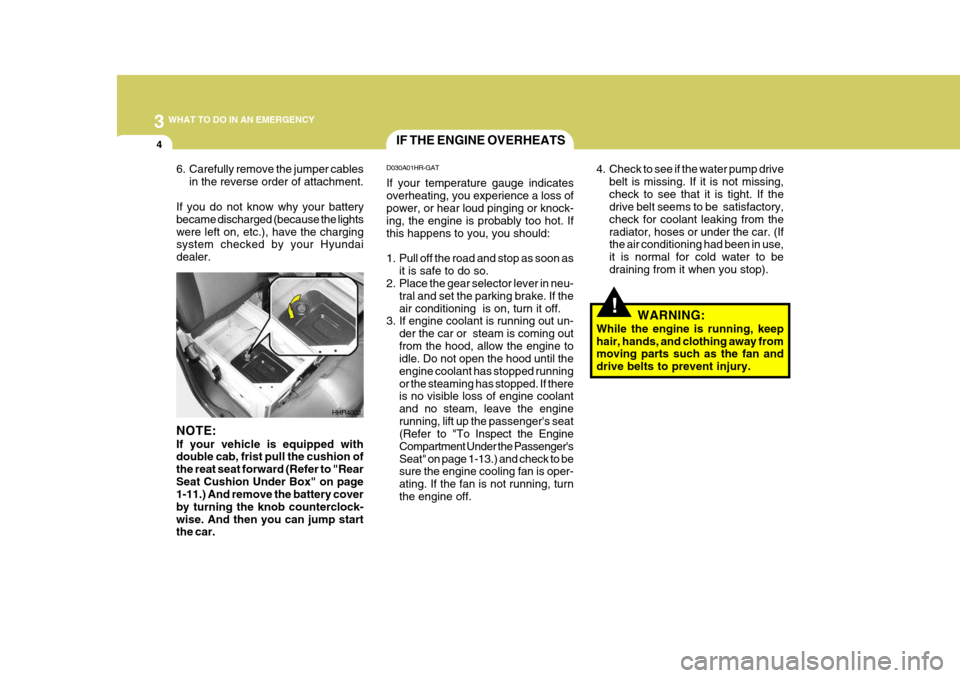
NOTE: If your vehicle is equipped with double cab, frist pull the cushion of the reat seat forward (Refer to "RearSeat Cushion Under Box" on page 1-11.) And remove the battery cover by turning the knob counterclock-wise. And then you can jump start the car.
Page 129 of 207
3
WHAT TO DO IN AN EMERGENCY
7
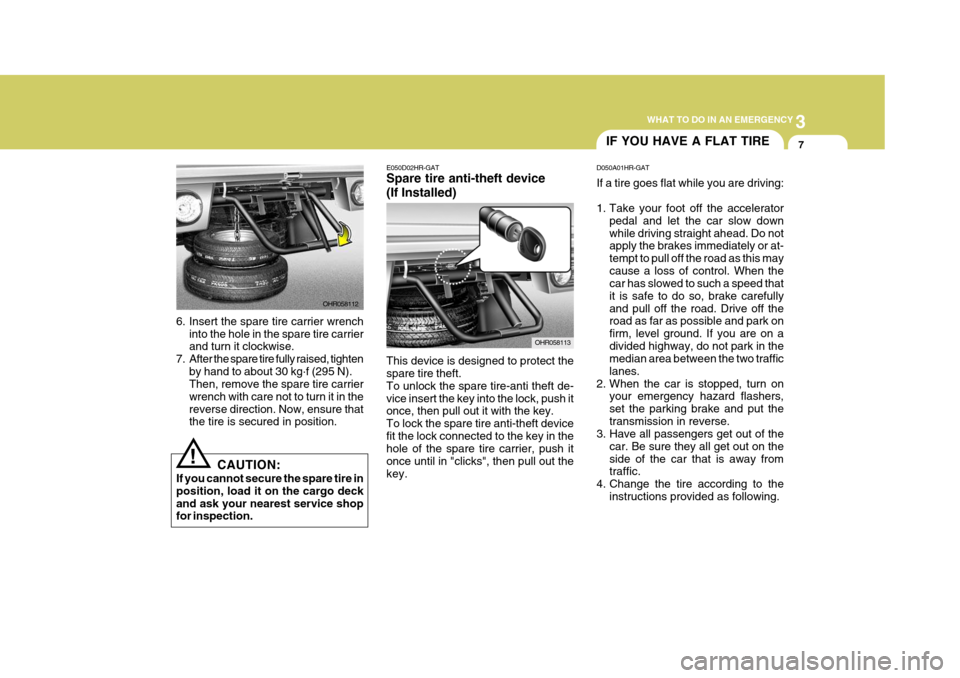
6. Insert the spare tire carrier wrench
into the hole in the spare tire carrier and turn it clockwise.
7. After the spare tire fully raised, tighten by hand to about 30 kg .
f (295 N).
Then, remove the spare tire carrier wrench with care not to turn it in thereverse direction. Now, ensure that the tire is secured in position.
! CAUTION:
If you cannot secure the spare tire in position, load it on the cargo deckand ask your nearest service shop for inspection. E050D02HR-GAT Spare tire anti-theft device (If Installed) This device is designed to protect the spare tire theft. To unlock the spare tire-anti theft de-vice insert the key into the lock, push it once, then pull out it with the key. To lock the spare tire anti-theft devicefit the lock connected to the key in the hole of the spare tire carrier, push it once until in "clicks", then pull out thekey.
OHR058113
OHR058112
IF YOU HAVE A FLAT TIRE
D050A01HR-GAT If a tire goes flat while you are driving:
1. Take your foot off the accelerator pedal and let the car slow down while driving straight ahead. Do not apply the brakes immediately or at- tempt to pull off the road as this maycause a loss of control. When the car has slowed to such a speed that it is safe to do so, brake carefullyand pull off the road. Drive off the road as far as possible and park on firm, level ground. If you are on adivided highway, do not park in the median area between the two traffic lanes.
2. When the car is stopped, turn on your emergency hazard flashers,set the parking brake and put thetransmission in reverse.
3. Have all passengers get out of the
car. Be sure they all get out on theside of the car that is away from traffic.
4. Change the tire according to the instructions provided as following.
Page 166 of 207
6 DO-IT-YOURSELF MAINTENANCE
8
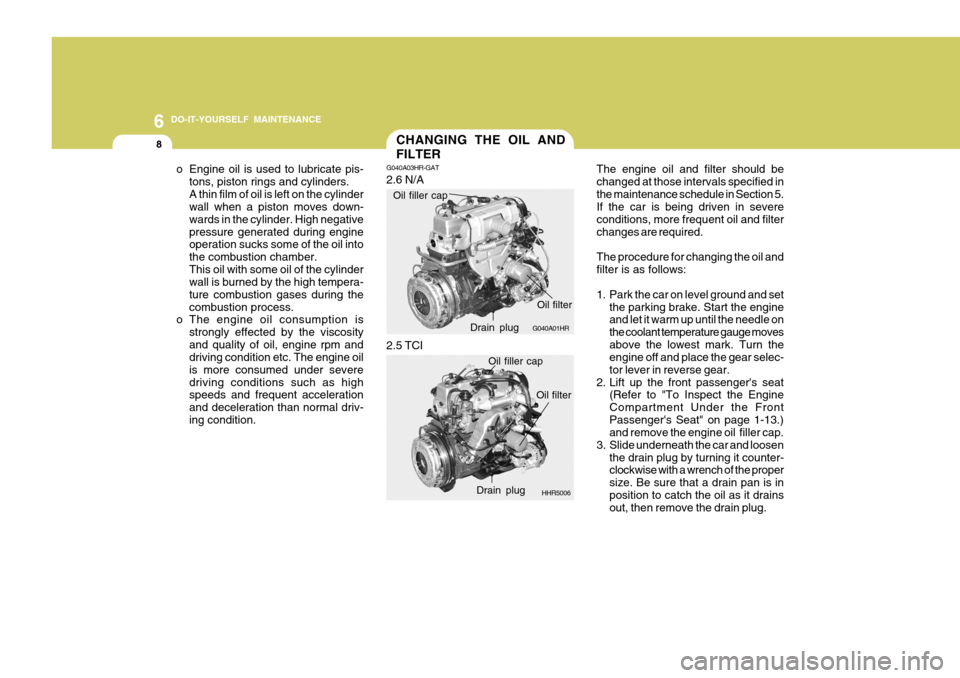
The engine oil and filter should be changed at those intervals specified inthe maintenance schedule in Section 5. If the car is being driven in severe conditions, more frequent oil and filterchanges are required. The procedure for changing the oil and filter is as follows:
1. Park the car on level ground and set
the parking brake. Start the engine and let it warm up until the needle on the coolant temperature gauge movesabove the lowest mark. Turn the engine off and place the gear selec- tor lever in reverse gear.
2. Lift up the front passenger's seat (Refer to "To Inspect the EngineCompartment Under the FrontPassenger's Seat" on page 1-13.) and remove the engine oil filler cap.
3. Slide underneath the car and loosen the drain plug by turning it counter-clockwise with a wrench of the proper size. Be sure that a drain pan is inposition to catch the oil as it drains out, then remove the drain plug.
CHANGING THE OIL AND FILTER
o Engine oil is used to lubricate pis- tons, piston rings and cylinders. A thin film of oil is left on the cylinder wall when a piston moves down- wards in the cylinder. High negativepressure generated during engine operation sucks some of the oil into the combustion chamber.This oil with some oil of the cylinder wall is burned by the high tempera-
ture combustion gases during thecombustion process.
o The engine oil consumption is
strongly effected by the viscosityand quality of oil, engine rpm and driving condition etc. The engine oil is more consumed under severedriving conditions such as high speeds and frequent acceleration and deceleration than normal driv-ing condition. G040A03HR-GAT 2.6 N/A
G040A01HR
Oil filler capDrain plugOil filter
2.5 TCI
HHR5006
Oil filler cap
Drain plug Oil filter
Page 169 of 207
6
DO-IT-YOURSELF MAINTENANCE
11
!
G050D01HR
G050D01HR-GAT To Change the Coolant The coolant should be changed at those intervals specified in the vehiclemaintenance schedule in Section 5.
CAUTION:
Engine coolant can damage the fin-ish of your car. If you spill enginecoolant on the car, wash it off thor- oughly with clean water.
!
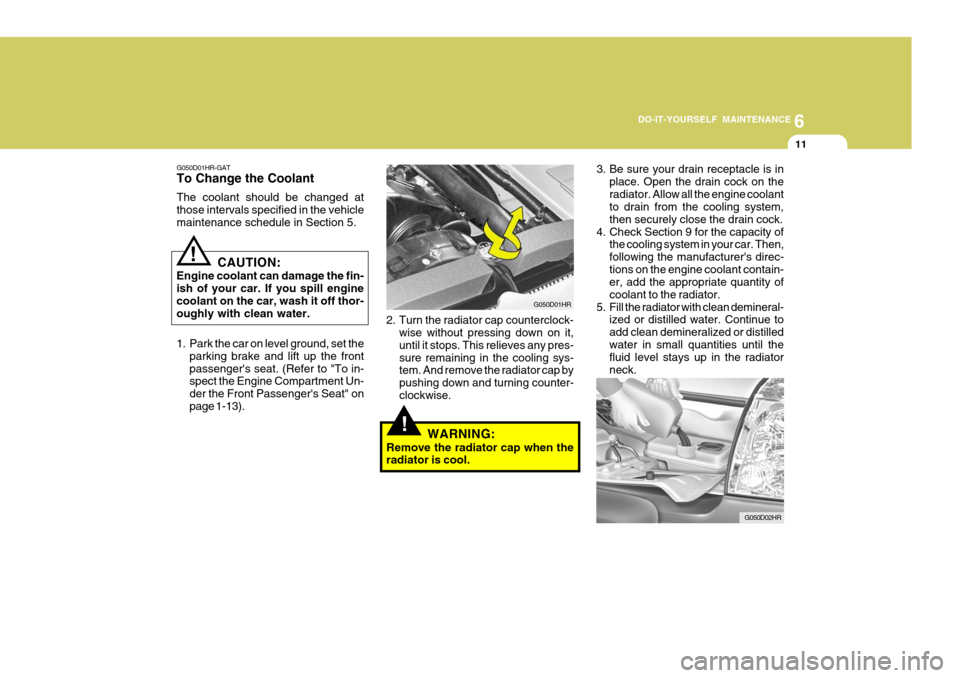
1. Park the car on level ground, set the parking brake and lift up the front passenger's seat. (Refer to "To in- spect the Engine Compartment Un- der the Front Passenger's Seat" onpage 1-13). 2. Turn the radiator cap counterclock-
wise without pressing down on it,until it stops. This relieves any pres-sure remaining in the cooling sys- tem. And remove the radiator cap by pushing down and turning counter-clockwise.
WARNING:
Remove the radiator cap when the radiator is cool. 3. Be sure your drain receptacle is in
place. Open the drain cock on the radiator. Allow all the engine coolant to drain from the cooling system, then securely close the drain cock.
4. Check Section 9 for the capacity of the cooling system in your car. Then,following the manufacturer's direc-tions on the engine coolant contain- er, add the appropriate quantity of coolant to the radiator.
5. Fill the radiator with clean demineral- ized or distilled water. Continue toadd clean demineralized or distilledwater in small quantities until the fluid level stays up in the radiator neck.
G050D02HR
Page 182 of 207
6 DO-IT-YOURSELF MAINTENANCE
24
!
CHECKING THE BATTERY
G210A01A-AAT
WARNING:
Batteries can be dangerous! When working with batteries, carefully ob-serve the following precautions to avoid serious injuries. D010B01HR
The fluid in the battery contains a strong solution of sulfuric acid, which is poi- sonous and highly corrosive. Be careful not to spill it on yourself or the car. If youdo spill battery fluid on yourself, imme- diately do the following:
NOTE: See page 6-38 for the fuse panel descriptions. G200C01HR-GAT Power Connector
4. Insert the power connector in the
opposite direction.
NOTE:
o If the power connector is pulled up from the fuse panel, the warn- ing chime, audio, clock and inte-rior lamps, etc., will not operate. The following items must be reset after replacement.- Digital Clock
o Even though the power connector
is pulled up, the battery can stillbe discharged by operation of the headlights or other electrical de- vices.
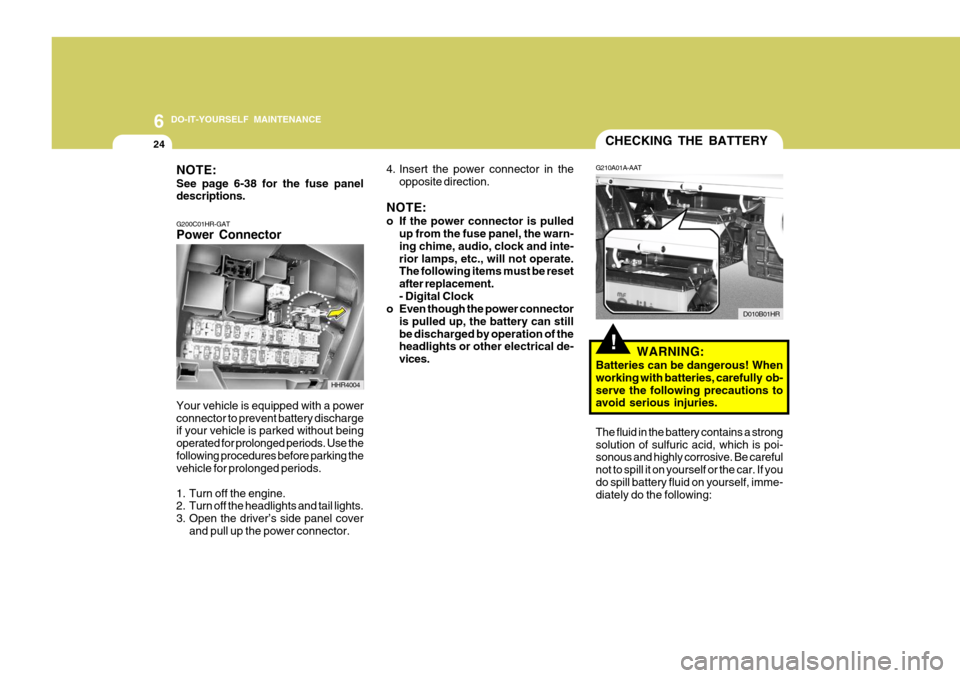
Your vehicle is equipped with a powerconnector to prevent battery discharge if your vehicle is parked without being operated for prolonged periods. Use thefollowing procedures before parking the vehicle for prolonged periods.
1. Turn off the engine.
2. Turn off the headlights and tail lights.
3. Open the driver’s side panel cover and pull up the power connector.
HHR4004