2010 Hyundai Accent clock
[x] Cancel search: clockPage 161 of 284

1
FEATURES OF YOUR HYUNDAI
149149149149
1. CD Loading Slot Please face printed side upward and gently push in. When the ignition switch is on ACC or ON and power is off, poweris automatically turned on if the CD is loaded. This CDP supports only 12cm CD. If VCD, Data CD, are loaded, "Er-6" message will appear and CD will be ejected. 2. CD Indicator When car ignition switch is ACC or ON and if the CD is loaded, this indicator is lighted. If the CD is ejected the light isturned off. 3. CD Eject Button Push button to eject the CD. This but- ton is enabled when ignition switch isoff. 4. CD Selection Button If there is a CD in the CDP DECK it plays the CD. Press CD button to automatically insert CD when the disc is ejected from thedeck by pressing CD EJECT. 5. AUX Selection Button If AUX function is not supported, when you push the button, no function wil be done. (‘NO MEDIA’ will be displayed)
6. Automatic Track Selection
Button
o Push [SEEK
] button for less than
0.8 second to play from the begin- ning of current song.
o Push [SEEK
] button for less than
0.8 second and press again within 1 secondto play the previous song.
o Push [SEEK
] button for 0.8 or
longer to initiate reverse direction high speed sound search of currentsong.
o Push [SEEK
] button for less than
0.8 second to play the next song.
o Push [SEEK
] button for 0.8 or
longer to initiate high speed sound search of current song. 7. Information Display Button Displays the information of the current CD TRACK in the order of DISC TITLE ➟
DISC ARTIST ➟ TRACK TITLE ➟
TRACK ARTIST ➟ TOTAL TRACK ➟
Play Screen ➟ DISC TITLE ➟ ···. (not
displayed if the information is not avail-able on the DISC.) (If MP3 is displayed FILE NAME ➟
TITLE ➟ ARTIST ➟ ALBUM ➟
FOLDER ➟ TOTAL FILE ➟ FILE NAME
➟ ···.)
8. TUNE/ENTER Button Turn this button clockwise to display songs after current song. Also, turn this button counterclockwiseto display songs before current song. To listen to the displayed song, press the button to skip to the song and play. 9. RANDOM Play Button Turns on/off the randomization of the play list of files in the currently played DISC.To cancel the mode, press the key once again.
Page 166 of 284
2 DRIVING YOUR HYUNDAI
4
C070C01A-AAT
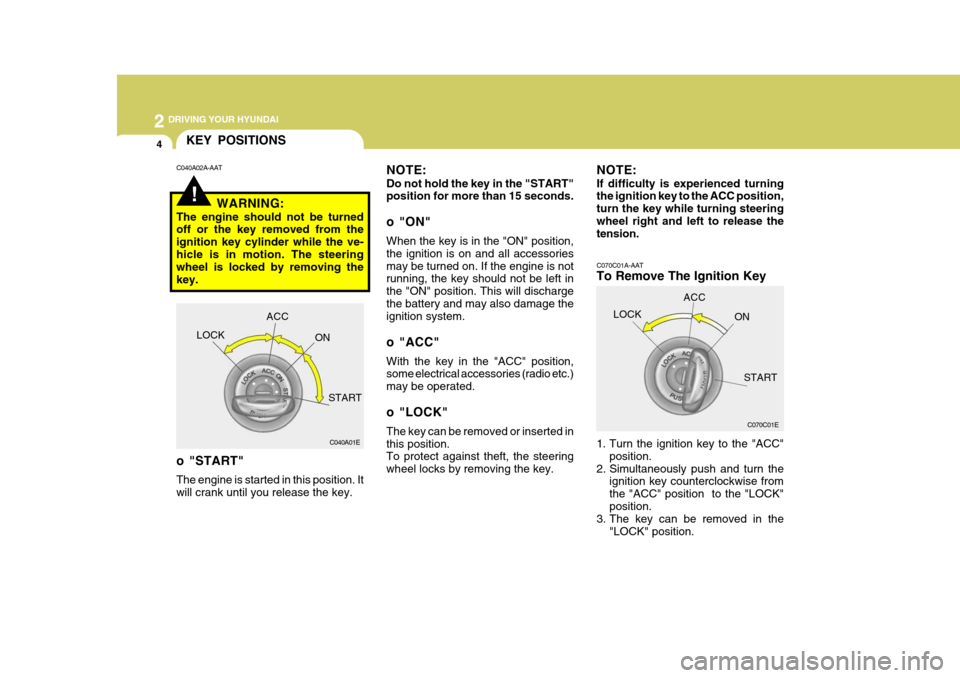
To Remove The Ignition Key
1. Turn the ignition key to the "ACC"position.
2. Simultaneously push and turn the ignition key counterclockwise from the "ACC" position to the "LOCK"position.
3. The key can be removed in the
"LOCK" position.
C070C01E
LOCK
ACC
ON
START
!
KEY POSITIONS
C040A01E
LOCK
ACC
ON
START
o "START" The engine is started in this position. It will crank until you release the key.
C040A02A-AAT
NOTE: Do not hold the key in the "START" position for more than 15 seconds.
o "ON" When the key is in the "ON" position, the ignition is on and all accessoriesmay be turned on. If the engine is not running, the key should not be left in the "ON" position. This will dischargethe battery and may also damage the ignition system.
o "ACC" With the key in the "ACC" position, some electrical accessories (radio etc.) may be operated.
o "LOCK" The key can be removed or inserted in this position. To protect against theft, the steering wheel locks by removing the key.
WARNING:
The engine should not be turned off or the key removed from the ignition key cylinder while the ve-hicle is in motion. The steering wheel is locked by removing the key. NOTE: If difficulty is experienced turning the ignition key to the ACC position, turn the key while turning steeringwheel right and left to release the tension.
Page 199 of 284
3
WHAT TO DO IN AN EMERGENCY
9
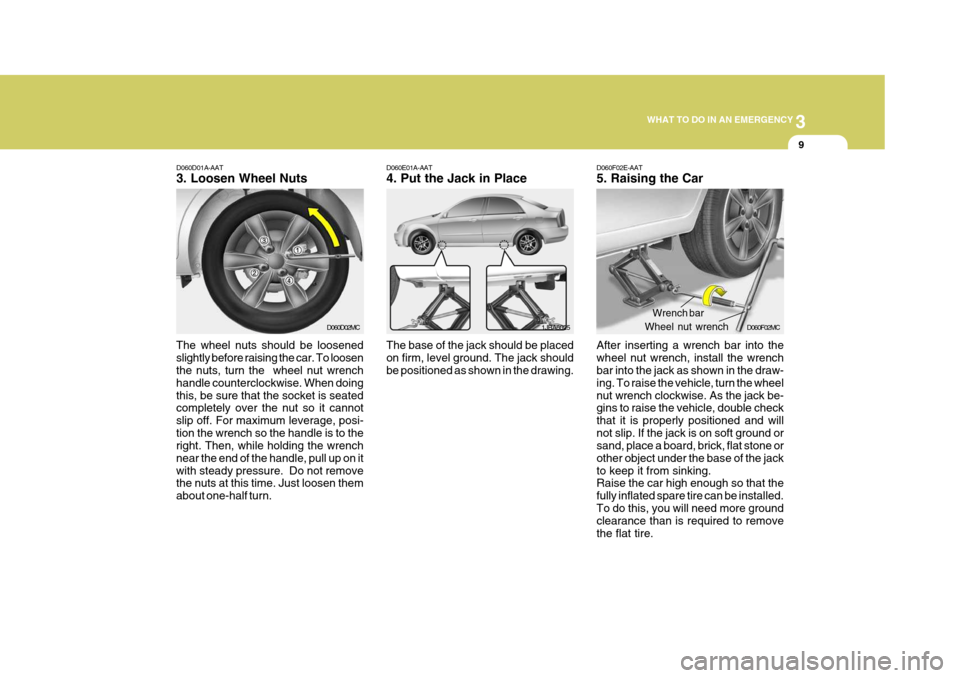
D060D01A-AAT 3. Loosen Wheel Nuts
The wheel nuts should be loosened slightly before raising the car. To loosen the nuts, turn the wheel nut wrench handle counterclockwise. When doingthis, be sure that the socket is seated completely over the nut so it cannot slip off. For maximum leverage, posi-tion the wrench so the handle is to the right. Then, while holding the wrench near the end of the handle, pull up on itwith steady pressure. Do not remove the nuts at this time. Just loosen them about one-half turn. D060E01A-AAT 4. Put the Jack in Place The base of the jack should be placed on firm, level ground. The jack should be positioned as shown in the drawing.
1JBA6025
D060D02MC
D060F02E-AAT 5. Raising the Car After inserting a wrench bar into the wheel nut wrench, install the wrench bar into the jack as shown in the draw- ing. To raise the vehicle, turn the wheelnut wrench clockwise. As the jack be- gins to raise the vehicle, double check that it is properly positioned and willnot slip. If the jack is on soft ground or sand, place a board, brick, flat stone or other object under the base of the jackto keep it from sinking. Raise the car high enough so that the fully inflated spare tire can be installed.To do this, you will need more ground clearance than is required to remove the flat tire.Wrench bar
Wheel nut wrench D060F02MC
Page 201 of 284
3
WHAT TO DO IN AN EMERGENCY
11
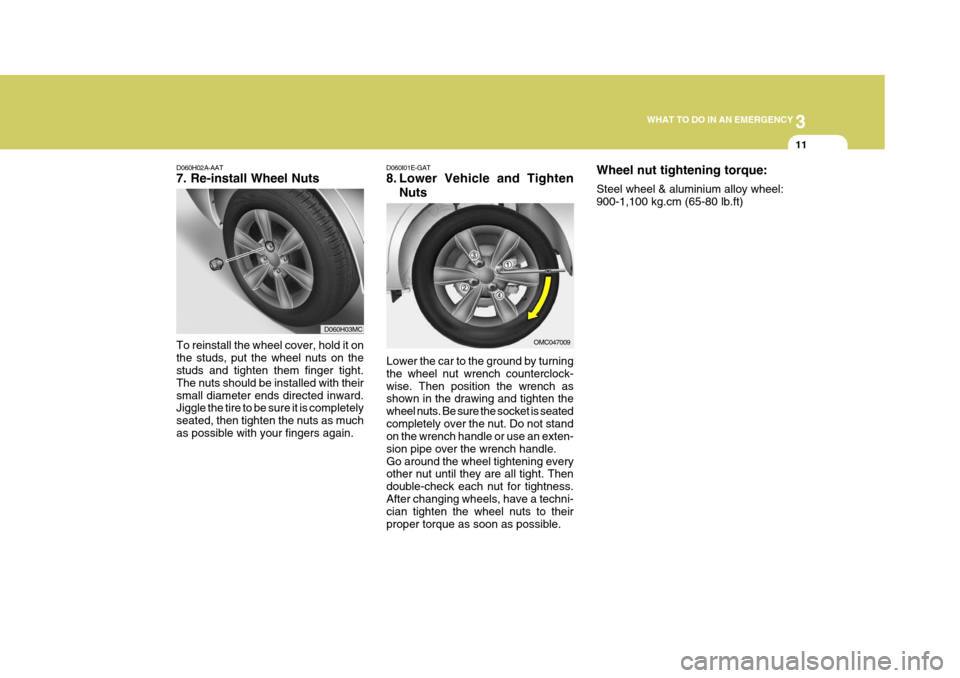
D060H02A-AAT 7. Re-install Wheel Nuts
Lower the car to the ground by turning the wheel nut wrench counterclock-wise. Then position the wrench as shown in the drawing and tighten the wheel nuts. Be sure the socket is seatedcompletely over the nut. Do not stand on the wrench handle or use an exten- sion pipe over the wrench handle.Go around the wheel tightening every other nut until they are all tight. Then double-check each nut for tightness.After changing wheels, have a techni- cian tighten the wheel nuts to their proper torque as soon as possible.
D060I01E-GAT
8. Lower Vehicle and Tighten
Nuts
To reinstall the wheel cover, hold it on the studs, put the wheel nuts on the studs and tighten them finger tight. The nuts should be installed with theirsmall diameter ends directed inward. Jiggle the tire to be sure it is completely seated, then tighten the nuts as muchas possible with your fingers again. OMC047009
D060H03MCWheel nut tightening torque: Steel wheel & aluminium alloy wheel: 900-1,100 kg.cm (65-80 lb.ft)
Page 206 of 284
3 WHAT TO DO IN AN EMERGENCY
16
CAUTION
It should be tightened firmly with your fingers until there is no more play in the towing hole. Towing hook is located in the jack case on thespare tire.
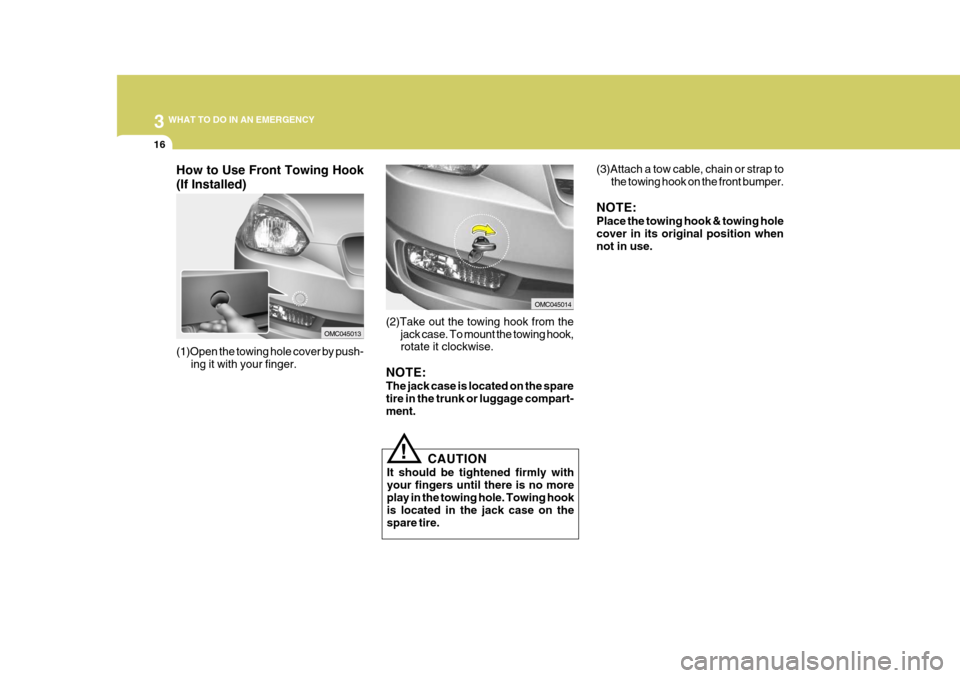
! (3)Attach a tow cable, chain or strap to
the towing hook on the front bumper.
NOTE: Place the towing hook & towing hole cover in its original position when not in use.
(2)Take out the towing hook from the jack case. To mount the towing hook, rotate it clockwise.
NOTE: The jack case is located on the spare tire in the trunk or luggage compart- ment.
OMC045014
(1)Open the towing hole cover by push- ing it with your finger.
OMC045013
How to Use Front Towing Hook (If Installed)
Page 235 of 284

6
DO-IT-YOURSELF MAINTENANCE
9
G350A01A-GAT ENGINE OIL CONSUMPTION Function of Engine Oil Engine oil has the primary function of lubricating and cooling the inside of theengine. Engine oil consumption It is normal that an engine should consume some engine oil while nor-
mal driving. The cause of oil consump- tion in a normal engine are as follows;
o Engine oil is used to lubricate pis- tons, piston rings and cylinders. A thin film of oil is left on the cylinder wall when a piston moves down- wards in the cylinder. High negativepressure generated during engine operation sucks some of the oil into the combustion chamber.This oil with some oil of the cylinder wall is burned by the high tempera- ture combustion gases during thecombustion process.
NOTE:
o It is recommended that the engine
oil and filter should be changed by an authorized Hyundai dealer.
o Always dispose of used engine oil in an environmentally acceptablemanner. It is suggested that it beplaced in a sealed container and taken to a service station for maybe reclaimation. Do not pour the oilon the ground or put it into the household trash.
!WARNING:
Used motor oil may cause irritation or cancer of the skin if left in contact with the skin for prolonged periodsof time. Wash your hands thoroughly with soap and warm water as soon as possible after handling used oil.
!
If the oil level is close to or below the "L" mark, add oil until it reaches the "F"mark. To add oil:
1. Remove the oil filler cap by turning it counterclockwise.
2. Add oil, then check the level again.
Do not overfill.
3. Replace the cap by turning it clock- wise.
The distance between the "F" and "L" marks is equal to about 1 liter(Gasoline Engine)/1.5 liter(Diesel Engine) of oil.
WARNING:
Be very careful not to touch the radia-tor hose when adding the engine oilas it may be hot enough to burn you. CAUTION:
Slowly pour the recommended oilby using a funnel. Do not overfill soas not to damage engine.
!
Page 248 of 284

6 DO-IT-YOURSELF MAINTENANCE
22
!
CHECKING THE BATTERY
G210A01A-AAT
WARNING:
Batteries can be dangerous! When working with batteries, carefully ob-serve the following precautions to avoid serious injuries. The fluid in the battery contains a strong solution of sulfuric acid, which is poi- sonous and highly corrosive. Be careful not to spill it on yourself or the car. If youdo spill battery fluid on yourself, imme- diately do the following:
OMC055018
G200C01CM-GAT Power Connector
NOTE:
o If the power connector is pulled
up from the fuse panel, the warn- ing chime, audio, clock and inte- rior lamps, etc., will not operate. The following items must be resetafter replacement. - Digital Clock - Trip computer
- Automatic heating and cooling control system
- Audio
o Even though the power connector is pulled up, the battery can stillbe discharged by operation of theheadlights or other electrical de- vices.
Your vehicle is equipped with a power connector to prevent battery discharge if your vehicle is parked without being operated for prolonged periods. Use thefollowing procedures before parking the vehicle for prolonged periods.
1. Turn off the engine.
2. Turn off the headlights and tail lights.
3. Open the driver’s side panel cover
and pull up the power connector.
4. Insert the power connector in the
opposite direction.
G200F01MC
Page 256 of 284
6 DO-IT-YOURSELF MAINTENANCE
30
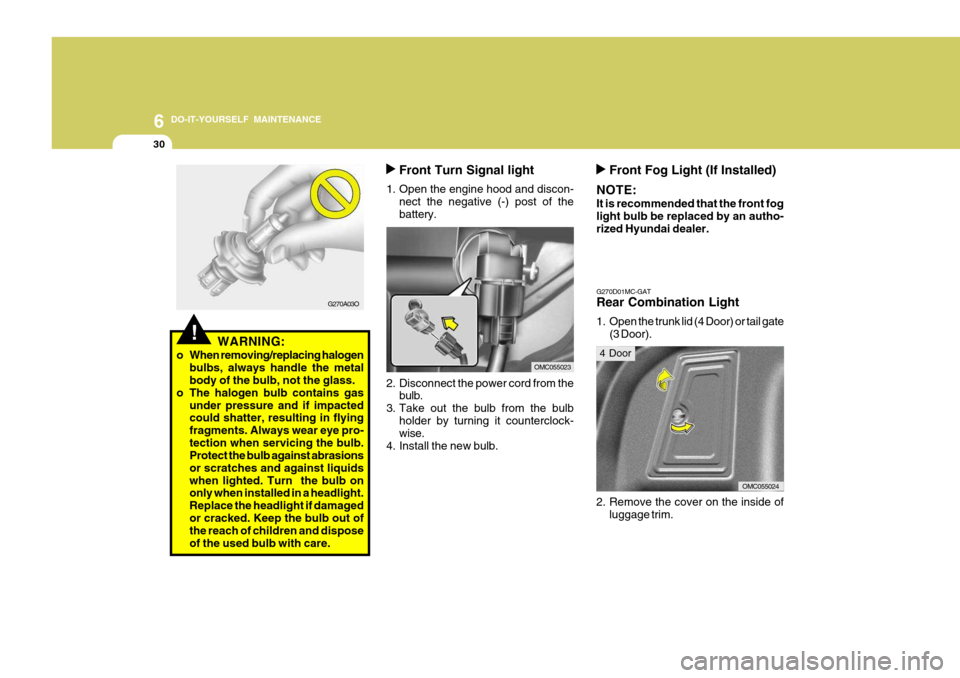
Front Turn Signal light
1. Open the engine hood and discon- nect the negative (-) post of the battery.
2. Disconnect the power cord from the bulb.
3. Take out the bulb from the bulb holder by turning it counterclock- wise.
4. Install the new bulb.
OMC055023
Front Fog Light (If Installed)
NOTE: It is recommended that the front fog light bulb be replaced by an autho- rized Hyundai dealer.
G270D01MC-GAT Rear Combination Light
1. Open the trunk lid (4 Door) or tail gate (3 Door).
OMC055024
2. Remove the cover on the inside of luggage trim.
4 Door
G270A03O
!WARNING:
o When removing/replacing halogen bulbs, always handle the metal body of the bulb, not the glass.
o The halogen bulb contains gas under pressure and if impactedcould shatter, resulting in flying fragments. Always wear eye pro-tection when servicing the bulb. Protect the bulb against abrasions or scratches and against liquidswhen lighted. Turn the bulb on only when installed in a headlight. Replace the headlight if damagedor cracked. Keep the bulb out of the reach of children and dispose of the used bulb with care.