2010 HUMMER H3 height
[x] Cancel search: heightPage 46 of 410

3-2 Seats and Restraints
Head Restraints
The front seats have adjustable
head restraints in the outboard
seating positions.
{WARNING
With head restraints that are
not installed and adjusted
properly, there is a greater
chance that occupants will
suffer a neck/spinal injury in a
crash. Do not drive until the head
restraints for all occupants are
installed and adjusted properly.
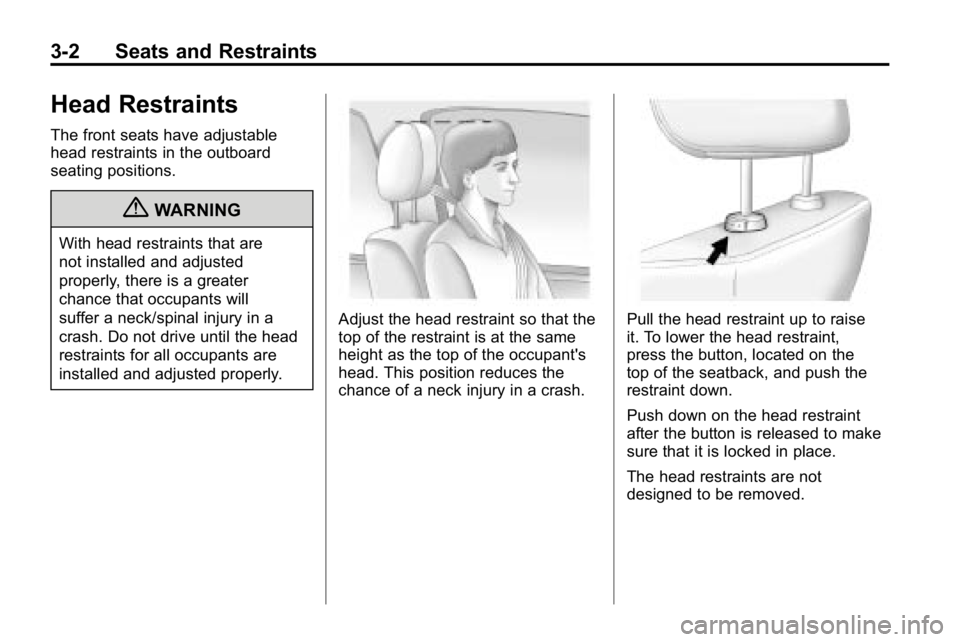
Adjust the head restraint so that the
top of the restraint is at the same
height as the top of the occupant's
head. This position reduces the
chance of a neck injury in a crash.Pull the head restraint up to raise
it. To lower the head restraint,
press the button, located on the
top of the seatback, and push the
restraint down.
Push down on the head restraint
after the button is released to make
sure that it is locked in place.
The head restraints are not
designed to be removed.
Page 66 of 410

3-22 Seats and Restraints
4. If equipped with a shoulder beltheight adjuster, move it to the
height that is right for you.
See “Shoulder Belt Height
Adjustment” later in this section
for instructions on use and
important safety information.
5. To make the lap part tight, pull
up on the shoulder belt.
It may be necessary to pull
stitching on the safety belt
through the latch plate to fully
tighten the lap belt on smaller
occupants.
To unlatch the belt, push the button
on the buckle. The belt should
return to its stowed position. Slide
the latch plate up the safety belt
webbing when the safety belt is not
in use. The latch plate should rest
on the stitching on the safety belt,
near the guide loop on the side wall.
Before a door is closed, be sure the
safety belt is out of the way. If a
door is slammed against a safety
belt, damage can occur to both the
safety belt and the vehicle.
Shoulder Belt Height Adjuster
The vehicle has a shoulder belt
height adjuster for the driver and
right front passenger seating
positions.
Adjust the height so that the
shoulder portion of the belt is
centered on the shoulder. The
belt should be away from the face
and neck, but not falling off of the
shoulder. Improper shoulder belt
height adjustment could reduce the
effectiveness of the safety belt in a
crash.
Page 67 of 410

Seats and Restraints 3-23
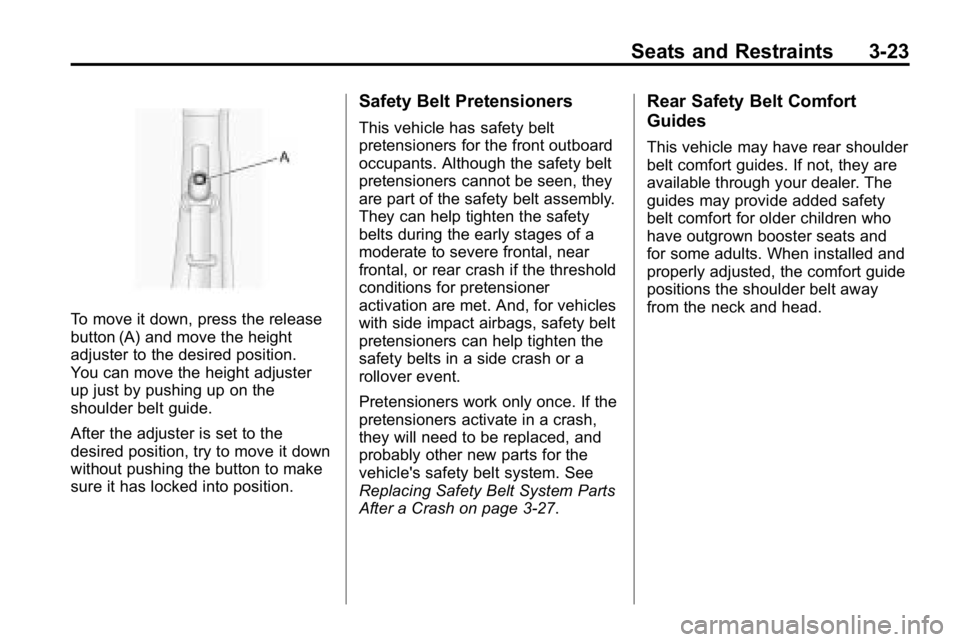
To move it down, press the release
button (A) and move the height
adjuster to the desired position.
You can move the height adjuster
up just by pushing up on the
shoulder belt guide.
After the adjuster is set to the
desired position, try to move it down
without pushing the button to make
sure it has locked into position.
Safety Belt Pretensioners
This vehicle has safety belt
pretensioners for the front outboard
occupants. Although the safety belt
pretensioners cannot be seen, they
are part of the safety belt assembly.
They can help tighten the safety
belts during the early stages of a
moderate to severe frontal, near
frontal, or rear crash if the threshold
conditions for pretensioner
activation are met. And, for vehicles
with side impact airbags, safety belt
pretensioners can help tighten the
safety belts in a side crash or a
rollover event.
Pretensioners work only once. If the
pretensioners activate in a crash,
they will need to be replaced, and
probably other new parts for the
vehicle's safety belt system. See
Replacing Safety Belt System Parts
After a Crash on page 3‑27.
Rear Safety Belt Comfort
Guides
This vehicle may have rear shoulder
belt comfort guides. If not, they are
available through your dealer. The
guides may provide added safety
belt comfort for older children who
have outgrown booster seats and
for some adults. When installed and
properly adjusted, the comfort guide
positions the shoulder belt away
from the neck and head.
Page 84 of 410

3-40 Seats and Restraints
Servicing the
Airbag-Equipped Vehicle
Airbags affect how the vehicle
should be serviced. There are
parts of the airbag system in
several places around the vehicle.
Your dealer and the service manual
have information about servicing
the vehicle and the airbag system.
To purchase a service manual, see
Service Publications Ordering
Information on page 13‑12.
{WARNING
For up to 10 seconds after the
ignition is turned off and the
battery is disconnected, an airbag
can still inflate during improper
service. You can be injured if you
are close to an airbag when it
inflates. Avoid yellow connectors.(Continued)
WARNING (Continued)
They are probably part of the
airbag system. Be sure to follow
proper service procedures, and
make sure the person performing
work for you is qualified to do so.
Adding Equipment to the
Airbag-Equipped Vehicle
Q: Is there anything I might addto or change about the vehicle
that could keep the airbags
from working properly?
A: Yes. If you add things that
change the vehicle's frame,
bumper system, height, front
end or side sheet metal, they
may keep the airbag system
from working properly. Changing
or moving any parts of the front
seats, safety belts, the airbag
sensing and diagnostic module, steering wheel, instrument
panel, roof-rail airbag modules,
ceiling headliner or pillar garnish
trim, overhead console, front
sensors, side impact sensors,
rollover sensor module, or airbag
wiring can affect the operation of
the airbag system.
In addition, the vehicle has a
passenger sensing system
for the right front passenger
position, which includes sensors
that are part of the passenger
seat. The passenger sensing
system may not operate properly
if the original seat trim is
replaced with non-Hummer
covers, upholstery or trim,
or with Hummer covers,
upholstery or trim designed for
a different vehicle. Any object,
such as an aftermarket seat
heater or a comfort enhancing
pad or device, installed under or
Page 87 of 410

Seats and Restraints 3-43
The manufacturer's instructions that
come with the booster seat, state
the weight and height limitations for
that booster. Use a booster seat
with a lap-shoulder belt until the
child passes the below fit test:
.Sit all the way back on the seat.
Do the knees bend at the seat
edge? If yes, continue. If no,
return to the booster seat.
.Buckle the lap-shoulder belt.
Does the shoulder belt rest on
the shoulder? If yes, continue.
If no, try using the rear safety
belt comfort guide. See“Rear
Safety Belt Comfort Guides”
under Lap-Shoulder Belt
on
page 3‑20for more information.
If the shoulder belt still does not
rest on the shoulder, then return
to the booster seat.
.Does the lap belt fit low and
snug on the hips, touching the
thighs? If yes, continue. If no,
return to the booster seat.
.Can proper safety belt fit be
maintained for the length of the
trip? If yes, continue. If no,
return to the booster seat.
Q: What is the proper way to wear safety belts?
A: An older child should wear a
lap-shoulder belt and get the
additional restraint a shoulder
belt can provide. The shoulder
belt should not cross the face or
neck. The lap belt should fit
snugly below the hips, just
touching the top of the thighs.
This applies belt force to the
child's pelvic bones in a crash.
It should never be worn over the
abdomen, which could cause
severe or even fatal internal
injuries in a crash. Also see
“Rear Safety Belt Comfort
Guides” underLap-Shoulder Belt
on
page 3‑20.
According to accident statistics,
children and infants are safer
when properly restrained in a child
restraint system or infant restraint
system secured in a rear seating
position.
In a crash, children who are not
buckled up can strike other people
who are buckled up, or can be
thrown out of the vehicle. Older
children need to use safety belts
properly.
Page 90 of 410

3-46 Seats and Restraints
{WARNING
Never do this.
Children who are up against,
or very close to, any airbag when
it inflates can be seriously injured
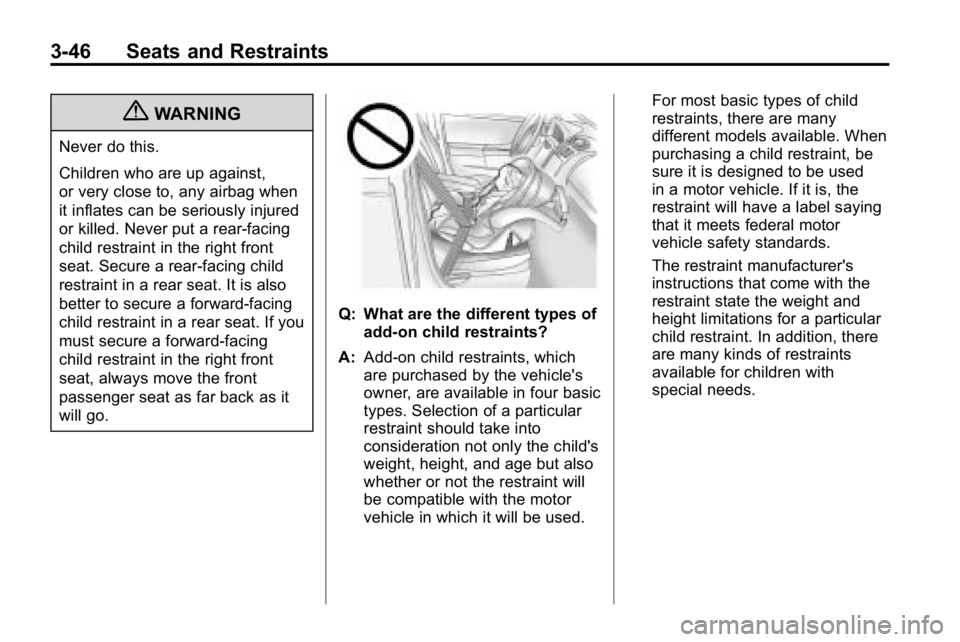
or killed. Never put a rear-facing
child restraint in the right front
seat. Secure a rear-facing child
restraint in a rear seat. It is also
better to secure a forward-facing
child restraint in a rear seat. If you
must secure a forward-facing
child restraint in the right front
seat, always move the front
passenger seat as far back as it
will go.
Q: What are the different types ofadd-on child restraints?
A: Add-on child restraints, which
are purchased by the vehicle's
owner, are available in four basic
types. Selection of a particular
restraint should take into
consideration not only the child's
weight, height, and age but also
whether or not the restraint will
be compatible with the motor
vehicle in which it will be used. For most basic types of child
restraints, there are many
different models available. When
purchasing a child restraint, be
sure it is designed to be used
in a motor vehicle. If it is, the
restraint will have a label saying
that it meets federal motor
vehicle safety standards.
The restraint manufacturer's
instructions that come with the
restraint state the weight and
height limitations for a particular
child restraint. In addition, there
are many kinds of restraints
available for children with
special needs.
Page 292 of 410

10-26 Vehicle Care
Brakes
This vehicle has disc brakes. Disc
brake pads have built-in wear
indicators that make a high-pitched
warning sound when the brake pads
are worn and new pads are needed.
The sound can come and go or be
heard all the time the vehicle is
moving, except when applying the
brake pedal firmly.
{WARNING
The brake wear warning sound
means that soon the brakes will
not work well. That could lead to
an accident. When the brake
wear warning sound is heard,
have the vehicle serviced.
Notice: Continuing to drive with
worn-out brake pads could result
in costly brake repair. Some driving conditions or climates
can cause a brake squeal when the
brakes are first applied or lightly
applied. This does not mean
something is wrong with the brakes.
Properly torqued wheel nuts are
necessary to help prevent brake
pulsation. When tires are rotated,
inspect brake pads for wear and
evenly tighten wheel nuts in the
proper sequence to torque
specifications in
Capacities and
Specifications on page 12‑2.
Brake linings should always be
replaced as complete axle sets.
Brake Pedal Travel
See your dealer if the brake pedal
does not return to normal height,
or if there is a rapid increase in
pedal travel. This could be a sign
that brake service might be
required.
Brake Adjustment
Every time the brakes are applied,
with or without the vehicle moving,
the brakes adjust for wear.
Replacing Brake System Parts
The braking system on a vehicle is
complex. Its many parts have to be
of top quality and work well together
if the vehicle is to have really good
braking. The vehicle was designed
and tested with top-quality brake
parts. When parts of the braking
system are replaced, be sure to get
new, approved replacement parts.
If this is not done, the brakes might
not work properly. For example,
installing disc brake pads that are
wrong for the vehicle, can change
the balance between the front and
rear brakes —for the worse. The
braking performance expected can
change in many other ways if the
wrong replacement brake parts are
installed.
Page 310 of 410

10-44 Vehicle Care
Wheels and Tires
Tires
Your new vehicle comes with
high-quality tires made by a
leading tire manufacturer. If you
ever have questions about your
tire warranty and where to
obtain service, see your vehicle
Warranty booklet for details. For
additional information refer to
the tire manufacturer.
{WARNING
Poorly maintained and improperly
used tires are dangerous.
.Overloading your tires can
cause overheating as a result
of too much flexing. You
could have an air-out and a
serious accident. SeeVehicle
Load Limits on page 9‑27.
(Continued)
WARNING (Continued)
.Underinflated tires pose the
same danger as overloaded
tires. The resulting accident
could cause serious injury.
Check all tires frequently to
maintain the recommended
pressure. Tire pressure
should be checked when your
tires are cold. See Tire
Pressure on page 10‑51.
.Overinflated tires are more
likely to be cut, punctured
or broken by a sudden
impact —such as when you
hit a pothole. Keep tires at
the recommended pressure.
.Worn, old tires can cause
accidents. If your tread is
badly worn, or if your tires
have been damaged,
replace them.
Tire Sidewall Labeling
Useful information about a tire
is molded into the sidewall.
The following illustrations are
examples of a typical P‐Metric
and a LT‐Metric tire sidewall.
Passenger (P‐Metric) Tire
(A) Tire Size:The tire size
code is a combination of letters
and numbers used to define a
particular tire's width, height,
aspect ratio, construction type,