Page 75 of 526

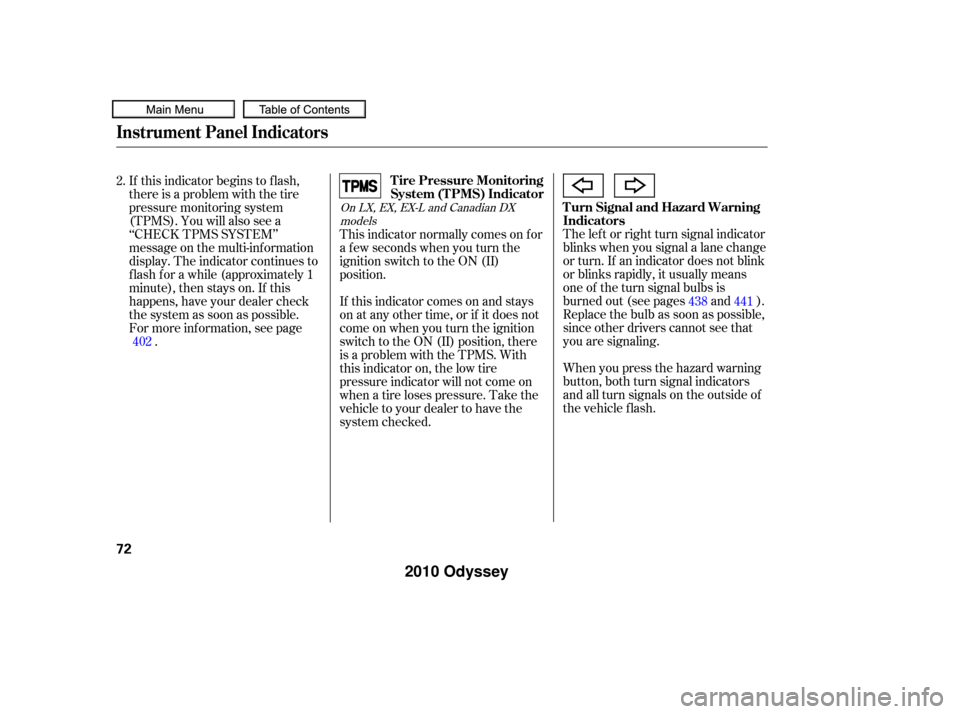
When you press the hazard warning
button, both turn signal indicators
and all turn signals on the outside of
the vehicle f lash. The lef t or right turn signal indicator
blinks when you signal a lane change
or turn. If an indicator does not blink
or blinks rapidly, it usually means
one of the turn signal bulbs is
burned out (see pages and ).
Replace the bulb as soon as possible,
since other drivers cannot see that
you are signaling.
If this indicator begins to f lash,
there is a problem with the tire
pressure monitoring system
(TPMS). You will also see a
‘‘CHECK TPMS SYSTEM’’
message on the multi-inf ormation
display. The indicator continues to
f lash f or a while (approximately 1
minute), then stays on. If this
happens, have your dealer check
the system as soon as possible.
For more inf ormation, see page
. This indicator normally comes on f or
a f ew seconds when you turn the
ignition switch to the ON (II)
position.
If this indicator comes on and stays
on at any other time, or if it does not
come on when you turn the ignition
switch to the ON (II) position, there
is a problem with the TPMS. With
this indicator on, the low tire
pressure indicator will not come on
when a tire loses pressure. Take the
vehicle to your dealer to have the
system checked.
2.
438 441
402
On LX, EX, EX-L and Canadian DX models
Instrument Panel Indicators
Turn Signal and Hazard Warning
Indicators
Tire Pressure Monitoring
System (T PMS) Indicator
72
�����—�����—�
���y�
���������
�
�y���
�(�����������y���������y
2010 Odyssey
Page 440 of 526

Your vehicle has halogen headlight
bulbs, two on each side. When
replacing a bulb, handle it by its base
and protect the glass from contact
with your skin or hard objects. If you
touch the glass, clean it with
denaturedalcoholandacleancloth.The high beam headlight bulb and
the low beam headlight bulb are
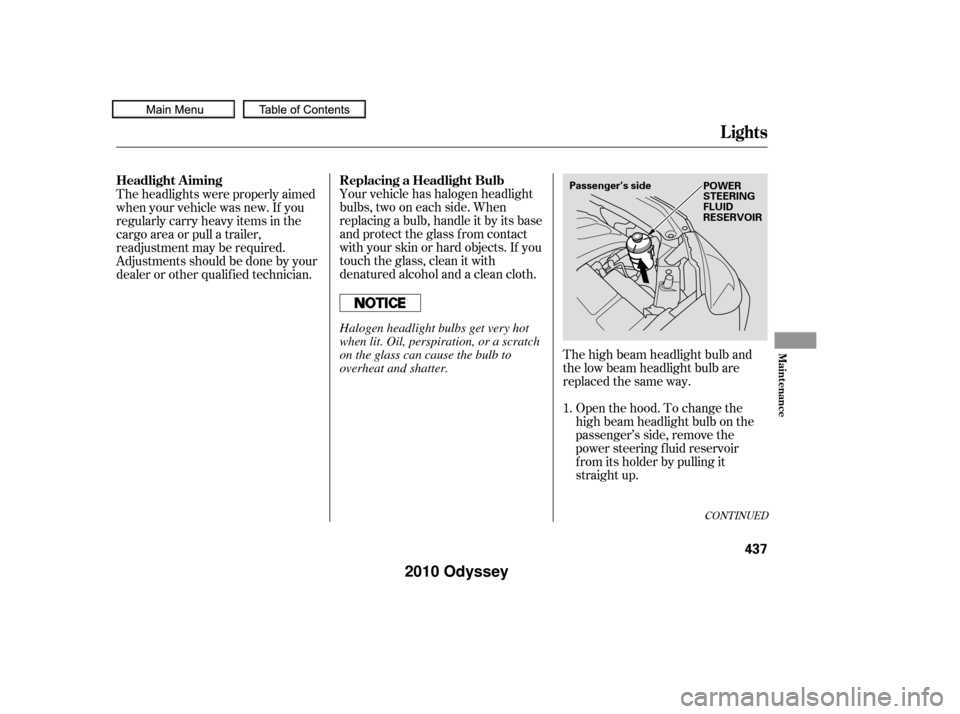
replaced the same way.Open the hood. To change the
high beam headlight bulb on the
passenger’s side, remove the
power steering f luid reservoir
f rom its holder by pulling it
straight up.
Theheadlightswereproperlyaimed
when your vehicle was new. If you
regularly carry heavy items in the
cargo area or pull a trailer,
readjustment may be required.
Adjustmentsshouldbedonebyyour
dealer or other qualif ied technician.
1.
CONT INUED
Lights
Headlight A imingReplacing a Headlight Bulb
Maint enance
437
POWER
STEERING
FLUID
RESERVOIR
Passenger’s side
Halogen headlight bulbs get very hot
when lit. Oil, perspiration, or a scratch
on the glass can cause the bulb to
overheat and shatter.
�����—�����—�
���y�
�������������y���
�(�����������y���������y
2010 Odyssey
Page 441 of 526
Remove the electrical connector
f rom the bulb by pushing on the
tab and pulling the connector
down.
Remove the bulb by turning it one-
quarter turn counterclockwise.Open the hood. Remove the
socket f rom the headlight
assembly by turning it one-quarter
turn counterclockwise.
Pull the burned out bulb straight
out of its socket.
Push the new bulb straight into
the socket until it bottoms.
Push the electrical connector back
onto the bulb. Make sure it is on
all the way.
Turn on the headlights to test the
new bulb.
If you replaced the high beam
headlight bulb on the passenger’s
side, reinstall the power steering
f luid reservoir.
Insert the new bulb into the hole,
and turn it one-quarter turn clock-
wise to lock it in place. 5.
6.
7.
2.
3.
4. 2. 1.
Lights
Replacing a Front T urn Signal
Bulb
438
TAB
BULB
CONNECTOR BULB SOCKET
Driver’s side
�����—�����—�
���y�
���������
���y���
�(�����������y���������y
2010 Odyssey
Page 442 of 526
Insert the socket back into the
headlight assembly. Turn it
clockwise to lock it in place.
Turn on the lights to make sure
the new bulb is working.Open the hood. Remove the
socket f rom the headlight
assembly by turning it one-quarter
turn counterclockwise.
Pull the bulb straight out of its
socket. Push the new bulb straight
into the socket until it bottoms.Insert the socket back into the
headlight assembly. Turn it
clockwise to lock it in place.
Turn on the lights to make sure
the new bulb is working.
3.
4.
1.
2.
3.
4.
Lights
Replacing a Front Parking/Side
Marker Bulb
Maint enance
439
BULB
SOCKET
�����—�����—�
���y�
�������������y���
�(�����������y���������y
2010 Odyssey
Page 443 of 526
Push the electrical connector onto
the new bulb.
Turn on the f og lights to test the
new bulb. Insert the new bulb into the
assembly and turn it one-quarter
turn clockwise to lock it in place.
Reinstall the f og light assembly,
then tighten the screw.
Use a Phillips-head screwdriver to
remove the screw.
Remove the f og light assembly
f rom the bumper by pulling its
inner edge f irst, then the whole
assembly out of the bumper. Remove the electrical connector
f rom the bulb by pushing on the
tab and pulling the connector
down.
Remove the bulb f rom the f og
light assembly by turning it one-
quarter turn counterclockwise.
1.
2.
3.
4.5.
6.
7.
8.
Touring models only
Lights
ReplacingaFogLightBulb
440
TAB
BULB
CONNECTOR
SCREW
Halogen bulbs get very hot when lit. Oil,
perspiration, or a scratch on the glass
can cause the bulb to overheat and
shatter.
�����—�����—�
���y�
�������������y���
�(�����������y���������y
2010 Odyssey
Page 444 of 526
Open the tailgate.Install the rear light assembly in
the rear pillar. Tighten the two
bolts. Snap the bolt covers into
position. Put the socket back into the light
assembly, and turn it clockwise to
lock it in place. Testthelightstomakesurethe
new bulb is working.
Remove the two bolt covers on the
rear pillar by prying on the bottom
edge with a flat-tip screwdriver.
Remove the bolts with a Phillips-
head screwdriver, and remove the
light assembly f rom the rear pillar. Push the new bulb straight into
the socket until it bottoms. Remove the bulb by pulling it
straight out of its socket. Remove the socket by turning it
one-quarter turn counterclockwise. Determine which of the two bulbs
is burned out: turn signal or
brake/taillight.
2. 3.
5.6.
1. 4.7.
8.
Lights
Replacing Rear Bulbs (in Rear
Pillar)
Maint enance
441
COVER
BOLTS BULBS
SOCKETS
�����—�����—�
���y�
�������������y���
�(�����������y���������y
2010 Odyssey
Page 445 of 526
Open the tailgate. Place a cloth on
the edge of the light assembly
cover to prevent scratches.
Remove the cover by caref ully
prying in the notch on its middle
edge with a flat-tip screwdriver.
Determine which of the two bulbs
is burned out: taillight or back-up
light.Remove the socket by turning it
one-quarter turn counterclockwise.
Pull the bulb straight out of its
socket. Push the new bulb straight
into the socket until it bottoms.Turn on the lights to make sure
the new bulb is working.
Reinstall the socket into the light
assembly by turning it clockwise
until it locks.
Reinstall the light assembly cover.
1.
2. 3.
4.5.
7. 6.
Lights
Replacing Rear Bulbs
(in Tailgate)
442
COVER
BULBS
SOCKETS
�����—�����—�
���y�
�������������y���
�(�����������y���������y
2010 Odyssey
Page 446 of 526
Remove the socket f rom the light
assembly by turning it one-quarter
turn counterclockwise.
Remove the two screw covers on
the light assembly by prying on
the side edge with a flat-tip
screwdriver.
Remove the screws with a Phillips-
head screwdriver, then remove
the light assembly f rom the
tailgate. Pull the bulb straight out of its
socket. Push the new bulb straight
into the socket until it bottoms.Press the brake pedal to make
sure the new bulb is working.
Put the socket back into the light
assembly, and turn it clockwise to
lock it in place.
Reinstall the high-mount brake
light assembly into the tailgate.
Tighten the two screws and
reinstall the covers.
1.
2. 3.
4.5.
6.
7.
Lights
Replacing a High-mount Brake
Light Bulb
Maint enance
443
SCREWS
BULB
SOCKET
COVER
�����—�����—�
���y�
�������������y���
�(�����������y���������y
2010 Odyssey