Page 292 of 351

It is best to replace all four tires at
the same time. If that is not possible
or necessary, replace the two front
tires or two rear tires as a pair.
Replacing just one tire can seriously
affect your vehicle's handling.
If you ever replace a wheel, make
sure that the wheel's specifications
match those of the original wheels.
Also be sure you use only TPMS
specific wheels (if equipped). If you
do not, the tire pressure monitoring
system will not work.
Replacement wheels are available at
your dealer.
Installing improper tires on your
vehicle can affect handling and
stability. This can cause a crash
in which you can be seriously
hurt or killed.
Always use the size and type of
tires recommended in this
owner's manual.Wheel and Tire SpecificationsWheels:All models except Sport
15 x 5 1/2J
Sport model
16 x 6J
Tires:
All models except Sport
175/65R15 84S
Sport model
185/55R16 83H
See page 321 for DOT tire quality
grading information, and page 323
for tire size and labeling information.
CONTINUED
Tires
277
Maintenance
Table of Contents
Page 298 of 351

This section covers the more
common problems that motorists
experience with their vehicles. It
gives you information about how to
safely evaluate the problem and what
to do to correct it. If the problem has
stranded you on the side of the road,
you may be able to get going again. If
not, you will also find instructions on
getting your vehicle towed.Compact Spare Tire....................
284
Changing a Flat Tire ...................
285
Temporarily Repairing a Flat Tire .........................................
291
If the Engine Won't Start .............
297
Jump Starting ..............................
299
If the Engine Overheats ..............
301
Low Oil Pressure Indicator .........
303
Charging System Indicator .........
303
Malfunction Indicator Lamp ........
304
Brake System Indicator ...............
305
Fuses ..........................................
306
Fuse Locations ............................
309
Emergency Towing .....................
311
If Your Vehicle Gets Stuck ..........
312
Taking Care of the Unexpected
283
Taking Care of the Unexpected
Page 299 of 351

Except all Canadian models withautomatic transmission
Use the compact spare tire as a
temporary replacement only. Get
your regular tire repaired or
replaced, and put it back on your
vehicle as soon as you can.
Check the inflation pressure of the
compact spare tire every time you
check the other tires. It should be
inflated to:
60 psi (420 kPa, 4.2 kgf/cm
2) Follow these precautions:
● Never exceed 50 mph (80 km/h).
● This tire gives a harsher ride and
less traction on some road
surfaces. Use greater caution while driving.
● Do not mount tire chains on the
compact spare tire.
● Do not use your compact spare tire
on another vehicle unless it is the
same make and model.
● On vehicles with the TPMS
system, the low tire pressure
indicator comes on and stays on
after you replace the flat tire with
the compact spare tire. After
several miles (kilometers) driving
with the compact spare tire, the
TPMS indicator comes on and the
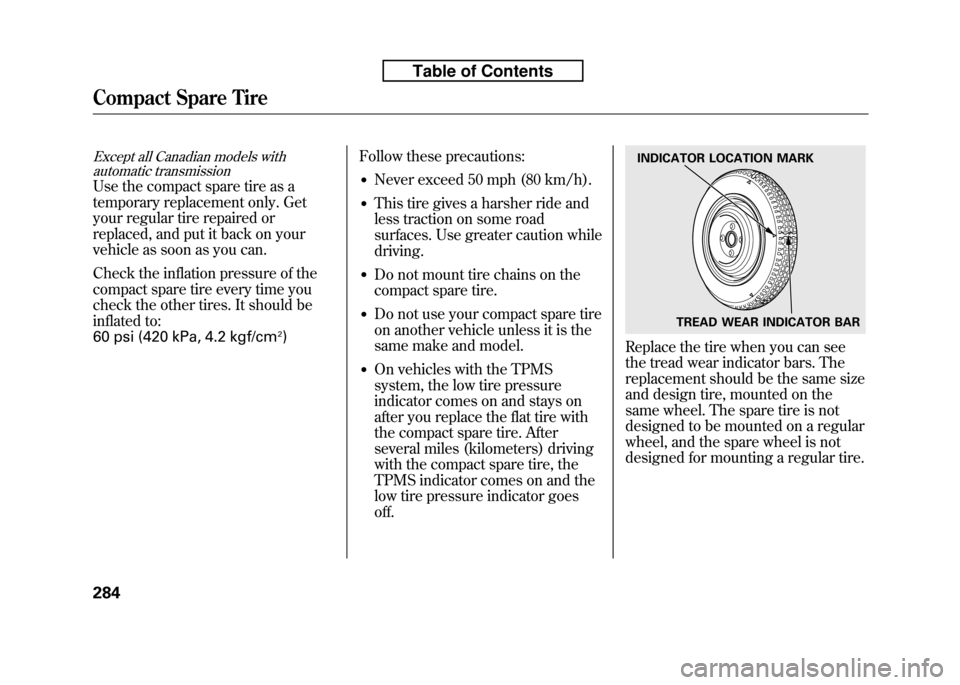
low tire pressure indicator goesoff.Replace the tire when you can see
the tread wear indicator bars. The
replacement should be the same size
and design tire, mounted on the
same wheel. The spare tire is not
designed to be mounted on a regular
wheel, and the spare wheel is not
designed for mounting a regular tire.
INDICATOR LOCATION MARK
TREAD WEAR INDICATOR BAR
Compact Spare Tire
284
Table of Contents
Page 304 of 351
21. Place the flat tire face down in thespare tire well.
22. Secure the flat tire by screwing the wing bolt back into its hole. 23. Store the jack. Place the tool kit in
the center of the flat tire.
Loose items can fly around the
interior in a crash and could
seriously injure the occupants.
Store the wheel, jack, and tools
securely before driving. 24. Place the floor lid in the cargo
area.
25. Store the wheel cover or center cap in the cargo area. Make sure it
will not get scratched or damaged.
26. Close the tailgate. 27.
On U.S. models
Your vehicle's original tire has a
tire pressure monitoring system
sensor. To replace a tire, refer to
Changing a Tire with TPMS (see
page 237).
For normal tire For spare tire
CONTINUED
Changing a Flat Tire
289
Taking Care of the Unexpected
Table of Contents
Page 309 of 351

In freezing temperatures, turn the
engine on and leave it running
while the flat tire is being serviced.
Prolonged exposure to the cold
may cause the vehicle's battery to
weaken. Under cold conditions,
safely start the vehicle's engine and
keep the engine running at idle
when operating the air pump.
Running the engine with the
vehicle in an enclosed or even
partly enclosed area can cause
a rapid build-up of toxic carbonmonoxide.
Breathing this colorless,
odorless gas can cause
unconsciousness and even
death. Only run the engine to
power the air pump with the
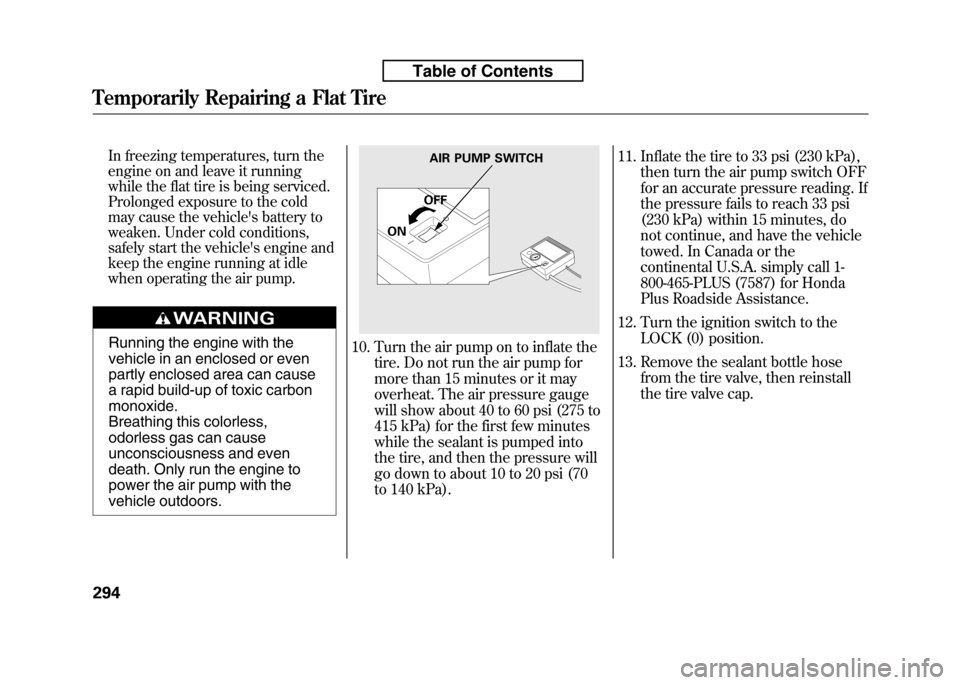
vehicle outdoors.10. Turn the air pump on to inflate thetire. Do not run the air pump for
more than 15 minutes or it may
overheat. The air pressure gauge
will show about 40 to 60 psi (275 to
415 kPa) for the first few minutes
while the sealant is pumped into
the tire, and then the pressure will
go down to about 10 to 20 psi (70
to 140 kPa). 11. Inflate the tire to 33 psi (230 kPa),
then turn the air pump switch OFF
for an accurate pressure reading. If
the pressure fails to reach 33 psi
(230 kPa) within 15 minutes, do
not continue, and have the vehicle
towed. In Canada or the
continental U.S.A. simply call 1-
800-465-PLUS (7587) for Honda
Plus Roadside Assistance.
12. Turn the ignition switch to the LOCK (0) position.
13. Remove the sealant bottle hose from the tire valve, then reinstall
the tire valve cap.
AIR PUMP SWITCH
OFF
ON
Temporarily Repairing a Flat Tire
294
Table of Contents
Page 310 of 351
14. Push the deflate button on the airpump until the air pressure gauge
shows 0 psi.15. Remove the wheel label from the repair kit, wipe any dirt off the
wheel with a clean cloth, and
attach the label to the center of thewheel.
The label may adhere poorly when
cold. Clean the surface and
securely attach the label.16. Remove the front pillar label fromthe repair kit and place it as shown above.
17. Remove the power plug from the accessory power socket.
18. Return all items except the air pump to the repair kit, and store
the kit in the cargo floor box. Keep
the air pump handy as you may
need it soon.
AIR PRESSURE GAUGE
DEFLATE BUTTON
WHEEL LABEL
LABEL
CONTINUED
Temporarily Repairing a Flat Tire
295
Taking Care of the Unexpected
Table of Contents
Page 311 of 351
19. Drive carefully within the speed of50 mph (80 km/h) for 5 minutes.
20. Stop safely and check the pressure in the tire. Remove the tire valve
cap, screw the air pump hose onto
the tire valve, and check the air
gauge. (You do not need to attach
the power cord or turn the air
pump switch on.) If pressure is less than 19 psi (130
kPa), do not drive the vehicle
further or attempt to re-inflate the
tire. Call or wait for help. If
pressure is lower than 33 psi (230
kPa) and higher than 19 psi (130
kPa), use air pump to bring tire
pressure to 33 psi (230 kPa).
21. Then, drive carefully within the speed of 50 mph (80 km/h) for 5
minutes more.
22. Stop safely and check the pressure in the tire.
VALVE CAP TIRE VALVE
AIR PUMP HOSE
Temporarily Repairing a Flat Tire
296
Table of Contents
Page 312 of 351

If the pressure is lower than 32 psi
(220 kPa) and higher than 19 psi
(130 kPa), use the air pump to
bring air to the desired level as
described in step 11. Then drive to
the nearest service station at no
more than 50 mph (80 km/h).
If the pressure is below 19 psi, do
not continue. Have the vehicle
towed (see page 311).
In any case, be sure to have the
damaged tire permanently repaired
as soon as possible.
Remember to return the tire sealant
bottle to your Honda service center
for proper disposal. If the Engine Won't Start
Diagnosing why the engine won't
start falls into two areas, depending
on what you hear when you turn the
ignition switch to the START (III)position:
● You hear nothing, or almost
nothing. The engine's starter
motor does not operate at all, or
operates very slowly.
● You can hear the starter motor
operating normally, or the starter
motor sounds like it is spinning
faster than normal, but the engine
does not start up and run. Nothing Happens or the Starter
Motor Operates Very Slowly
When you turn the ignition switch to
the START (III) position, you do not
hear the normal noise of the engine
trying to start. You may hear a
clicking sound, a series of clicks, or
nothing at all.
Check these things:
● Check the transmission interlock.
If you have a manual transmission,
the clutch pedal must be pushed
all the way to the floor or the
starter will not operate. With an
automatic transmission, it must be
in Park or neutral.
● Turn the ignition switch to the ON
(II) position. Turn on the
headlights, and check their
brightness. If the headlights are
very dim or do not come on at all,
the battery is discharged. See
Jump Starting on page 299.
CONTINUED
Temporarily Repairing a Flat Tire, If the Engine Won't Start
297
Taking Care of the Unexpected
Table of Contents