Page 285 of 351
●Pivot the blade assembly toward
the wiper arm until it releases
from the wiper arm.
When replacing a wiper blade,
make sure not to drop the wiper
blade or wiper arm down on thewindshield.3. Remove the blade from its holder by grabbing the tabbed end of the
blade. Pull firmly until the tabs
come out of the holder. 4. Examine the new wiper blades. If
they have no plastic or metal
reinforcement along the back
edge, remove the metal
reinforcement strips from the old
wiper blade, and install them in the
slots along the edge of the newblade.
Make sure the two rubber tabs
inside the blade fit to each notch of
the reinforcement, as shown.
WIPER ARMBLADE
REINFORCEMENT
TOPBLADE
Wiper Blades
270
Table of Contents
Page 294 of 351

Wheels
Clean the wheels as you would the
rest of the exterior. Wash them with
the same solution, and rinse themthoroughly.
If equipped
Aluminum alloy wheels have a
protective clear-coat that keeps the
aluminum from corroding and
tarnishing. Cleaning the wheels with
harsh chemicals (including some
commercial wheel cleaners) or a stiff
brush can damage the clear-coat. To
clean the wheels, use a mild
detergent and a soft brush or sponge.Checking the Battery
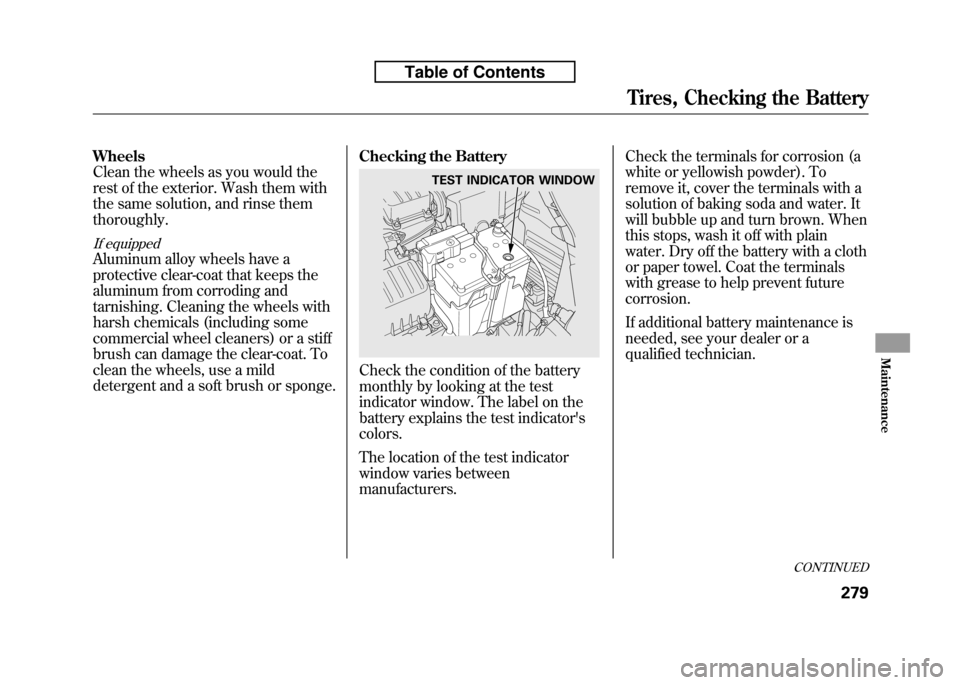
Check the condition of the battery
monthly by looking at the test
indicator window. The label on the
battery explains the test indicator'scolors.
The location of the test indicator
window varies between
manufacturers.Check the terminals for corrosion (a
white or yellowish powder). To
remove it, cover the terminals with a
solution of baking soda and water. It
will bubble up and turn brown. When
this stops, wash it off with plain
water. Dry off the battery with a cloth
or paper towel. Coat the terminals
with grease to help prevent futurecorrosion.
If additional battery maintenance is
needed, see your dealer or a
qualified technician.
TEST INDICATOR WINDOW
CONTINUED
Tires, Checking the Battery
279
Maintenance
Table of Contents
Page 296 of 351

If you need to park your vehicle for
an extended period (more than 1
month), there are several things you
should do to prepare it for storage.
Proper preparation helps prevent
deterioration and makes it easier to
get your vehicle back on the road. If
possible, store your vehicle indoors.● Fill the fuel tank.
● Wash and dry the exteriorcompletely.
● Clean the interior. Make sure the
carpeting, floor mats, etc., are
completely dry.
● Leave the parking brake off. Put
the transmission in reverse
(manual) or Park (automatic).
● Block the rear wheels. ●
If the vehicle is to be stored for a
longer period, it should be
supported on jackstands so the
tires are off the ground.
● Leave one window open slightly (if
the vehicle is being storedindoors).
● Disconnect the battery.
● Support the front and rear wiper
blade arms with a folded towel or
rag so they do not touch thewindshield.
● To minimize sticking, apply a
silicone spray lubricant to all door
and tailgate seals. Also, apply a
vehicle body wax to the painted
surfaces that mate with the door
and tailgate seals. ●
Cover the vehicle with a‘‘breathable ’’cover, one made from
a porous material such as cotton.
Non-porous materials, such as
plastic sheeting, trap moisture,
which can damage the paint.
● If possible, periodically run the
engine until it reaches full
operating temperature (the cooling
fans cycle on and off twice).
Preferably, do this once a month.
Vehicle Storage
281
Maintenance
Table of Contents
Page 298 of 351

This section covers the more
common problems that motorists
experience with their vehicles. It
gives you information about how to
safely evaluate the problem and what
to do to correct it. If the problem has
stranded you on the side of the road,
you may be able to get going again. If
not, you will also find instructions on
getting your vehicle towed.Compact Spare Tire....................
284
Changing a Flat Tire ...................
285
Temporarily Repairing a Flat Tire .........................................
291
If the Engine Won't Start .............
297
Jump Starting ..............................
299
If the Engine Overheats ..............
301
Low Oil Pressure Indicator .........
303
Charging System Indicator .........
303
Malfunction Indicator Lamp ........
304
Brake System Indicator ...............
305
Fuses ..........................................
306
Fuse Locations ............................
309
Emergency Towing .....................
311
If Your Vehicle Gets Stuck ..........
312
Taking Care of the Unexpected
283
Taking Care of the Unexpected
Page 303 of 351
14. Put on the spare tire. Put thewheel nuts back on finger-tight,
then tighten them in a crisscross
pattern with the wheel nut wrench
until the wheel is firmly against the
hub. Do not try to tighten the
wheel nuts fully.
15. Lower the vehicle to the ground, and remove the jack.
16. Tighten the wheel nuts securely in the same crisscross pattern. Have
the wheel nut torque checked at
the nearest automotive servicefacility.
Tighten the wheel nuts to:
80 lbf·ft (108 N·m, 11 kgf·m)
17.
On Sport model and Canadian LX model with manual transmission:
Remove the center cap before
storing the flat tire.
18. Remove the strap loop from the
legs of the head restraint and
lower the cargo area floor lid.
19. Pull the floor lid toward you and remove the tabs.
20. Pull the floor lid out.
TAB
FLOOR LID
Changing a Flat Tire
288
Table of Contents
Page 306 of 351

How to Use the Tire Repair Kit
All Canadian models with automatictransmission
To reduce weight, your vehicle is
equipped with a tire repair kit instead
of a spare tire. This kit will allow you
to temporarily repair a flat tire under
the following conditions:
● Only one tire is flat.
● The puncture is smaller than
3/16ths of an inch (4 mm).
● The puncture is located within the tread.
● The wheel rim is not damaged.
● The tire bead is seated.
When making a temporary repair,
carefully follow all instructions in this
owner's manual and in the
instructions that came with the kit. If you have a flat tire while driving,
park the vehicle on a level surface in
a safe place, put the transmission in
Park (P), set the parking brake, and
turn the hazard lights on.
Thoroughly examine the tire for a
puncture or other damage.
If a puncture is wider than 3/16ths of
an inch (4 mm), or is located in the
tire sidewall, do not attempt to repair
the tire. Have your vehicle towed to a
Honda service center. In Canada or
the continental U.S.A. simply call 1-
800-465-PLUS (7587) for Honda Plus
Roadside Assistance.
If the damage is smaller than 3/16ths
of an inch (4 mm) and within the tire
tread, proceed with the followinginstructions.
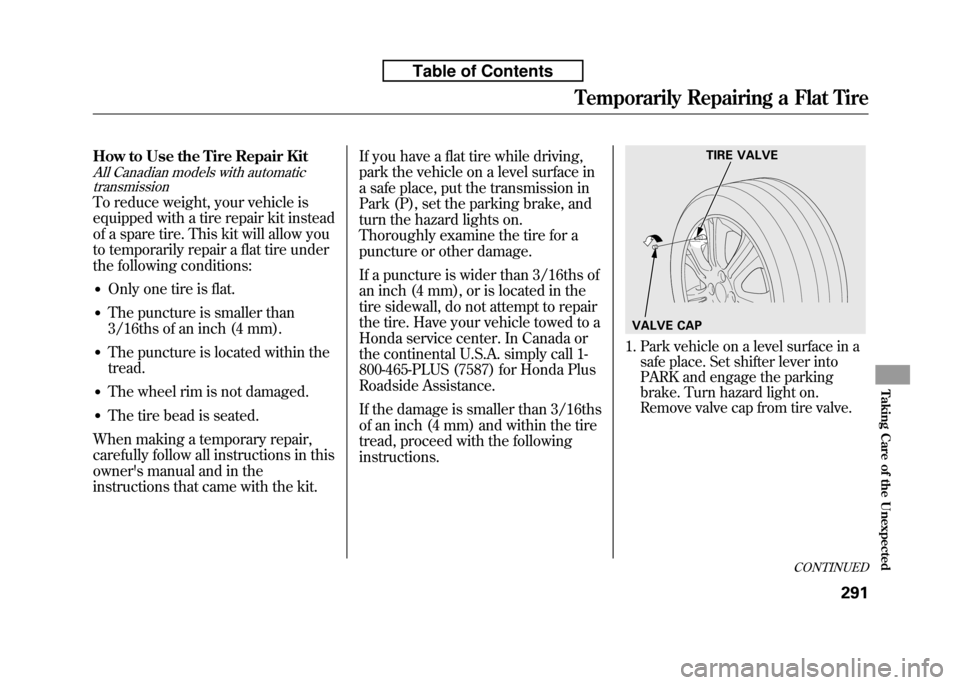
1. Park vehicle on a level surface in a
safe place. Set shifter lever into
PARK and engage the parking
brake. Turn hazard light on.
Remove valve cap from tire valve.
TIRE VALVE
VALVE CAP
CONTINUED
Temporarily Repairing a Flat Tire
291
Taking Care of the Unexpected
Table of Contents
Page 307 of 351
2. Open the tailgate.
3. Raise the cargo area floor lid bylifting it up with the back of the
strap. Remove the tire repair kit.Your tire repair kit contains:
● An air pump with a power cord and
an air hose attached.
● A bottle of sealant with a filler hoseattached.
● Two labels, one for the tire wheel
and one for the instrument panel.
● An instruction sheet. ●
An empty recovery bottle. A tire
repair professional will use this to
collect the injected sealant from the
tire during the permanent repair.
4. Remove the sealant bottle and
check the expiration date on the
label. If the date has expired, do not
continue. Have your vehicle towed
to the nearest Honda service
center. In Canada or the
continental U.S.A. simply call 1-800-
465-PLUS (7587) for Honda Plus
Roadside Assistance.
FLOOR LID
TIRE REPAIR KIT STRAP
EXPIRATION DATE
Temporarily Repairing a Flat Tire
292
Table of Contents
Page 309 of 351

In freezing temperatures, turn the
engine on and leave it running
while the flat tire is being serviced.
Prolonged exposure to the cold
may cause the vehicle's battery to
weaken. Under cold conditions,
safely start the vehicle's engine and
keep the engine running at idle
when operating the air pump.
Running the engine with the
vehicle in an enclosed or even
partly enclosed area can cause
a rapid build-up of toxic carbonmonoxide.
Breathing this colorless,
odorless gas can cause
unconsciousness and even
death. Only run the engine to
power the air pump with the
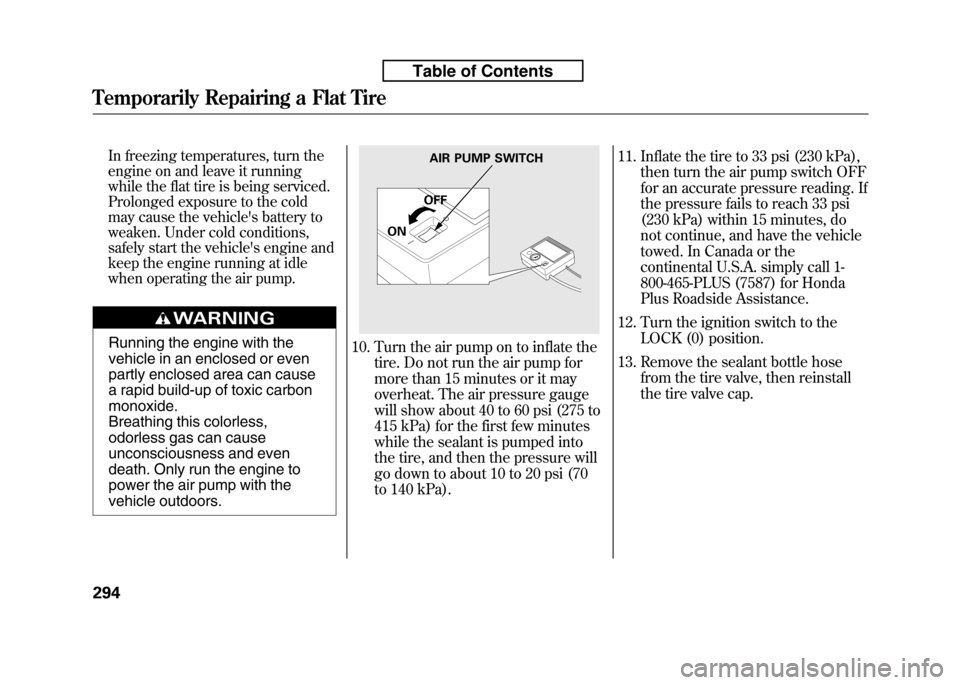
vehicle outdoors.10. Turn the air pump on to inflate thetire. Do not run the air pump for
more than 15 minutes or it may
overheat. The air pressure gauge
will show about 40 to 60 psi (275 to
415 kPa) for the first few minutes
while the sealant is pumped into
the tire, and then the pressure will
go down to about 10 to 20 psi (70
to 140 kPa). 11. Inflate the tire to 33 psi (230 kPa),
then turn the air pump switch OFF
for an accurate pressure reading. If
the pressure fails to reach 33 psi
(230 kPa) within 15 minutes, do
not continue, and have the vehicle
towed. In Canada or the
continental U.S.A. simply call 1-
800-465-PLUS (7587) for Honda
Plus Roadside Assistance.
12. Turn the ignition switch to the LOCK (0) position.
13. Remove the sealant bottle hose from the tire valve, then reinstall
the tire valve cap.
AIR PUMP SWITCH
OFF
ON
Temporarily Repairing a Flat Tire
294
Table of Contents