Page 86 of 351

Instant Fuel Economy
This shows your instant fuel
economy in mpg (U.S.) or l/100 km(Canada).
Average Fuel Economy
This shows your vehicle's average
fuel economy in mpg (U.S.) or 1/100
km (Canada) since you last reset the
trip meter.
When you reset a trip meter, the
average fuel economiy for that trip
meter also resets.Odometer
The odometer shows the total
distance your vehicle has been
driven. It measures miles in U.S.
models and kilometers in Canadian
models. It is illegal under U.S.
federal law and Canadian provincial/
territorial regulations to disconnect,
reset, or alter the odometer with the
intent to change the number of miles
or kilometers indicated.
Fuel Gauge
This shows how much fuel you have.
It may show slightly more or less
than the actual amount. The needle
returns to the bottom after you turn
off the ignition.
Avoid driving with an extremely low
fuel level. Running out of fuel could
cause the engine to misfire, damaging
the catalytic converter.Check Fuel Cap Indicator
If the fuel fill cap is loose or missing,a
‘‘CHECK FUEL CAP ’’message
appears on the information display
after you start the engine. The
message changes from CHECK, to
FUEL, to CAP repeatedly.
Turn the engine off and confirm the
fuel fill cap is installed. If it is, loosen
the cap, then retighten it until it
clicks at least once. You can cycle the
message off of the display by
pressing the select/reset knob
repeatedly, but this message will be
displayed each time the engine is
started. It will take several days of
normal driving for the vehicle to turn
the warning off.
Gauges
70
Table of Contents
Page 87 of 351
If the system still detects a loose or
missing fuel fill cap, the malfunction
indicator lamp (MIL) comes on. Turn
the engine off, and check or
retighten the fuel fill cap until it
clicks at least once. The MIL goes
out after several days of normal
driving once the cap is tightened or
replaced. If it does not go out, have
your dealer inspect the vehicle. For
more information, see page 304.Maintenance Minder
The information display in the
instrument panel shows you the
engine oil life and maintenance
service items when the ignition
switch is in the ON (II) position. This
information helps to keep you aware
of the periodic maintenance your
vehicle needs for continued trouble-
free driving. Refer to page 245 for
more information.
Gauges
71
Instruments and Controls
Table of Contents
Page 214 of 351

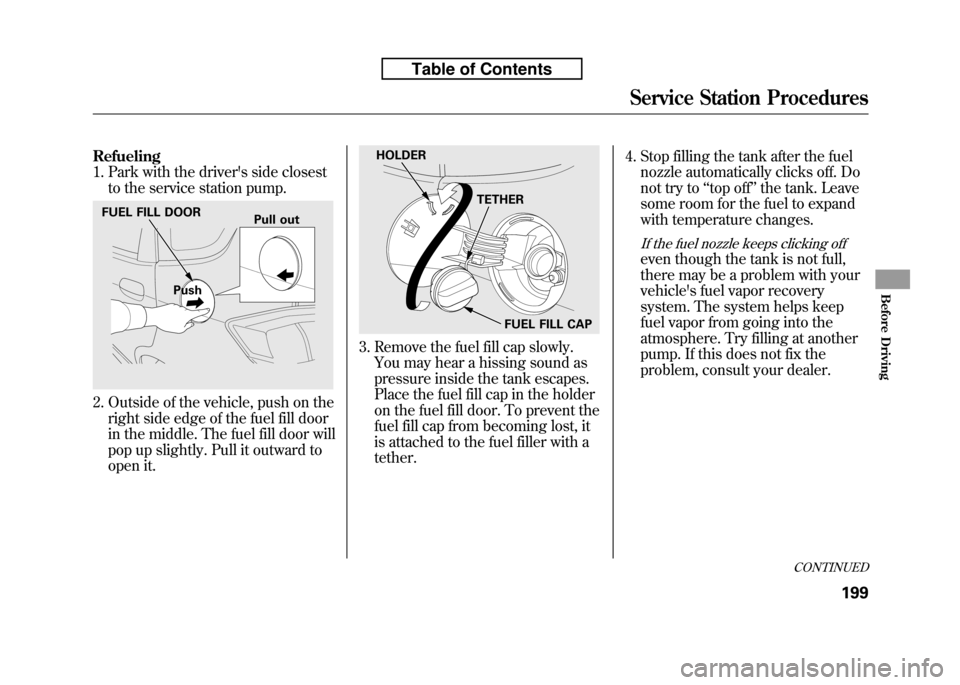
Refueling
1. Park with the driver's side closestto the service station pump.
2. Outside of the vehicle, push on theright side edge of the fuel fill door
in the middle. The fuel fill door will
pop up slightly. Pull it outward to
open it.
3. Remove the fuel fill cap slowly.You may hear a hissing sound as
pressure inside the tank escapes.
Place the fuel fill cap in the holder
on the fuel fill door. To prevent the
fuel fill cap from becoming lost, it
is attached to the fuel filler with atether. 4. Stop filling the tank after the fuel
nozzle automatically clicks off. Do
not try to ‘‘top off ’’the tank. Leave
some room for the fuel to expand
with temperature changes.
If the fuel nozzle keeps clicking off
even though the tank is not full,
there may be a problem with your
vehicle's fuel vapor recovery
system. The system helps keep
fuel vapor from going into the
atmosphere. Try filling at another
pump. If this does not fix the
problem, consult your dealer.
FUEL FILL DOOR
Push Pull out
HOLDER
TETHER
FUEL FILL CAP
CONTINUED
Service Station Procedures
199
Before Driving
Table of Contents
Page 215 of 351

Gasoline is highly flammable
and explosive. You can be
burned or seriously injured
when handling fuel.● Stop the engine, and keep
heat, sparks, and flameaway.
● Handle fuel only outdoors.
● Wipe up spills immediately.
5. Screw the fuel fill cap back on until it clicks at least once. If you do not
properly tighten the cap, the
malfunction indicator lamp may
come on (see page 304). You will
also see a ‘‘CHECK FUEL CAP ’’
message on the informationdisplay.
6. Push the fuel fill door closed until it latches. Opening and Closing the Hood
1. Park the vehicle, and set the
parking brake. Pull the hood
release handle under the lower left
corner of the dashboard. The hood
will pop up slightly.
2. Put your fingers under the frontedge of the hood near the center.
Slide your hand to the left until
you feel the hood latch handle.
Push this handle up to release it.
Lift up the hood.
If the hood latch handle moves
stiffly, or if you can open the hood
without lifting the handle, the
mechanism should be cleaned andlubricated.
HOOD RELEASE HANDLELATCH
Service Station Procedures
200
Table of Contents
Page 268 of 351

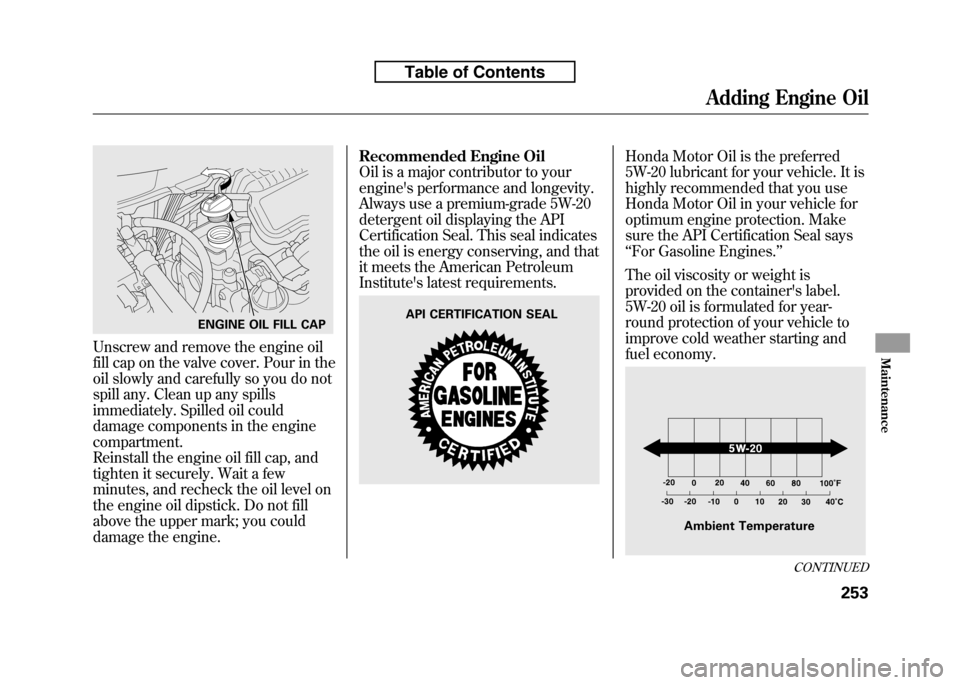
Unscrew and remove the engine oil
fill cap on the valve cover. Pour in the
oil slowly and carefully so you do not
spill any. Clean up any spills
immediately. Spilled oil could
damage components in the enginecompartment.
Reinstall the engine oil fill cap, and
tighten it securely. Wait a few
minutes, and recheck the oil level on
the engine oil dipstick. Do not fill
above the upper mark; you could
damage the engine.Recommended Engine Oil
Oil is a major contributor to your
engine's performance and longevity.
Always use a premium-grade 5W-20
detergent oil displaying the API
Certification Seal. This seal indicates
the oil is energy conserving, and that
it meets the American Petroleum
Institute's latest requirements.
Honda Motor Oil is the preferred
5W-20 lubricant for your vehicle. It is
highly recommended that you use
Honda Motor Oil in your vehicle for
optimum engine protection. Make
sure the API Certification Seal says‘‘
For Gasoline Engines. ’’
The oil viscosity or weight is
provided on the container's label.
5W-20 oil is formulated for year-
round protection of your vehicle to
improve cold weather starting and
fuel economy.
ENGINE OIL FILL CAPAPI CERTIFICATION SEAL
Ambient Temperature
CONTINUED
Adding Engine Oil
253
Maintenance
Table of Contents
Page 319 of 351

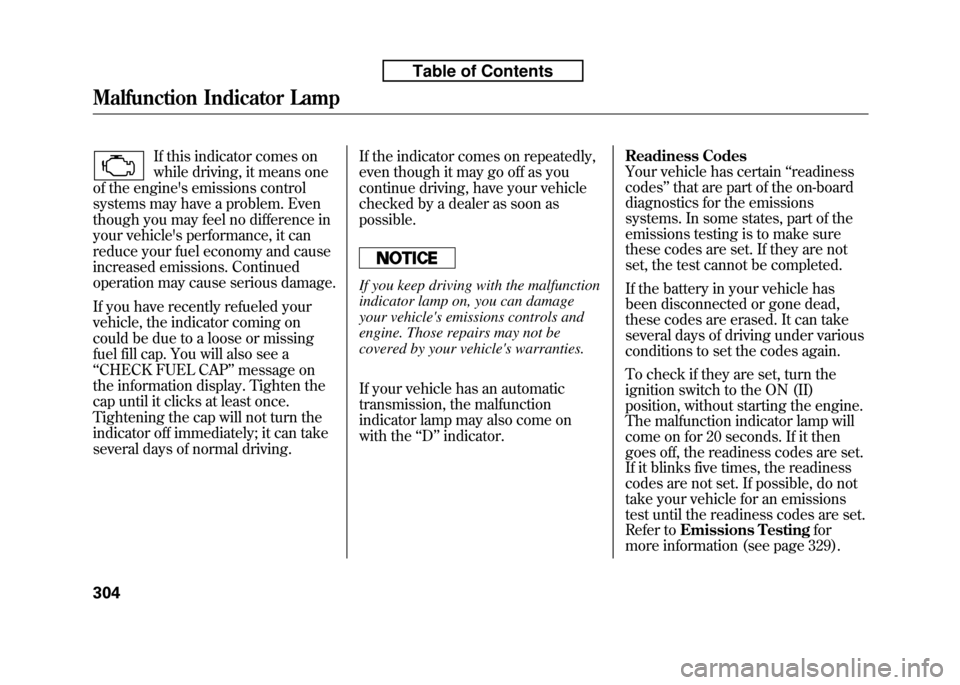
If this indicator comes on
while driving, it means one
of the engine's emissions control
systems may have a problem. Even
though you may feel no difference in
your vehicle's performance, it can
reduce your fuel economy and cause
increased emissions. Continued
operation may cause serious damage.
If you have recently refueled your
vehicle, the indicator coming on
could be due to a loose or missing
fuel fill cap. You will also see a‘‘ CHECK FUEL CAP ’’message on
the information display. Tighten the
cap until it clicks at least once.
Tightening the cap will not turn the
indicator off immediately; it can take
several days of normal driving. If the indicator comes on repeatedly,
even though it may go off as you
continue driving, have your vehicle
checked by a dealer as soon aspossible.
If you keep driving with the malfunction
indicator lamp on, you can damage
your vehicle's emissions controls and
engine. Those repairs may not be
covered by your vehicle's warranties.
If your vehicle has an automatic
transmission, the malfunction
indicator lamp may also come on
with the
‘‘D ’’indicator. Readiness Codes
Your vehicle has certain
‘‘readiness
codes ’’that are part of the on-board
diagnostics for the emissions
systems. In some states, part of the
emissions testing is to make sure
these codes are set. If they are not
set, the test cannot be completed.
If the battery in your vehicle has
been disconnected or gone dead,
these codes are erased. It can take
several days of driving under various
conditions to set the codes again.
To check if they are set, turn the
ignition switch to the ON (II)
position, without starting the engine.
The malfunction indicator lamp will
come on for 20 seconds. If it then
goes off, the readiness codes are set.
If it blinks five times, the readiness
codes are not set. If possible, do not
take your vehicle for an emissions
test until the readiness codes are set.
Refer to Emissions Testing for
more information (see page 329).
Malfunction Indicator Lamp
304
Table of Contents
Page 330 of 351

The diagrams in this section give you
the dimensions and capacities of
your vehicle and the locations of the
identification numbers. It also
includes information you should
know about your vehicle's tires and
emissions control systems.Identification Numbers...............
316
Specifications ..............................
318
DOT Tire Quality Grading (U.S. Vehicles) .............................
321
Uniform Tire Quality Grading ...............................
321
Treadwear ...............................
321
Traction ..................................
321
Temperature ...........................
322
Tire Labeling ..............................
323
Tire Pressure Monitoring System (TPMS) -Required Federal
Explanation .........................
324
Emissions Controls .....................
326
The Clean Air Act ....................
326
Crankcase Emissions Control System ................................
326
Evaporative Emissions Control System ................................
326
Onboard Refueling Vapor
Recovery .............................
326
Exhaust Emissions Controls ..............................
327
Replacement Parts ..................
327Three Way Catalytic
Converter ................................
328
Emissions Testing .......................
329
Technical Information
315
Technical Information
Page 334 of 351

CapacitiesFuel tank Approx.
10.6 US gal (40 L)
Engine oil Change
ꭧ 1
Including filter 3.8 US qt (3.6 L)
Withoutfilter 3.6 US qt (3.4 L)
Total 4.4 US qt (4.2 L)
Engine
coolant Automatic
transmission
Change
ꭧ21.19 US gal (4.5 L)
Total 1.32 US gal (5.0 L)
Manual
transmission
Change
ꭧ21.16 US gal (4.4 L)
Total 1.29 US gal (4.9 L)
Automatic
transmissionfluid Change 2.6 US qt (2.5 L)
Total 6.18 US qt (5.85 L)
Manual
transmissionfluid Change 1.6 US qt (1.5 L)
Total 1.7 US qt (1.6 L)
Windshield
washer
reservoir U.S. Vehicles 2.6 US qt (2.5 L)
Canada Vehicles 4.8 US qt (4.5 L)
ꭧ 1: Excluding the oil remaining in the engine
ꭧ 2: Including the coolant in the reserve tank and that remaining in the
engine
Reserve tank capacity:
0.116 US gal (0.44 L) Air Conditioning
Refrigerant type HFC-134a (R-134a)
Charge quantity 13.1 -14.8 oz
(370 -420 g)
Lubricant type SP-10
Lights Headlights High/Low 12 V -60/55 W (HB2)
Front turn signal lights 12 V -21 W (Amber)
Parking lights/side marker lights 12 V -3.8 W (Amber)
Fog lights
ꭧ12 V -55 W (H11)
Rear turn signal lights 12 V -21 W (Amber)
Stop/Taillights 12 V -21/5 W
Back-up lights 12 V -16 W
License plate lights 12 V -5W
Ceiling light 12 V -8W
Cargo area light 12 V -5W
Map light
ꭧ12 V -8W
High-mount brake light LED
ꭧ : For some types
Specifications
319
Technical Information
Table of Contents