2010 HONDA ELEMENT ignition
[x] Cancel search: ignitionPage 139 of 342

On EX and SC models
SCAN-The scan function samples
all tracks/files on the disc in the
order they are recorded. To activate
scan, press and hold the SCAN
button until you hear a beep. You will
see SCAN in the display. You will get
a 10 second sampling of each track/
file on the disc. Press the SCAN
button again to exit scan and play the
last track/file sampled.
Pressing either side of the SEEK/
SKIP button also turns off scan.
On EX and SC models In MP3/WMA mode
FOLDER SCAN -This feature,
when activated, samples all files on
the selected folder in order. To
activate folder scan, press and hold
the SCAN button until you hear a
beep. You will see
SCAN in the
display. The system will then play
the first file for about 10 seconds. If
you do nothing, the system will then
play the first file in each folder for 10
seconds. When it plays a file you
want to continue listening to, press
the SCAN button again.
Pressing either side of the SEEK/
SKIP button or selecting a different
folder with the FOLDER knob also
turns off folder scan. To Stop Playing a Disc
Press the eject button (
)to
remove the disc. If you eject the disc,
but do not remove it from the slot,
the system will automatically reload
the disc after 10 seconds (EX and SC
models) or 15 seconds (LX model)
and put it in pause mode. To begin
playing, press the CD/TAPE or CD/
AUX button.
Press the AM/FM button to switch
to the radio while a disc is playing.
To play the disc, press the CD/TAPE
or CD/AUX button.
If you turn the system off while a disc
is playing, either with the VOL/PWR
knob or by turning off the ignition
switch, the disc will stay in the drive.
When you turn the system back on,
the disc will begin playing where it
left off.
CONTINUED
Playing a Disc (Models without navigation system)
123
Features
Table of Contents
Page 144 of 342

To Play the FM/AM Radio
The ignition switch must be in the
ACCESSORY (I) or ON (II) position.
Turn the system on by pushing the
power/volume knob or the AM/FM
button. Adjust the volume by turning
the power/volume knob.
Pushing the AUDIO button will also
turn on the system.
You can also operate the audio
system without using the control
icons on the audio screen. Use the
control buttons on the left side of the
screen. The status bar appears on the
bottom of the screen each time you
operate any of the control buttons.
On the navigation screen, you can
also see audio information by
touching the AUDIO INFO icon on
the lower of the screen.The band and frequency that the
radio was last tuned to are displayed.
To change bands, press the AM/FM
button, or touch the desired band
icon (FM1, FM2, AM, XM1, or
XM2). On the FM band, STEREO
will be displayed if the station is
broadcasting in stereo. Stereo
reproduction on AM is not available.
For information on XM Radio, see
page 132.
To Select a Station
You can use any of five methods to
find radio stations on the selected
band: tune, seek, scan, the preset
buttons, and auto select. TUNE
-Use the TUNE bar to tune
the radio to a desired frequency.
Press the
side of the bar to tune to
a higher frequency, and press the
side to tune to a lower frequency.
Press and hold the
orside of the
TUNE bar until you hear two beeps
to change the frequency rapidly.
Release the bar when the display
reaches the desired frequency. SEEK -The seek function searches
up and down from the current
frequency to find a station with a
strong signal. To activate it, press
and hold the
orside of the
TUNE bar until you hear a beep,
then release it.
Playing the FM/AM Radio (Models with navigation system)
128
Table of Contents
Page 149 of 342

Your vehicle is capable of receiving XM®Radio anywhere in the United
States, and Canada except Hawaii,
Alaska and Puerto Rico. XM is a
registered trademark of Sirius XM Radio
®, Inc. and XM CANADA®is a
registered business name of
Canadian Satellite Radio Inc.
XM Radio receives signals from two
satellites to produce clear, high-
quality digital reception. It offers
many channels in several categories.
Along with a large selection of
different types of music, XM Radio
allows you to view channel and
category selections in the display.
When you press and hold the
AUDIO button, the display also
shows all XM information. Operating the XM Radio
To listen to XM Radio, turn the
ignition switch to the ACCESSORY
(I) or the ON (II) position. Press the
CD/XM button to select XM Radio.
Adjust the volume by turning the
knob. The last channel you listened
to will show in the display.
You can also change to the XM Radio
while you are listening to an FM
station, AM station, disc, PC card,
etc., by touching the XM1 or XM2
icon on the audio display.
You can also operate the radio using
the control buttons on the left side of
the screen. The status bar appears on
the bottom of the screen each time
you press any of the control buttons.
On the navigation screen, you can
also see the audio information by
touching the AUDIO INFO icon on
the lower of the screen.MODE
-To switch between
channel mode and category mode,
touch the MODE icon. In channel
mode, you can select all of the
available channels. In category
mode, such as Jazz, Rock, Classical,
etc., you can select all of the
channels within that category. Each
time you touch and release the
MODE icon, the display changes
between the channel mode and the
category mode.
CONTINUED
Playing the XM®Radio (Models with navigation system)
133
Features
Table of Contents
Page 154 of 342

Depending on where you drive, you
may experience reception problems.
Interference can be caused by any of
these conditions:● Driving on the north side of an
east/west mountain road.
● Driving on the north side of a large
commercial truck on an east/westroad.
● Driving in tunnels.
● Driving on a road beside a vertical
wall, steep cliff, or hill to the south
of you.
● Driving on the lower level of a
multi-tiered road.
● Driving on a single lane road
alongside dense trees taller than
50 ft. (15 m) to the south of you.
● Large items carried on a roof rack.
There may be other geographic
situations that could affect XM Radioreception.As required by the FCC: Changes or modifications not expresslyapproved by the party responsible for
compliance could void the user'sauthority to operate the equipment.
Receiving XM Radio Service
If your XM Radio service has expired
or you purchased your vehicle from a
previous owner, you can listen to a
sampling of the broadcasts available
on XM Radio. With the ignition
switch in the ACCESSORY (I) or ON
(II) position, push the power/volume
knob to turn on the audio system and
press the CD/XM button. A variety
of music types and styles will play. If you decide to purchase XM Radio
service, contact XM Radio at
www.
xmradio.com,
or at 1-800-852-9696. In
Canada, contact XM CANADA at
www.xmradio.ca,or at 1-877-209-0079.
You will need to give them your radio
I.D. number and your credit card
number. To get your radio I.D.
number, press the TUNE bar until‘‘ 0 ’’ appears in the display. Your I.D.
will appear in the display.
After you've registered with XM
Radio, keep your audio system in the
XM Radio mode while you wait for
activation. This should take about 30 minutes.
Playing the XM®Radio (Models with navigation system)
138
Table of Contents
Page 157 of 342

To Play a Disc
You operate the disc player with the
same controls used for the radio. To
load or play discs, the ignition switch
must be in the ACCESSORY (I) or
ON (II) position.
Do not use discs with adhesive labels.
The label can curl up and cause the
disc to jam in the unit.
This audio system can also play
CD-Rs and CD-RWs compressed in
MP3 or WMA formats. When playing
a disc in MP3, you will see‘‘MP3 ’’on
the screen. In WMA format, ‘‘WMA ’’
will appear on the screen. You can
select up to 99 folders and play up to
999 tracks. If the disc has a complex
structure, it takes a while to read the
disc before the system begins to playit. If you have a disc that is a
combination of CD-DA tracks and
MP3/WMA files, you can choose the
format to listen by pressing and
holding CD/XM button until you
hear a beep.
Video CDs and DVDs do not work in
this unit.
The specifications for compatible
MP3 files are:
– Sampling frequency:
32/44.1/48 kHz (MPEG1)
16/22.05/24 kHz (MPEG2)
– Bitrate:
32/40/48/56/64/80/96/112/128/
160/192/224/256/320 kbps(MPEG1)
8/16/24/32/40/48/56/64/80/96/
112/128/160 kbps (MPEG2)
– Compatible with variable bitrate
and multi-session
– Maximum layers
(including ROOT): 8 layers The specifications for compatible
WMA files are:
– Sampling frequency:
22.05/32/44.1/48 kHz
– Bitrate:
32/40/48/64/80/96/128/160/192kbps
– Compatible with variable bit rate
and multi-session
– Maximum layers
(including ROOT): 8 layers
NOTE:
If a file on an MP3 or WMA disc is
protected by digital rights
management (DRM), the audio unit
displays CD FORMAT, and then
skips to the next file.
CONTINUED
Playing a Disc (Models with navigation system)
141
Features
Table of Contents
Page 163 of 342

To Stop Playing a Disc
To play the radio when a disc is
playing, press the AM/FM button or
touch the FM1, FM2, AM, XM1, or
XM2 icon. If a PC card is in the audio
unit, touch the CARD icon to play the
PC card. Press the CD/XM button
again or touch the CD icon to switch
back to the disc player.
To play an audio unit connected to
the auxiliary input jack or the USB
adapter cable when a disc is playing,
touch the AUX icon.
If you turn the system off while a disc
is playing, either with the power/
volume knob or by turning off the
ignition switch, the disc will stay in
the drive. When you turn the system
back on, the disc will begin playing
where it left off.Removing a Disc
To remove a disc from the audio unit,
fold back the screen by pressing the
OPEN button (see page 142). Press
the disc eject button (
) to remove
the disc. If you eject the disc, but do
not remove it from the slot, the
system will automatically reload it
after 10 seconds and put it in pause
mode. To begin playing, press the
CD/XM button.
To return the screen to the upright
position, press the CLOSE button.
You cannot close the screen if a disc
is partially inserted into its slot.
You can also eject the disc when the
ignition switch is off. Protecting Discs
For information on how to handle
and protect discs, see page 183.
Playing a Disc (Models with navigation system)
147
Features
Table of Contents
Page 166 of 342

To Play a PC Card
You operate the PC card player with
the same controls used for the radio
and the disc player. To load or play a
card, the ignition switch must be in
the ACCESSORY (I) or ON (II)position.
The PC card player reads and plays
cards in MP3 or WMA formats.
Depending on the format, the screen
will indicate‘‘MP3 ’’or ‘‘WMA ’’when
a card is playing. The card limit of
the player is 99 folders and 999
tracks. If the card has a complex
structure, it takes some time for the
system to begin playing it.
Based on PCMCIA 2.1/JEIDA 4.2,
the recommended PC cards for the
PC card reader are: CompactFlash
Flash ATA
SD memory card Always use the recommended
memory card with the appropriate
adapter (if an adapter is needed).
Some memory cards will not work in
this unit. NOTE:
● When you insert a PC card into the
slot, make sure you put it in
straight. If you cannot insert it,
remove it, and insert again.
● Do not keep PC cards in the
vehicle. Direct sunlight and high
heat will damage them.
● To avoid damaging the card
reader, do not insert hard disc
drive cards into the PC card slot.
● You cannot close the screen (move
it to the upright position) until the
PC card is inserted all the way into
its slot or removed. ●
Never insert foreign objects into
the PC card slot.
The specifications for compatible
MP3 files are: – Sampling frequency:
32/44.1/48 kHz (MPEG1)
16/22.05/24 kHz (MPEG2)
– Bitrate:
32/40/48/56/64/80/96/112/128/
160/192/224/256/320 kbps (MPEG1)
8/16/24/32/40/48/56/64/80/96/
112/128/160 kbps (MPEG2)
– Compatible with variable bitrate
and multi-session
– Maximum layers
(including ROOT): 8 layers
Playing a PC Card (Models with navigation system)
150
Table of Contents
Page 176 of 342

Searching for a Song by Album Name
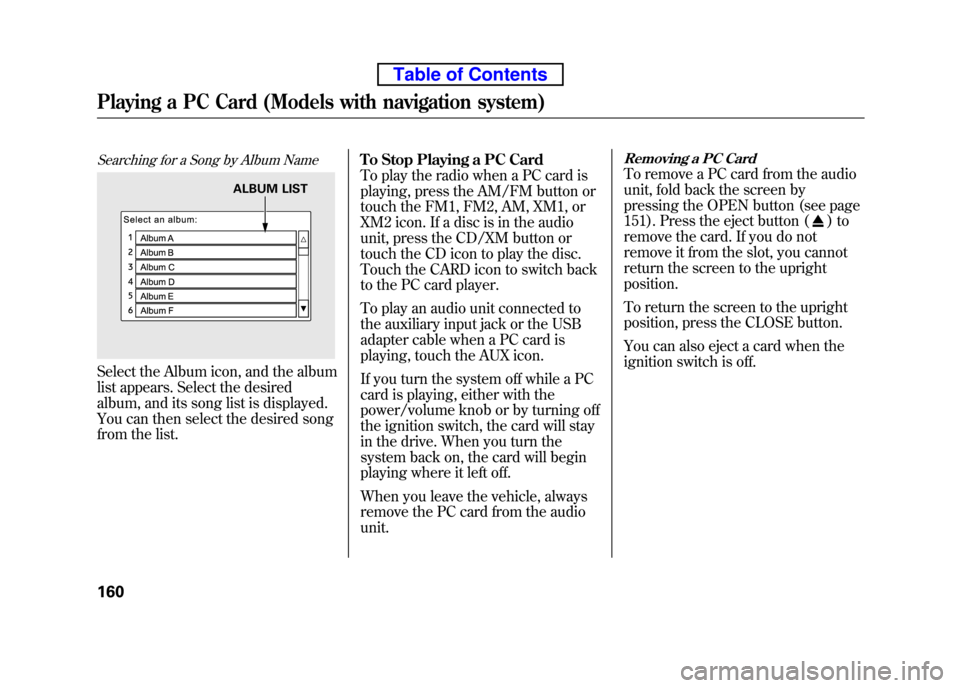
Select the Album icon, and the album
list appears. Select the desired
album, and its song list is displayed.
You can then select the desired song
from the list.To Stop Playing a PC Card
To play the radio when a PC card is
playing, press the AM/FM button or
touch the FM1, FM2, AM, XM1, or
XM2 icon. If a disc is in the audio
unit, press the CD/XM button or
touch the CD icon to play the disc.
Touch the CARD icon to switch back
to the PC card player.
To play an audio unit connected to
the auxiliary input jack or the USB
adapter cable when a PC card is
playing, touch the AUX icon.
If you turn the system off while a PC
card is playing, either with the
power/volume knob or by turning off
the ignition switch, the card will stay
in the drive. When you turn the
system back on, the card will begin
playing where it left off.
When you leave the vehicle, always
remove the PC card from the audiounit.
Removing a PC Card
To remove a PC card from the audio
unit, fold back the screen by
pressing the OPEN button (see page
151). Press the eject button (
)to
remove the card. If you do not
remove it from the slot, you cannot
return the screen to the upright position.
To return the screen to the upright
position, press the CLOSE button.
You can also eject a card when the
ignition switch is off.
ALBUM LIST
Playing a PC Card (Models with navigation system)
160
Table of Contents