Page 386 of 614

Driving at Night
Night driving is more dangerous than day driving
because some drivers are likely to be impaired—by
alcohol or drugs, with night vision problems, or by
fatigue.
Night driving tips include:
.Drive defensively.
.Do not drink and drive.
.Reduce headlamp glare by adjusting the inside
rearview mirror.
.Slow down and keep more space between you and
other vehicles because headlamps can only light
up so much road ahead.
.Watch for animals.
.When tired, pull off the road.
.Do not wear sunglasses.
.Avoid staring directly into approaching headlamps.
.Keep the windshield and all glass on your vehicle
clean —inside and out.
.Keep your eyes moving, especially during turns or
curves.
No one can see as well at night as in the daytime.
But, as we get older, these differences increase.
A 50-year-old driver might need at least twice as much
light to see the same thing at night as a 20-year-old.
Driving in Rain and on Wet Roads
Rain and wet roads can reduce vehicle traction and
affect your ability to stop and accelerate. Always drive
slower in these types of driving conditions and avoid
driving through large puddles and deep‐standing or
flowing water.
{WARNING:
Wet brakes can cause crashes. They might not
work as well in a quick stop and could cause
pulling to one side. You could lose control of the
vehicle.
After driving through a large puddle of water or a
car/vehicle wash, lightly apply the brake pedal
until the brakes work normally.
Flowing or rushing water creates strong forces.
Driving through flowing water could cause your
vehicle to be carried away. If this happens, you
and other vehicle occupants could drown. Do not
ignore police warnings and be very cautious about
trying to drive through flowing water.
5-24
Page 388 of 614
Highway Hypnosis
Always be alert and pay attention to your surroundings
while driving. If you become tired or sleepy, find a safe
place to park your vehicle and rest.
Other driving tips include:
.Keep the vehicle well ventilated.
.Keep interior temperature cool.
.Keep your eyes moving—scan the road ahead
and to the sides.
.Check the rearview mirror and vehicle instruments
often.
Hill and Mountain Roads
Driving on steep hills or through mountains is different
than driving on flat or rolling terrain. Tips for driving in
these conditions include:
.Keep the vehicle serviced and in good shape.
.Check all fluid levels and brakes, tires, cooling
system, and transmission.
.Going down steep or long hills, shift to a
lower gear.
{WARNING:
If you do not shift down, the brakes could get so
hot that they would not work well. You would then
have poor braking or even none going down a hill.
You could crash. Shift down to let the engine
assist the brakes on a steep downhill slope.
5-26
Page 389 of 614

{WARNING:
Coasting downhill in N (Neutral) or with the
ignition off is dangerous. The brakes will have
to do all the work of slowing down and they
could get so hot that they would not work well.
You would then have poor braking or even none
going down a hill. You could crash. Always have
the engine running and the vehicle in gear when
going downhill.
.Stay in your own lane. Do not swing wide or cut
across the center of the road. Drive at speeds that
let you stay in your own lane.
.Top of hills: Be alert—something could be in your
lane (stalled car, accident).
.Pay attention to special road signs (falling rocks
area, winding roads, long grades, passing or
no-passing zones) and take appropriate action.
See Off-Road Driving
on page 5‑12for information
about driving off-road.
Winter Driving
Driving on Snow or Ice
Drive carefully when there is snow or ice between the
tires and the road, creating less traction or grip. Wet ice
can occur at about 0°C (32°F) when freezing rain
begins to fall, resulting in even less traction. Avoid
driving on wet ice or in freezing rain until roads can
be treated with salt or sand.
Drive with caution, whatever the condition. Accelerate
gently so traction is not lost. Accelerating too quickly
causes the wheels to spin and makes the surface under
the tires slick, so there is even less traction.
Try not to break the fragile traction. If you accelerate too
fast, the drive wheels will spin and polish the surface
under the tires even more.
The StabiliTrak
®Systemon page 5‑6improves the
ability to accelerate on slippery roads, but slow down
and adjust your driving to the road conditions. When
driving through deep snow, turn off the traction control
part of the StabiliTrak
®System to help maintain vehicle
motion at lower speeds.
The Antilock Brake System (ABS)
on page 5‑4improves vehicle stability during hard stops on a
slippery roads, but apply the brakes sooner than
when on dry pavement.
5-27
Page 402 of 614

You can add heavier equipment on the front of the
vehicle if you compensate for it by carrying fewer
passengers, less cargo, or by positioning cargo towards
the rear. This has the effect of reducing the load on the
front. However, the front GAWR, rear GAWR, and the
Gross Vehicle Weight Rating (GVWR) must never be
exceeded.
{WARNING:
On some vehicles that have certain front mounted
equipment, such as a snow plow, it may be
possible to load the front axle to the front gross
axle weight rating (GAWR) but not have enough
weight on the rear axle to have proper braking
performance. If your brakes can not work properly,
you could have a crash. To help your brakes work
properly when a snow plow is installed, always
follow the snow plow manufacturer or installer's
recommendation for rear ballast to ensure a
proper front and rear weight distribution ratio,
even though the actual front weight may be less
than the front GAWR, and the total vehicle weight
is less than the gross vehicle weight rating
(GVWR). Maintaining a proper front and rear
weight distribution ratio is necessary to provide
proper braking performance.Total vehicle reserve capacity is the difference between
your GVWR and the weight of your vehicle with full fuel
and passengers. It is the amount of weight you can add
to your vehicle before reaching your GVWR. Keep in
mind that reserve capacity numbers are intended as
a guide when selecting the amount of equipment or
cargo your vehicle can carry. If you are unsure of your
vehicle's front, rear, or total weight, go to a weigh
station and weigh your vehicle. Your dealer can also
help you with this.
The total vehicle reserve capacity for your vehicle can
be found in the lower right corner of the Certification/
Tire label as shown previously.
See your dealer for additional advice and information
about using a snow plow on your vehicle. Also, see
Loading the Vehicle on page 5‑31.
Emergency Roof Lamp Provisions
Vehicles with the RPO VYU snow plow prep package
also have an emergency roof lamp provision package,
RPO TRW. Wiring for the emergency roof lamp is
provided above the overhead console. See
Auxiliary
Roof-Mounted Lamp
on page 4‑13for switch location.
5-40
Page 405 of 614

Four-Wheel Drive Vehicles with a Two
Speed Automatic Transfer Case
Use the following procedure to dinghy tow a four-wheel
drive vehicle with a two speed automatic transfer case:1. Position the vehicle being towed behind the tow vehicle and shift the transmission to P (Park).
2. Turn the engine off and firmly set the parking brake.
3. Securely attach the vehicle being towed to the tow vehicle.
{WARNING:
Shifting a four-wheel-drive vehicle's transfer case
into N (Neutral) can cause the vehicle to roll even
if the transmission is in P (Park). The driver or
others could be injured. Make sure the parking
brake is firmly set before the transfer case is
shifted to N (Neutral).
4. Shift the transfer case to N (Neutral). See “Shifting
into Neutral” under“Four-Wheel Drive” for the
proper procedure to select the Neutral position
for the vehicle.
5. Release the parking brake only after the vehicle being towed is firmly attached to the towing
vehicle.
6. Turn the ignition to LOCK/OFF and remove the key —the steering wheel will still turn.
After towing, see “Shifting Out of Neutral” under
“Four-Wheel Drive” for the proper procedure to take
the vehicle out of the Neutral position.
5-43
Page 407 of 614

Four-Wheel Drive Vehicles with a Two
Speed Automatic Transfer Case
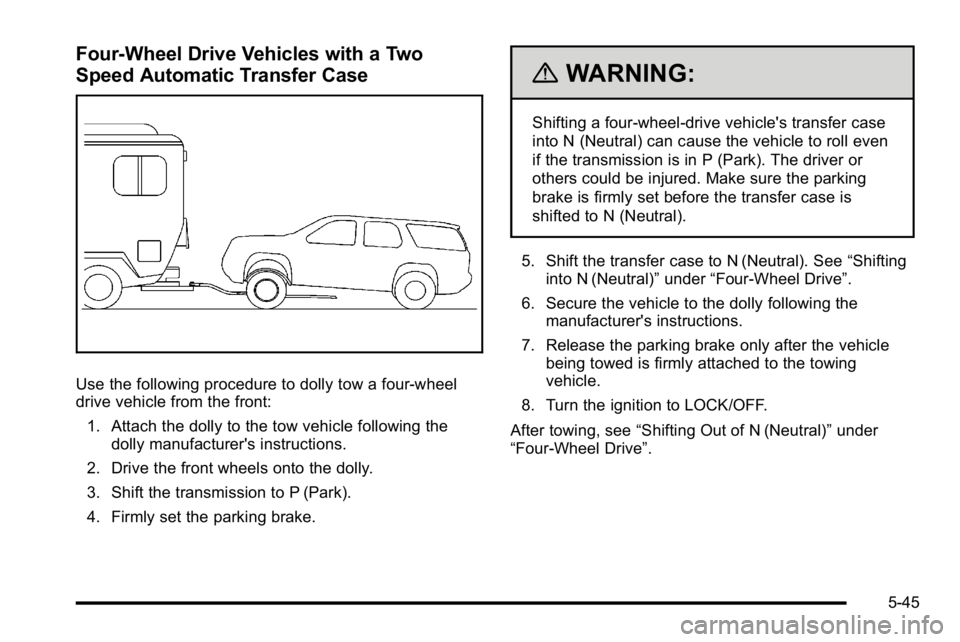
Use the following procedure to dolly tow a four-wheel
drive vehicle from the front:1. Attach the dolly to the tow vehicle following the dolly manufacturer's instructions.
2. Drive the front wheels onto the dolly.
3. Shift the transmission to P (Park).
4. Firmly set the parking brake.
{WARNING:
Shifting a four-wheel-drive vehicle's transfer case
into N (Neutral) can cause the vehicle to roll even
if the transmission is in P (Park). The driver or
others could be injured. Make sure the parking
brake is firmly set before the transfer case is
shifted to N (Neutral).
5. Shift the transfer case to N (Neutral). See “Shifting
into N (Neutral)” under“Four-Wheel Drive”.
6. Secure the vehicle to the dolly following the manufacturer's instructions.
7. Release the parking brake only after the vehicle being towed is firmly attached to the towing
vehicle.
8. Turn the ignition to LOCK/OFF.
After towing, see “Shifting Out of N (Neutral)” under
“Four-Wheel Drive”.
5-45
Page 408 of 614
Rear Towing (Rear Wheels Off the
Ground)Two-Wheel-Drive Vehicles and Four-Wheel
Drive Vehicles with a Single Speed
Automatic Transfer Case
Use the following procedure to dolly tow the vehicle
from the rear:1. Attach the dolly to the tow vehicle following the dolly manufacturer's instructions.
2. Drive the rear wheels onto the dolly.
3. Firmly set the parking brake. See Parking Brake
on page 3‑48.
4. Put the transmission in P (Park).
5. Secure the vehicle to the dolly following the manufacturer's instructions.
6. Use an adequate clamping device designed for towing to ensure that the front wheels are locked
into the straight position.
7. For four-wheel drive vehicles with a single speed automatic transfer case, turn the transfer case
knob to the Two-Wheel High position.
8. Turn the ignition to LOCK/OFF.
5-46
Page 409 of 614

Four-Wheel Drive Vehicles with a
Two Speed Automatic Transfer Case
Use the following procedure to dolly tow a four-wheel
drive vehicle from the rear:1. Attach the dolly to the tow vehicle following the dolly manufacturer's instructions.
2. Drive the rear wheels onto the dolly.
3. Firmly set the parking brake. See Parking Brake
on page 3‑48.
4. Put the transmission in P (Park).
5. Secure the vehicle to the dolly following the manufacturer's instructions.
6. Use an adequate clamping device designed for towing to ensure that the front wheels are locked
into the straight position.
{WARNING:
Shifting a four-wheel-drive vehicle's transfer case
into N (Neutral) can cause the vehicle to roll even
if the transmission is in P (Park). The driver or
others could be injured. Make sure the parking
brake is firmly set before the transfer case is
shifted to N (Neutral).
7. Shift the transfer case to N (Neutral). See “Shifting
into N (Neutral)” under“Four-Wheel Drive”.
8. Turn the ignition to LOCK/OFF.
After towing, see “Shifting Out of N (Neutral)” under
“Four-Wheel Drive”.
5-47