Page 97 of 120

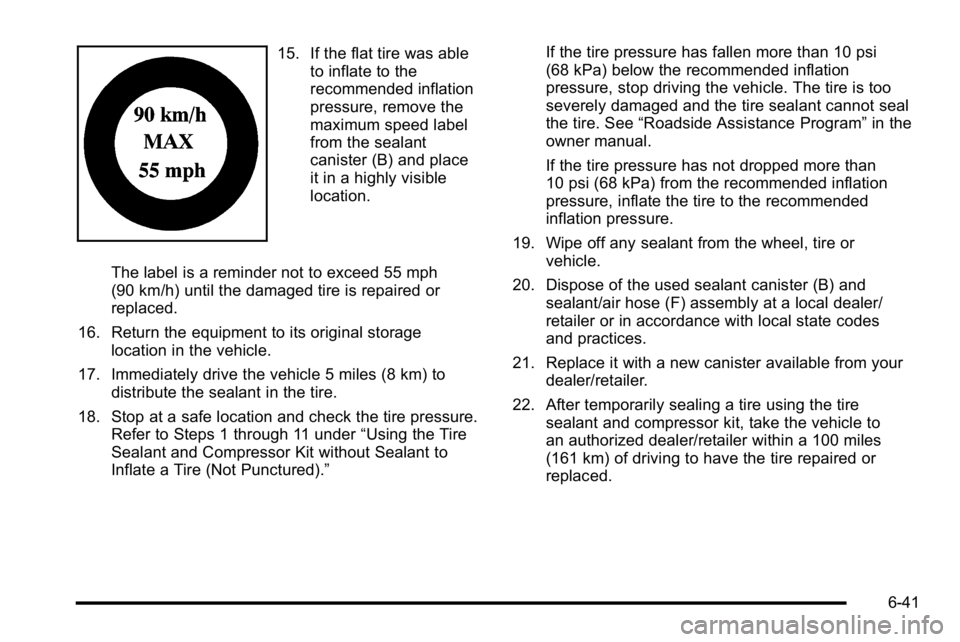
15. If the flat tire was ableto inflate to the
recommended inflation
pressure, remove the
maximum speed label
from the sealant
canister (B) and place
it in a highly visible
location.
The label is a reminder not to exceed 55 mph
(90 km/h) until the damaged tire is repaired or
replaced.
16. Return the equipment to its original storage location in the vehicle.
17. Immediately drive the vehicle 5 miles (8 km) to distribute the sealant in the tire.
18. Stop at a safe location and check the tire pressure. Refer to Steps 1 through 11 under “Using the Tire
Sealant and Compressor Kit without Sealant to
Inflate a Tire (Not Punctured).” If the tire pressure has fallen more than 10 psi
(68 kPa) below the recommended inflation
pressure, stop driving the vehicle. The tire is too
severely damaged and the tire sealant cannot seal
the tire. See
“Roadside Assistance Program” in the
owner manual.
If the tire pressure has not dropped more than
10 psi (68 kPa) from the recommended inflation
pressure, inflate the tire to the recommended
inflation pressure.
19. Wipe off any sealant from the wheel, tire or vehicle.
20. Dispose of the used sealant canister (B) and sealant/air hose (F) assembly at a local dealer/
retailer or in accordance with local state codes
and practices.
21. Replace it with a new canister available from your dealer/retailer.
22. After temporarily sealing a tire using the tire sealant and compressor kit, take the vehicle to
an authorized dealer/retailer within a 100 miles
(161 km) of driving to have the tire repaired or
replaced.
6-41
Page 103 of 120

{WARNING:
Storing the tire sealant and compressor kit or
other equipment in the passenger compartment of
the vehicle could cause injury. In a sudden stop or
collision, loose equipment could strike someone.
Store the tire sealant and compressor kit in its
original location.
If this vehicle has a tire sealant and compressor kit,
there may not be a spare tire, tire changing equipment,
and on some vehicles there may not be a place to
store a tire.
The tire sealant and compressor can be used to
temporarily seal punctures up to ¼ inch (6 mm) in the
tread area of the tire. It can also be used to inflate an
under inflated tire.
If the tire has been separated from the wheel, has
damaged sidewalls, or has a large puncture, the tire
is too severely damaged for the tire sealant and
compressor kit to be effective. See “Roadside
Assistance Program” in the owner manual. Read and follow all of the tire sealant and compressor
kit instructions.
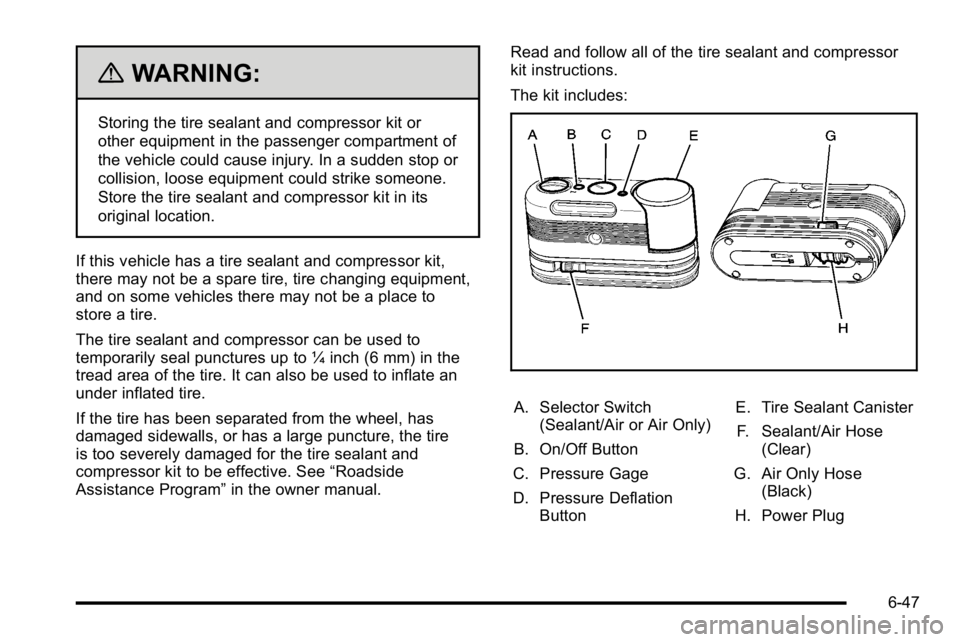
The kit includes:
A. Selector Switch
(Sealant/Air or Air Only)
B. On/Off Button
C. Pressure Gage
D. Pressure Deflation Button E. Tire Sealant Canister
F. Sealant/Air Hose (Clear)
G. Air Only Hose (Black)
H. Power Plug
6-47
Page 107 of 120

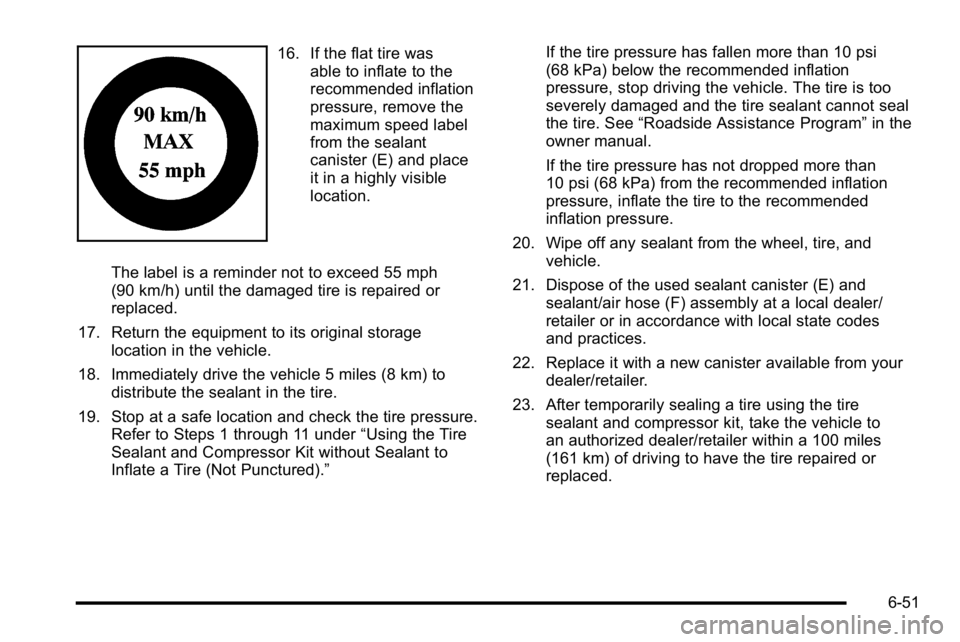
16. If the flat tire wasable to inflate to the
recommended inflation
pressure, remove the
maximum speed label
from the sealant
canister (E) and place
it in a highly visible
location.
The label is a reminder not to exceed 55 mph
(90 km/h) until the damaged tire is repaired or
replaced.
17. Return the equipment to its original storage location in the vehicle.
18. Immediately drive the vehicle 5 miles (8 km) to distribute the sealant in the tire.
19. Stop at a safe location and check the tire pressure. Refer to Steps 1 through 11 under “Using the Tire
Sealant and Compressor Kit without Sealant to
Inflate a Tire (Not Punctured).” If the tire pressure has fallen more than 10 psi
(68 kPa) below the recommended inflation
pressure, stop driving the vehicle. The tire is too
severely damaged and the tire sealant cannot seal
the tire. See
“Roadside Assistance Program” in the
owner manual.
If the tire pressure has not dropped more than
10 psi (68 kPa) from the recommended inflation
pressure, inflate the tire to the recommended
inflation pressure.
20. Wipe off any sealant from the wheel, tire, and vehicle.
21. Dispose of the used sealant canister (E) and sealant/air hose (F) assembly at a local dealer/
retailer or in accordance with local state codes
and practices.
22. Replace it with a new canister available from your dealer/retailer.
23. After temporarily sealing a tire using the tire sealant and compressor kit, take the vehicle to
an authorized dealer/retailer within a 100 miles
(161 km) of driving to have the tire repaired or
replaced.
6-51
Page 111 of 120
Tire Sealant and Compressor Kit
Storage
The tire sealant and compressor kit is located under the
storage tray on the driver side trim panel (over the rear
wheelhouse).
To access the tire sealant and compressor kit:
1. Remove the tray by pulling up on the fingerdepression to access the tire sealant and
compressor kit .
2. Locate the tire sealant and compressor kit .
3. Remove the sealant and compressor kit without
a selector switch by pulling the velcro strip up
and back.
6-55
Page 118 of 120

E
EngineCompartment Overview . . . . . . . . . . . . . . . . . . . . . . . . . . . . 6-4
Coolant Temperature Gage . . . . . . . . . . . . . . . . . . . . . . . . 4-8
Drive Belt Routing . . . . . . . . . . . . . . . . . . . . . . . . . . . . . . . . . 7-2
Engine Coolant Heater . . . . . . . . . . . . . . . . . . . . . . . . . . . . 3-17
F
Flat Tire . . . . . . . . . . . . . . . . . . . . . . . . . . . . . . . . . . . . . . . . . . . 6-34
Fluid Power Steering . . . . . . . . . . . . . . . . . . . . . . . . . . . . . . . . . . . 6-13
Four-Wheel Drive . . . . . . . . . . . . . . . . . . . . . . . . . . . . . . . . . . 3-10
Fuel Gage . . . . . . . . . . . . . . . . . . . . . . . . . . . . . . . . . . . . . . . . . . . . . 4-11
Fuel Economy Gage . . . . . . . . . . . . . . . . . . . . . . . . . . . . . . . . .4-5
G
Gages Engine Coolant Temperature . . . . . . . . . . . . . . . . . . . . . . 4-8
Fuel . . . . . . . . . . . . . . . . . . . . . . . . . . . . . . . . . . . . . . . . . . . . . . 4-11
Fuel Economy . . . . . . . . . . . . . . . . . . . . . . . . . . . . . . . . . . . . . 4-5
Oil Pressure . . . . . . . . . . . . . . . . . . . . . . . . . . . . . . . . . . . . . . . 4-8
Tachometer . . . . . . . . . . . . . . . . . . . . . . . . . . . . . . . . . . . . . . . . 4-4
H
High Voltage Devices and Wiring . . . . . . . . . . . . . . . . . . . .6-3
I
Inflation - Tire Pressure . . . . . . . . . . . . . . . . . . . . . . . . . . . . 6-28
Instrument Panel Cluster . . . . . . . . . . . . . . . . . . . . . . . . . . . .4-3
Introduction . . . . . . . . . . . . . . . . . . . . . . . . . . . . . . . . . . . . . . . . . . . iii
J
Jump Starting . . . . . . . . . . . . . . . . . . . . . . . . . . . . . . . . . . . . . . 6-18
L
LightsAntilock Brake System (ABS) Warning . . . . . . . . . . . . . 4-7
Brake System Warning . . . . . . . . . . . . . . . . . . . . . . . . . . . . 4-6
Charging System . . . . . . . . . . . . . . . . . . . . . . . . . . . . . . . . . . 4-4
Oil Pressure . . . . . . . . . . . . . . . . . . . . . . . . . . . . . . . . . . . . . . 4-10
StabiliTrak
®Indicator . . . . . . . . . . . . . . . . . . . . . . . . . . . . . . 4-7
Lumbar Manual Controls . . . . . . . . . . . . . . . . . . . . . . . . . . . . . . . . . . . 2-2
i - 2