2010 GMC SIERRA light
[x] Cancel search: lightPage 205 of 630
Universal Home Remote
System
SeeRadio Frequency Statementon page 8‑19for
information regarding Part 15 of the Federal
Communications Commission (FCC) Rules and
RSS-210/211 of Industry and Science Canada.
Universal Home Remote System
Operation (With Three Round LED)
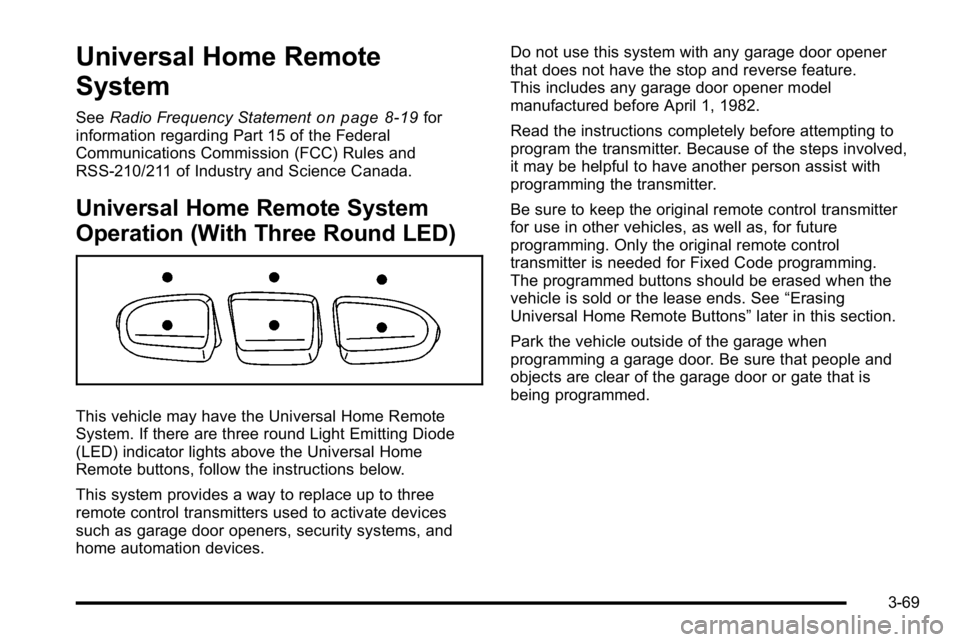
This vehicle may have the Universal Home Remote
System. If there are three round Light Emitting Diode
(LED) indicator lights above the Universal Home
Remote buttons, follow the instructions below.
This system provides a way to replace up to three
remote control transmitters used to activate devices
such as garage door openers, security systems, and
home automation devices. Do not use this system with any garage door opener
that does not have the stop and reverse feature.
This includes any garage door opener model
manufactured before April 1, 1982.
Read the instructions completely before attempting to
program the transmitter. Because of the steps involved,
it may be helpful to have another person assist with
programming the transmitter.
Be sure to keep the original remote control transmitter
for use in other vehicles, as well as, for future
programming. Only the original remote control
transmitter is needed for Fixed Code programming.
The programmed buttons should be erased when the
vehicle is sold or the lease ends. See
“Erasing
Universal Home Remote Buttons” later in this section.
Park the vehicle outside of the garage when
programming a garage door. Be sure that people and
objects are clear of the garage door or gate that is
being programmed.
3-69
Page 207 of 630

3. Immediately return to the vehicle. Press and holdthe Universal Home Remote button that will be
used to control the garage door until the garage
door moves. The indicator light, above the selected
button, should slowly blink. This button may need
to be held for up to 20 seconds.
4. Immediately, within one second, release the button when the garage door moves. The indicator light
will blink rapidly until programming is complete.
5. Press and release the same button again. The garage door should move, confirming that
programming is successful and complete.
To program another Rolling Code device such as an
additional garage door opener, a security device,
or home automation device, repeat Steps 1 through 5,
choosing a different function button in Step 3 than what
was used for the garage door opener.
If these instructions do not work, the garage door
opener is probably a Fixed Code unit. Follow the
Programming instructions that follow for a Fixed Code
garage door opener.
Programming Universal Home
Remote —Fixed Code
For questions or help programming the Universal
Home Remote System, call 1-866-572-2728 or go to
learcar2u.com. Most garage door openers sold before 1996 are
Fixed Code units.
Programming a garage door opener involves
time-sensitive actions, so read the entire procedure
before starting. Otherwise, the device will time out
and the procedure will have to be repeated.
To program up to three devices:
1. To verify that the garage door opener is a Fixed
Code unit, remove the battery cover on the hand
held transmitter supplied by the manufacturer of
the garage door opener motor.
3-71
Page 210 of 630
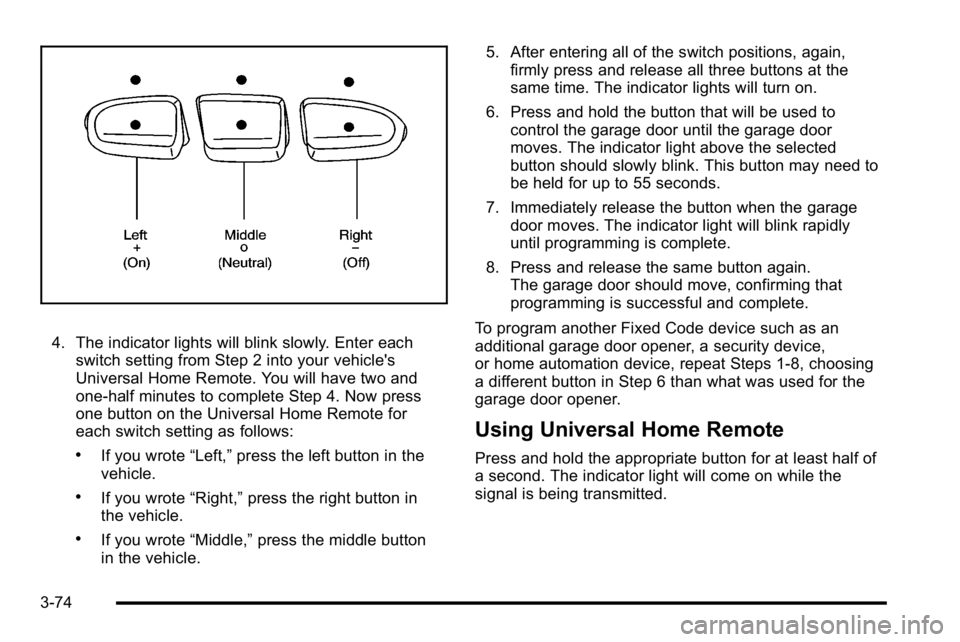
4. The indicator lights will blink slowly. Enter eachswitch setting from Step 2 into your vehicle's
Universal Home Remote. You will have two and
one-half minutes to complete Step 4. Now press
one button on the Universal Home Remote for
each switch setting as follows:
.If you wrote “Left,”press the left button in the
vehicle.
.If you wrote “Right,”press the right button in
the vehicle.
.If you wrote “Middle,”press the middle button
in the vehicle. 5. After entering all of the switch positions, again,
firmly press and release all three buttons at the
same time. The indicator lights will turn on.
6. Press and hold the button that will be used to control the garage door until the garage door
moves. The indicator light above the selected
button should slowly blink. This button may need to
be held for up to 55 seconds.
7. Immediately release the button when the garage door moves. The indicator light will blink rapidly
until programming is complete.
8. Press and release the same button again. The garage door should move, confirming that
programming is successful and complete.
To program another Fixed Code device such as an
additional garage door opener, a security device,
or home automation device, repeat Steps 1-8, choosing
a different button in Step 6 than what was used for the
garage door opener.
Using Universal Home Remote
Press and hold the appropriate button for at least half of
a second. The indicator light will come on while the
signal is being transmitted.
3-74
Page 211 of 630
Reprogramming Universal Home
Remote Buttons
Any of the three buttons can be reprogrammed by
repeating the instructions.
Erasing Universal Home Remote
Buttons
The programmed buttons should be erased when the
vehicle is sold or the lease ends.
To erase either Rolling Code or Fixed Code on the
Universal Home Remote device:1. Press and hold the two outside buttons at the same time for approximately 20 seconds, until the
indicator lights, located directly above the buttons,
begin to blink rapidly.
2. Once the indicator lights begin to blink, release both buttons. The codes from all buttons will be
erased.
For help or information on the Universal Home Remote
System, call the customer assistance phone number
under Customer Assistance Offices on page 8‑6.
Storage Areas
Glove Box
Lift up on the glove box lever to open it.
Cupholders
Vehicles with cupholders have them located on and
behind the center console and in the rear seat armrest.
Pull the loop down on the rear seat armrest to access
the cupholders.
Pull downward on the cover to access the cupholders
behind the center console.
3-75
Page 214 of 630
Do not exceed the maximum vehicle capacity when
loading the vehicle. For more information on vehicle
capacity and loading, seeLoading the Vehicle
on
page 5‑30.
.If small heavy objects are placed on the roof, cut a
piece of 3/8 inch plywood to fit inside the crossrails
and siderails to spread the load. Tie the plywood to
the siderail supports.
.Tie the load and secure it to the crossrails or the
siderail supports. Use the crossrails only to keep
the load from sliding. To move a crossrail, lift the
release lever up, on both sides of the rail. Then
slide the crossrail to the desired position balancing
the force side to side. Press the release lever
down on both sides of the rail, down to tighten it.
Try to slide the crossrail back and forth slightly to
make sure it is tight.
.To carry long items, move the crossrails as far
apart as possible. Tie the load to the crossrails and
the siderails or siderail supports. Also tie the load
to the bumpers, but do not tie the load so tightly
that the crossrails or siderails are damaged.
.After moving a crossrail, be sure it is securely
locked into the siderail. A Center High-Mounted Stoplamp (CHMSL) is located
above the rear window glass.
Make sure items loaded on the roof of the vehicle do
not block or damage the CHMSL.
Rear Seat Armrest
Vehicles with a rear seat armrest have two cupholders.
Pull the armrest down from the rear seatback to access
the cupholders.
Cargo Management System
For vehicles with a cargo management system, it is
located in the bed of the truck. The system contains
three rails located on the front and sides of the bed.
The system has four adjustable cargo tie-downs, that
can be placed on the upper and lower slides of the rail.
3-78
Page 219 of 630
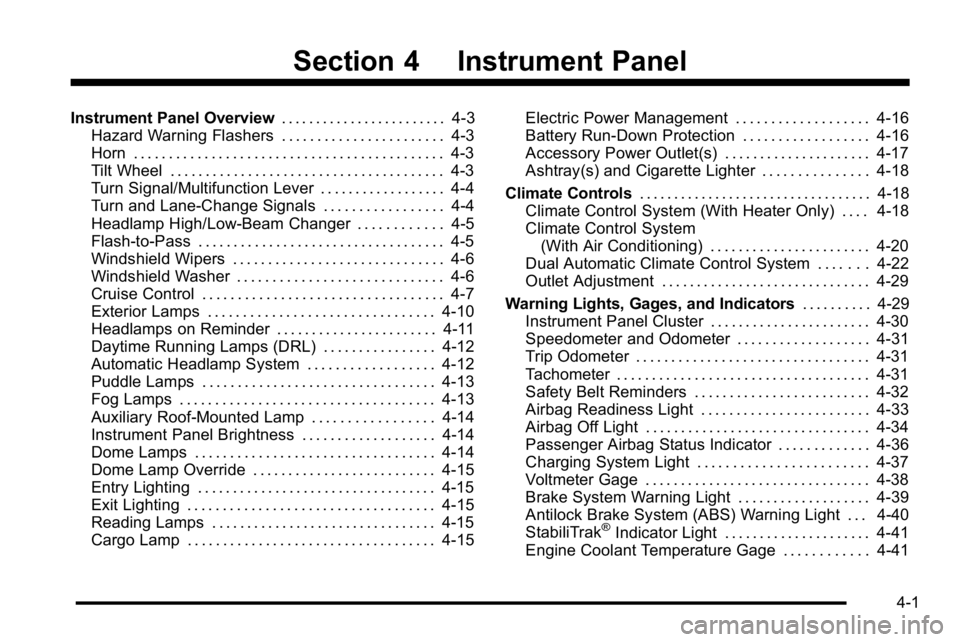
Section 4 Instrument Panel
Instrument Panel Overview. . . . . . . . . . . . . . . . . . . . . . . .4-3
Hazard Warning Flashers . . . . . . . . . . . . . . . . . . . . . . . 4-3
Horn . . . . . . . . . . . . . . . . . . . . . . . . . . . . . . . . . . . . . . . . . . . . 4-3
Tilt Wheel . . . . . . . . . . . . . . . . . . . . . . . . . . . . . . . . . . . . . . . 4-3
Turn Signal/Multifunction Lever . . . . . . . . . . . . . . . . . . 4-4
Turn and Lane-Change Signals . . . . . . . . . . . . . . . . . 4-4
Headlamp High/Low-Beam Changer . . . . . . . . . . . . 4-5
Flash-to-Pass . . . . . . . . . . . . . . . . . . . . . . . . . . . . . . . . . . . 4-5
Windshield Wipers . . . . . . . . . . . . . . . . . . . . . . . . . . . . . . 4-6
Windshield Washer . . . . . . . . . . . . . . . . . . . . . . . . . . . . . 4-6
Cruise Control . . . . . . . . . . . . . . . . . . . . . . . . . . . . . . . . . . 4-7
Exterior Lamps . . . . . . . . . . . . . . . . . . . . . . . . . . . . . . . . 4-10
Headlamps on Reminder . . . . . . . . . . . . . . . . . . . . . . . 4-11
Daytime Running Lamps (DRL) . . . . . . . . . . . . . . . . 4-12
Automatic Headlamp System . . . . . . . . . . . . . . . . . . 4-12
Puddle Lamps . . . . . . . . . . . . . . . . . . . . . . . . . . . . . . . . . 4-13
Fog Lamps . . . . . . . . . . . . . . . . . . . . . . . . . . . . . . . . . . . . 4-13
Auxiliary Roof-Mounted Lamp . . . . . . . . . . . . . . . . . 4-14
Instrument Panel Brightness . . . . . . . . . . . . . . . . . . . 4-14
Dome Lamps . . . . . . . . . . . . . . . . . . . . . . . . . . . . . . . . . . 4-14
Dome Lamp Override . . . . . . . . . . . . . . . . . . . . . . . . . . 4-15
Entry Lighting . . . . . . . . . . . . . . . . . . . . . . . . . . . . . . . . . . 4-15
Exit Lighting . . . . . . . . . . . . . . . . . . . . . . . . . . . . . . . . . . . 4-15
Reading Lamps . . . . . . . . . . . . . . . . . . . . . . . . . . . . . . . . 4-15
Cargo Lamp . . . . . . . . . . . . . . . . . . . . . . . . . . . . . . . . . . . 4-15 Electric Power Management . . . . . . . . . . . . . . . . . . . 4-16
Battery Run-Down Protection . . . . . . . . . . . . . . . . . . 4-16
Accessory Power Outlet(s) . . . . . . . . . . . . . . . . . . . . . 4-17
Ashtray(s) and Cigarette Lighter . . . . . . . . . . . . . . . 4-18
Climate Controls . . . . . . . . . . . . . . . . . . . . . . . . . . . . . . . . . . 4-18
Climate Control System (With Heater Only) . . . . 4-18
Climate Control System (With Air Conditioning) . . . . . . . . . . . . . . . . . . . . . . . 4-20
Dual Automatic Climate Control System . . . . . . . 4-22
Outlet Adjustment . . . . . . . . . . . . . . . . . . . . . . . . . . . . . . 4-29
Warning Lights, Gages, and Indicators . . . . . . . . . .4-29
Instrument Panel Cluster . . . . . . . . . . . . . . . . . . . . . . . 4-30
Speedometer and Odometer . . . . . . . . . . . . . . . . . . . 4-31
Trip Odometer . . . . . . . . . . . . . . . . . . . . . . . . . . . . . . . . . 4-31
Tachometer . . . . . . . . . . . . . . . . . . . . . . . . . . . . . . . . . . . . 4-31
Safety Belt Reminders . . . . . . . . . . . . . . . . . . . . . . . . . 4-32
Airbag Readiness Light . . . . . . . . . . . . . . . . . . . . . . . . 4-33
Airbag Off Light . . . . . . . . . . . . . . . . . . . . . . . . . . . . . . . . 4-34
Passenger Airbag Status Indicator . . . . . . . . . . . . . 4-36
Charging System Light . . . . . . . . . . . . . . . . . . . . . . . . 4-37
Voltmeter Gage . . . . . . . . . . . . . . . . . . . . . . . . . . . . . . . . 4-38
Brake System Warning Light . . . . . . . . . . . . . . . . . . . 4-39
Antilock Brake System (ABS) Warning Light . . . 4-40
StabiliTrak
®Indicator Light . . . . . . . . . . . . . . . . . . . . . 4-41
Engine Coolant Temperature Gage . . . . . . . . . . . . 4-41
4-1
Page 220 of 630

Section 4 Instrument Panel
Tire Pressure Light . . . . . . . . . . . . . . . . . . . . . . . . . . . . 4-42
Malfunction Indicator Lamp . . . . . . . . . . . . . . . . . . . . 4-42
Oil Pressure Gage . . . . . . . . . . . . . . . . . . . . . . . . . . . . . 4-46
Oil Pressure Light . . . . . . . . . . . . . . . . . . . . . . . . . . . . . 4-47
Security Light . . . . . . . . . . . . . . . . . . . . . . . . . . . . . . . . . . 4-48
Fog Lamp Light . . . . . . . . . . . . . . . . . . . . . . . . . . . . . . . . 4-48
Cruise Control Light . . . . . . . . . . . . . . . . . . . . . . . . . . . 4-48
Highbeam On Light . . . . . . . . . . . . . . . . . . . . . . . . . . . . 4-48
Four-Wheel-Drive Light . . . . . . . . . . . . . . . . . . . . . . . . 4-49
Tow/Haul Mode Light . . . . . . . . . . . . . . . . . . . . . . . . . . 4-49
Fuel Gage . . . . . . . . . . . . . . . . . . . . . . . . . . . . . . . . . . . . . 4-49
Low Fuel Warning Light . . . . . . . . . . . . . . . . . . . . . . . . 4-50
Driver Information Center (DIC) . . . . . . . . . . . . . . . . . .4-51
DIC Operation and Displays (With DIC Buttons) . . . . . . . . . . . . . . . . . . . . . . . . . . 4-51
DIC Operation and Displays (Without DIC Buttons) . . . . . . . . . . . . . . . . . . . . . . . 4-58
DIC Compass . . . . . . . . . . . . . . . . . . . . . . . . . . . . . . . . . . 4-62
DIC Warnings and Messages . . . . . . . . . . . . . . . . . . 4-65
DIC Vehicle Customization (With DIC Buttons) . . . . . . . . . . . . . . . . . . . . . . . . . . 4-75 Audio System(s)
. . . . . . . . . . . . . . . . . . . . . . . . . . . . . . . . . . 4-84
Setting the Clock . . . . . . . . . . . . . . . . . . . . . . . . . . . . . . 4-84
Radio(s) . . . . . . . . . . . . . . . . . . . . . . . . . . . . . . . . . . . . . . . 4-87
Using an MP3 (Radios with CD) . . . . . . . . . . . . . . 4-107
Using an MP3 (Radios with CD and DVD) . . . . 4-114
XM Radio Messages . . . . . . . . . . . . . . . . . . . . . . . . . 4-122
Navigation/Radio System . . . . . . . . . . . . . . . . . . . . . 4-123
Bluetooth
®. . . . . . . . . . . . . . . . . . . . . . . . . . . . . . . . . . . . 4-123
Rear Seat Entertainment (RSE) System . . . . . . 4-134
Rear Seat Audio (RSA) . . . . . . . . . . . . . . . . . . . . . . . 4-143
Theft-Deterrent Feature . . . . . . . . . . . . . . . . . . . . . . 4-145
Audio Steering Wheel Controls . . . . . . . . . . . . . . . 4-145
Radio Reception . . . . . . . . . . . . . . . . . . . . . . . . . . . . . . 4-148
Fixed Mast Antenna . . . . . . . . . . . . . . . . . . . . . . . . . . 4-149
XM™ Satellite Radio Antenna System . . . . . . . . 4-149
4-2
Page 223 of 630
Turn Signal On Chime
If the turn signal is left on for more than 3/4 of a mile
(1.2 km), a chime will sound at each flash of the turn
signal and the message TURN SIGNAL ON will also
appear in the Driver Information Control (DIC). To turn
the chime and message off, move the turn signal lever
to the off position.
Headlamp High/Low-Beam Changer
53(Headlamp High/Low Beam Changer) :
To change the headlamps from low to high beam,
push the lever toward the instrument panel. To return
to low-beam headlamps, pull the multifunction lever
toward you. Then release it.
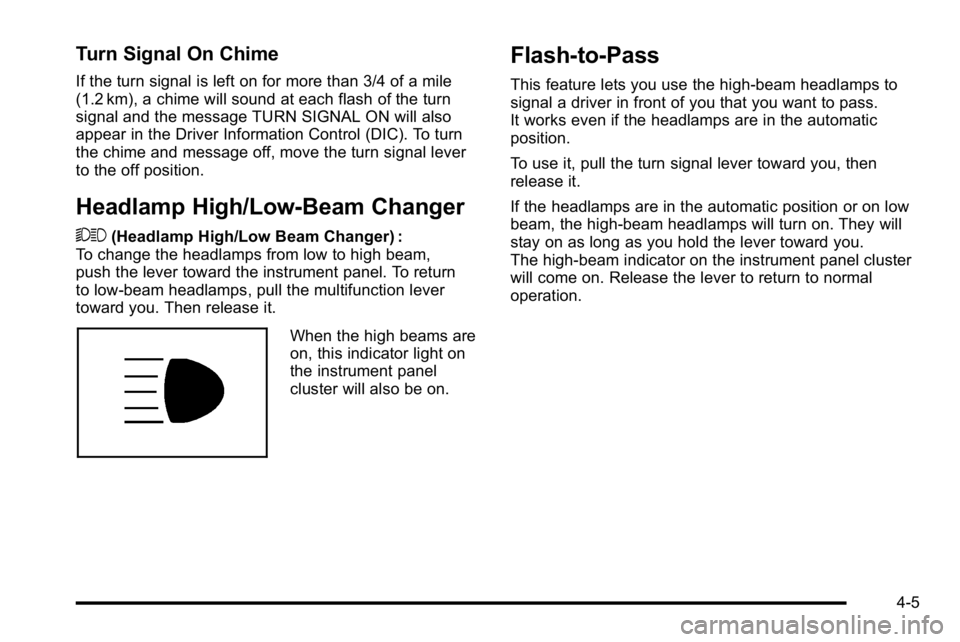
When the high beams are
on, this indicator light on
the instrument panel
cluster will also be on.
Flash-to-Pass
This feature lets you use the high-beam headlamps to
signal a driver in front of you that you want to pass.
It works even if the headlamps are in the automatic
position.
To use it, pull the turn signal lever toward you, then
release it.
If the headlamps are in the automatic position or on low
beam, the high-beam headlamps will turn on. They will
stay on as long as you hold the lever toward you.
The high-beam indicator on the instrument panel cluster
will come on. Release the lever to return to normal
operation.
4-5