2010 GMC SIERRA light
[x] Cancel search: lightPage 185 of 630

Shifting into Neutral
To shift the transfer case to N (Neutral) do the following:1. Make sure the vehicle is parked so that it will not roll.
2. Set the parking brake and apply the regular brake pedal. See Parking Brake
on page 3‑50for more
information.
3. Shifting the transfer case into N (Neutral) can be done with or without the engine running. Shifting
without the engine running should be done with the
ignition in ON/RUN.
4. Put the transmission in N (Neutral).
5. Shift the transfer case to Two-Wheel Drive High.
6. Turn the transfer case dial clockwise to N (Neutral) until it stops and hold it there until the N (Neutral)
light starts blinking. This will take at least
10 seconds. Then slowly release the dial to the
four low position. The N (Neutral) light will come on
when the transfer case shift to N (Neutral) is
complete.
7. If the engine is running, make sure that the transfer case is in N (Neutral) by shifting the transmission
to R (Reverse) for one second, then shift the
transmission to D (Drive) for one second.
8. Turn the ignition to ACC/ACCESSORY, which will turn the engine off. 9. Place the transmission shift lever in P (Park).
10. Release the parking brake prior to moving the vehicle.
11. Turn the ignition to LOCK/OFF.Shifting Out of Neutral
To shift out of N (Neutral) do the following: 1. Set the parking brake and apply the regular brake pedal.
2. Turn the ignition to ON/RUN with the engine off, and shift the transmission to N (Neutral).
3. Turn the transfer case dial to Two-Wheel-Drive High, Four-Wheel-Drive High, AUTO.
After the transfer case has shifted out of
N (Neutral), the N (Neutral) light will go out.
4. Release the parking brake prior to moving the vehicle.
Notice: Shifting the transmission into gear before
the requested mode indicator light has stopped
flashing could damage the transfer case. To help
avoid damaging the vehicle, always wait for the
mode indicator lights to stop flashing before
shifting the transmission into gear.
5. Start the engine and shift the transmission to the desired position.
3-49
Page 186 of 630

Parking Brake
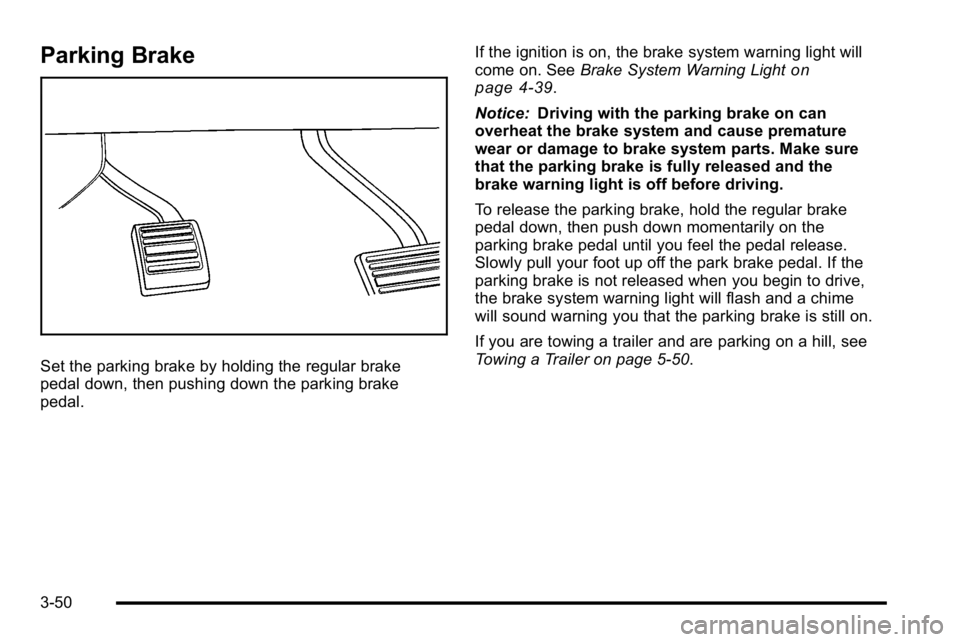
Set the parking brake by holding the regular brake
pedal down, then pushing down the parking brake
pedal.If the ignition is on, the brake system warning light will
come on. See
Brake System Warning Light
on
page 4‑39.
Notice: Driving with the parking brake on can
overheat the brake system and cause premature
wear or damage to brake system parts. Make sure
that the parking brake is fully released and the
brake warning light is off before driving.
To release the parking brake, hold the regular brake
pedal down, then push down momentarily on the
parking brake pedal until you feel the pedal release.
Slowly pull your foot up off the park brake pedal. If the
parking brake is not released when you begin to drive,
the brake system warning light will flash and a chime
will sound warning you that the parking brake is still on.
If you are towing a trailer and are parking on a hill, see
Towing a Trailer on page 5‑50.
3-50
Page 192 of 630

Mirrors
Manual Rearview Mirror
Hold the inside rearview mirror in the center to move it
for a clearer view behind your vehicle. Adjust the mirror
to avoid glare from the headlamps behind you. Push the
tab forward for daytime use and pull it for nighttime use.
Automatic Dimming Rearview Mirror
The vehicle may have an automatic dimming inside
rearview mirror.
Vehicles with OnStar
®have three additional control
buttons for the OnStar®system. See your dealer/retailer
for more information about OnStar®and how to
subscribe to it. See the OnStar®owner guide for more
information about the services OnStar®provides.
O(On/Off): Press to turn the dimming feature on or off.
The vehicle may also have a Rear Vision Camera
(RVC). See Rear Vision Camera (RVC)
on page 3‑63for more information.
If the vehicle has RVC, the
Obutton may not be
available.
Automatic Dimming Mirror Operation
Automatic dimming reduces the glare from the
headlamps of the vehicle behind you. The dimming
feature comes on and the indicator light illuminates
each time the ignition is turned to start.
Cleaning the Mirror
Do not spray glass cleaner directly on the mirror. Use a
soft towel dampened with water.
Outside Manual Mirrors
Adjust the outside mirror for a clearer view.
Manually fold the mirrors inward to prevent damage
when going through an automatic car wash. To fold,
push the mirror toward the vehicle. Push the mirror
outward, to return to its original position.
Using hood-mounted air deflectors and add-on convex
mirror attachments could decrease mirror performance.
3-56
Page 197 of 630

How the System Works
URPA comes on automatically when the shift lever is
moved into R (Reverse). A single tone sounds to
indicate the system is working.
URPA operates only at speeds less than
5 mph (8 km/h).
An obstacle is indicated by audible beeps. The interval
between the beeps becomes shorter as the vehicle gets
closer to the obstacle. When the distance is less than
30 cm (12 in) the beeps are continuous.
To be detected, objects must be at least 25.4 cm (10 in)
off the ground and below tailgate level. Objects must
also be within 2.5 m (8 ft) from the rear bumper. This
distance may be less during warmer or humid weather.
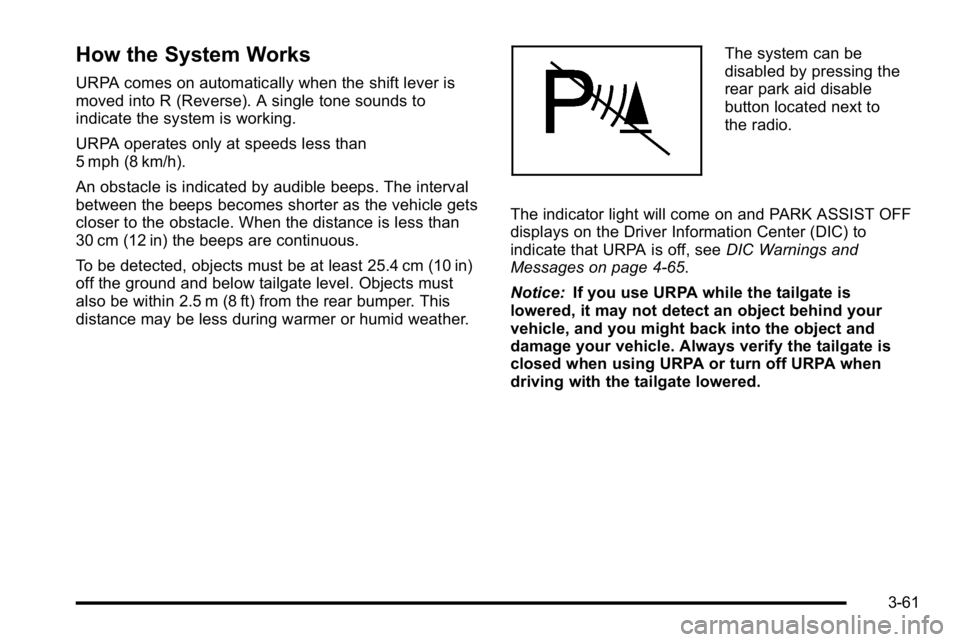
The system can be
disabled by pressing the
rear park aid disable
button located next to
the radio.
The indicator light will come on and PARK ASSIST OFF
displays on the Driver Information Center (DIC) to
indicate that URPA is off, see DIC Warnings and
Messages on page 4‑65.
Notice: If you use URPA while the tailgate is
lowered, it may not detect an object behind your
vehicle, and you might back into the object and
damage your vehicle. Always verify the tailgate is
closed when using URPA or turn off URPA when
driving with the tailgate lowered.
3-61
Page 199 of 630

Rear Vision Camera (RVC)
This vehicle may have a Rear Vision Camera system.
Read this entire section before using it.
{WARNING:
The Rear Vision Camera (RVC) system does not
replace driver vision. RVC does not:
.Detect objects that are outside the camera's
field of view, below the bumper, or underneath
the vehicle.
.Detect children, pedestrians, bicyclists,
or pets.
Do not back the vehicle by only looking at the
RVC screen, or use the screen during longer,
higher speed backing maneuvers or where there
could be cross-traffic. Your judged distances using
the screen will differ from actual distances.
So if you do not use proper care before backing
up, you could hit a vehicle, child, pedestrian,
bicyclist, or pet, resulting in vehicle damage,
injury, or death. Even though the vehicle has the
RVC system, always check carefully before
backing up by checking behind and around the
vehicle.
Vehicles Without Navigation System
The rear vision camera system is designed to help the
driver when backing up by displaying a view of the
area behind the vehicle. When the key is in the
ON/RUN position and the driver shifts the vehicle into
R (Reverse), the video image automatically appears on
the inside rear view mirror. Once the driver shifts out of
R (Reverse), the video image automatically disappears
from the inside rear view mirror.
Turning the Rear Vision Camera System
Off or On
To turn off the rear vision camera system, press and
hold
z, located on the inside rearview mirror, until the
left indicator light turns off. The rear camera vision
display is now disabled.
To turn the rear vision camera system on again, press
and hold
zuntil the left indicator light illuminates.
The rear vision camera system display is now enabled
and the display will appear in the mirror normally.
3-63
Page 200 of 630

Vehicles With Navigation System
The rear vision camera system is designed to help the
driver when backing up by displaying a view of the area
behind the vehicle. When the driver shifts the vehicle
into R (Reverse), the video image automatically
appears on the navigation screen. Once the driver shifts
out of R (Reverse), the navigation screen will go back to
the last screen that had been displayed, after a delay.
Turning the Rear Vision Camera System
On or Off
To turn the rear vision camera system on or off:1. Shift into P (Park).
2. Press the MENU button to enter the configure menu options, then press the MENU hard key to
select Display or touch the Display screen button.
3. Select the Rear Camera Options screen button. The Rear Camera Options screen will display.
4. Select the Video screen button. When the Videoscreen button is highlighted the RVC system is on.
The delay that is received after shifting out of
R (Reverse) is approximately 10 seconds. The delay
can be cancelled by performing one of the following:
.Pressing a hard key on the navigation system.
.Shifting in to P (Park).
.Reach a vehicle speed of 5 mph (8 km/h).
There is a message on the rear vision camera screen
that states “Check Surroundings for Safety”.
3-64
Page 201 of 630

Adjusting the Brightness and Contrast of
the Screen
To adjust the brightness and contrast of the screen,
press the MENU button while the rear vision camera
image is on the display. Any adjustments made will only
affect the rear vision camera screen.
](Brightness) :Touch the + (plus) or –(minus)
screen buttons to increase or decrease the brightness
of the screen.
_(Contrast) : Touch the + (plus) or –(minus) screen
buttons to increase or decrease the contrast of the
screen.
Symbols
The navigation system may have a feature that lets the
driver view symbols on the navigation screen while
using the rear vision camera. The Ultrasonic Rear Park
Assist (URPA) system must not be disabled to use the
caution symbols. If URPA has been disabled and the
symbols have been turned on, the Rear Parking Assist
Symbols Unavailable error message may display. See
Ultrasonic Rear Parking Assist (URPA) on page 3‑60. The symbols appear when an object has been detected
by the URPA system. The symbol may cover the object
when viewing the navigation screen.
To turn the symbols on or off:
1. Make sure that URPA has not been disabled.
2. Shift into P (Park).
3. Press the MENU hard key to enter the configure menu options, then press the MENU hard key
repeatedly until Display is selected or touch the
Display screen button.
4. Select the Rear Camera Options screen button. The Rear Camera Options screen will display.
5. Touch the Symbols screen button. The screen button will be highlighted when on.
Rear Vision Camera Error Messages
Service Rear Vision Camera System : This message
can display when the system is not receiving
information it requires from other vehicle systems.
If any other problem occurs or if a problem persists, see
your dealer/retailer.
3-65
Page 204 of 630

When the System Does Not Seem To
Work Properly
The rear vision camera system might not work properly
or display a clear image if:
.The RVC is turned off. See“Turning the Rear
Camera System On or Off” earlier in this section.
.It is dark.
.The sun or the beam of headlights is shining
directly into the camera lens.
.Ice, snow, mud, or anything else builds up on the
camera lens. Clean the lens, rinse it with water,
and wipe it with a soft cloth.
.The back of the vehicle is in an accident, the
position and mounting angle of the camera can
change or the camera can be affected. Be sure to
have the camera and its position and mounting
angle checked at your dealer/retailer. The rear vision camera system display in the rearview
mirror may turn off or not appear as expected due to
one of the following conditions. If this occurs the left
indicator light on the mirror will flash.
.A slow flash may indicate a loss of video signal,
or no video signal present during the reverse cycle.
.A fast flash may indicate that the display has been
on for the maximum allowable time during a
reverse cycle, or the display has reached an Over
Temperature limit.
The fast flash conditions are used to protect the
video device from high temperature conditions.
Once conditions return to normal the device will
reset and the green indicator will stop flashing.
During any of these fault conditions, the display will be
blank and the indicator will continue to flash as long as
the vehicle is in R (Reverse) or until the conditions
return to normal.
Pressing and holding
zwhen the left indicator light is
flashing will turn off the video display along with the left
indicator light.
3-68