2010 GMC SIERRA tow
[x] Cancel search: towPage 229 of 630
AUTO (Automatic) :Automatically turns on the
headlamps at normal brightness, together with the
following:
.Parking Lamps
.Instrument Panel Lights
.Taillamps
.License Plate Lamps
When the vehicle is turned off and the headlamps are in
AUTO, the headlamps may automatically remain on for
a set time. The time of the delay can be changed using
the DIC. See Driver Information Center (DIC)
on
page 4‑51(If Equipped).
; (Parking Lamps) : Turns on the parking lamps
together with the following:
.Instrument Panel Lights
.Taillamps
.License Plate Lamps
2 (Headlamps) : Turns on the headlamps together with
the following:
.Parking Lamps
.Instrument Panel Lights
.Taillamps
.License Plate Lamps When the headlamps are turned on while the vehicle is
on, the headlamps turn off automatically 10 minutes
after the ignition is turned off. When the headlamps are
turned on while the vehicle is off, the headlamps will
stay on for 10 minutes before automatically turning off
to prevent the battery from being drained. Turn the
headlamp control to off and then back to the headlamp
on position to make the headlamps stay on for an
additional 10 minutes.
Push the turn signal/multifunction lever toward the
instrument panel to change the headlamps from low
beam to high beam.
Headlamps on Reminder
For vehicles with a radio, a reminder chime sounds
when the headlamps or parking lamps are manually
turned on, the ignition is off and a door is open.
To disable the chime, turn the light off.
4-11
Page 236 of 630
Ashtray(s) and Cigarette Lighter
The vehicle may have a front ashtray located near the
center of the instrument panel. Pull on the door to
open it. The ashtray may have a cigarette lighter.
Notice:If papers, pins, or other flammable items are
put in the ashtray, hot cigarettes or other smoking
materials could ignite them and possibly damage
the vehicle. Never put flammable items in the
ashtray.
To remove the ashtray, open the door and pull the
ashtray bin toward you. To replace the ashtray, insert
the ashtray bin inside the ashtray door and press down
until it engages. To use the cigarette lighter, push it in
all the way, and let go. When it is ready for use, the
lighter pops back out.
Notice: Holding a cigarette lighter in while it is
heating does not let the lighter back away from the
heating element when it is hot. Damage from
overheating can occur to the lighter or heating
element, or a fuse could be blown. Do not hold a
cigarette lighter in while it is heating.
Climate Controls
Climate Control System
(With Heater Only)
With this system the heating and ventilation can be
controlled.
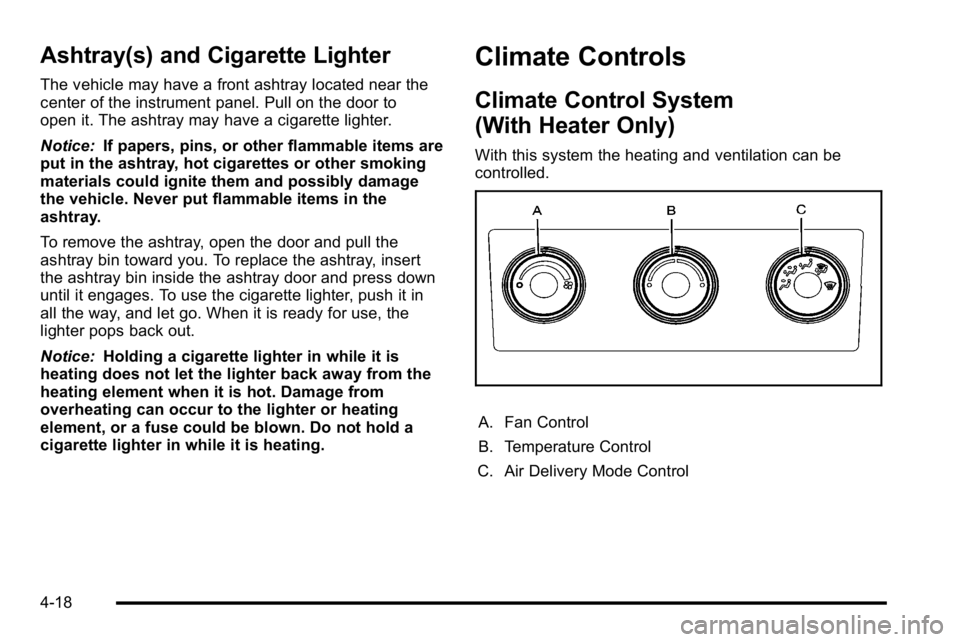
A. Fan Control
B. Temperature Control
C. Air Delivery Mode Control
4-18
Page 243 of 630
Manual Operation
D C(Fan Control):Press these buttons to increase or
decrease the fan speed.
Pressing either fan button while in automatic control
places the fan under manual control. The fan setting
remains displayed and the AUTO light turns off. The air
delivery mode remains under automatic control.
H G(Air Delivery Mode Control): Press these buttons
to change the direction of the airflow in the vehicle.
Repeatedly press either button until the desired mode
appears on the display. Pressing either mode button
while the system is off changes the air delivery mode
without turning the system on. Pressing either mode
button while in automatic control places the mode under
manual control.
The air delivery mode setting is displayed and the
AUTO light turns off. The fan remains under automatic
control.
H(Vent): Air is directed to the instrument panel
outlets.
)(Bi-Level): Air is divided between the instrument
panel and floor outlets. Some air is directed towards the
windshield and side window outlets.
6(Floor): Air is directed to the floor outlets, with some
to the windshield, side window outlets, and second row
floor outlets. In this mode, the system automatically
selects outside air.
-(Defog): This mode clears the windows of fog or
moisture. Air is directed to the windshield, floor outlets,
and side window vents. In this mode, the system
turns off recirculation and runs the air conditioning
compressor unless the outside temperature is close to
freezing. The recirculation mode cannot be selected
while in the defrost mode.
4-25
Page 249 of 630
Speedometer and Odometer
The speedometer shows the vehicle speed in both
miles per hour (mph) and kilometers per hour (km/h).
The odometer shows how far the vehicle has been
driven, in either miles (used in the United States) or
kilometers (used in Canada).
Engine Hour Meter Display
The Driver Information Center (DIC) can also display
the number of hours the engine has run. To display the
engine hours, turn the ignition off, press and hold the
reset button for at least four seconds. The hour meter
displays for up to 30 seconds, or until the ignition is
turned on. SeeDIC Operation and Displays (With DIC
Buttons)
on page 4‑51or DIC Operation and Displays
(Without DIC Buttons)on page 4‑58for more
information.
Trip Odometer
The trip odometer shows how far the vehicle has been
driven since the trip odometer was last set to zero.
Press the reset button, located on the instrument panel
cluster next to the voltmeter, to toggle between the trip
odometer and the regular odometer. Holding the reset
button for approximately one second while the trip
odometer is displayed will reset it.
To display the odometer reading with the ignition off,
press the reset button.
See DIC Operation and Displays (With DIC Buttons)
on
page 4‑51or DIC Operation and Displays (Without DIC
Buttons)on page 4‑58for more information.
Tachometer
The tachometer displays the engine speed in
revolutions per minute (rpm). For a description of
how Grade Braking affects vehicle speed while the
Tow/Haul Mode is activated, see “Grade Braking
(Allison Transmission
®)” under Tow/Haul Modeon
page 3‑34for more information.
4-31
Page 257 of 630
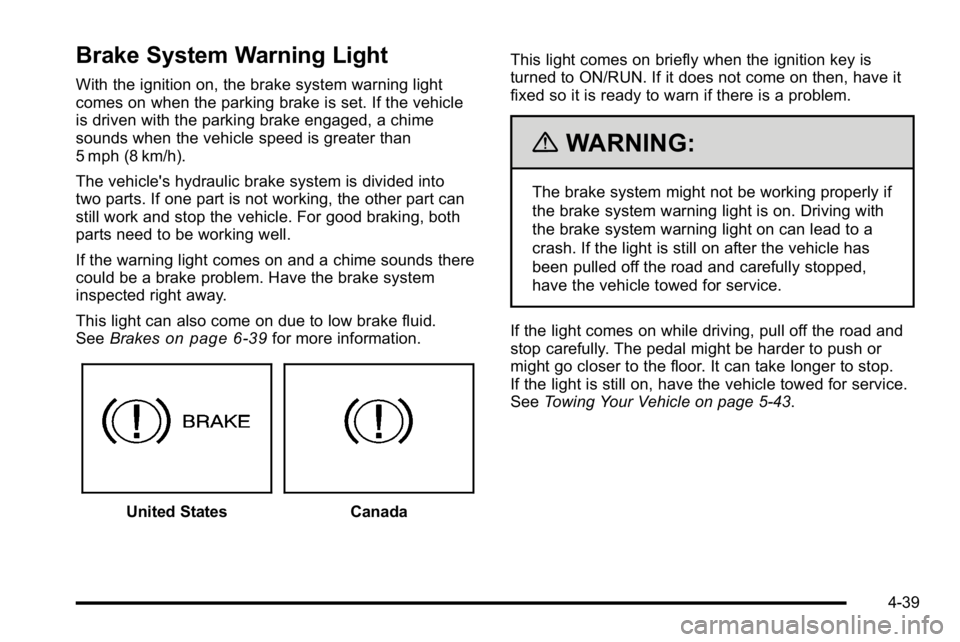
Brake System Warning Light
With the ignition on, the brake system warning light
comes on when the parking brake is set. If the vehicle
is driven with the parking brake engaged, a chime
sounds when the vehicle speed is greater than
5 mph (8 km/h).
The vehicle's hydraulic brake system is divided into
two parts. If one part is not working, the other part can
still work and stop the vehicle. For good braking, both
parts need to be working well.
If the warning light comes on and a chime sounds there
could be a brake problem. Have the brake system
inspected right away.
This light can also come on due to low brake fluid.
SeeBrakes
on page 6‑39for more information.
United StatesCanada This light comes on briefly when the ignition key is
turned to ON/RUN. If it does not come on then, have it
fixed so it is ready to warn if there is a problem.
{WARNING:
The brake system might not be working properly if
the brake system warning light is on. Driving with
the brake system warning light on can lead to a
crash. If the light is still on after the vehicle has
been pulled off the road and carefully stopped,
have the vehicle towed for service.
If the light comes on while driving, pull off the road and
stop carefully. The pedal might be harder to push or
might go closer to the floor. It can take longer to stop.
If the light is still on, have the vehicle towed for service.
See Towing Your Vehicle on page 5‑43.
4-39
Page 262 of 630

This light comes on during a malfunction in one of
two ways:
Light Flashing :A misfire condition has been detected.
A misfire increases vehicle emissions and could
damage the emission control system on the vehicle.
Diagnosis and service might be required.
To prevent more serious damage to the vehicle:
.Reduce vehicle speed.
.Avoid hard accelerations.
.Avoid steep uphill grades.
.If towing a trailer, reduce the amount of cargo
being hauled as soon as it is possible.
If the light continues to flash, when it is safe to do so,
stop the vehicle. Find a safe place to park the vehicle.
Turn the key off, wait at least 10 seconds, and restart
the engine. If the light is still flashing, follow the
previous steps and see your dealer/retailer for service
as soon as possible. Light On Steady :
An emission control system
malfunction has been detected on the vehicle.
Diagnosis and service might be required.
An emission system malfunction might be corrected by
doing the following:
.Make sure the fuel cap is fully installed. See Filling
the Tankon page 6‑11. The diagnostic system
can determine if the fuel cap has been left off or
improperly installed. A loose or missing fuel cap
allows fuel to evaporate into the atmosphere.
A few driving trips with the cap properly installed
should turn the light off.
.If the vehicle has been driven through a deep
puddle of water, the vehicle's electrical system
might be wet. The condition is usually corrected
when the electrical system dries out. A few driving
trips should turn the light off.
4-44
Page 267 of 630
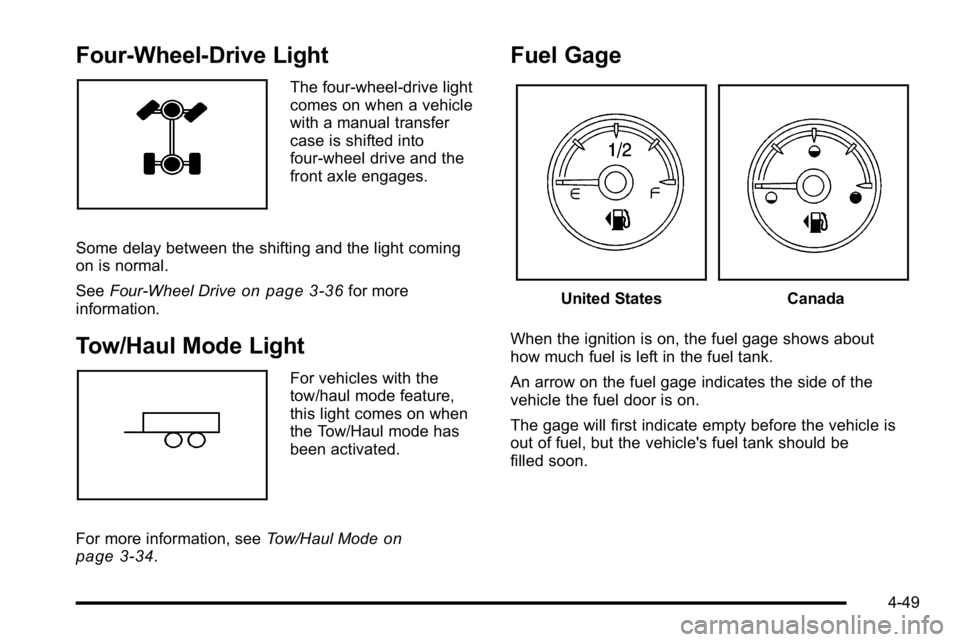
Four-Wheel-Drive Light
The four-wheel-drive light
comes on when a vehicle
with a manual transfer
case is shifted into
four-wheel drive and the
front axle engages.
Some delay between the shifting and the light coming
on is normal.
See Four-Wheel Drive
on page 3‑36for more
information.
Tow/Haul Mode Light
For vehicles with the
tow/haul mode feature,
this light comes on when
the Tow/Haul mode has
been activated.
For more information, see Tow/Haul Mode
on
page 3‑34.
Fuel Gage
United StatesCanada
When the ignition is on, the fuel gage shows about
how much fuel is left in the fuel tank.
An arrow on the fuel gage indicates the side of the
vehicle the fuel door is on.
The gage will first indicate empty before the vehicle is
out of fuel, but the vehicle's fuel tank should be
filled soon.
4-49
Page 274 of 630
If the tire pressure display shows dashes instead of a
value, there may be a problem with your vehicle. If this
consistently occurs, see your dealer/retailer for service.
Trailer Gain and Output
On vehicles with the Integrated Trailer Brake Control
(ITBC) system, the trailer brake display appears in
the DIC. Press the vehicle information button until
TRAILER GAIN and OUTPUT display.
TRAILER GAIN shows the trailer gain setting. This
setting can be adjusted from 0.0 to 10.0 with either a
trailer connected or disconnected. To adjust this setting,
see“Integrated Trailer Brake Control System” under
Towing a Trailer
on page 5‑50for more information.
OUTPUT shows the power output to the trailer anytime
a trailer with electric brakes is connected. Output is
displayed in 0 to 10 bars. Dashes may appear in the
OUTPUT display. See “Integrated Trailer Brake Control
System” underTowing a Trailer
on page 5‑50for more
information.
Engine Hours
Press the vehicle information button until ENGINE
HOURS displays. This display shows the total number
of hours the engine has run.
Relearn Remote Key
This display allows you to match Remote Keyless Entry
(RKE) transmitters to your vehicle. This procedure will
erase all previously learned transmitters. Therefore,
they must be relearned as additional transmitters.
To match an RKE transmitter to your vehicle:
1. Press the vehicle information button until PRESS
VTO RELEARN REMOTE KEY displays.
2. Press the set/reset button until REMOTE KEY LEARNING ACTIVE is displayed.
3. Press and hold the lock and unlock buttons on the first transmitter at the same time for about
15 seconds.
On vehicles with memory recall seats, the first
transmitter learned will match driver 1 and the
second will match driver 2.
A chime will sound indicating that the transmitter
is matched.
4. To match additional transmitters at this time, repeat Step 3.
Each vehicle can have a maximum of eight
transmitters matched to it.
5. To exit the programming mode, you must cycle the key to LOCK/OFF.
4-56