2010 GMC SIERRA tow
[x] Cancel search: towPage 193 of 630
Outside Towing Mirrors
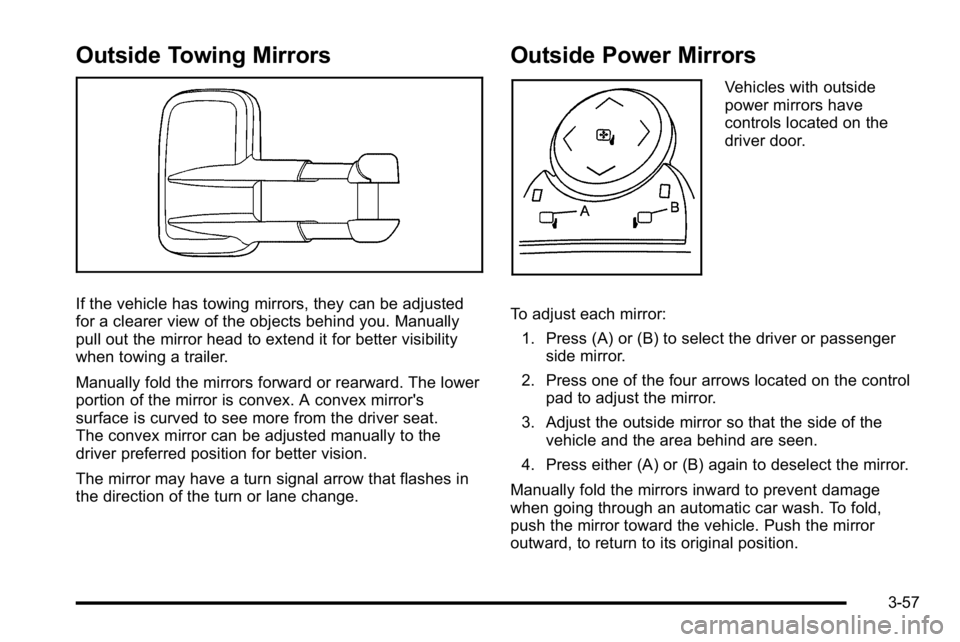
If the vehicle has towing mirrors, they can be adjusted
for a clearer view of the objects behind you. Manually
pull out the mirror head to extend it for better visibility
when towing a trailer.
Manually fold the mirrors forward or rearward. The lower
portion of the mirror is convex. A convex mirror's
surface is curved to see more from the driver seat.
The convex mirror can be adjusted manually to the
driver preferred position for better vision.
The mirror may have a turn signal arrow that flashes in
the direction of the turn or lane change.
Outside Power Mirrors
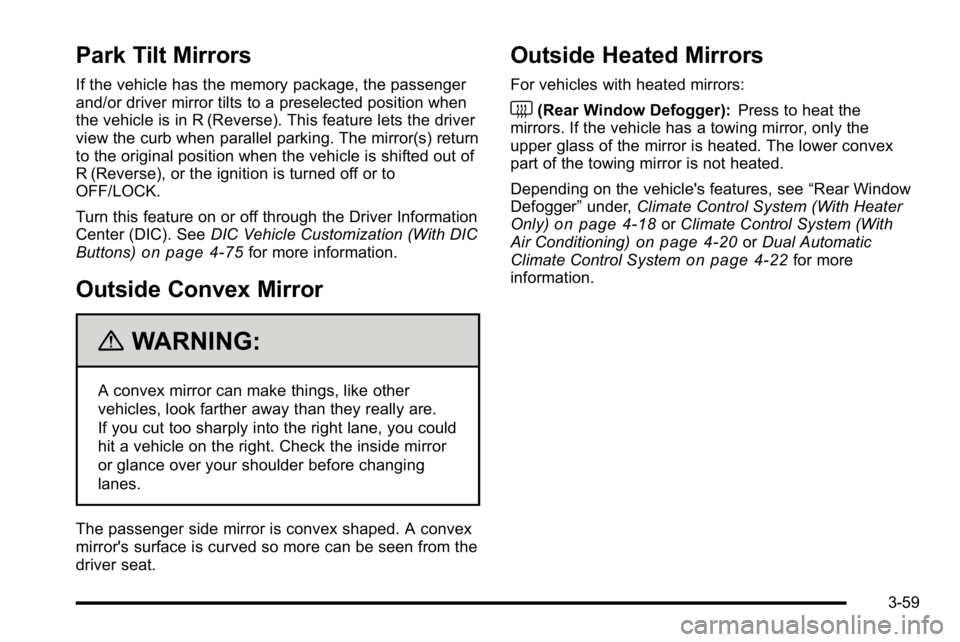
Vehicles with outside
power mirrors have
controls located on the
driver door.
To adjust each mirror: 1. Press (A) or (B) to select the driver or passenger side mirror.
2. Press one of the four arrows located on the control pad to adjust the mirror.
3. Adjust the outside mirror so that the side of the vehicle and the area behind are seen.
4. Press either (A) or (B) again to deselect the mirror.
Manually fold the mirrors inward to prevent damage
when going through an automatic car wash. To fold,
push the mirror toward the vehicle. Push the mirror
outward, to return to its original position.
3-57
Page 195 of 630
Park Tilt Mirrors
If the vehicle has the memory package, the passenger
and/or driver mirror tilts to a preselected position when
the vehicle is in R (Reverse). This feature lets the driver
view the curb when parallel parking. The mirror(s) return
to the original position when the vehicle is shifted out of
R (Reverse), or the ignition is turned off or to
OFF/LOCK.
Turn this feature on or off through the Driver Information
Center (DIC). SeeDIC Vehicle Customization (With DIC
Buttons)
on page 4‑75for more information.
Outside Convex Mirror
{WARNING:
A convex mirror can make things, like other
vehicles, look farther away than they really are.
If you cut too sharply into the right lane, you could
hit a vehicle on the right. Check the inside mirror
or glance over your shoulder before changing
lanes.
The passenger side mirror is convex shaped. A convex
mirror's surface is curved so more can be seen from the
driver seat.
Outside Heated Mirrors
For vehicles with heated mirrors:
<(Rear Window Defogger): Press to heat the
mirrors. If the vehicle has a towing mirror, only the
upper glass of the mirror is heated. The lower convex
part of the towing mirror is not heated.
Depending on the vehicle's features, see “Rear Window
Defogger” under,Climate Control System (With Heater
Only)
on page 4‑18or Climate Control System (With
Air Conditioning)on page 4‑20or Dual Automatic
Climate Control Systemon page 4‑22for more
information.
3-59
Page 198 of 630

When the System Does Not Seem to
Work Properly
If the URPA system will not activate due to a temporary
condition, the messages PARK ASSIST OFF or PARK
ASST BLOCKED SEE OWNERS MANUAL will be
displayed on the DIC.
SERVICE PARK ASSIST :If this message occurs, take
the vehicle to your dealer/retailer to repair the system.
PARK ASSIST OFF : This message occurs if the driver
disables the system.
PARK ASST BLOCKED SEE OWNERS MANUAL :
This message can occur under the following conditions:
.The ultrasonic sensors are not clean. Keep the
vehicle's rear bumper free of mud, dirt, snow, ice
and slush. For cleaning instructions, see Washing
Your Vehicle on page 6‑113.
.The park assist sensors are covered by frost or
ice. Frost or ice can form around and behind the
sensors and may not always be seen; this can
occur after washing the vehicle in cold weather.
The message may not clear until the frost or ice
has melted.
.A trailer was attached to the vehicle, or a bicycle or
an object was hanging out of the tailgate during the
last drive cycle. Once the attached object is
removed and the tailgate is raised, URPA will
return to normal operation.
.A tow bar is attached to the vehicle.
.The vehicle's bumper is damaged. Take the vehicle
to your dealer/retailer to repair the system.
.Other conditions may affect system performance,
such as vibrations from a jackhammer or the
compression of air brakes on a very large truck.
If the system is still disabled, after driving forward at
least 40 km/h (25 mph), take the vehicle to your
dealer/retailer.
3-62
Page 215 of 630
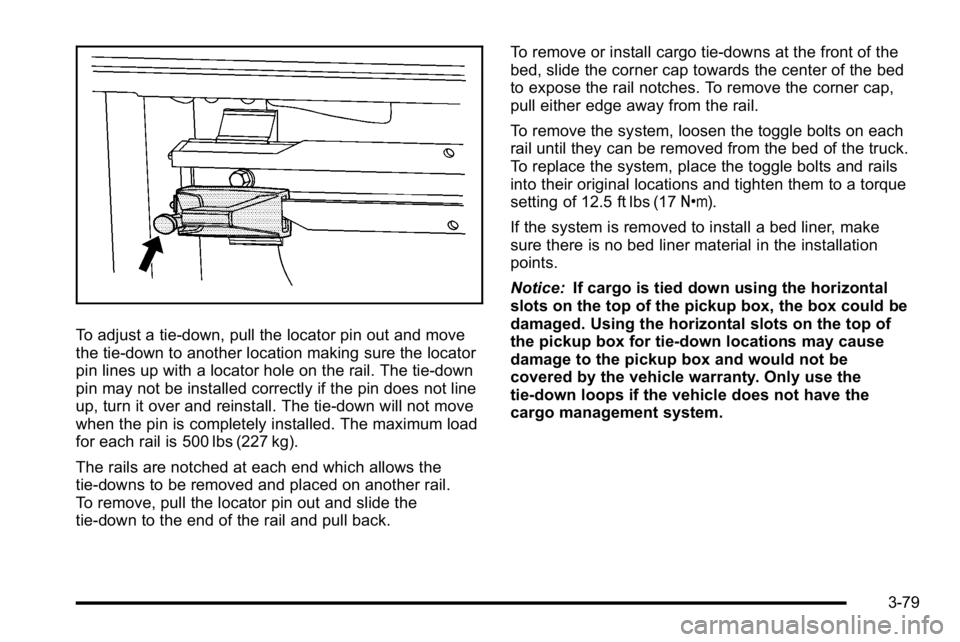
To adjust a tie-down, pull the locator pin out and move
the tie-down to another location making sure the locator
pin lines up with a locator hole on the rail. The tie-down
pin may not be installed correctly if the pin does not line
up, turn it over and reinstall. The tie-down will not move
when the pin is completely installed. The maximum load
for each rail is 500 lbs (227 kg).
The rails are notched at each end which allows the
tie-downs to be removed and placed on another rail.
To remove, pull the locator pin out and slide the
tie-down to the end of the rail and pull back.To remove or install cargo tie-downs at the front of the
bed, slide the corner cap towards the center of the bed
to expose the rail notches. To remove the corner cap,
pull either edge away from the rail.
To remove the system, loosen the toggle bolts on each
rail until they can be removed from the bed of the truck.
To replace the system, place the toggle bolts and rails
into their original locations and tighten them to a torque
setting of 12.5 ft lbs (17
Y).
If the system is removed to install a bed liner, make
sure there is no bed liner material in the installation
points.
Notice: If cargo is tied down using the horizontal
slots on the top of the pickup box, the box could be
damaged. Using the horizontal slots on the top of
the pickup box for tie-down locations may cause
damage to the pickup box and would not be
covered by the vehicle warranty. Only use the
tie-down loops if the vehicle does not have the
cargo management system.
3-79
Page 220 of 630

Section 4 Instrument Panel
Tire Pressure Light . . . . . . . . . . . . . . . . . . . . . . . . . . . . 4-42
Malfunction Indicator Lamp . . . . . . . . . . . . . . . . . . . . 4-42
Oil Pressure Gage . . . . . . . . . . . . . . . . . . . . . . . . . . . . . 4-46
Oil Pressure Light . . . . . . . . . . . . . . . . . . . . . . . . . . . . . 4-47
Security Light . . . . . . . . . . . . . . . . . . . . . . . . . . . . . . . . . . 4-48
Fog Lamp Light . . . . . . . . . . . . . . . . . . . . . . . . . . . . . . . . 4-48
Cruise Control Light . . . . . . . . . . . . . . . . . . . . . . . . . . . 4-48
Highbeam On Light . . . . . . . . . . . . . . . . . . . . . . . . . . . . 4-48
Four-Wheel-Drive Light . . . . . . . . . . . . . . . . . . . . . . . . 4-49
Tow/Haul Mode Light . . . . . . . . . . . . . . . . . . . . . . . . . . 4-49
Fuel Gage . . . . . . . . . . . . . . . . . . . . . . . . . . . . . . . . . . . . . 4-49
Low Fuel Warning Light . . . . . . . . . . . . . . . . . . . . . . . . 4-50
Driver Information Center (DIC) . . . . . . . . . . . . . . . . . .4-51
DIC Operation and Displays (With DIC Buttons) . . . . . . . . . . . . . . . . . . . . . . . . . . 4-51
DIC Operation and Displays (Without DIC Buttons) . . . . . . . . . . . . . . . . . . . . . . . 4-58
DIC Compass . . . . . . . . . . . . . . . . . . . . . . . . . . . . . . . . . . 4-62
DIC Warnings and Messages . . . . . . . . . . . . . . . . . . 4-65
DIC Vehicle Customization (With DIC Buttons) . . . . . . . . . . . . . . . . . . . . . . . . . . 4-75 Audio System(s)
. . . . . . . . . . . . . . . . . . . . . . . . . . . . . . . . . . 4-84
Setting the Clock . . . . . . . . . . . . . . . . . . . . . . . . . . . . . . 4-84
Radio(s) . . . . . . . . . . . . . . . . . . . . . . . . . . . . . . . . . . . . . . . 4-87
Using an MP3 (Radios with CD) . . . . . . . . . . . . . . 4-107
Using an MP3 (Radios with CD and DVD) . . . . 4-114
XM Radio Messages . . . . . . . . . . . . . . . . . . . . . . . . . 4-122
Navigation/Radio System . . . . . . . . . . . . . . . . . . . . . 4-123
Bluetooth
®. . . . . . . . . . . . . . . . . . . . . . . . . . . . . . . . . . . . 4-123
Rear Seat Entertainment (RSE) System . . . . . . 4-134
Rear Seat Audio (RSA) . . . . . . . . . . . . . . . . . . . . . . . 4-143
Theft-Deterrent Feature . . . . . . . . . . . . . . . . . . . . . . 4-145
Audio Steering Wheel Controls . . . . . . . . . . . . . . . 4-145
Radio Reception . . . . . . . . . . . . . . . . . . . . . . . . . . . . . . 4-148
Fixed Mast Antenna . . . . . . . . . . . . . . . . . . . . . . . . . . 4-149
XM™ Satellite Radio Antenna System . . . . . . . . 4-149
4-2
Page 222 of 630
Turn Signal/Multifunction Lever
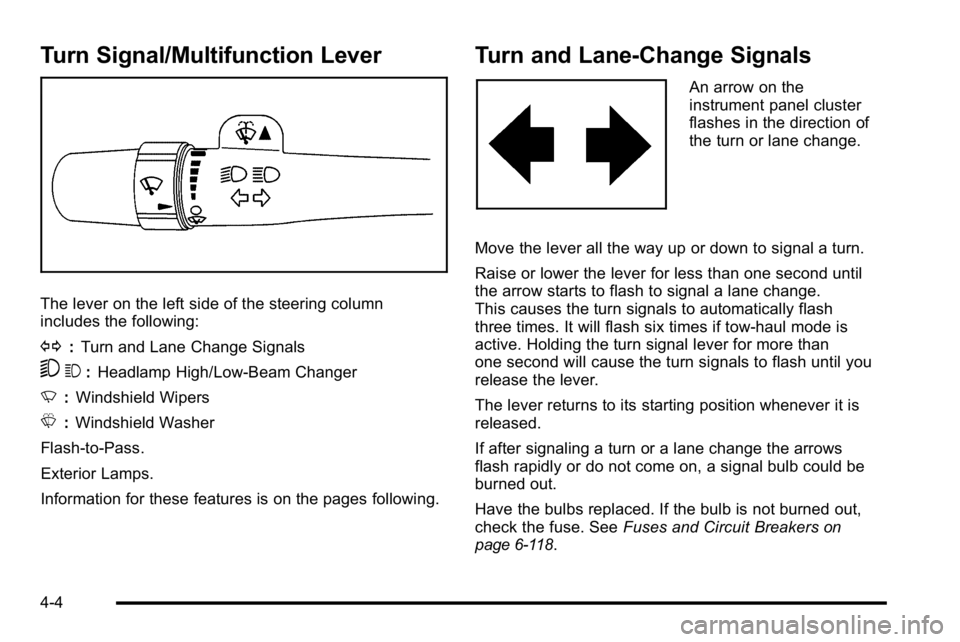
The lever on the left side of the steering column
includes the following:
G:Turn and Lane Change Signals
53 :Headlamp High/Low-Beam Changer
N :Windshield Wipers
L :Windshield Washer
Flash-to-Pass.
Exterior Lamps.
Information for these features is on the pages following.
Turn and Lane-Change Signals
An arrow on the
instrument panel cluster
flashes in the direction of
the turn or lane change.
Move the lever all the way up or down to signal a turn.
Raise or lower the lever for less than one second until
the arrow starts to flash to signal a lane change.
This causes the turn signals to automatically flash
three times. It will flash six times if tow-haul mode is
active. Holding the turn signal lever for more than
one second will cause the turn signals to flash until you
release the lever.
The lever returns to its starting position whenever it is
released.
If after signaling a turn or a lane change the arrows
flash rapidly or do not come on, a signal bulb could be
burned out.
Have the bulbs replaced. If the bulb is not burned out,
check the fuse. See Fuses and Circuit Breakers
on
page 6‑118.
4-4
Page 223 of 630
Turn Signal On Chime
If the turn signal is left on for more than 3/4 of a mile
(1.2 km), a chime will sound at each flash of the turn
signal and the message TURN SIGNAL ON will also
appear in the Driver Information Control (DIC). To turn
the chime and message off, move the turn signal lever
to the off position.
Headlamp High/Low-Beam Changer
53(Headlamp High/Low Beam Changer) :
To change the headlamps from low to high beam,
push the lever toward the instrument panel. To return
to low-beam headlamps, pull the multifunction lever
toward you. Then release it.
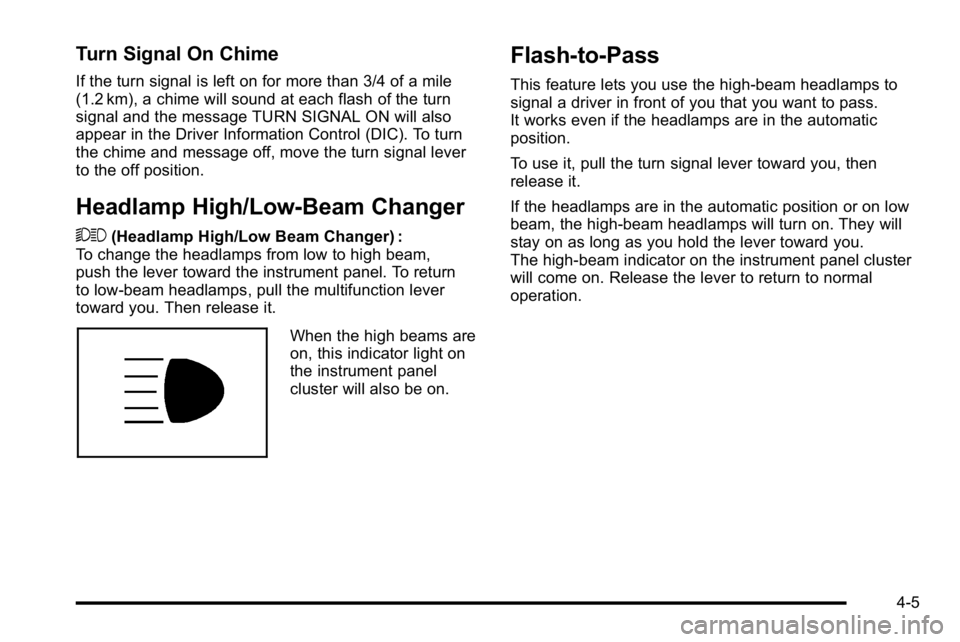
When the high beams are
on, this indicator light on
the instrument panel
cluster will also be on.
Flash-to-Pass
This feature lets you use the high-beam headlamps to
signal a driver in front of you that you want to pass.
It works even if the headlamps are in the automatic
position.
To use it, pull the turn signal lever toward you, then
release it.
If the headlamps are in the automatic position or on low
beam, the high-beam headlamps will turn on. They will
stay on as long as you hold the lever toward you.
The high-beam indicator on the instrument panel cluster
will come on. Release the lever to return to normal
operation.
4-5
Page 225 of 630
Cruise Control
{WARNING:
Cruise control can be dangerous where you
cannot drive safely at a steady speed. So, do not
use the cruise control on winding roads or in
heavy traffic.
Cruise control can be dangerous on slippery
roads. On such roads, fast changes in tire traction
can cause excessive wheel slip, and you could
lose control. Do not use cruise control on slippery
roads.
For vehicles with cruise control, a speed of about
40 km/h (25 mph) or more can be maintained without
keeping your foot on the accelerator. Cruise control
does not work at speeds below about 40 km/h (25 mph). When the brakes are applied, cruise control is
turned off.
For vehicles with an Allison
®or Hydra‐Matic 6‐speed
automatic transmission, see “Grade Braking and Cruise
Grade Braking (Allison Transmission) under Tow/Haul
Mode
on page 3‑34for an explanation of how cruise
control interacts with the Range Selection Mode,
tow/haul and grade braking systems.
For vehicles with the StabiliTrak
®system that begins
to limit wheel spin while you are using cruise control,
the cruise control will automatically disengage.
See StabiliTrak
®Systemon page 5‑6. When road
conditions allow the cruise control to be safely used
again, it can be turned back on.
4-7