2010 GMC SIERRA instrument panel
[x] Cancel search: instrument panelPage 133 of 630

Servicing Your Airbag-Equipped
Vehicle
Airbags affect how the vehicle should be serviced.
There are parts of the airbag system in several places
around the vehicle. Your dealer/retailer and the service
manual have information about servicing the vehicle
and the airbag system. To purchase a service manual,
seeService Publications Ordering Information
on
page 8‑16.
{WARNING:
For up to 10 seconds after the ignition is turned off
and the battery is disconnected, an airbag can still
inflate during improper service. You can be injured
if you are close to an airbag when it inflates. Avoid
yellow connectors. They are probably part of the
airbag system. Be sure to follow proper service
procedures, and make sure the person performing
work for you is qualified to do so.
Adding Equipment to Your
Airbag-Equipped Vehicle
Q: Is there anything I might add to or change about the vehicle that could keep the airbags from
working properly?
A: Yes. If you add things that change your vehicle's
frame, bumper system, height, front end or side
sheet metal, they may keep the airbag system from
working properly. Changing or moving any parts of
the front seats, safety belts, the airbag sensing and
diagnostic module, steering wheel, instrument panel,
roof-rail airbag modules, ceiling headliner or pillar
garnish trim, overhead console, front sensors, side
impact sensors, rollover sensor module, or airbag
wiring can affect the operation of the airbag system.
In addition, the vehicle may have a passenger
sensing system for the right front passenger's
position, which includes sensors that are part of the
passenger's seat. The passenger sensing system
may not operate properly if the original seat trim is
replaced with non-GM covers, upholstery or trim,
or with GM covers, upholstery or trim designed for a
different vehicle. Any object, such as an aftermarket
2-91
Page 138 of 630
Section 3 Features and Controls
Mirrors. . . . . . . . . . . . . . . . . . . . . . . . . . . . . . . . . . . . . . . . . . . . 3-56
Manual Rearview Mirror . . . . . . . . . . . . . . . . . . . . . . . . 3-56
Automatic Dimming Rearview Mirror . . . . . . . . . . . 3-56
Outside Manual Mirrors . . . . . . . . . . . . . . . . . . . . . . . . 3-56
Outside Towing Mirrors . . . . . . . . . . . . . . . . . . . . . . . . 3-57
Outside Power Mirrors . . . . . . . . . . . . . . . . . . . . . . . . . 3-57
Outside Power Foldaway Mirrors . . . . . . . . . . . . . . 3-58
Park Tilt Mirrors . . . . . . . . . . . . . . . . . . . . . . . . . . . . . . . . 3-59
Outside Convex Mirror . . . . . . . . . . . . . . . . . . . . . . . . . 3-59
Outside Heated Mirrors . . . . . . . . . . . . . . . . . . . . . . . . 3-59
Object Detection Systems . . . . . . . . . . . . . . . . . . . . . . .3-60
Ultrasonic Rear Parking Assist (URPA) . . . . . . . . 3-60
Rear Vision Camera (RVC) . . . . . . . . . . . . . . . . . . . . 3-63 Universal Home Remote System
. . . . . . . . . . . . . . . .3-69
Universal Home Remote System Operation (With Three Round LED) . . . . . . . . . . . . . . . . . . . . 3-69
Storage Areas . . . . . . . . . . . . . . . . . . . . . . . . . . . . . . . . . . . . 3-75
Glove Box . . . . . . . . . . . . . . . . . . . . . . . . . . . . . . . . . . . . . 3-75
Cupholders . . . . . . . . . . . . . . . . . . . . . . . . . . . . . . . . . . . . 3-75
Instrument Panel Storage . . . . . . . . . . . . . . . . . . . . . 3-76
Center Console Storage . . . . . . . . . . . . . . . . . . . . . . 3-76
Roof Rack System . . . . . . . . . . . . . . . . . . . . . . . . . . . . . 3-77
Rear Seat Armrest . . . . . . . . . . . . . . . . . . . . . . . . . . . . . 3-78
Cargo Management System . . . . . . . . . . . . . . . . . . . 3-78
Sunroof . . . . . . . . . . . . . . . . . . . . . . . . . . . . . . . . . . . . . . . . . . . 3-80
3-2
Page 155 of 630

PASS-Key®III+ Electronic
Immobilizer
See Radio Frequency Statementon page 8‑19for information regarding Part 15 of the Federal
Communications Commission (FCC) Rules and
RSS-210/211 of Industry and Science Canada.
PASS-Key®III+ Electronic
Immobilizer Operation
Your vehicle has PASS-Key®III+ (Personalized
Automotive Security System) theft-deterrent system.
PASS-Key
®III+ is a passive theft-deterrent system.
The system is automatically armed when the key is
removed from the ignition.
The system is automatically disarmed when the key is
turned to ON/RUN, ACC/ACCESSORY or START from
the LOCK/OFF position. You do not have to manually arm or disarm the system.
The security light will come on if there is a problem with
arming or disarming the theft-deterrent system.
When the PASS-Key
®III+ system senses that someone
is using the wrong key, it prevents the vehicle from
starting. Anyone using a trial-and-error method to start
the vehicle will be discouraged because of the high
number of electrical key codes.
If the engine does not start and the security light on
the instrument panel cluster comes on when trying to
start the vehicle, there may be a problem with your
theft-deterrent system. Turn the ignition off and
try again.
If the engine still does not start, and the key appears to
be undamaged, try another ignition key. At this time,
you may also want to check the fuse, see Fuses and
Circuit Breakers
on page 6‑118. If the engine still
does not start with the other key, your vehicle needs
service. If your vehicle does start, the first key may be
faulty. See your dealer/retailer who can service the
PASS-Key
®III+ to have a new key made. In an
emergency, contact Roadside Assistance.
3-19
Page 158 of 630

Ignition Positions
The ignition switch has
four different positions.
To shift out of P (Park), the ignition must be in ON/RUN
or ACC/ACCESSORY and the regular brake pedal must
be applied.
A (LOCK/OFF) : This position locks the ignition. It also
locks the transmission on automatic transmission
vehicles. The key can be removed in LOCK/OFF.
On vehicles with an automatic transmission, the shift
lever must be in P (Park) to turn the ignition switch to
LOCK/OFF. The steering can bind with the wheels turned off center.
If this happens, move the steering wheel from right to
left while turning the key to ACC/ACCESSORY. If this
doesn't work, then the vehicle needs service.
Notice:
Using a tool to force the key to turn in the
ignition could cause damage to the switch or break
the key. Use the correct key, make sure it is all the
way in, and turn it only with your hand. If the key
cannot be turned by hand, see your dealer/retailer.
B (ACC/ACCESSORY) : This position lets things like
the radio and the windshield wipers operate while the
engine is off. Use this position if the vehicle must be
pushed or towed.
C (ON/RUN) : This position can be used to operate the
electrical accessories and to display some instrument
panel cluster warning and indicator lights. The switch
stays in this position when the engine is running.
The transmission is also unlocked in this position on
automatic transmission vehicles.
If you leave the key in the ACC/ACCESSORY or
ON/RUN position with the engine off, the battery could
be drained. You may not be able to start the vehicle if
the battery is allowed to drain for an extended period
of time.
3-22
Page 162 of 630
Adjustable Throttle and Brake Pedal
On vehicles with this feature, you can change the
position of the throttle and brake pedals.
No adjustment to the pedals can be made when the
vehicle is in R (Reverse) or while using the cruise
control.
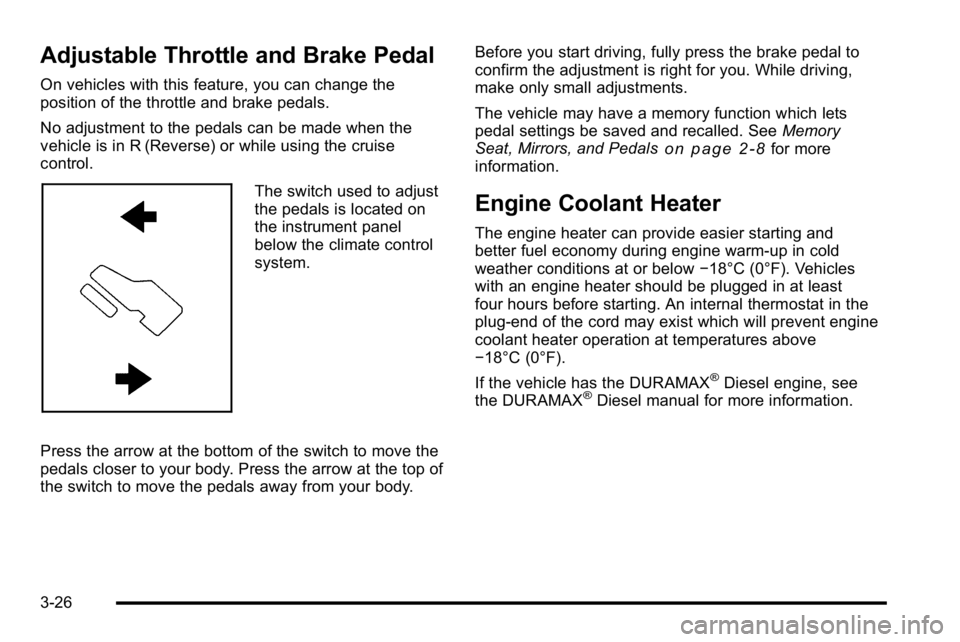
The switch used to adjust
the pedals is located on
the instrument panel
below the climate control
system.
Press the arrow at the bottom of the switch to move the
pedals closer to your body. Press the arrow at the top of
the switch to move the pedals away from your body. Before you start driving, fully press the brake pedal to
confirm the adjustment is right for you. While driving,
make only small adjustments.
The vehicle may have a memory function which lets
pedal settings be saved and recalled. See
Memory
Seat, Mirrors, and Pedals
on page 2‑8for more
information.
Engine Coolant Heater
The engine heater can provide easier starting and
better fuel economy during engine warm-up in cold
weather conditions at or below −18°C (0°F). Vehicles
with an engine heater should be plugged in at least
four hours before starting. An internal thermostat in the
plug-end of the cord may exist which will prevent engine
coolant heater operation at temperatures above
−18°C (0°F).
If the vehicle has the DURAMAX
®Diesel engine, see
the DURAMAX®Diesel manual for more information.
3-26
Page 164 of 630
Automatic Transmission Operation
If the vehicle is a Two-mode Hybrid, see the Two-mode
Hybrid manual for more information.
Vehicles with an automatic transmission have an
electronic shift position indicator within the instrument
panel cluster. This display comes on when the ignition
key is turned to the ON/RUN position.
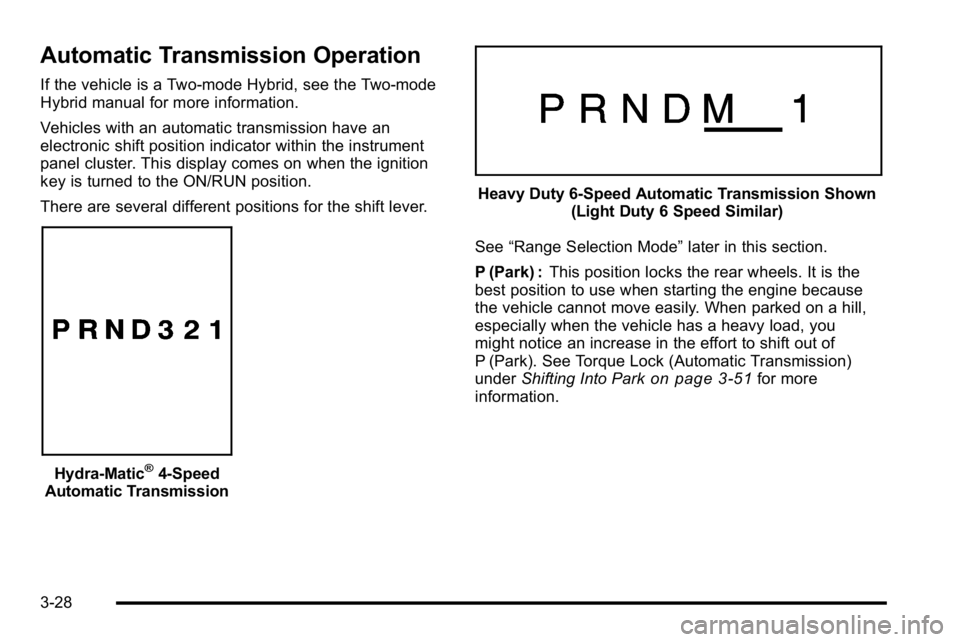
There are several different positions for the shift lever.
Hydra-Matic®4-Speed
Automatic Transmission
Heavy Duty 6-Speed Automatic Transmission Shown (Light Duty 6 Speed Similar)
See “Range Selection Mode” later in this section.
P (Park) : This position locks the rear wheels. It is the
best position to use when starting the engine because
the vehicle cannot move easily. When parked on a hill,
especially when the vehicle has a heavy load, you
might notice an increase in the effort to shift out of
P (Park). See Torque Lock (Automatic Transmission)
under Shifting Into Park
on page 3‑51for more
information.
3-28
Page 170 of 630
Tow/Haul Mode
Vehicles with an automatic transmission have a tow/
haul mode. The tow/haul mode adjusts the transmission
shift pattern to reduce shift cycling, providing increased
performance, vehicle control, and transmission cooling
when towing or hauling heavy loads.
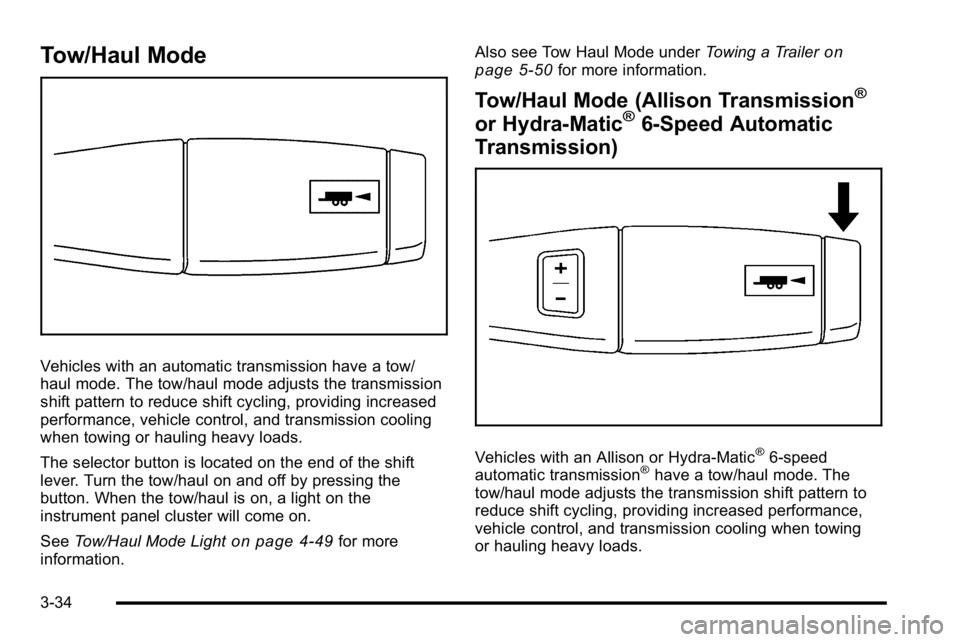
The selector button is located on the end of the shift
lever. Turn the tow/haul on and off by pressing the
button. When the tow/haul is on, a light on the
instrument panel cluster will come on.
SeeTow/Haul Mode Light
on page 4‑49for more
information. Also see Tow Haul Mode under
Towing a Trailer
on
page 5‑50for more information.
Tow/Haul Mode (Allison Transmission®
or Hydra-Matic®6-Speed Automatic
Transmission)
Vehicles with an Allison or Hydra-Matic®6-speed
automatic transmission®have a tow/haul mode. The
tow/haul mode adjusts the transmission shift pattern to
reduce shift cycling, providing increased performance,
vehicle control, and transmission cooling when towing
or hauling heavy loads.
3-34
Page 171 of 630
Turn the tow/haul mode on and off by pressing the
button, located on the end of the shift lever. When the
tow/haul is on, a light on the instrument panel cluster
will come on.
SeeTow/Haul Mode Light
on page 4‑49for more
information.
Also see “Tow Haul Mode” underTowing a Trailer
on
page 5‑50for more information.
Grade Braking (Allison Transmission®
or Hydra-Matic®6-Speed Automatic
Transmission)
The Grade Braking shift modes can be activated by
pressing the button on the end of the shift control lever.
While in Range Selection Mode , Grade Braking is
deactivated allowing the driver to select a desired range
of gears.
Grade Braking is only active while the Tow/Haul Mode
is selected and you are not in the Range Selection
Mode. See “Tow/Haul Mode listed previously and
Automatic Transmission Operation
on page 3‑28for
more information on the Range Selection Mode. Grade
Braking assists in maintaining desired vehicle speeds
when driving on downhill grades by automatically
implementing a shift schedule that utilizes the engine
and transmission to slow the vehicle. This reduces wear
on the braking system and increases control of the vehicle. Grade Braking monitors vehicle speed,
acceleration, engine torque and brake pedal usage.
Using this information, it detects when the truck is on a
downhill grade and the driver desires to slow the vehicle
by pressing the brake.
Also see
Towing a Trailer
on page 5‑50for more
information.
Cruise Grade Braking (Allison
Transmission®or Hydra-Matic®
6-Speed Automatic Transmission)
Cruise Grade Braking assists when driving on a
downhill grade. It maintains vehicle speed by
automatically implementing a shift schedule that uses
the engine and the transmission to slow the vehicle.
Cruise Grade Braking operates while Cruise Control is
engaged in Tow/Haul mode to assist in maintaining
vehicle speed under loaded vehicle conditions.
It utilizes vehicle acceleration and deviation from
desired speed to determine the correct gear for the
operating condition. If vehicle speed is above the
desired speed the transmission will downshift to slow
the vehicle. If vehicle speed is near or below desired
speed the trans will upshift, allowing vehicle speed to
increase.
While in the Range Select Mode (RSM) mode, cruise
grade braking is not available.
See Automatic Transmission Operation on page 3‑28.
3-35