2010 GMC SIERRA fuel
[x] Cancel search: fuelPage 162 of 630

Adjustable Throttle and Brake Pedal
On vehicles with this feature, you can change the
position of the throttle and brake pedals.
No adjustment to the pedals can be made when the
vehicle is in R (Reverse) or while using the cruise
control.
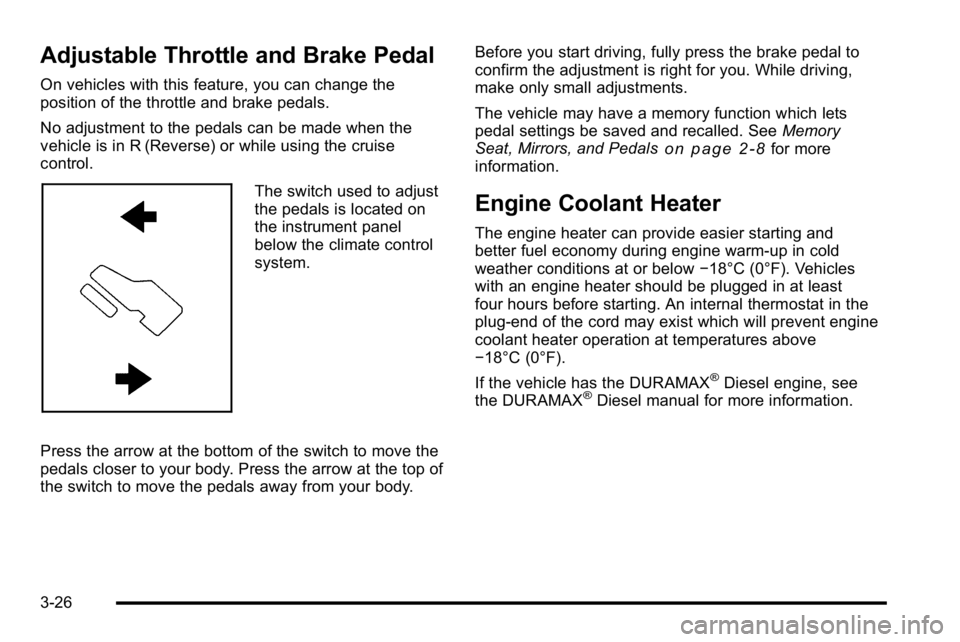
The switch used to adjust
the pedals is located on
the instrument panel
below the climate control
system.
Press the arrow at the bottom of the switch to move the
pedals closer to your body. Press the arrow at the top of
the switch to move the pedals away from your body. Before you start driving, fully press the brake pedal to
confirm the adjustment is right for you. While driving,
make only small adjustments.
The vehicle may have a memory function which lets
pedal settings be saved and recalled. See
Memory
Seat, Mirrors, and Pedals
on page 2‑8for more
information.
Engine Coolant Heater
The engine heater can provide easier starting and
better fuel economy during engine warm-up in cold
weather conditions at or below −18°C (0°F). Vehicles
with an engine heater should be plugged in at least
four hours before starting. An internal thermostat in the
plug-end of the cord may exist which will prevent engine
coolant heater operation at temperatures above
−18°C (0°F).
If the vehicle has the DURAMAX
®Diesel engine, see
the DURAMAX®Diesel manual for more information.
3-26
Page 163 of 630

To Use the Engine Coolant Heater
1. Turn off the engine.
2. Open the hood and unwrap the electrical cord.The cord is secured to the Engine Compartment
Fuse Block with a clip. Carefully remove the wire
tie which bundles the electrical plug. Do not cut the
electrical cord.
3. Plug the cord into a normal, grounded 110-volt AC outlet.
{WARNING:
Plugging the cord into an ungrounded outlet could
cause an electrical shock. Also, the wrong kind of
extension cord could overheat and cause a fire.
You could be seriously injured. Plug the cord into
a properly grounded three-prong 110-volt AC
outlet. If the cord will not reach, use a heavy-duty
three-prong extension cord rated for at least
15 amps.
4. Before starting the engine, be sure to unplug and store the cord as it was before to keep it away from
moving engine parts. If you do not, it could be
damaged. The length of time the heater should remain plugged in
depends on several factors. Ask a dealer/retailer in the
area where you will be parking the vehicle for the best
advice on this.
Active Fuel Management™
Vehicles with V8 engines may have Active Fuel
Management™. This system allows the engine to
operate on either all or half of its cylinders, depending
on the driving conditions.
When less power is required, such as cruising at a
constant vehicle speed, the system will operate in the
half cylinder mode, allowing the vehicle to achieve
better fuel economy. When greater power demands are
required, such as accelerating from a stop, passing,
or merging onto a freeway, the system will maintain
full-cylinder operation.
If the vehicle has an Active Fuel Management™
indicator, see
DIC Operation and Displays (With DIC
Buttons)
on page 4‑51or DIC Operation and Displays
(Without DIC Buttons)on page 4‑58for more
information on using this display .
3-27
Page 166 of 630

N (Neutral) :In this position, the engine does not
connect with the wheels. To restart when you are
already moving, use N (Neutral) only. Also, use
N (Neutral) when the vehicle is being towed.
{WARNING:
Shifting into a drive gear while the engine is
running at high speed is dangerous. Unless your
foot is firmly on the brake pedal, the vehicle could
move very rapidly. You could lose control and hit
people or objects. Do not shift into a drive gear
while the engine is running at high speed.
Notice: Shifting out of P (Park) or N (Neutral) with
the engine running at high speed may damage the
transmission. The repairs would not be covered by
the vehicle warranty. Be sure the engine is not
running at high speed when shifting the vehicle. D (Drive) :
This position is for normal driving. It provides
the best fuel economy. If you need more power for
passing, and you are:
.Going less than about 35 mph (55 km/h), push the
accelerator pedal about halfway down.
.Going about 35 mph (55 km/h) or more, push the
accelerator all the way down.
By doing this, the vehicle shifts down to the next
gear and has more power.
D (Drive) can be used when towing a trailer, carrying a
heavy load, driving on steep hills, or for off-road driving.
You might want to shift the transmission to a lower gear
selection if the transmission shifts too often.
Downshifting the transmission in slippery road
conditions could result in skidding. See Skidding under
Loss of Control on page 5‑10.
The vehicle has a shift stabilization feature that
adjusts the transmission shifting to the current driving
conditions in order to reduce rapid upshifts and
downshifts. This shift stabilization feature is designed to
determine, before making an upshift, if the engine is
able to maintain vehicle speed by analyzing things such
as vehicle speed, throttle position, and vehicle load.
3-30
Page 174 of 630

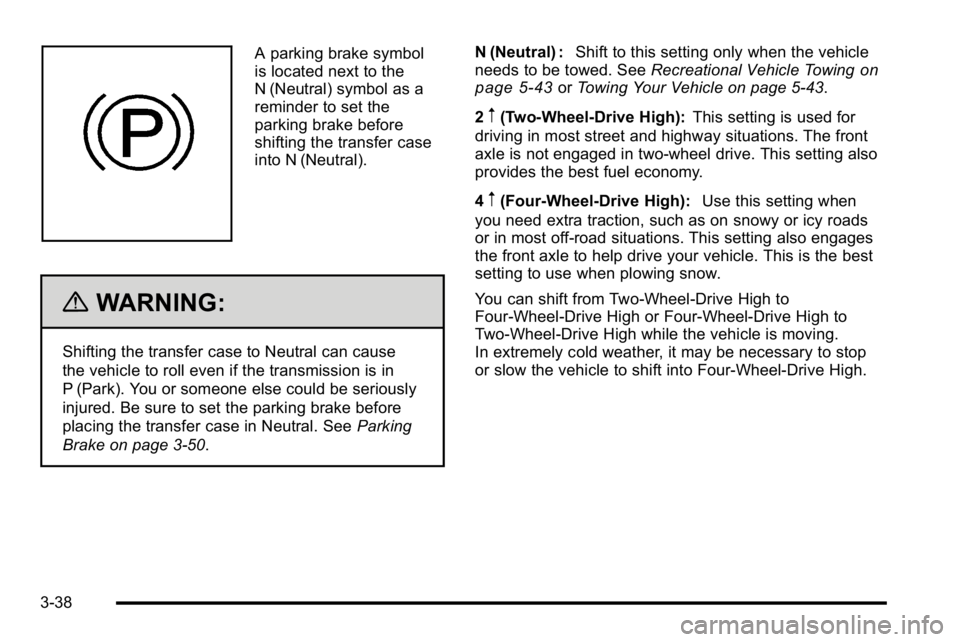
A parking brake symbol
is located next to the
N (Neutral) symbol as a
reminder to set the
parking brake before
shifting the transfer case
into N (Neutral).
{WARNING:
Shifting the transfer case to Neutral can cause
the vehicle to roll even if the transmission is in
P (Park). You or someone else could be seriously
injured. Be sure to set the parking brake before
placing the transfer case in Neutral. SeeParking
Brake on page 3‑50. N (Neutral) :
Shift to this setting only when the vehicle
needs to be towed. See Recreational Vehicle Towing
on
page 5‑43or Towing Your Vehicle on page 5‑43.
2
m(Two-Wheel-Drive High): This setting is used for
driving in most street and highway situations. The front
axle is not engaged in two-wheel drive. This setting also
provides the best fuel economy.
4
m(Four-Wheel-Drive High): Use this setting when
you need extra traction, such as on snowy or icy roads
or in most off-road situations. This setting also engages
the front axle to help drive your vehicle. This is the best
setting to use when plowing snow.
You can shift from Two-Wheel-Drive High to
Four-Wheel-Drive High or Four-Wheel-Drive High to
Two-Wheel-Drive High while the vehicle is moving.
In extremely cold weather, it may be necessary to stop
or slow the vehicle to shift into Four-Wheel-Drive High.
3-38
Page 175 of 630

When Using the Manual Transfer Case
.Shifting should be made using quick motions.
Shifting slowly may make it more difficult to shift.
.You may notice that it is harder to shift when the
vehicle is cold. After the vehicle warms up the
shifting will return to normal.
.While in Four-Wheel High or Four-Wheel-Drive
Low you may experience reduced fuel economy.
.Avoid driving in Four-Wheel Drive on clean, dry
pavement. It may cause your tires to wear faster,
make the transfer case harder to shift, and run
noisier.
.If the transfer case shifter is in the N (Neutral)
position and you have difficulty reaching the
selected transfer case mode, with the engine
running, shift the transmission momentarily to drive
and then back to N (Neutral). This will realign the
gear teeth in the transfer case and allow you to
complete the shift.
Shifting from Two-Wheel-Drive High to
Four-Wheel-Drive High
.Shifts between Two-Wheel-Drive High and
Four-Wheel-Drive High can be made at any
vehicle speed.
.Shift the transfer case lever in one continuous
motion into either the Four-Wheel-Drive High or
Two-Wheel-Drive High position.
.In extremely cold weather, it may be necessary
to slow or stop the vehicle to shift into
Four-Wheel-Drive High until the vehicle has
warmed up.
.While in Four-Wheel-Drive High, the vehicle can be
driven at any posted legal speed limit.
3-39
Page 177 of 630

Electronic Transfer Case
The transfer case knob
is located next to the
steering column.
Use the dial to shift into and out of four-wheel drive.
Recommended Transfer Case Settings
Driving Conditions Transfer Case Settings
2m 4m4n N
Normal YES
Severe YES
Extreme YES
Vehicle in Tow* YES
*See Recreational Vehicle Towing
on page 5‑43or
Towing Your Vehicle on page 5‑43
You can choose among four driving settings:
Indicator lights in the dial show which setting you are in.
The indicator lights will come on briefly when you
turn on the ignition and one will stay on. If the lights
do not come on, you should take the vehicle to your
dealer/retailer for service. An indicator light flashes
while shifting the transfer case and remains illuminated
when the shift is complete. If for some reason the
transfer case cannot make a requested shift, it will
return to the last chosen setting.
2
m(Two-Wheel-Drive High): This setting is used for
driving in most street and highway situations. The front
axle is not engaged in Two-Wheel Drive. This setting
also provides the best fuel economy.
3-41
Page 182 of 630

Automatic Transfer Case
The transfer case knob
is located next to the
steering column.
Use the dial to shift into and out of Four-Wheel Drive.
You can choose among five driving settings:
Indicator lights in the dial show which setting you are in.
The indicator lights will come on briefly when you turn
on the ignition and one will stay on. If the lights do not
come on, you should take the vehicle to your dealer/
retailer for service. An indicator light will flash while
shifting the transfer case. It will remain illuminated when
the shift is complete. If for some reason the transfer
case cannot make a requested shift, it will return to the
last chosen setting. 2
m(Two-Wheel-Drive High):
This setting is used for
driving in most street and highway situations. The front
axle is not engaged in Two-Wheel Drive. This setting
also provides the best fuel economy.
AUTO (Automatic Four-Wheel Drive) : This setting is
ideal for use when road surface traction conditions are
variable. When driving the vehicle in AUTO, the front
axle is engaged, but the vehicle's power is sent only to
the front and rear wheels automatically based on driving
conditions. Driving in this mode results in slightly lower
fuel economy than Two-Wheel-Drive High.
4
m(Four-Wheel-Drive High): Use the
Four-Wheel-Drive High position when extra traction is
needed, such as on snowy or icy roads or in most
off-road situations. This setting also engages the front
axle to help drive the vehicle. This is the best setting to
use when plowing snow.
4
n(Four-Wheel-Drive Low): This setting also engages
the front axle and delivers extra torque. You may never
need this setting. It sends maximum power to all four
wheels. You might choose Four-Wheel-Drive Low if you
are driving off-road in deep sand, deep mud, deep
snow, and while climbing or descending steep hills.
3-46
Page 220 of 630

Section 4 Instrument Panel
Tire Pressure Light . . . . . . . . . . . . . . . . . . . . . . . . . . . . 4-42
Malfunction Indicator Lamp . . . . . . . . . . . . . . . . . . . . 4-42
Oil Pressure Gage . . . . . . . . . . . . . . . . . . . . . . . . . . . . . 4-46
Oil Pressure Light . . . . . . . . . . . . . . . . . . . . . . . . . . . . . 4-47
Security Light . . . . . . . . . . . . . . . . . . . . . . . . . . . . . . . . . . 4-48
Fog Lamp Light . . . . . . . . . . . . . . . . . . . . . . . . . . . . . . . . 4-48
Cruise Control Light . . . . . . . . . . . . . . . . . . . . . . . . . . . 4-48
Highbeam On Light . . . . . . . . . . . . . . . . . . . . . . . . . . . . 4-48
Four-Wheel-Drive Light . . . . . . . . . . . . . . . . . . . . . . . . 4-49
Tow/Haul Mode Light . . . . . . . . . . . . . . . . . . . . . . . . . . 4-49
Fuel Gage . . . . . . . . . . . . . . . . . . . . . . . . . . . . . . . . . . . . . 4-49
Low Fuel Warning Light . . . . . . . . . . . . . . . . . . . . . . . . 4-50
Driver Information Center (DIC) . . . . . . . . . . . . . . . . . .4-51
DIC Operation and Displays (With DIC Buttons) . . . . . . . . . . . . . . . . . . . . . . . . . . 4-51
DIC Operation and Displays (Without DIC Buttons) . . . . . . . . . . . . . . . . . . . . . . . 4-58
DIC Compass . . . . . . . . . . . . . . . . . . . . . . . . . . . . . . . . . . 4-62
DIC Warnings and Messages . . . . . . . . . . . . . . . . . . 4-65
DIC Vehicle Customization (With DIC Buttons) . . . . . . . . . . . . . . . . . . . . . . . . . . 4-75 Audio System(s)
. . . . . . . . . . . . . . . . . . . . . . . . . . . . . . . . . . 4-84
Setting the Clock . . . . . . . . . . . . . . . . . . . . . . . . . . . . . . 4-84
Radio(s) . . . . . . . . . . . . . . . . . . . . . . . . . . . . . . . . . . . . . . . 4-87
Using an MP3 (Radios with CD) . . . . . . . . . . . . . . 4-107
Using an MP3 (Radios with CD and DVD) . . . . 4-114
XM Radio Messages . . . . . . . . . . . . . . . . . . . . . . . . . 4-122
Navigation/Radio System . . . . . . . . . . . . . . . . . . . . . 4-123
Bluetooth
®. . . . . . . . . . . . . . . . . . . . . . . . . . . . . . . . . . . . 4-123
Rear Seat Entertainment (RSE) System . . . . . . 4-134
Rear Seat Audio (RSA) . . . . . . . . . . . . . . . . . . . . . . . 4-143
Theft-Deterrent Feature . . . . . . . . . . . . . . . . . . . . . . 4-145
Audio Steering Wheel Controls . . . . . . . . . . . . . . . 4-145
Radio Reception . . . . . . . . . . . . . . . . . . . . . . . . . . . . . . 4-148
Fixed Mast Antenna . . . . . . . . . . . . . . . . . . . . . . . . . . 4-149
XM™ Satellite Radio Antenna System . . . . . . . . 4-149
4-2