2010 GMC SIERRA DENALI instrument panel
[x] Cancel search: instrument panelPage 369 of 550
Following Distance
Stay at least twice as far behind the vehicle ahead as
you would when driving the vehicle without a trailer.
This can help to avoid heavy braking and sudden turns.
Passing
More passing distance is needed when towing a trailer.
The combination will not accelerate as quickly and is
longer so it is necessary to go much farther beyond the
passed vehicle before returning to the lane.
Backing Up
Hold the bottom of the steering wheel with one hand.
Then, to move the trailer to the left, move that hand to
the left. To move the trailer to the right, move your hand
to the right. Always back up slowly and, if possible,
have someone guide you.
Making Turns
Notice:Making very sharp turns while trailering
could cause the trailer to come in contact with the
vehicle. The vehicle could be damaged. Avoid
making very sharp turns while trailering.
When turning with a trailer, make wider turns than
normal. Do this so the trailer will not strike soft
shoulders, curbs, road signs, trees or other objects.
Avoid jerky or sudden maneuvers. Signal well in
advance.
If the trailer turn signal bulbs burn out, the arrows on the
instrument panel will still flash for turns. It is important to
check occasionally to be sure the trailer bulbs are still
working.
5-57
Page 373 of 550
Electric Brake Control Wiring
Provisions
These wiring provisions are included with the vehicle as
part of the trailer wiring package. These provisions are
for an electric brake controller. The instrument panel
contains blunt cut wires near the data link connector for
the trailer brake controller. The harness contains the
following wires:
.Dark Blue: Brake Signal to Trailer Connector
.Red/Black: Battery
.Light Blue/White: Brake Switch
.White: Ground
It should be installed by your dealer/retailer or a
qualified service center.
If the vehicle is equipped with an ITBC, the blunt cuts
exist, but are not connected further in the harness. If an
aftermarket trailer brake controller is installed, the ITBC
must be disconnected. Do not power both ITBC and
aftermarket controllers to control the trailer brakes at the
same time.
Trailer Recommendations
Subtract the hitch loads from the Cargo Weight Rating
(CWR). CWR is the maximum weight of the load the
vehicle can carry. It does not include the weight of the
people inside, but you can figure about 150 lbs. (68 kg)
for each passenger. The total cargo load must not be
more than the vehicles CWR.
Weigh the vehicle with the trailer attached, so the
GVWR or GAWR are not exceeded. If using a
weight-distributing hitch, weigh the vehicle without the
spring bars in place.
The best performance is obtained by correctly
spreading out the weight of the load and choosing the
correct hitch and trailer brakes.
For more information see Towing a Trailer
on
page 5‑42.
5-61
Page 376 of 550
Section 6 Service and Appearance Care
Tires. . . . . . . . . . . . . . . . . . . . . . . . . . . . . . . . . . . . . . . . . . . . . . . 6-62
Tire Sidewall Labeling . . . . . . . . . . . . . . . . . . . . . . . . . 6-63
Tire Terminology and Definitions . . . . . . . . . . . . . . . 6-68
Inflation - Tire Pressure . . . . . . . . . . . . . . . . . . . . . . . . 6-71
High-Speed Operation . . . . . . . . . . . . . . . . . . . . . . . . . 6-72
Tire Pressure Monitor System . . . . . . . . . . . . . . . . . 6-73
Tire Pressure Monitor Operation . . . . . . . . . . . . . . . 6-74
Tire Inspection and Rotation . . . . . . . . . . . . . . . . . . . 6-78
When It Is Time for New Tires . . . . . . . . . . . . . . . . . 6-79
Buying New Tires . . . . . . . . . . . . . . . . . . . . . . . . . . . . . . 6-80
Different Size Tires and Wheels . . . . . . . . . . . . . . . 6-82
Uniform Tire Quality Grading . . . . . . . . . . . . . . . . . . . 6-82
Wheel Alignment and Tire Balance . . . . . . . . . . . . 6-84
Wheel Replacement . . . . . . . . . . . . . . . . . . . . . . . . . . . 6-84
Tire Chains . . . . . . . . . . . . . . . . . . . . . . . . . . . . . . . . . . . . 6-85
If a Tire Goes Flat . . . . . . . . . . . . . . . . . . . . . . . . . . . . . 6-85
Changing a Flat Tire . . . . . . . . . . . . . . . . . . . . . . . . . . . 6-86
Removing the Spare Tire and Tools . . . . . . . . . . . . 6-88
Removing the Flat Tire and Installing the Spare Tire . . . . . . . . . . . . . . . . . . . . . . . . . . . . . . . . . . . 6-92
Secondary Latch System . . . . . . . . . . . . . . . . . . . . . . 6-97
Storing a Flat or Spare Tire and Tools . . . . . . . . 6-100
Spare Tire . . . . . . . . . . . . . . . . . . . . . . . . . . . . . . . . . . . . 6-104 Appearance Care
. . . . . . . . . . . . . . . . . . . . . . . . . . . . . . . . 6-105
Interior Cleaning . . . . . . . . . . . . . . . . . . . . . . . . . . . . . 6-105
Fabric/Carpet . . . . . . . . . . . . . . . . . . . . . . . . . . . . . . . . . 6-106
Leather . . . . . . . . . . . . . . . . . . . . . . . . . . . . . . . . . . . . . . . 6-107
Instrument Panel, Vinyl, and Other Plastic Surfaces . . . . . . . . . . . . . . . . . . . . . . . . . . . . . . . . . . . 6-107
Wood Panels . . . . . . . . . . . . . . . . . . . . . . . . . . . . . . . . . 6-108
Care of Safety Belts . . . . . . . . . . . . . . . . . . . . . . . . . . 6-108
Weatherstrips . . . . . . . . . . . . . . . . . . . . . . . . . . . . . . . . 6-108
Washing Your Vehicle . . . . . . . . . . . . . . . . . . . . . . . . 6-108
Cleaning Exterior Lamps/Lenses . . . . . . . . . . . . . 6-109
Finish Care . . . . . . . . . . . . . . . . . . . . . . . . . . . . . . . . . . . 6-109
Windshield and Wiper Blades . . . . . . . . . . . . . . . . . 6-110
Aluminum or Chrome-Plated Wheels and Trim . . . . . . . . . . . . . . . . . . . . . . . . . . . . . . . . . . . . 6-110
Tires . . . . . . . . . . . . . . . . . . . . . . . . . . . . . . . . . . . . . . . . . . 6-111
Sheet Metal Damage . . . . . . . . . . . . . . . . . . . . . . . . . 6-111
Finish Damage . . . . . . . . . . . . . . . . . . . . . . . . . . . . . . . 6-112
Underbody Maintenance . . . . . . . . . . . . . . . . . . . . . . 6-112
Chemical Paint Spotting . . . . . . . . . . . . . . . . . . . . . . 6-112
6-2
Page 377 of 550
Section 6 Service and Appearance Care
Vehicle Identification. . . . . . . . . . . . . . . . . . . . . . . . . . . . 6-113
Vehicle Identification Number (VIN) . . . . . . . . . . . 6-113
Service Parts Identification Label . . . . . . . . . . . . . 6-113
Electrical System . . . . . . . . . . . . . . . . . . . . . . . . . . . . . . . . 6-114
Add-On Electrical Equipment . . . . . . . . . . . . . . . . . 6-114
Windshield Wiper Fuses . . . . . . . . . . . . . . . . . . . . . . 6-114 Power Windows and Other Power Options . . . 6-114
Fuses and Circuit Breakers . . . . . . . . . . . . . . . . . . . 6-114
Instrument Panel Fuse Block . . . . . . . . . . . . . . . . . 6-115
Center Instrument Panel Fuse Block . . . . . . . . . . 6-117
Underhood Fuse Block . . . . . . . . . . . . . . . . . . . . . . . 6-118
Capacities and Specifications . . . . . . . . . . . . . . . . . .6-122
6-3
Page 408 of 550
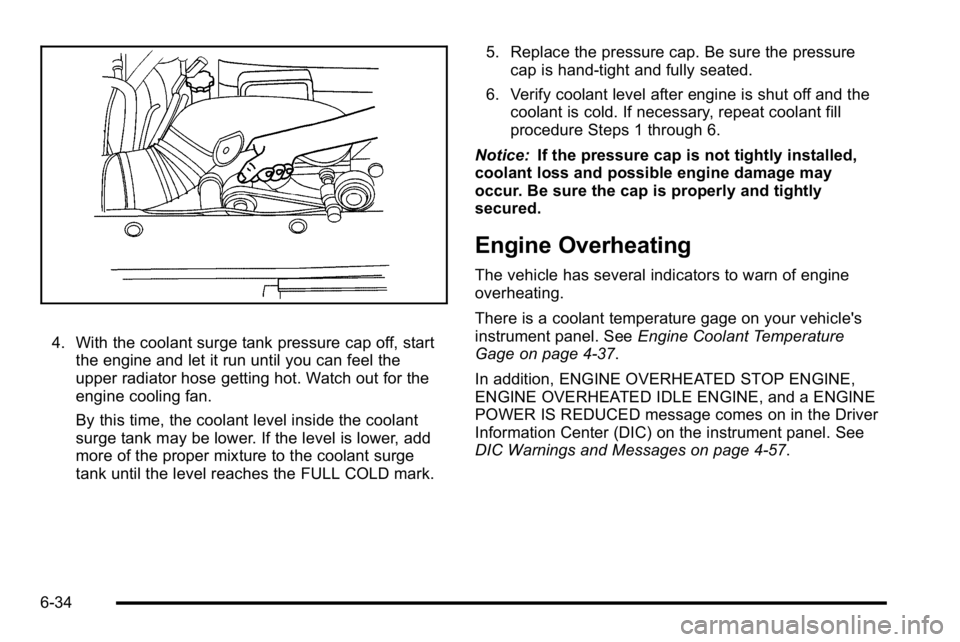
4. With the coolant surge tank pressure cap off, startthe engine and let it run until you can feel the
upper radiator hose getting hot. Watch out for the
engine cooling fan.
By this time, the coolant level inside the coolant
surge tank may be lower. If the level is lower, add
more of the proper mixture to the coolant surge
tank until the level reaches the FULL COLD mark. 5. Replace the pressure cap. Be sure the pressure
cap is hand-tight and fully seated.
6. Verify coolant level after engine is shut off and the coolant is cold. If necessary, repeat coolant fill
procedure Steps 1 through 6.
Notice: If the pressure cap is not tightly installed,
coolant loss and possible engine damage may
occur. Be sure the cap is properly and tightly
secured.
Engine Overheating
The vehicle has several indicators to warn of engine
overheating.
There is a coolant temperature gage on your vehicle's
instrument panel. See Engine Coolant Temperature
Gage on page 4‑37.
In addition, ENGINE OVERHEATED STOP ENGINE,
ENGINE OVERHEATED IDLE ENGINE, and a ENGINE
POWER IS REDUCED message comes on in the Driver
Information Center (DIC) on the instrument panel. See
DIC Warnings and Messages on page 4‑57.
6-34
Page 448 of 550

When the malfunction indicator is illuminated, the
system may not be able to detect or signal low tire
pressure as intended. TPMS malfunctions may occur
for a variety of reasons, including the installation of
replacement or alternate tires or wheels on the vehicle
that prevent the TPMS from functioning properly.
Always check the TPMS malfunction telltale after
replacing one or more tires or wheels on your vehicle to
ensure that the replacement or alternate tires and
wheels allow the TPMS to continue to function properly.
SeeTire Pressure Monitor Operation
on page 6‑74for
additional information.
Federal Communications Commission
(FCC) and Industry and Science Canada
See Radio Frequency Statementon page 8‑20for
information regarding Part 15 of the Federal
Communications Commission (FCC) Rules and
RSS-210/211 of Industry and Science Canada.
Tire Pressure Monitor Operation
This vehicle may have a Tire Pressure Monitor System
(TPMS). The TPMS is designed to warn the driver when
a low tire pressure condition exists. TPMS sensors are
mounted onto each tire and wheel assembly, excluding
the spare tire and wheel assembly. The TPMS sensors
monitor the air pressure in the vehicle's tires and
transmits the tire pressure readings to a receiver
located in the vehicle.
When a low tire pressure
condition is detected, the
TPMS illuminates the low
tire pressure warning light
located on the instrument
panel cluster.
6-74
Page 481 of 550
Leather
A soft cloth dampened with water can be used to
remove dust. If a more thorough cleaning is necessary,
a soft cloth dampened with a mild soap solution can be
used. Allow the leather to dry naturally. Do not use heat
to dry. Never use steam to clean leather. Never use
spot lifters or spot removers on leather. Many
commercial leather cleaners and coatings that are sold
to preserve and protect leather may permanently
change the appearance and feel of the leather and are
not recommended. Do not use silicone or wax-based
products, or those containing organic solvents to clean
the vehicle's interior because they can alter the
appearance by increasing the gloss in a non-uniform
manner. Never use shoe polish on leather.
Instrument Panel, Vinyl, and Other
Plastic Surfaces
A soft cloth dampened with water may be used to
remove dust. If a more thorough cleaning is necessary,
a clean soft cloth dampened with a mild soap solution
can be used to gently remove dust and dirt. Never use
spot lifters or removers on plastic surfaces. Many
commercial cleaners and coatings that are sold to
preserve and protect soft plastic surfaces may
permanently change the appearance and feel of the
interior and are not recommended. Do not use silicone
or wax-based products, or those containing organic
solvents to clean the vehicle's interior because they can
alter the appearance by increasing the gloss in a
non-uniform manner.
Some commercial products may increase gloss on the
instrument panel. The increase in gloss may cause
annoying reflections in the windshield and even make it
difficult to see through the windshield under certain
conditions.
6-107
Page 487 of 550
Vehicle Identification
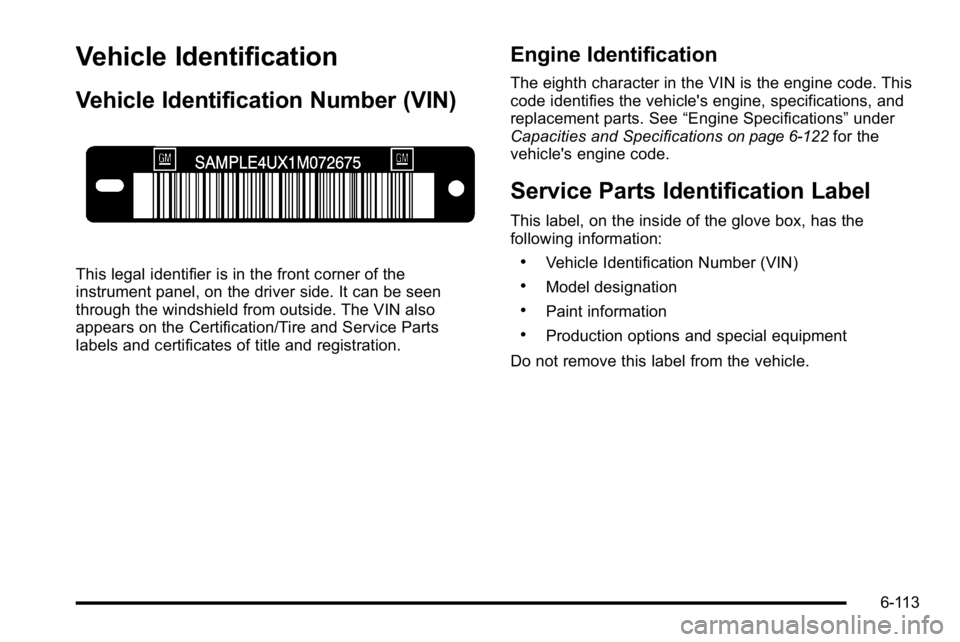
Vehicle Identification Number (VIN)
This legal identifier is in the front corner of the
instrument panel, on the driver side. It can be seen
through the windshield from outside. The VIN also
appears on the Certification/Tire and Service Parts
labels and certificates of title and registration.
Engine Identification
The eighth character in the VIN is the engine code. This
code identifies the vehicle's engine, specifications, and
replacement parts. See“Engine Specifications”under
Capacities and Specifications
on page 6‑122for the
vehicle's engine code.
Service Parts Identification Label
This label, on the inside of the glove box, has the
following information:
.Vehicle Identification Number (VIN)
.Model designation
.Paint information
.Production options and special equipment
Do not remove this label from the vehicle.
6-113