2010 GMC SIERRA DENALI instrument panel
[x] Cancel search: instrument panelPage 130 of 550

PASS-Key®III+ Electronic
Immobilizer
See Radio Frequency Statementon page 8‑20for
information regarding Part 15 of the Federal
Communications Commission (FCC) Rules and
RSS-210/211 of Industry and Science Canada.
PASS-Key®III+ Electronic
Immobilizer Operation
Your vehicle has PASS-Key®III+ (Personalized
Automotive Security System) theft-deterrent system.
PASS-Key
®III+ is a passive theft-deterrent system.
The system is automatically armed when the key is
removed from the ignition.
The system is automatically disarmed when the key is
turned to ON/RUN, ACC/ACCESSORY or START from
the LOCK/OFF position. You do not have to manually arm or disarm the system.
The security light will come on if there is a problem with
arming or disarming the theft-deterrent system.
When the PASS-Key
®III+ system senses that someone
is using the wrong key, it prevents the vehicle from
starting. Anyone using a trial-and-error method to start
the vehicle will be discouraged because of the high
number of electrical key codes.
If the engine does not start and the security light on the
instrument panel cluster comes on when trying to start
the vehicle, there may be a problem with your
theft-deterrent system. Turn the ignition off and try
again.
If the engine still does not start, and the key appears to
be undamaged, try another ignition key. At this time,
you may also want to check the fuse, see Fuses and
Circuit Breakers
on page 6‑114. If the engine still does
not start with the other key, your vehicle needs service.
If your vehicle does start, the first key may be faulty.
See your dealer/retailer who can service the
PASS-Key
®III+ to have a new key made. In an
emergency, contact Roadside Assistance.
3-20
Page 134 of 550
C (ON/RUN) :This position can be used to operate the
electrical accessories and to display some instrument
panel cluster warning and indicator lights. The switch
stays in this position when the engine is running. The
transmission is also unlocked in this position on
automatic transmission vehicles.
If you leave the key in the ACC/ACCESSORY or ON/
RUN position with the engine off, the battery could be
drained. You may not be able to start the vehicle if the
battery is allowed to drain for an extended period
of time.
D (START) : This is the position that starts the engine.
When the engine starts, release the key. The ignition
switch returns to ON/RUN for driving.
A warning tone will sound when the driver door is
opened, the ignition is in ACC/ACCESSORY or LOCK/
OFF and the key is in the ignition.Retained Accessory Power (RAP)
The following vehicle accessories can be used for up to
10 minutes after the engine is turned off:
.Audio System
.Power Windows
.OnStar®System (if equipped)
.Sunroof (if equipped)
These features work when the key is in ON/RUN or
ACC/ACCESSORY. Once the key is turned from ON/
RUN to LOCK/OFF, the windows and sunroof continue
to work up to 10 minutes until any door is opened. The
radio continues to work for up to 10 minutes or until the
driver door is opened.
Starting the Engine
Move the shift lever to P (Park) or N (Neutral). The
engine will not start in any other position. To restart the
engine when the vehicle is already moving, use
N (Neutral) only.
Notice: Do not try to shift to P (Park) if the vehicle is
moving. If you do, you could damage the
transmission. Shift to P (Park) only when the vehicle
is stopped.
3-24
Page 136 of 550
Adjustable Throttle and Brake Pedal
On vehicles with this feature, you can change the
position of the throttle and brake pedals.
No adjustment to the pedals can be made when the
vehicle is in R (Reverse) or while using the cruise
control.
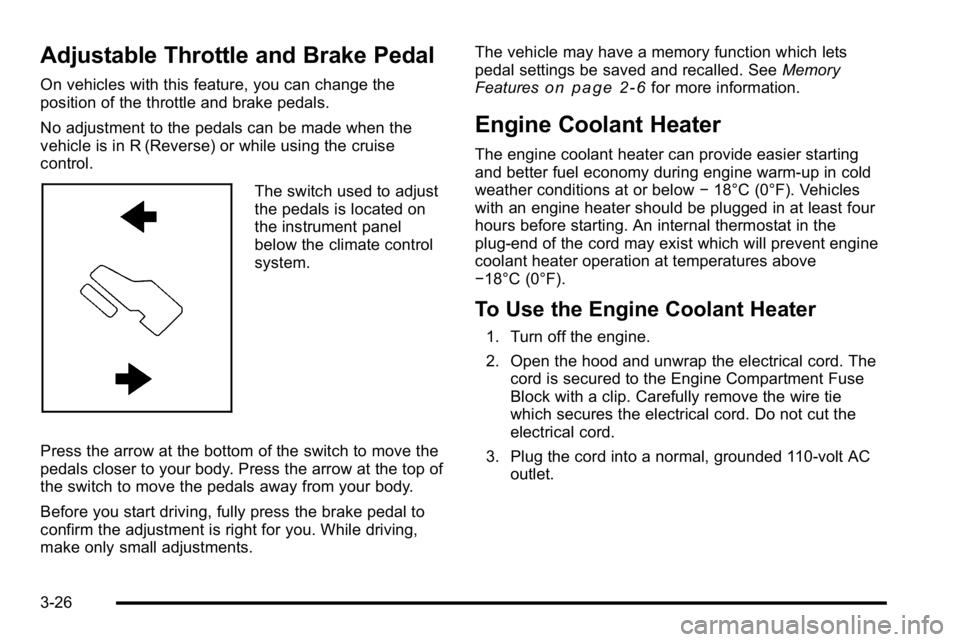
The switch used to adjust
the pedals is located on
the instrument panel
below the climate control
system.
Press the arrow at the bottom of the switch to move the
pedals closer to your body. Press the arrow at the top of
the switch to move the pedals away from your body.
Before you start driving, fully press the brake pedal to
confirm the adjustment is right for you. While driving,
make only small adjustments. The vehicle may have a memory function which lets
pedal settings be saved and recalled. See
Memory
Features
on page 2‑6for more information.
Engine Coolant Heater
The engine coolant heater can provide easier starting
and better fuel economy during engine warm-up in cold
weather conditions at or below −18°C (0°F). Vehicles
with an engine heater should be plugged in at least four
hours before starting. An internal thermostat in the
plug-end of the cord may exist which will prevent engine
coolant heater operation at temperatures above
−18°C (0°F).
To Use the Engine Coolant Heater
1. Turn off the engine.
2. Open the hood and unwrap the electrical cord. The cord is secured to the Engine Compartment Fuse
Block with a clip. Carefully remove the wire tie
which secures the electrical cord. Do not cut the
electrical cord.
3. Plug the cord into a normal, grounded 110-volt AC outlet.
3-26
Page 138 of 550
Automatic Transmission Operation
The vehicle has a Hydra-Matic®6L80 automatic
transmission, and has an electronic shift position
indicator within the instrument panel cluster. The
electronic shift position indicator displays when the shift
lever is moved out of P (Park).
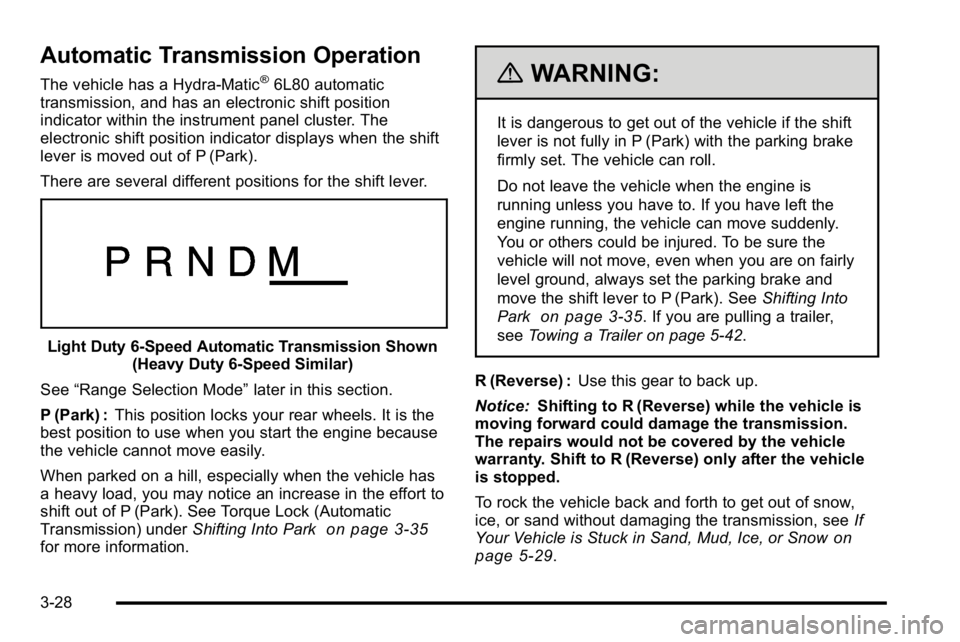
There are several different positions for the shift lever.
Light Duty 6‐Speed Automatic Transmission Shown (Heavy Duty 6‐Speed Similar)
See “Range Selection Mode” later in this section.
P (Park) : This position locks your rear wheels. It is the
best position to use when you start the engine because
the vehicle cannot move easily.
When parked on a hill, especially when the vehicle has
a heavy load, you may notice an increase in the effort to
shift out of P (Park). See Torque Lock (Automatic
Transmission) under Shifting Into Park
on page 3‑35for more information.
{WARNING:
It is dangerous to get out of the vehicle if the shift
lever is not fully in P (Park) with the parking brake
firmly set. The vehicle can roll.
Do not leave the vehicle when the engine is
running unless you have to. If you have left the
engine running, the vehicle can move suddenly.
You or others could be injured. To be sure the
vehicle will not move, even when you are on fairly
level ground, always set the parking brake and
move the shift lever to P (Park). See Shifting Into
Park
on page 3‑35. If you are pulling a trailer,
see Towing a Trailer on page 5‑42.
R (Reverse) : Use this gear to back up.
Notice: Shifting to R (Reverse) while the vehicle is
moving forward could damage the transmission.
The repairs would not be covered by the vehicle
warranty. Shift to R (Reverse) only after the vehicle
is stopped.
To rock the vehicle back and forth to get out of snow,
ice, or sand without damaging the transmission, see If
Your Vehicle is Stuck in Sand, Mud, Ice, or Snow
on
page 5‑29.
3-28
Page 142 of 550
Tow/Haul Mode
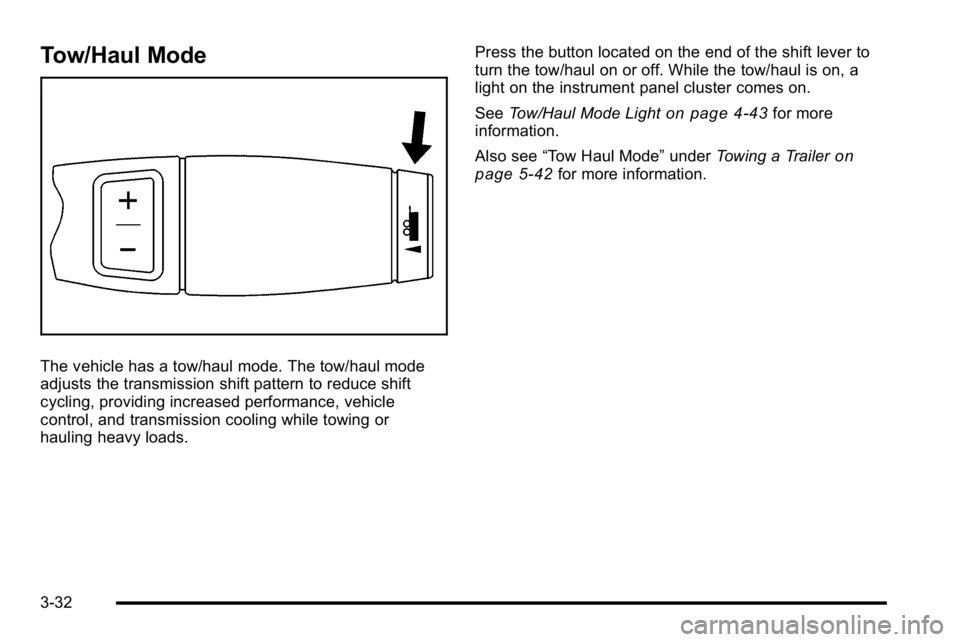
The vehicle has a tow/haul mode. The tow/haul mode
adjusts the transmission shift pattern to reduce shift
cycling, providing increased performance, vehicle
control, and transmission cooling while towing or
hauling heavy loads.Press the button located on the end of the shift lever to
turn the tow/haul on or off. While the tow/haul is on, a
light on the instrument panel cluster comes on.
See
Tow/Haul Mode Light
on page 4‑43for more
information.
Also see “Tow Haul Mode” underTowing a Trailer
on
page 5‑42for more information.
3-32
Page 168 of 550
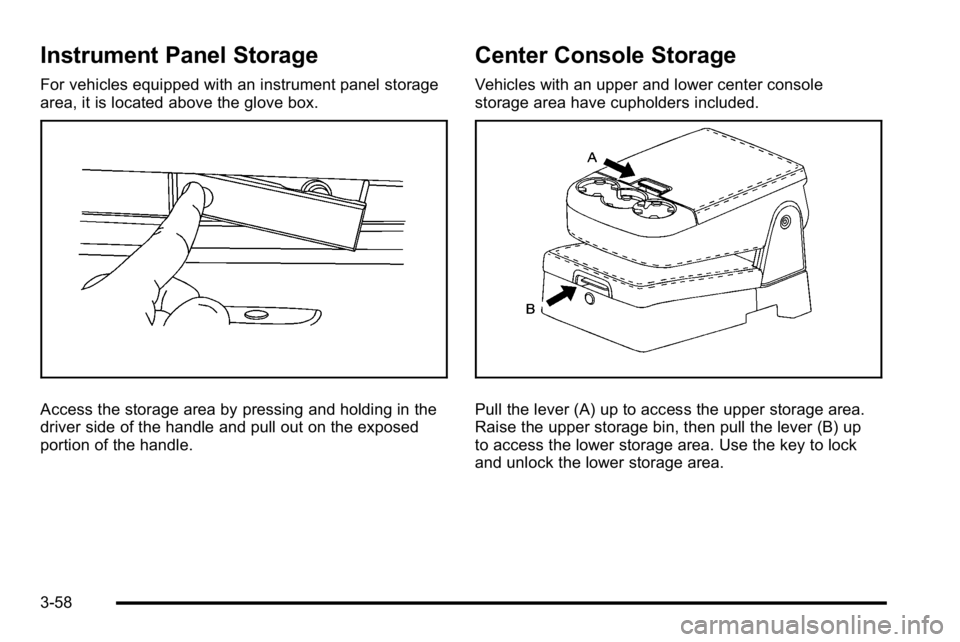
Instrument Panel Storage
For vehicles equipped with an instrument panel storage
area, it is located above the glove box.
Access the storage area by pressing and holding in the
driver side of the handle and pull out on the exposed
portion of the handle.
Center Console Storage
Vehicles with an upper and lower center console
storage area have cupholders included.
Pull the lever (A) up to access the upper storage area.
Raise the upper storage bin, then pull the lever (B) up
to access the lower storage area. Use the key to lock
and unlock the lower storage area.
3-58
Page 173 of 550
Section 4 Instrument Panel
Instrument Panel Overview. . . . . . . . . . . . . . . . . . . . . . . .4-3
Hazard Warning Flashers . . . . . . . . . . . . . . . . . . . . . . . 4-3
Horn . . . . . . . . . . . . . . . . . . . . . . . . . . . . . . . . . . . . . . . . . . . . 4-3
Tilt Wheel . . . . . . . . . . . . . . . . . . . . . . . . . . . . . . . . . . . . . . . 4-3
Turn Signal/Multifunction Lever . . . . . . . . . . . . . . . . . . 4-4
Turn and Lane-Change Signals . . . . . . . . . . . . . . . . . 4-4
Headlamp High/Low-Beam Changer . . . . . . . . . . . . 4-5
Flash-to-Pass . . . . . . . . . . . . . . . . . . . . . . . . . . . . . . . . . . . 4-5
Windshield Wipers . . . . . . . . . . . . . . . . . . . . . . . . . . . . . . 4-6
Windshield Washer . . . . . . . . . . . . . . . . . . . . . . . . . . . . . 4-6
Cruise Control . . . . . . . . . . . . . . . . . . . . . . . . . . . . . . . . . . 4-7
Exterior Lamps . . . . . . . . . . . . . . . . . . . . . . . . . . . . . . . . 4-10
Headlamps on Reminder . . . . . . . . . . . . . . . . . . . . . . . 4-11
Daytime Running Lamps (DRL) . . . . . . . . . . . . . . . . 4-11
Automatic Headlamp System . . . . . . . . . . . . . . . . . . 4-12
Puddle Lamps . . . . . . . . . . . . . . . . . . . . . . . . . . . . . . . . . 4-13
Fog Lamps . . . . . . . . . . . . . . . . . . . . . . . . . . . . . . . . . . . . 4-13
Instrument Panel Brightness . . . . . . . . . . . . . . . . . . . 4-13
Dome Lamps . . . . . . . . . . . . . . . . . . . . . . . . . . . . . . . . . . 4-13
Dome Lamp Override . . . . . . . . . . . . . . . . . . . . . . . . . . 4-14
Entry Lighting . . . . . . . . . . . . . . . . . . . . . . . . . . . . . . . . . . 4-14
Exit Lighting . . . . . . . . . . . . . . . . . . . . . . . . . . . . . . . . . . . 4-14
Reading Lamps . . . . . . . . . . . . . . . . . . . . . . . . . . . . . . . . 4-14
Cargo Lamp . . . . . . . . . . . . . . . . . . . . . . . . . . . . . . . . . . . 4-14
Electric Power Management . . . . . . . . . . . . . . . . . . . 4-15 Battery Run-Down Protection . . . . . . . . . . . . . . . . . . 4-15
Accessory Power Outlet(s) . . . . . . . . . . . . . . . . . . . . . 4-16
Ashtray(s) and Cigarette Lighter . . . . . . . . . . . . . . . 4-17
Climate Controls . . . . . . . . . . . . . . . . . . . . . . . . . . . . . . . . . . 4-17
Climate Control System (With Air
Conditioning) . . . . . . . . . . . . . . . . . . . . . . . . . . . . . . . . 4-17
Climate Control System (With Heater Only) . . . . 4-20
Dual Automatic Climate Control System . . . . . . . 4-21
Outlet Adjustment . . . . . . . . . . . . . . . . . . . . . . . . . . . . . . 4-27
Warning Lights, Gages, and Indicators . . . . . . . . . .4-27
Instrument Panel Cluster . . . . . . . . . . . . . . . . . . . . . . . 4-28
Speedometer and Odometer . . . . . . . . . . . . . . . . . . . 4-29
Trip Odometer . . . . . . . . . . . . . . . . . . . . . . . . . . . . . . . . . 4-29
Tachometer . . . . . . . . . . . . . . . . . . . . . . . . . . . . . . . . . . . . 4-29
Safety Belt Reminders . . . . . . . . . . . . . . . . . . . . . . . . . 4-30
Airbag Readiness Light . . . . . . . . . . . . . . . . . . . . . . . . 4-31
Passenger Airbag Status Indicator . . . . . . . . . . . . . 4-32
Charging System Light . . . . . . . . . . . . . . . . . . . . . . . . 4-33
Voltmeter Gage . . . . . . . . . . . . . . . . . . . . . . . . . . . . . . . . 4-33
Brake System Warning Light . . . . . . . . . . . . . . . . . . . 4-34
Antilock Brake System (ABS) Warning Light . . . 4-36
StabiliTrak
®Indicator Light . . . . . . . . . . . . . . . . . . . . . 4-36
Engine Coolant Temperature Gage . . . . . . . . . . . . 4-37
Tire Pressure Light . . . . . . . . . . . . . . . . . . . . . . . . . . . . 4-37
4-1
Page 174 of 550

Section 4 Instrument Panel
Malfunction Indicator Lamp . . . . . . . . . . . . . . . . . . . . 4-38
Oil Pressure Gage . . . . . . . . . . . . . . . . . . . . . . . . . . . . . 4-40
Oil Pressure Light . . . . . . . . . . . . . . . . . . . . . . . . . . . . . 4-41
Security Light . . . . . . . . . . . . . . . . . . . . . . . . . . . . . . . . . . 4-42
Fog Lamp Light . . . . . . . . . . . . . . . . . . . . . . . . . . . . . . . . 4-42
Cruise Control Light . . . . . . . . . . . . . . . . . . . . . . . . . . . 4-42
Highbeam On Light . . . . . . . . . . . . . . . . . . . . . . . . . . . . 4-42
Tow/Haul Mode Light . . . . . . . . . . . . . . . . . . . . . . . . . . 4-43
Fuel Gage . . . . . . . . . . . . . . . . . . . . . . . . . . . . . . . . . . . . . 4-43
Driver Information Center (DIC) . . . . . . . . . . . . . . . . . .4-44
DIC Operation and Displays (Using Trip Odometer Reset Stem) . . . . . . . . . . . . . . . . . . . . . . 4-44
DIC Operation and Displays (Using DIC Buttons) . . . . . . . . . . . . . . . . . . . . . . . . . . . . . . . . . . . . . 4-48
DIC Compass . . . . . . . . . . . . . . . . . . . . . . . . . . . . . . . . . . 4-55
DIC Warnings and Messages . . . . . . . . . . . . . . . . . . 4-57
DIC Vehicle Customization (With DIC Buttons) . . . . . . . . . . . . . . . . . . . . . . . . . . . . . . . . . . . . . 4-67 Audio System(s)
. . . . . . . . . . . . . . . . . . . . . . . . . . . . . . . . . . 4-76
Setting the Clock . . . . . . . . . . . . . . . . . . . . . . . . . . . . . . 4-77
Radio(s) . . . . . . . . . . . . . . . . . . . . . . . . . . . . . . . . . . . . . . . 4-79
Using an MP3 (Radios with CD) . . . . . . . . . . . . . . . 4-99
Using an MP3 (Radios with CD and DVD) . . . . 4-106
XM Radio Messages . . . . . . . . . . . . . . . . . . . . . . . . . 4-114
Navigation/Radio System . . . . . . . . . . . . . . . . . . . . . 4-115
Bluetooth
®. . . . . . . . . . . . . . . . . . . . . . . . . . . . . . . . . . . . 4-115
Rear Seat Entertainment (RSE) System . . . . . . 4-126
Rear Seat Audio (RSA) . . . . . . . . . . . . . . . . . . . . . . . 4-135
Theft-Deterrent Feature . . . . . . . . . . . . . . . . . . . . . . 4-136
Audio Steering Wheel Controls . . . . . . . . . . . . . . . 4-137
Radio Reception . . . . . . . . . . . . . . . . . . . . . . . . . . . . . . 4-139
Fixed Mast Antenna . . . . . . . . . . . . . . . . . . . . . . . . . . 4-140
XM™ Satellite Radio Antenna System . . . . . . . . 4-140
4-2