2010 GMC SIERRA DENALI rear view mirror
[x] Cancel search: rear view mirrorPage 156 of 550

To turn the rear vision camera system on again, press
and hold
zuntil the left indicator light illuminates. The
rear vision camera system display is now enabled and
the display will appear in the mirror normally.
Vehicles With Navigation System
The rear vision camera system is designed to help the
driver when backing up by displaying a view of the area
behind the vehicle. When the driver shifts the vehicle
into R (Reverse), the video image automatically
appears on the navigation screen. Once the driver shifts
out of R (Reverse), the navigation screen will go back to
the last screen that had been displayed, after a delay.
Turning the Rear Vision Camera System
On or Off
To turn the rear vision camera system on or off:
1. Shift into P (Park).
2. Press the MENU button to enter the configure menu options, then press the MENU hard key to
select Display or touch the Display screen button.
3. Select the Rear Camera Options screen button. The Rear Camera Options screen will display.
4. Select the Video screen button. When the Videoscreen button is highlighted the RVC system is on.
The delay that is received after shifting out of
R (Reverse) is approximately 10 seconds. The delay
can be cancelled by performing one of the following:
.Pressing a hard key on the navigation system.
.Shifting in to P (Park).
.Reach a vehicle speed of 5 mph (8 km/h).
There is a message on the rear vision camera screen
that states “Check Surroundings for Safety”.
3-46
Page 160 of 550
When the System Does Not Seem To
Work Properly
The rear vision camera system might not work properly
or display a clear image if:
.The RVC is turned off. See“Turning the Rear
Camera System On or Off” earlier in this section.
.It is dark.
.The sun or the beam of headlights is shining
directly into the camera lens.
.Ice, snow, mud, or anything else builds up on the
camera lens. Clean the lens, rinse it with water,
and wipe it with a soft cloth.
.The back of the vehicle is in an accident, the
position and mounting angle of the camera can
change or the camera can be affected. Be sure to
have the camera and its position and mounting
angle checked at your dealer/retailer. The rear vision camera system display in the rearview
mirror may turn off or not appear as expected due to
one of the following conditions. If this occurs the left
indicator light on the mirror will flash.
.A slow flash may indicate a loss of video signal,
or no video signal present during the reverse cycle.
.A fast flash may indicate that the display has been
on for the maximum allowable time during a
reverse cycle, or the display has reached an Over
Temperature limit.
The fast flash conditions are used to protect the
video device from high temperature conditions.
Once conditions return to normal the device will
reset and the green indicator will stop flashing.
During any of these fault conditions, the display will be
blank and the indicator will continue to flash as long as
the vehicle is in R (Reverse) or until the conditions
return to normal.
Pressing and holding
zwhen the left indicator light is
flashing will turn off the video display along with the left
indicator light.
3-50
Page 171 of 550
To remove or install cargo tie-downs at the front of the
bed, slide the corner cap towards the center of the bed
to expose the rail notches. To remove the corner cap,
pull either edge away from the rail.
To remove the system, loosen the toggle bolts on each
rail until they can be removed from the bed of the truck.
To replace the system, place the toggle bolts and rails
into their original locations and tighten them to a torque
setting of 12.5 ft lbs (17Y).
If the system is removed to install a bed liner, make
sure there is no bed liner material in the installation
points.
Notice: If cargo is tied down using the horizontal
slots on the top of the pickup box, the box could be
damaged. Using the horizontal slots on the top of
the pickup box for tie-down locations may cause
damage to the pickup box and would not be
covered by the vehicle warranty. Only use the
tie-down loops if the vehicle does not have the
cargo management system.Sunroof
On vehicles with a power sliding sunroof, the ignition
needs to be turned to RUN, or the Retained Accessory
Power (RAP) must be activated to open or close the
sunroof. When RAP is active, the sunroof will work for
10 minutes after the ignition is turned off, or until the
driver's door is opened. See Retained Accessory Power
(RAP)
on page 3‑24for more information.
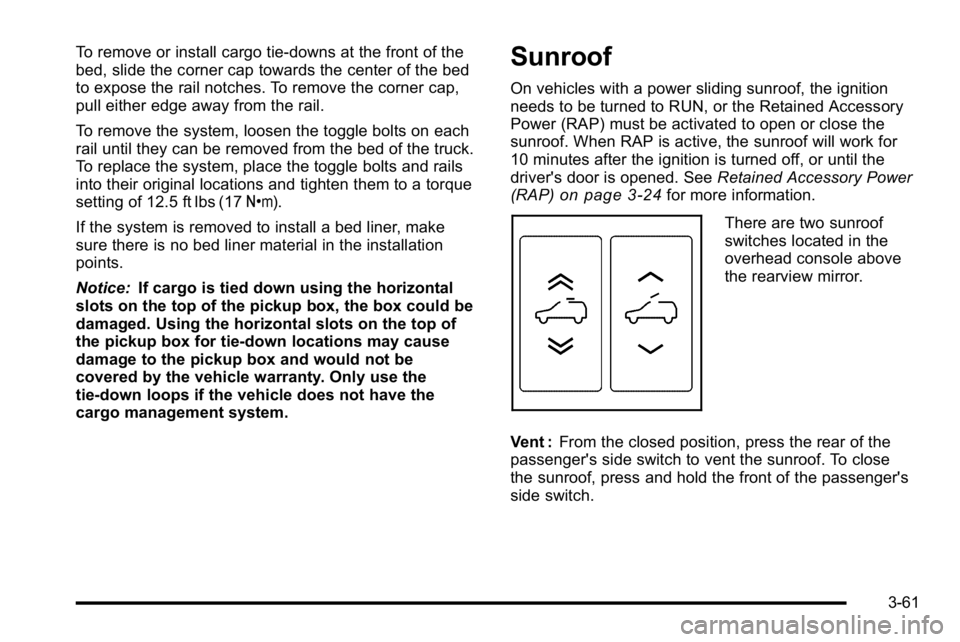
There are two sunroof
switches located in the
overhead console above
the rearview mirror.
Vent : From the closed position, press the rear of the
passenger's side switch to vent the sunroof. To close
the sunroof, press and hold the front of the passenger's
side switch.
3-61
Page 197 of 550
@(Recirculation):Press to turn the recirculation
mode on. An indicator light comes on to show that the
recirculation is on.
This mode recirculates and helps to quickly cool the air
inside the vehicle. It can be used to help prevent
outside air and odors from entering the vehicle.
The recirculation mode cannot be used with floor, defog,
or defrost modes. If recirculation is selected with one of
those modes, the indicator light flashes three times and
then turns off. The air conditioning compressor also
comes on when this mode is activated. While in
recirculation mode the windows may fog when the
weather is cold and damp. To clear the fog, select either
the defog or defrost mode and increase the fan speed.
The recirculation mode can be turned off by pressing
the outside air button, or by turning off the ignition.
;(Outside Air): Press to turn the outside air mode
on. An indicator light on the button comes on to show
that outside is on. When selected, air from outside the
vehicle circulates throughout the vehicle. The outside
air mode can be used with all modes, but it cannot be
used with the recirculation mode.
Rear Window Defogger
The rear window defogger uses a warming grid to
remove fog from the rear window.
<(Rear Window Defogger): For vehicles with this
feature, press to turn the defogger on or off.
It automatically turns off several minutes after it has
been activated. The defogger can also be turned off by
turning the engine off. Do not drive the vehicle until all
the windows are clear.
Notice: Do not use a razor blade or sharp object to
clear the inside rear window. Do not adhere
anything to the defogger grid lines in the rear glass.
These actions may damage the rear defogger.
Repairs would not be covered by your warranty.
Heated Mirror : For vehicles with heated outside
rearview mirrors, the mirrors heat to help clear fog or
frost from the surface of the mirror when the rear
window defog button is pressed. See Outside Power
Mirrors on page 3‑40.
4-25
Page 336 of 550
Driving at Night
Night driving is more dangerous than day driving
because some drivers are likely to be impaired—by
alcohol or drugs, with night vision problems, or by
fatigue.
Night driving tips include:
.Drive defensively.
.Do not drink and drive.
.Reduce headlamp glare by adjusting the inside
rearview mirror.
.Slow down and keep more space between you and
other vehicles because headlamps can only light
up so much road ahead.
.Watch for animals.
.When tired, pull off the road.
.Do not wear sunglasses.
.Avoid staring directly into approaching headlamps.
.Keep the windshield and all glass on your vehicle
clean —inside and out.
.Keep your eyes moving, especially during turns or
curves.
No one can see as well at night as in the daytime.
But, as we get older, these differences increase.
A 50-year-old driver might need at least twice as much
light to see the same thing at night as a 20-year-old.
Driving in Rain and on Wet Roads
Rain and wet roads can reduce vehicle traction and
affect your ability to stop and accelerate. Always drive
slower in these types of driving conditions and avoid
driving through large puddles and deep‐standing or
flowing water.
{WARNING:
Wet brakes can cause crashes. They might not
work as well in a quick stop and could cause
pulling to one side. You could lose control of the
vehicle.
After driving through a large puddle of water or a
car/vehicle wash, lightly apply the brake pedal
until the brakes work normally.
Flowing or rushing water creates strong forces.
Driving through flowing water could cause your
vehicle to be carried away. If this happens, you
and other vehicle occupants could drown. Do not
ignore police warnings and be very cautious about
trying to drive through flowing water.
5-24
Page 338 of 550
Highway Hypnosis
Always be alert and pay attention to your surroundings
while driving. If you become tired or sleepy, find a safe
place to park your vehicle and rest.
Other driving tips include:
.Keep the vehicle well ventilated.
.Keep interior temperature cool.
.Keep your eyes moving—scan the road ahead
and to the sides.
.Check the rearview mirror and vehicle instruments
often.
Hill and Mountain Roads
Driving on steep hills or through mountains is different
than driving on flat or rolling terrain. Tips for driving in
these conditions include:
.Keep the vehicle serviced and in good shape.
.Check all fluid levels and brakes, tires, cooling
system, and transmission.
.Going down steep or long hills, shift to a
lower gear.
{WARNING:
If you do not shift down, the brakes could get so
hot that they would not work well. You would then
have poor braking or even none going down a hill.
You could crash. Shift down to let the engine
assist the brakes on a steep downhill slope.
5-26
Page 544 of 550

M
Maintenance ScheduleMaintenance Record . . . . . . . . . . . . . . . . . . . . . . . . . . . . . 7-15
Maintenance Replacement Parts . . . . . . . . . . . . . . . . . 7-13
Owner Checks and Services . . . . . . . . . . . . . . . . . . . . . . . 7-9
Recommended Fluids and Lubricants . . . . . . . . . . . . 7-11
Scheduled Maintenance . . . . . . . . . . . . . . . . . . . . . . . . . . . 7-3
Malfunction Indicator Lamp . . . . . . . . . . . . . . . . . . . . . . . . 4-38
Manual Windows . . . . . . . . . . . . . . . . . . . . . . . . . . . . . . . . . . 3-16
Memory Features . . . . . . . . . . . . . . . . . . . . . . . . . . . . . . . . . . . .2-6
Message DIC Warnings and Messages . . . . . . . . . . . . . . . . . . . . . 4-57
Mirrors Automatic Dimming Rearview . . . . . . . . . . . . . . . . . . . . . 3-39
Manual Rearview . . . . . . . . . . . . . . . . . . . . . . . . . . . . . . . . . 3-39
Outside Convex Mirror . . . . . . . . . . . . . . . . . . . . . . . . . . . . 3-42
Outside Heated Mirrors . . . . . . . . . . . . . . . . . . . . . . . . . . . 3-42
Outside Power Foldaway Mirrors . . . . . . . . . . . . . . . . . 3-40
Outside Power Mirrors . . . . . . . . . . . . . . . . . . . . . . . . . . . . 3-40
Park Tilt . . . . . . . . . . . . . . . . . . . . . . . . . . . . . . . . . . . . . . . . . . 3-41
MP3 . . . . . . . . . . . . . . . . . . . . . . . . . . . . . . . . . . . . . . . . 4-99, 4-106
N
Navigation System, Privacy . . . . . . . . . . . . . . . . . . . . . . . . 8-20
Navigation/Radio System, see Navigation Manual . . . . . . . . . . . . . . . . . . . . . . . . . . . . . . . . . . . . . . . . . . 4-115
New Vehicle Break-In . . . . . . . . . . . . . . . . . . . . . . . . . . . . . . 3-22
O
Odometer . . . . . . . . . . . . . . . . . . . . . . . . . . . . . . . . . . . . . . . . . . 4-29 Trip . . . . . . . . . . . . . . . . . . . . . . . . . . . . . . . . . . . . . . . . . . . . . . . 4-29
Off-Road . . . . . . . . . . . . . . . . . . . . . . . . . . . . . . . . . . . . . . . . . . 5-12 Driving . . . . . . . . . . . . . . . . . . . . . . . . . . . . . . . . . . . . . . . . . . . . 5-12
Recovery . . . . . . . . . . . . . . . . . . . . . . . . . . . . . . . . . . . . . . . . . 5-10
Oil
Engine . . . . . . . . . . . . . . . . . . . . . . . . . . . . . . . . . . . . . . . . . . . . 6-18
Engine Oil Life System . . . . . . . . . . . . . . . . . . . . . . . . . . . 6-20
Pressure Gage . . . . . . . . . . . . . . . . . . . . . . . . . . . . . . . . . . . 4-40
Pressure Light . . . . . . . . . . . . . . . . . . . . . . . . . . . . . . . . . . . . 4-41
Older Children, Restraints . . . . . . . . . . . . . . . . . . . . . . . . . 2-33
Online Owner Center . . . . . . . . . . . . . . . . . . . . . . . . . . . . . . . .8-5
OnStar, Privacy . . . . . . . . . . . . . . . . . . . . . . . . . . . . . . . . . . . . 8-20
OnStar
®System . . . . . . . . . . . . . . . . . . . . . . . . . . . . . . . . . . . 1-27
i - 10
Page 546 of 550

R
Radio FrequencyIdentification (RFID) . . . . . . . . . . . . . . . . . . . . . . . . . . . . . . 8-20
Statement . . . . . . . . . . . . . . . . . . . . . . . . . . . . . . . . . . . . . . . . 8-20
Radio(s) . . . . . . . . . . . . . . . . . . . . . . . . . . . . . . . . . . . . . . . . . . . 4-79
Radios Navigation/Radio System, see Navigation
Manual . . . . . . . . . . . . . . . . . . . . . . . . . . . . . . . . . . . . . . . . . 4-115
Reception . . . . . . . . . . . . . . . . . . . . . . . . . . . . . . . . . . . . . . .4-139
Setting the Clock . . . . . . . . . . . . . . . . . . . . . . . . . . . . . . . . . 4-77
Theft-Deterrent . . . . . . . . . . . . . . . . . . . . . . . . . . . . . . . . . .4-136
Reading Lamps . . . . . . . . . . . . . . . . . . . . . . . . . . . . . . . . . . . . 4-14
Rear Axle . . . . . . . . . . . . . . . . . . . . . . . . . . . . . . . . . . . . . . . . . . 6-50 Locking . . . . . . . . . . . . . . . . . . . . . . . . . . . . . . . . . . . . . . . . . . . . 5-8
Rear Door Security Locks . . . . . . . . . . . . . . . . . . . . . . . . . 3-12
Rear Doors . . . . . . . . . . . . . . . . . . . . . . . . . . . . . . . . . . . . . . . . 3-13
Rear Seat Armrest . . . . . . . . . . . . . . . . . . . . . . . . . . . . . . . . . 3-60
Rear Seat Audio (RSA) System . . . . . . . . . . . . . . . . . . 4-135
Rear Seat Entertainment System . . . . . . . . . . . . . . . . . 4-126 Rear Seat Audio (RSA) . . . . . . . . . . . . . . . . . . . . . . . . . .4-135
Rear Seat Operation . . . . . . . . . . . . . . . . . . . . . . . . . . . . . . . 2-10
Rear Vision Camera (RVC) . . . . . . . . . . . . . . . . . . . . . . . . 3-45
Rearview Mirrors . . . . . . . . . . . . . . . . . . . . . . . . . . . . . . . . . . 3-39 Automatic Dimming . . . . . . . . . . . . . . . . . . . . . . . . . . . . . . . 3-39
Reclining Seatbacks, Power . . . . . . . . . . . . . . . . . . . . . . . . .2-8
Recommended Fluids and Lubricants . . . . . . . . . . . . . 7-11 Recovery Hooks . . . . . . . . . . . . . . . . . . . . . . . . . . . . . . . . . . . 5-30
Recreational Vehicle Towing . . . . . . . . . . . . . . . . . . . . . . . 5-38
Reimbursement Program, GM Mobility . . . . . . . . . . . . . . .8-7
Remote Keyless Entry (RKE) System . . . . . . . . . . . . . . . .3-4
Remote Vehicle Start . . . . . . . . . . . . . . . . . . . . . . . . . . . . . . . .3-7
Removing the Flat Tire and Installing the
Spare Tire . . . . . . . . . . . . . . . . . . . . . . . . . . . . . . . . . . . . . . . . 6-92
Removing the Spare Tire and Tools . . . . . . . . . . . . . . . . 6-88
Replacement Bulbs . . . . . . . . . . . . . . . . . . . . . . . . . . . . . . . . 6-60
Replacement Parts Maintenance . . . . . . . . . . . . . . . . . . . . . . . . . . . . . . . . . . . . . . 7-13
Reporting Safety Defects Canadian Government . . . . . . . . . . . . . . . . . . . . . . . . . . . . 8-16
General Motors . . . . . . . . . . . . . . . . . . . . . . . . . . . . . . . . . . . 8-16
U.S. Government . . . . . . . . . . . . . . . . . . . . . . . . . . . . . . . . . 8-16
Restraint System Check
Checking the Restraint Systems . . . . . . . . . . . . . . . . . . 2-73
Replacing Restraint System Parts After aCrash . . . . . . . . . . . . . . . . . . . . . . . . . . . . . . . . . . . . . . . . . . . 2-74
Retained Accessory Power (RAP) . . . . . . . . . . . . . . . . . 3-24
Roadside Assistance Program . . . . . . . . . . . . . . . . . . . . . . .8-7
Rocking Your Vehicle to Get it Out . . . . . . . . . . . . . . . . . 5-30
Roof Sunroof . . . . . . . . . . . . . . . . . . . . . . . . . . . . . . . . . . . . . . . . . . . 3-61
Roof Rack System . . . . . . . . . . . . . . . . . . . . . . . . . . . . . . . . . 3-59
Running the Vehicle While Parked . . . . . . . . . . . . . . . . . 3-38
i - 12