2010 GMC CANYON tires
[x] Cancel search: tiresPage 1 of 448

In Brief........................................................... 1-1
Instrument Panel
........................................ 1-2
Initial Drive Information
............................... 1-3
Vehicle Features
......................................1-15
Performance and Maintenance
...................1-17
Seats and Restraint System............................. 2-1
Front Seats
............................................... 2-2
Rear Seats
..............................................2-10
Safety Belts
.............................................2-13
Child Restraints
.......................................2-35
Airbag System
.........................................2-64
Restraint System Check
............................2-81
Features and Controls..................................... 3-1
Keys
........................................................ 3-2
Doors and Locks
....................................... 3-5
Windows
.................................................3-10
Theft-Deterrent Systems
............................3-13
Starting and Operating Your Vehicle
...........3-16
Mirrors
....................................................3-36
Storage Areas
.........................................3-40
Sunroof
..................................................3-42Instrument Panel............................................. 4-1
Instrument Panel Overview
.......................... 4-3
Climate Controls
......................................4-16
Warning Lights, Gages, and Indicators
........4-18
Driver Information Center (DIC)
..................4-33
Audio System(s)
.......................................4-42
Driving Your Vehicle....................................... 5-1
Your Driving, the Road, and the Vehicle
....... 5-2
Towing
...................................................5-41
Service and Appearance Care.......................... 6-1
Service
..................................................... 6-3
Fuel
......................................................... 6-5
Checking Things Under the Hood
...............6-10
Rear Axle
...............................................6-47
Four-Wheel Drive
.....................................6-48
Front Axle
...............................................6-49
Headlamp Aiming
.....................................6-50
Bulb Replacement
....................................
6-50
Windshield Wiper Blade Replacement
.........6-55
Tires
......................................................6-57
2010 GMC Canyon Owner ManualM
Page 24 of 448

StabiliTrak®
The Electronic Stability Control system assists with
directional control of the vehicle in difficult driving
conditions. The system turns on automatically every
time the vehicle is started.
•To turn off both traction control and Electronic
Stability Control, press and hold
duntildilluminates
and the appropriate DIC message is displayed.
SeeDIC Warnings and Messages on page 4-37.
•Press and release the button again to turn on both
systems.
For more information, seeStabiliTrak
®System on
page 5-6.
Tire Pressure Monitor
The Tire Pressure Monitor
alerts you when a
significant reduction in
pressure occurs in one or
more of the vehicle’s tires
by illuminating the low tire
pressure warning light on
the instrument cluster.
The warning light will remain on until the tire pressure is
corrected. The proper tire pressures for your vehicle
are listed on the Tire and Loading Information label
located on the driver side center pillar (B pillar).
SeeLoading the Vehicle on page 5-33.
You may notice during cooler conditions that the low tire
pressure warning light will appear when the vehicle is
first started and then turn off as you drive. This may be
an early indicator that your tire pressures are getting
low and the tires need to be inflated to the proper
pressure.
Note:The Tire Pressure Monitor can alert you about
low tire pressure, but it does not replace normal monthly
tire maintenance. It is the driver’s responsibility to
maintain correct tire pressures.
SeeTire Pressure Monitor System on page 6-66andTire
Pressure Monitor Operation on page 6-67.
1-18
Page 25 of 448

Engine Oil Life System
The engine oil life system calculates engine oil life
based on vehicle use and displays a DIC message when
it is necessary to change the engine oil and filter.
Resetting the Oil Life System
1. Turn the ignition to ON/RUN, with the engine off.
2. Press and release the stem in the lower center
of the instrument cluster until the OIL LIFE
message is displayed.
3. Once the alternating OIL LIFE and RESET
messages appear, press and hold the stem
until several beeps sound. This confirms that the oil
life system has been reset.
4. Turn the key to LOCK/OFF.
SeeEngine Oil Life System on page 6-18.
Driving for Better Fuel Economy
Driving habits can affect fuel mileage. Here are some
driving tips to get the best fuel economy possible.
•Avoid fast starts and accelerate smoothly.
•Brake gradually and avoid abrupt stops.
•Avoid idling the engine for long periods of time.
•When road and weather conditions are appropriate,
use cruise control, if equipped.
•Always follow posted speed limits or drive more
slowly when conditions require.
•Keep vehicle tires properly inflated.
•Combine several trips into a single trip.
•Replace the vehicle’s tires with the same
TPC Spec number molded into the tire’s sidewall
near the size.
•Follow recommended scheduled maintenance.
1-19
Page 133 of 448

3 (Third):This position is also used for normal driving.
However, it reduces vehicle speed more than D (Drive)
without using the brakes. You might choose 3 (Third)
instead of D (Drive) when driving on hilly, winding roads,
or when towing a trailer, so there is less shifting
between gears and when going down a steep hill.
2 (Second):This position reduces vehicle speed even
more than 3 (Third) without using the brakes. You can
use 2 (Second) to help control vehicle speed on
steep mountain roads, but then you would also want to
use the brakes off and on.
1 (First):This position reduces vehicle speed even
more than 2 (Second) without using the brakes. You can
use it on very steep hills, or in deep snow or mud.
If the shift lever is put in 1 (First) while the vehicle is
moving forward, the transmission will not shift into first
gear until the vehicle is going slowly enough.
Notice:Spinning the tires or holding the vehicle
in one place on a hill using only the accelerator
pedal may damage the transmission. The repair will
not be covered by the vehicle warranty. If you
are stuck, do not spin the tires. When stopping on a
hill, use the brakes to hold the vehicle in place.Manual Transmission Operation
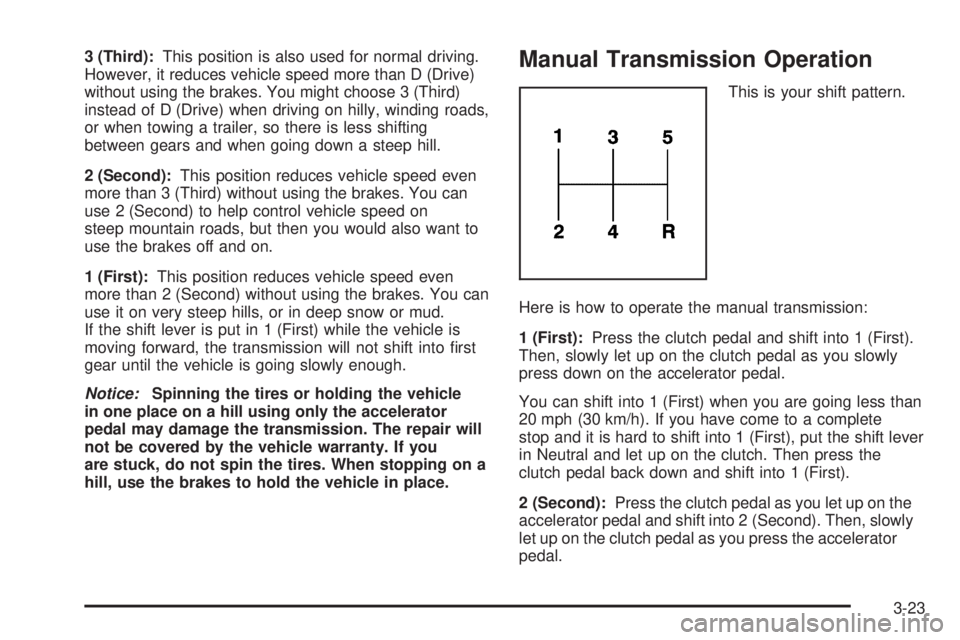
This is your shift pattern.
Here is how to operate the manual transmission:
1 (First):Press the clutch pedal and shift into 1 (First).
Then, slowly let up on the clutch pedal as you slowly
press down on the accelerator pedal.
You can shift into 1 (First) when you are going less than
20 mph (30 km/h). If you have come to a complete
stop and it is hard to shift into 1 (First), put the shift lever
in Neutral and let up on the clutch. Then press the
clutch pedal back down and shift into 1 (First).
2 (Second):Press the clutch pedal as you let up on the
accelerator pedal and shift into 2 (Second). Then, slowly
let up on the clutch pedal as you press the accelerator
pedal.
3-23
Page 180 of 448

Tire Pressure Light
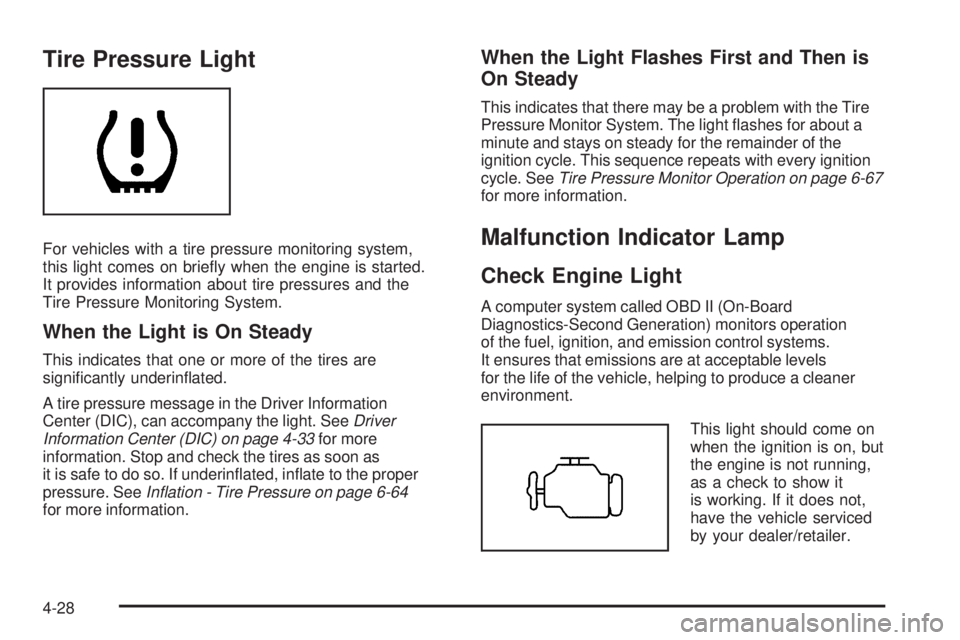
For vehicles with a tire pressure monitoring system,
this light comes on briefly when the engine is started.
It provides information about tire pressures and the
Tire Pressure Monitoring System.
When the Light is On Steady
This indicates that one or more of the tires are
significantly underinflated.
A tire pressure message in the Driver Information
Center (DIC), can accompany the light. SeeDriver
Information Center (DIC) on page 4-33for more
information. Stop and check the tires as soon as
it is safe to do so. If underinflated, inflate to the proper
pressure. SeeIn�ation - Tire Pressure on page 6-64
for more information.
When the Light Flashes First and Then is
On Steady
This indicates that there may be a problem with the Tire
Pressure Monitor System. The light flashes for about a
minute and stays on steady for the remainder of the
ignition cycle. This sequence repeats with every ignition
cycle. SeeTire Pressure Monitor Operation on page 6-67
for more information.
Malfunction Indicator Lamp
Check Engine Light
A computer system called OBD II (On-Board
Diagnostics-Second Generation) monitors operation
of the fuel, ignition, and emission control systems.
It ensures that emissions are at acceptable levels
for the life of the vehicle, helping to produce a cleaner
environment.
This light should come on
when the ignition is on, but
the engine is not running,
as a check to show it
is working. If it does not,
have the vehicle serviced
by your dealer/retailer.
4-28
Page 181 of 448

If the check engine light comes on and stays on, while
the engine is running, this indicates that there is an
OBD II problem and service is required.
Malfunctions often are indicated by the system before
any problem is apparent. Being aware of the light
can prevent more serious damage to the vehicle.
This system assists the service technician in correctly
diagnosing any malfunction.
Notice:If the vehicle is continually driven with
this light on, after a while, the emission controls
might not work as well, the vehicle’s fuel economy
might not be as good, and the engine might not
run as smoothly. This could lead to costly repairs
that might not be covered by the vehicle warranty.
Notice:Modi�cations made to the engine,
transmission, exhaust, intake, or fuel system
of the vehicle or the replacement of the original
tires with other than those of the same Tire
Performance Criteria (TPC) can affect the vehicle’s
emission controls and can cause this light to come
on. Modi�cations to these systems could lead to
costly repairs not covered by the vehicle warranty.
This could also result in a failure to pass a required
Emission Inspection/Maintenance test. See
Accessories and Modifications on page 6-3.This light comes on during a malfunction in one of
two ways:
Light Flashing:A misfire condition has been detected.
A misfire increases vehicle emissions and could
damage the emission control system on the vehicle.
Diagnosis and service might be required.
To prevent more serious damage to the vehicle:
•Reduce vehicle speed.
•Avoid hard accelerations.
•Avoid steep uphill grades.
•If towing a trailer, reduce the amount of cargo being
hauled as soon as it is possible.
If the light continues to flash, when it is safe to do so,
stop the vehicle. Find a safe place to park the vehicle.
Turn the key off, wait at least 10 seconds, and restart
the engine. If the light is still flashing, follow the previous
steps and see your dealer/retailer for service as soon
as possible.
4-29
Page 191 of 448

FUEL CAP
This message displays if the vehicle’s fuel cap is either off
or loose. Pull over as soon as possible and check to see
if the fuel cap is secure. You may also see the check
engine light on the instrument panel cluster. If the check
engine light does come on when the fuel cap was loose,
it may take a few driving trips before the light turns off.
SeeMalfunction Indicator Lamp on page 4-28for more
information if the light still remains on. Press and release
the reset stem to acknowledge the message and clear it
from the display.
LOW FUEL
This message displays if the level of fuel in the vehicle
is low. Also check the fuel gage. SeeFuel Gage on
page 4-32for more information. Refill the fuel tank
as soon as possible.
LOW TIRE
This message displays if a low tire pressure is detected
in any of the vehicle’s tires. Press and release the reset
stem to acknowledge the message and clear it from the
display. The message appears at each ignition cycle
until the tires are inflated to the correct inflation pressure.
SeeTires on page 6-57andIn�ation - Tire Pressure on
page 6-64for more information on tires and the correct
inflation pressures.
OIL
This message displays when the oil pressure is low.
SeeOil Pressure Light on page 4-31andEngine Oil
on page 6-15for more information.
PARK BRK (Brake)
This message displays when the parking brake is set.
SeeParking Brake on page 3-30andBrake System
Warning Light on page 4-25for more information.
The message clears from the display after the parking
brake is released or by pressing and releasing the
reset stem.
4-39
Page 219 of 448

Police records show that almost 40 percent of all motor
vehicle-related deaths involve alcohol. In most cases,
these deaths are the result of someone who was
drinking and driving. In recent years, more than
17,000 annual motor vehicle-related deaths have been
associated with the use of alcohol, with about
250,000 people injured.
For persons under 21, it is against the law in every
U.S. state to drink alcohol. There are good medical,
psychological, and developmental reasons for
these laws.
The obvious way to eliminate the leading highway
safety problem is for people never to drink alcohol and
then drive.
Medical research shows that alcohol in a person’s
system can make crash injuries worse, especially
injuries to the brain, spinal cord, or heart. This means
that when anyone who has been drinking — driver
or passenger — is in a crash, that person’s chance of
being killed or permanently disabled is higher than if the
person had not been drinking.Control of a Vehicle
The following three systems help to control the vehicle
while driving — brakes, steering, and accelerator.
At times, as when driving on snow or ice, it is easy to
ask more of those control systems than the tires
and road can provide. Meaning, you can lose control of
the vehicle.
Adding non-dealer/non-retailer accessories can affect
vehicle performance. SeeAccessories and Modi�cations
on page 6-3.
Braking
SeeBrake System Warning Light on page 4-25.
Braking action involves perception time and reaction
time. Deciding to push the brake pedal is perception
time. Actually doing it is reaction time.
5-3