2010 GMC CANYON seat adjustment
[x] Cancel search: seat adjustmentPage 7 of 448

Instrument Panel..............................................1-2
Initial Drive Information....................................1-3
Remote Keyless Entry (RKE) System................1-4
Door Locks....................................................1-4
Tailgate........................................................1-5
Windows.......................................................1-6
Seat Adjustment.............................................1-7
Heated Seats.................................................1-9
Head Restraint Adjustment...............................1-9
Safety Belt...................................................1-10
Sensing System for Passenger Airbag.............1-10
Mirror Adjustment.........................................1-11
Steering Wheel Adjustment............................1-12
Interior Lighting............................................1-12
Exterior Lighting...........................................1-13
Windshield Wiper/Washer...............................1-14
Climate Controls...........................................1-14Vehicle Features.............................................1-15
Radio(s)......................................................1-15
Satellite Radio..............................................1-16
Driver Information Center (DIC).......................1-16
Cruise Control..............................................1-17
Power Outlets..............................................1-17
Performance and Maintenance.........................1-17
Traction Control System (TCS).......................1-17
StabiliTrak
®..................................................1-18
Tire Pressure Monitor....................................1-18
Engine Oil Life System..................................1-19
Driving for Better Fuel Economy.....................1-19
Roadside Assistance Program........................1-20
OnStar
®......................................................1-20
Section 1 In Brief
1-1
Page 13 of 448
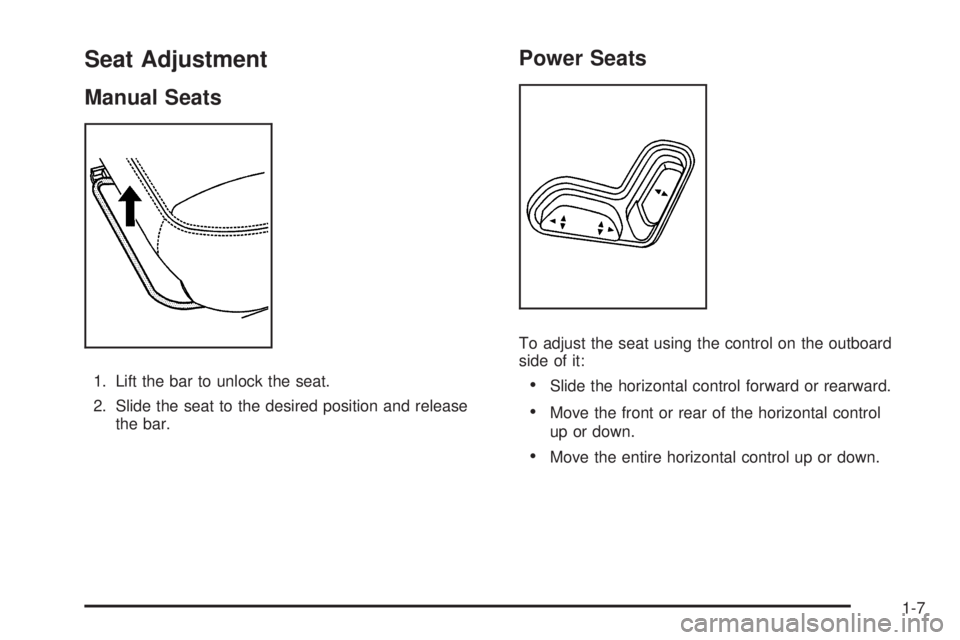
Seat Adjustment
Manual Seats
1. Lift the bar to unlock the seat.
2. Slide the seat to the desired position and release
the bar.
Power Seats
To adjust the seat using the control on the outboard
side of it:
•Slide the horizontal control forward or rearward.
•Move the front or rear of the horizontal control
up or down.
•Move the entire horizontal control up or down.
1-7
Page 15 of 448
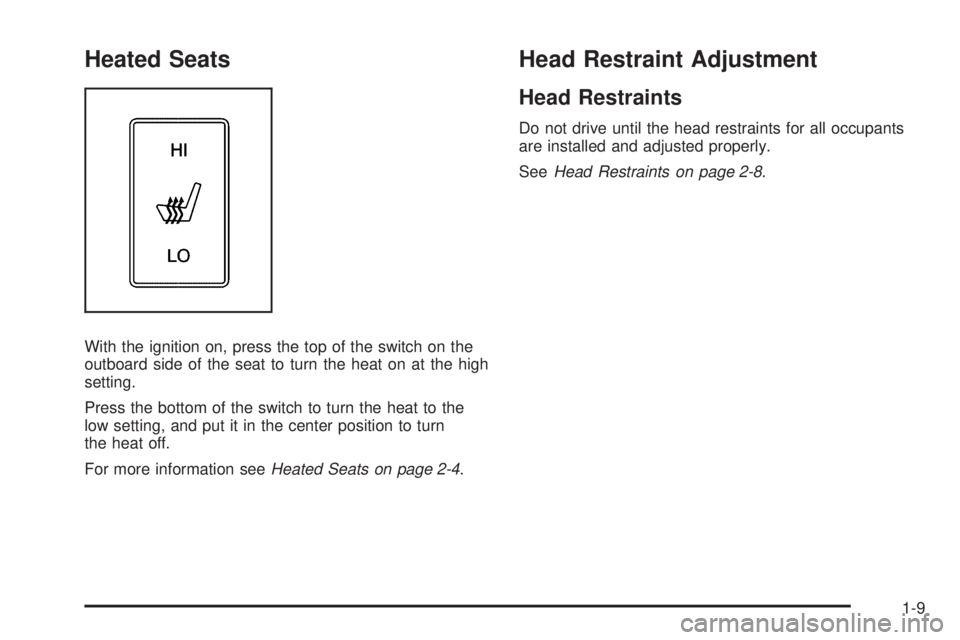
Heated Seats
With the ignition on, press the top of the switch on the
outboard side of the seat to turn the heat on at the high
setting.
Press the bottom of the switch to turn the heat to the
low setting, and put it in the center position to turn
the heat off.
For more information seeHeated Seats on page 2-4.
Head Restraint Adjustment
Head Restraints
Do not drive until the head restraints for all occupants
are installed and adjusted properly.
SeeHead Restraints on page 2-8.
1-9
Page 55 of 448
Lap-Shoulder Belt
All seating positions in the vehicle have a lap-shoulder
belt except for the center front passenger position,
if equipped, which has a lap belt. SeeLap Belt
on page 2-33for more information.
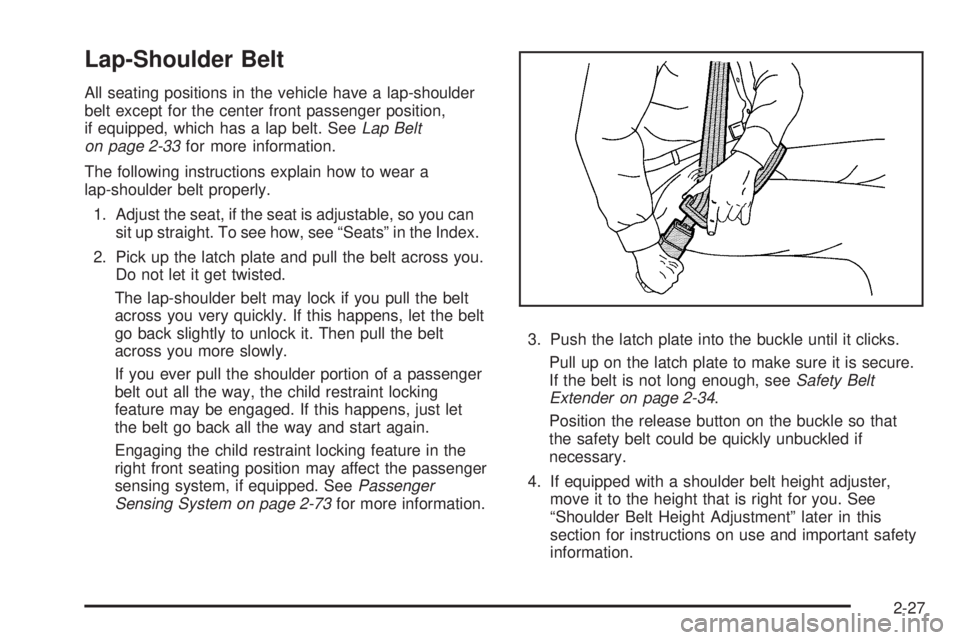
The following instructions explain how to wear a
lap-shoulder belt properly.
1. Adjust the seat, if the seat is adjustable, so you can
sit up straight. To see how, see “Seats” in the Index.
2. Pick up the latch plate and pull the belt across you.
Do not let it get twisted.
The lap-shoulder belt may lock if you pull the belt
across you very quickly. If this happens, let the belt
go back slightly to unlock it. Then pull the belt
across you more slowly.
If you ever pull the shoulder portion of a passenger
belt out all the way, the child restraint locking
feature may be engaged. If this happens, just let
the belt go back all the way and start again.
Engaging the child restraint locking feature in the
right front seating position may affect the passenger
sensing system, if equipped. SeePassenger
Sensing System on page 2-73for more information.3. Push the latch plate into the buckle until it clicks.
Pull up on the latch plate to make sure it is secure.
If the belt is not long enough, seeSafety Belt
Extender on page 2-34.
Position the release button on the buckle so that
the safety belt could be quickly unbuckled if
necessary.
4. If equipped with a shoulder belt height adjuster,
move it to the height that is right for you. See
“Shoulder Belt Height Adjustment” later in this
section for instructions on use and important safety
information.
2-27
Page 57 of 448
Shoulder Belt Height Adjuster
The vehicle has a shoulder belt height adjuster for the
driver and right front passenger seating position.
Adjust the height so that the shoulder portion of the belt
is centered on the shoulder. The belt should be away
from the face and neck, but not falling off the shoulder.
Improper shoulder belt height adjustment could
reduce the effectiveness of the safety belt in a crash.
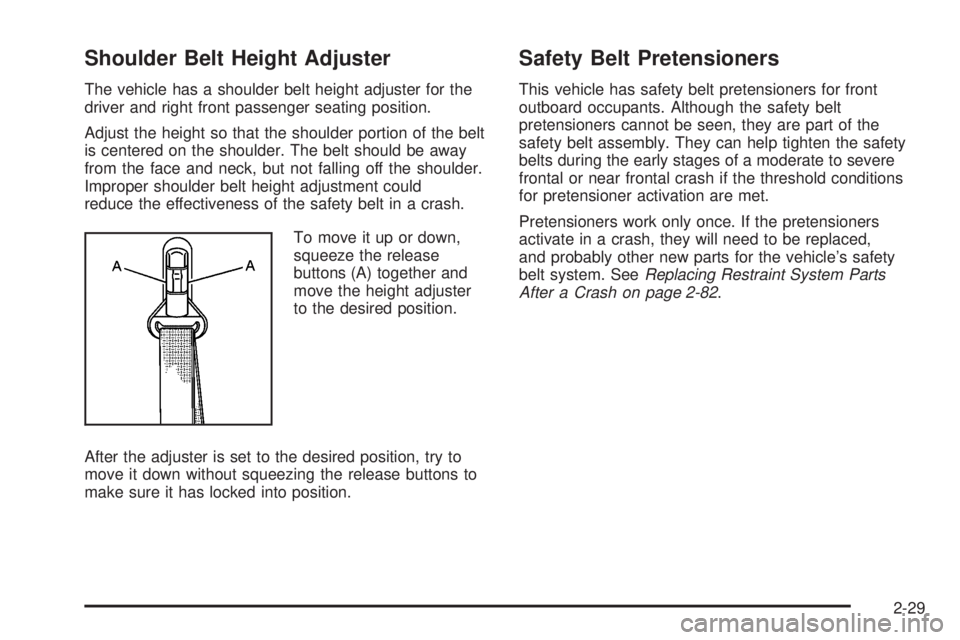
To move it up or down,
squeeze the release
buttons (A) together and
move the height adjuster
to the desired position.
After the adjuster is set to the desired position, try to
move it down without squeezing the release buttons to
make sure it has locked into position.
Safety Belt Pretensioners
This vehicle has safety belt pretensioners for front
outboard occupants. Although the safety belt
pretensioners cannot be seen, they are part of the
safety belt assembly. They can help tighten the safety
belts during the early stages of a moderate to severe
frontal or near frontal crash if the threshold conditions
for pretensioner activation are met.
Pretensioners work only once. If the pretensioners
activate in a crash, they will need to be replaced,
and probably other new parts for the vehicle’s safety
belt system. SeeReplacing Restraint System Parts
After a Crash on page 2-82.
2-29
Page 170 of 448

The recirculation mode cannot be used with floor/defog,
defrost, or defogging modes. If recirculation is selected in
these modes, the indicator will flash or not come on.
Outlet Adjustment
Use the thumbwheel on the outlets to change the
direction of the air flow.
Lift up or push down on the thumbwheel located in the
center of the outlet to direct the air up or down, or
slide the thumbwheel to the left or right to direct the
airflow from side-to-side.
Operation Tips
•
Clear away any ice, snow or leaves from the air
inlets at the base of the windshield that may
block the flow of air into the vehicle.
•Use of non-GM approved hood deflectors may
adversely affect the performance of the system.
•Keep the path under the front seats clear of objects
to help circulate the air inside of the vehicle more
effectively.
Warning Lights, Gages, and
Indicators
Warning lights and gages can signal that something
is wrong before it becomes serious enough to cause
an expensive repair or replacement. Paying attention
to the warning lights and gages could prevent injury.
Warning lights come on when there might be or there
is a problem with one of the vehicle’s functions. Some
warning lights come on briefly when the engine is started
to indicate they are working.
Gages can indicate when there might be or there is a
problem with one of the vehicle’s functions. Often gages
and warning lights work together to indicate a problem
with the vehicle.
When one of the warning lights comes on and stays on
while driving, or when one of the gages shows there
could be a problem, check the section that explains
what to do. Follow this manual’s advice. Waiting to
do repairs can be costly and even dangerous.
4-18
Page 215 of 448
Fixed Mast Antenna
The fixed mast antenna can withstand most car washes
without being damaged as long as it is securely attached
to the base. If the mast becomes slightly bent, straighten
it out by hand. If the mast is badly bent, replace it.
Occasionally check to make sure the antenna is
tightened to its base. If tightening is required, tighten
by hand until fully seated plus one quarter turn.
XM™ Satellite Radio Antenna
System
The XM Satellite Radio antenna is located on the roof of
the vehicle. Keep the antenna clear of obstructions for
clear radio reception.
If the vehicle has a sunroof, the performance of the
XM system may be affected if the sunroof is open.
Chime Level Adjustment
The radio is used to adjust the vehicle’s chime level.
To change the volume level of the chime, press and
hold pushbutton 6 with the ignition on and the radio
power off. The volume level will change from the normal
level to loud, and LOUD will appear on the radio display.
To change back to the default or normal setting, press
and hold pushbutton 6 again. The volume level will
change from the loud level to normal, and NORMAL will
appear on the radio display. Each time the chime volume
is changed, three chimes will sound to indicate the new
volume selected. Removing the radio and not replacing it
with a factory radio or chime module will disable vehicle
chimes.
4-63
Page 433 of 448

Bulb Replacement (cont.)
Halogen Bulbs............................................6-50
Headlamp Aiming........................................6-50
Headlamps.........................................6-50, 6-51
License Plate Lamps....................................6-54
Taillamps, Turn Signal, Stoplamps and
Back-up Lamps........................................6-53
Buying New Tires...........................................6-73
C
Calibration.....................................................3-37
California
Perchlorate Materials Requirements................. 6-4
Warning....................................................... 6-4
California Fuel.................................................. 6-6
Calling for Assistance........................................ 8-7
Canada........................................................... 8-6
Canadian Owners............................................... iii
Canadian Owners (Propriétaires Canadiens)........... iii
Capacities and Specifications..........................6-118
Carbon Monoxide
Engine Exhaust...........................................3-34
Tailgate........................................................ 3-8
Winter Driving.............................................5-29
Care of
Safety Belts..............................................6-105
CD Messages................................................4-55
CD, MP3 .......................................................4-56Cellular Phone Usage......................................4-62
Center Console Storage...................................3-40
Center High-Mounted Stoplamp (CHMSL)...........6-52
Certification/Tire Label.....................................5-38
Chains, Tire...................................................6-78
CHANGE OIL .................................................4-38
Charging System Light....................................4-24
Check
Engine Lamp..............................................4-28
Check Engine Light.........................................4-28
Checking Brake Fluid......................................6-40
Checking Coolant............................................6-31
Checking Engine Oil........................................6-15
Checking Things Under the Hood......................6-10
Chemical Paint Spotting.................................6-109
Child Restraints
Infants and Young Children...........................2-38
Lower Anchors and Tethers for Children..........2-46
Older Children.............................................2-35
Securing a Child Restraint in a
Rear Seat Position...................................2-58
Securing a Child Restraint in the
Center Front Seat Position........................2-60
Securing a Child Restraint in the
Right Front Seat Position
..........................2-60
Systems.....................................................2-42
Where to Put the Restraint...........................2-44
Chime Level Adjustment..................................4-63
Cigarette Lighter.............................................4-16
3