2010 GMC CANYON door lock
[x] Cancel search: door lockPage 1 of 448

In Brief........................................................... 1-1
Instrument Panel
........................................ 1-2
Initial Drive Information
............................... 1-3
Vehicle Features
......................................1-15
Performance and Maintenance
...................1-17
Seats and Restraint System............................. 2-1
Front Seats
............................................... 2-2
Rear Seats
..............................................2-10
Safety Belts
.............................................2-13
Child Restraints
.......................................2-35
Airbag System
.........................................2-64
Restraint System Check
............................2-81
Features and Controls..................................... 3-1
Keys
........................................................ 3-2
Doors and Locks
....................................... 3-5
Windows
.................................................3-10
Theft-Deterrent Systems
............................3-13
Starting and Operating Your Vehicle
...........3-16
Mirrors
....................................................3-36
Storage Areas
.........................................3-40
Sunroof
..................................................3-42Instrument Panel............................................. 4-1
Instrument Panel Overview
.......................... 4-3
Climate Controls
......................................4-16
Warning Lights, Gages, and Indicators
........4-18
Driver Information Center (DIC)
..................4-33
Audio System(s)
.......................................4-42
Driving Your Vehicle....................................... 5-1
Your Driving, the Road, and the Vehicle
....... 5-2
Towing
...................................................5-41
Service and Appearance Care.......................... 6-1
Service
..................................................... 6-3
Fuel
......................................................... 6-5
Checking Things Under the Hood
...............6-10
Rear Axle
...............................................6-47
Four-Wheel Drive
.....................................6-48
Front Axle
...............................................6-49
Headlamp Aiming
.....................................6-50
Bulb Replacement
....................................
6-50
Windshield Wiper Blade Replacement
.........6-55
Tires
......................................................6-57
2010 GMC Canyon Owner ManualM
Page 7 of 448

Instrument Panel..............................................1-2
Initial Drive Information....................................1-3
Remote Keyless Entry (RKE) System................1-4
Door Locks....................................................1-4
Tailgate........................................................1-5
Windows.......................................................1-6
Seat Adjustment.............................................1-7
Heated Seats.................................................1-9
Head Restraint Adjustment...............................1-9
Safety Belt...................................................1-10
Sensing System for Passenger Airbag.............1-10
Mirror Adjustment.........................................1-11
Steering Wheel Adjustment............................1-12
Interior Lighting............................................1-12
Exterior Lighting...........................................1-13
Windshield Wiper/Washer...............................1-14
Climate Controls...........................................1-14Vehicle Features.............................................1-15
Radio(s)......................................................1-15
Satellite Radio..............................................1-16
Driver Information Center (DIC).......................1-16
Cruise Control..............................................1-17
Power Outlets..............................................1-17
Performance and Maintenance.........................1-17
Traction Control System (TCS).......................1-17
StabiliTrak
®..................................................1-18
Tire Pressure Monitor....................................1-18
Engine Oil Life System..................................1-19
Driving for Better Fuel Economy.....................1-19
Roadside Assistance Program........................1-20
OnStar
®......................................................1-20
Section 1 In Brief
1-1
Page 10 of 448

Remote Keyless Entry (RKE)
System
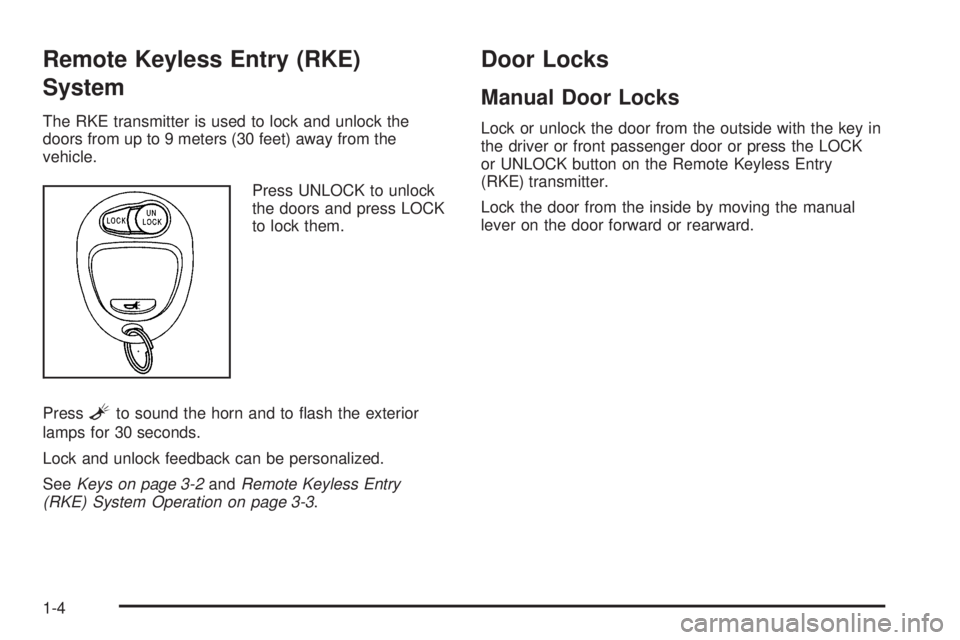
The RKE transmitter is used to lock and unlock the
doors from up to 9 meters (30 feet) away from the
vehicle.
Press UNLOCK to unlock
the doors and press LOCK
to lock them.
Press
Lto sound the horn and to flash the exterior
lamps for 30 seconds.
Lock and unlock feedback can be personalized.
SeeKeys on page 3-2andRemote Keyless Entry
(RKE) System Operation on page 3-3.
Door Locks
Manual Door Locks
Lock or unlock the door from the outside with the key in
the driver or front passenger door or press the LOCK
or UNLOCK button on the Remote Keyless Entry
(RKE) transmitter.
Lock the door from the inside by moving the manual
lever on the door forward or rearward.
1-4
Page 11 of 448

Power Door Locks
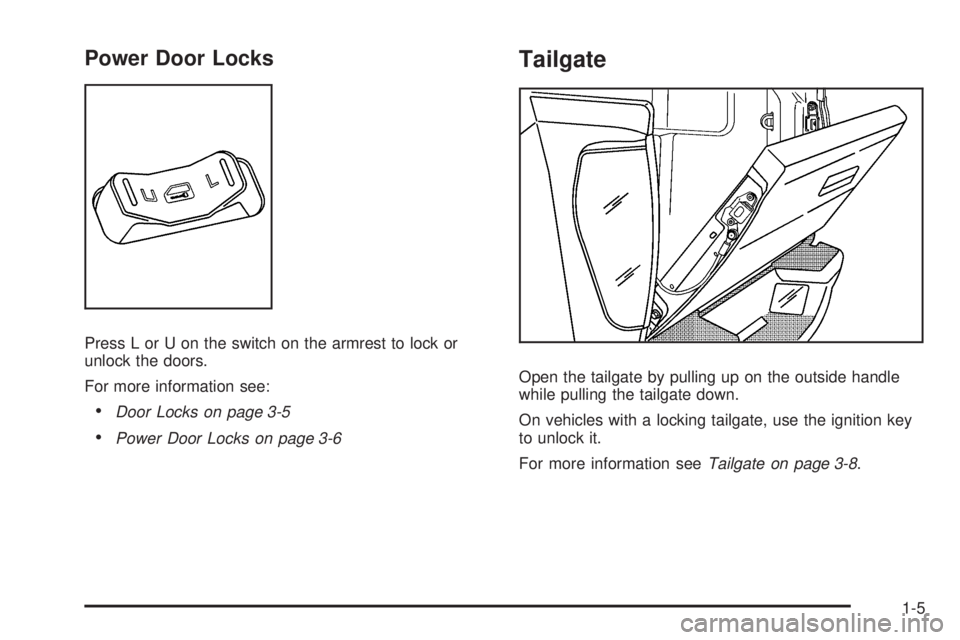
Press L or U on the switch on the armrest to lock or
unlock the doors.
For more information see:
•Door Locks on page 3-5
•Power Door Locks on page 3-6
Tailgate
Open the tailgate by pulling up on the outside handle
while pulling the tailgate down.
On vehicles with a locking tailgate, use the ignition key
to unlock it.
For more information seeTailgate on page 3-8.
1-5
Page 18 of 448

Steering Wheel Adjustment
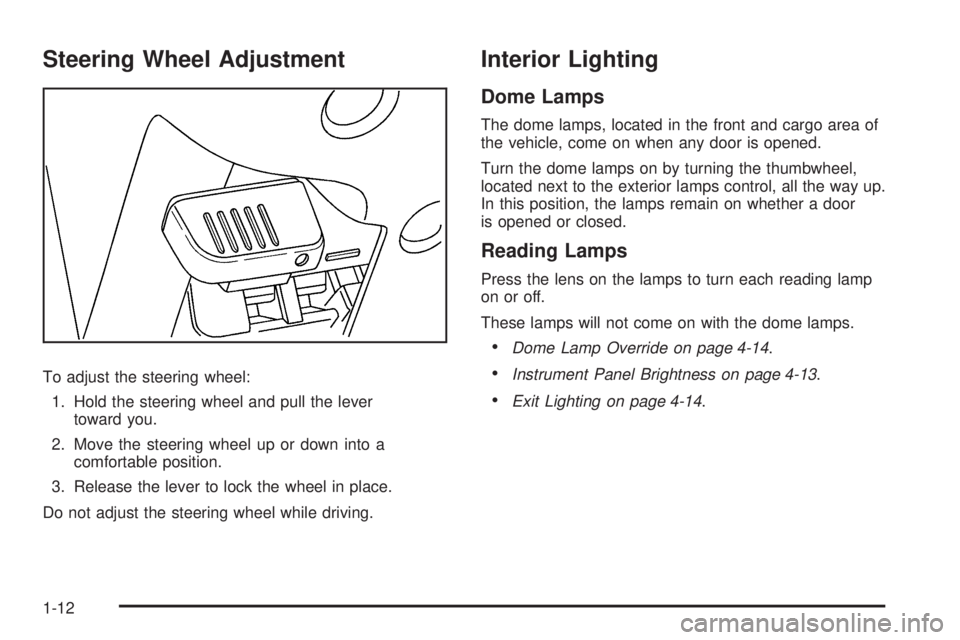
To adjust the steering wheel:
1. Hold the steering wheel and pull the lever
toward you.
2. Move the steering wheel up or down into a
comfortable position.
3. Release the lever to lock the wheel in place.
Do not adjust the steering wheel while driving.
Interior Lighting
Dome Lamps
The dome lamps, located in the front and cargo area of
the vehicle, come on when any door is opened.
Turn the dome lamps on by turning the thumbwheel,
located next to the exterior lamps control, all the way up.
In this position, the lamps remain on whether a door
is opened or closed.
Reading Lamps
Press the lens on the lamps to turn each reading lamp
on or off.
These lamps will not come on with the dome lamps.
•Dome Lamp Override on page 4-14.
•Instrument Panel Brightness on page 4-13.
•Exit Lighting on page 4-14.
1-12
Page 22 of 448

To synchronize the time with an FM station broadcasting
Radio Data System (RDS) information, press and
hold the HR and MIN buttons at the same time until
RDS TIME displays. To accept this time, press and hold
the HR and MIN buttons, at the same time, for another
two seconds. If the time is not available from the station,
NO UPDAT (update) displays.
RDS time is broadcast once a minute. After tuning to an
RDS broadcast station, it could take a few minutes
for the time to update.
For detailed instructions on setting the clock for your
specific audio system, seeSetting the Clock on
page 4-43.
Satellite Radio
XM is a satellite radio service that is based in the 48
contiguous United States and 10 Canadian provinces.
XM satellite radio has a wide variety of programming
and commercial-free music, coast-to-coast, and in
digital-quality sound.
A fee is required to receive the XM service.
For more information, refer to:
•www.xmradio.com or call 1-800-929-2100 (U.S.)
•www.xmradio.ca or call 1-877-438-9677 (Canada)See “XM Satellite Radio Service” underRadio(s) on
page 4-43andXM Radio Messages on page 4-60.
Driver Information Center (DIC)
The DIC is located on the instrument panel cluster. It
displays the status of many vehicle systems and enables
some features to be personalized.
Use the trip reset stem located on the instrument panel
cluster to scroll through the available functions. For
more information, seeDIC Operation and Displays on
page 4-33.
Vehicle Personalization
Some vehicle features can be personalized through the
DIC. These features include:
•Language: English, Spanish, or French
•Automatic Door Locks
•RKE Feedback
For more information, seeDIC Operation and Displays
on page 4-33.
1-16
Page 27 of 448
![GMC CANYON 2010 Owners Manual How OnStar Service Works
Q
:This blue button connects you to a specially
trained OnStar advisor to verify your account information
and to answer questions.
]:Push this red emergency button to get prio GMC CANYON 2010 Owners Manual How OnStar Service Works
Q
:This blue button connects you to a specially
trained OnStar advisor to verify your account information
and to answer questions.
]:Push this red emergency button to get prio](/manual-img/44/35520/w960_35520-26.png)
How OnStar Service Works
Q
:This blue button connects you to a specially
trained OnStar advisor to verify your account information
and to answer questions.
]:Push this red emergency button to get priority help
from specially trained OnStar emergency advisors.
X:Push this button for hands-free, voice-activated
calling and to give voice commands for turn-by-turn
navigation.
Crisis Assist, Stolen Vehicle Assistance, Vehicle
Diagnostics, Remote Door Unlock, Roadside Assistance,
Turn-by-Turn Navigation and Hands-Free Calling are
available on most vehicles. Not all OnStar services are
available on all vehicles. For more information see
the OnStar Owner’s Guide or visit www.onstar.com
(U.S.) or www.onstar.ca (Canada), contact OnStar at
1-888-4-ONSTAR (1-888-466-7827) or TTY
1-877-248-2080, or press
Qto speak with an OnStar
advisor 24 hours a day, 7 days a week.
For a full description of OnStar services and system
limitations, see the OnStar Owner’s Guide in the
glove box.OnStar service is subject to the OnStar terms and
conditions included in the OnStar Subscriber
Information.
OnStar service cannot work unless the vehicle is in a
place where OnStar has an agreement with a wireless
service provider for service in that area. OnStar
service also cannot work unless the vehicle is in a place
where the wireless service provider OnStar has hired
for that area has coverage, network capacity and
reception when the service is needed, and technology
that is compatible with the OnStar service. Not all
services are available everywhere, particularly in remote
or enclosed areas, or at all times.
The OnStar system can record and transmit vehicle
information. This information is automatically sent to an
OnStar call center when
Qis pressed,]is pressed,
or if the airbags or ACR system deploy. This information
usually includes the vehicle’s GPS location and, in
the event of a crash, additional information regarding
the crash that the vehicle was involved in (e.g. the
direction from which the vehicle was hit). When
the virtual advisor feature of OnStar hands-free calling
is used, the vehicle also sends OnStar the vehicle’s
GPS location so they can provide services where it is
located.
1-21
Page 96 of 448

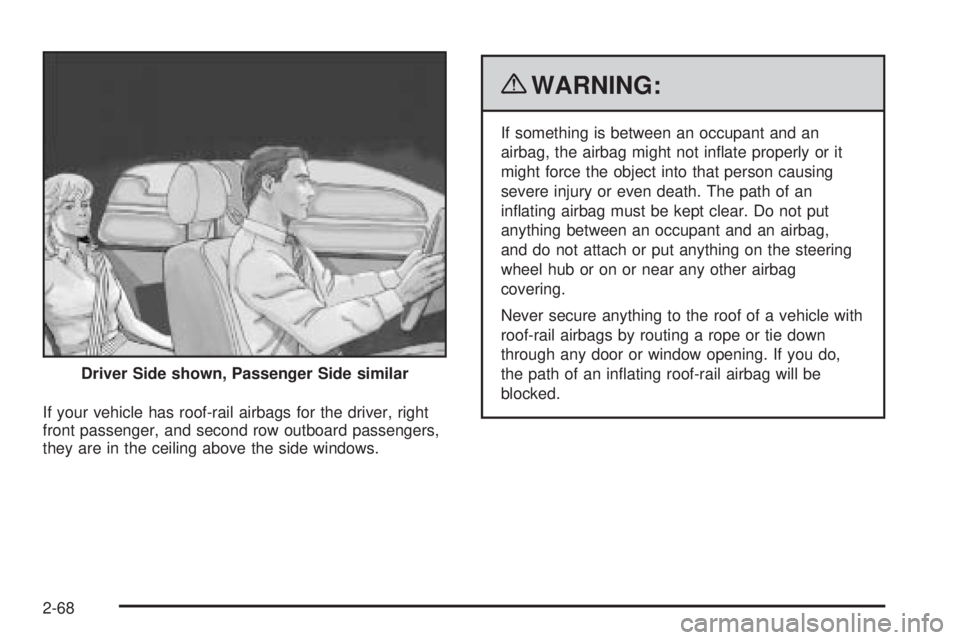
If your vehicle has roof-rail airbags for the driver, right
front passenger, and second row outboard passengers,
they are in the ceiling above the side windows.
{WARNING:
If something is between an occupant and an
airbag, the airbag might not inflate properly or it
might force the object into that person causing
severe injury or even death. The path of an
inflating airbag must be kept clear. Do not put
anything between an occupant and an airbag,
and do not attach or put anything on the steering
wheel hub or on or near any other airbag
covering.
Never secure anything to the roof of a vehicle with
roof-rail airbags by routing a rope or tie down
through any door or window opening. If you do,
the path of an inflating roof-rail airbag will be
blocked. Driver Side shown, Passenger Side similar
2-68