2010 GMC CANYON instrument panel
[x] Cancel search: instrument panelPage 127 of 448

Ignition Positions
The ignition switch has
four different positions.
To shift out of P (Park), turn the ignition to ON/RUN and
apply the regular brake pedal.
Notice:Using a tool to force the key to turn in the
ignition could cause damage to the switch or break
the key. Use the correct key, make sure it is all the
way in, and turn it only with your hand. If the key
cannot be turned by hand, see your dealer/retailer.
(A) LOCK/OFF:This position locks the ignition. It also
locks the transmission on automatic transmission
vehicles. It locks the steering wheel on manual
transmission vehicles. The key can on be removed
in LOCK/OFF.On vehicles with an automatic transmission, the shift
lever must be in P (Park) to turn the ignition switch
to LOCK/OFF.
The steering can bind with the wheels turned off center.
If this happens, move the steering wheel from right to
left while turning the key to ACC/ACCESSORY.
If this doesn’t work, then the vehicle needs service.
(B) ACC/ACCESSORY:This is the position in which
you can operate the electrical accessories or items
plugged into the accessory power outlets. On automatic
transmission vehicles, this position unlocks the
ignition. On manual transmission vehicles, it unlocks the
ignition and steering wheel. Use this position if the
vehicle must be pushed or towed.
(C) ON/RUN:This position can be used to operate
the electrical accessories and to display some
instrument panel cluster warning and indicator lights.
The switch stays in this position when the engine
is running. The transmission is also unlocked in this
position on automatic transmission vehicles.
If you leave the key in the ACC/ACCESSORY or
ON/RUN position with the engine off, the battery could
be drained. You may not be able to start your vehicle
if the battery is allowed to drain for an extended period
of time.
3-17
Page 135 of 448

Shift Speeds
{WARNING:
If you skip a gear when you downshift, you could
lose control of the vehicle. You could injure
yourself or others. Do not shift down more than
one gear at a time when you downshift.
Four-Wheel Drive
If the vehicle has four-wheel drive, you can send the
engine’s driving power to all four wheels for extra
traction. To get the best performance out of four-wheel
drive, you must be familiar with its operation. Read
this section before using four-wheel drive. You should
use two-wheel-drive high for most normal driving
conditions.
Notice:Driving on clean, dry pavement in
four-wheel drive for an extended period of time can
cause premature wear on the vehicle’s powertrain.
Do not drive on clean, dry pavement in Four-Wheel
Drive for extended periods of time.Notice:If the vehicle has four-wheel drive and the
different size spare tire is installed on the vehicle,
do not drive in four-wheel drive until you can have
your �at tire repaired and/or replaced. You could
damage the vehicle, and the repair costs would not
be covered by your warranty. Never use four-wheel
drive when the different size spare tire is installed on
the vehicle.
Notice:If the vehicle has four-wheel drive and the
compact spare tire is installed on the vehicle, do not
drive in four-wheel drive until you can have the �at
tire repaired and/or replaced. You could damage the
vehicle, and the repair costs would not be covered by
your warranty. Never use four-wheel drive when the
compact spare tire is installed on the vehicle.
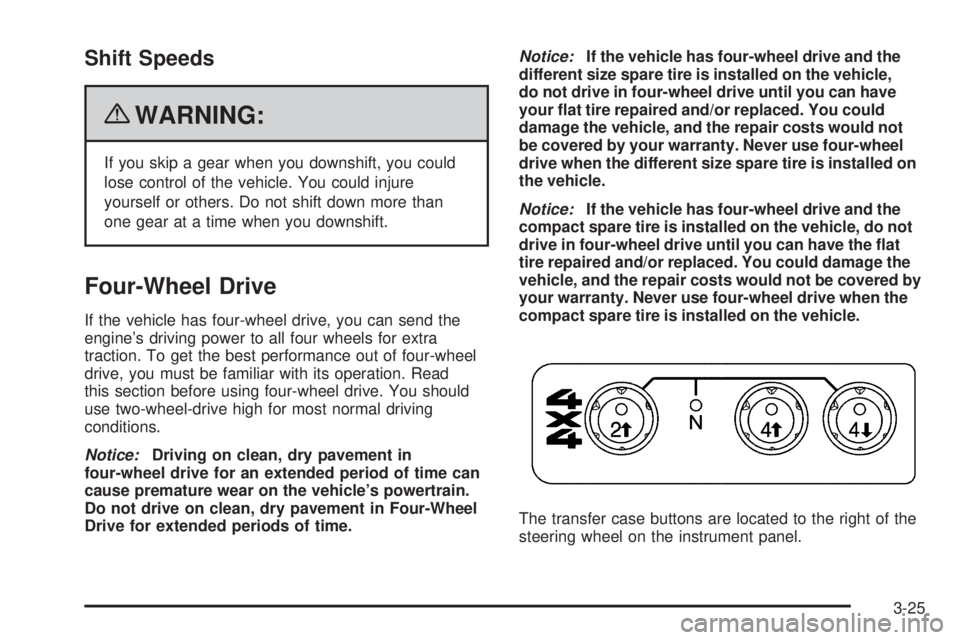
The transfer case buttons are located to the right of the
steering wheel on the instrument panel.
3-25
Page 140 of 448

Parking Brake
The parking brake pedal is
located to the left of the
brake pedal, near the
driver door.
To set the parking brake, hold the brake pedal down,
then push the parking brake pedal down to its
fully-applied position.
A chime will activate and the brake warning light,
located on the instrument panel, will flash when the
parking brake is applied and the vehicle is moving at
least 3 mph (5 km/h) for at least three seconds.
The chime will deactivate and the light will turn off
when the parking brake is set and the vehicle is moving
below 3 mph (5 km/h). SeeBrake System Warning
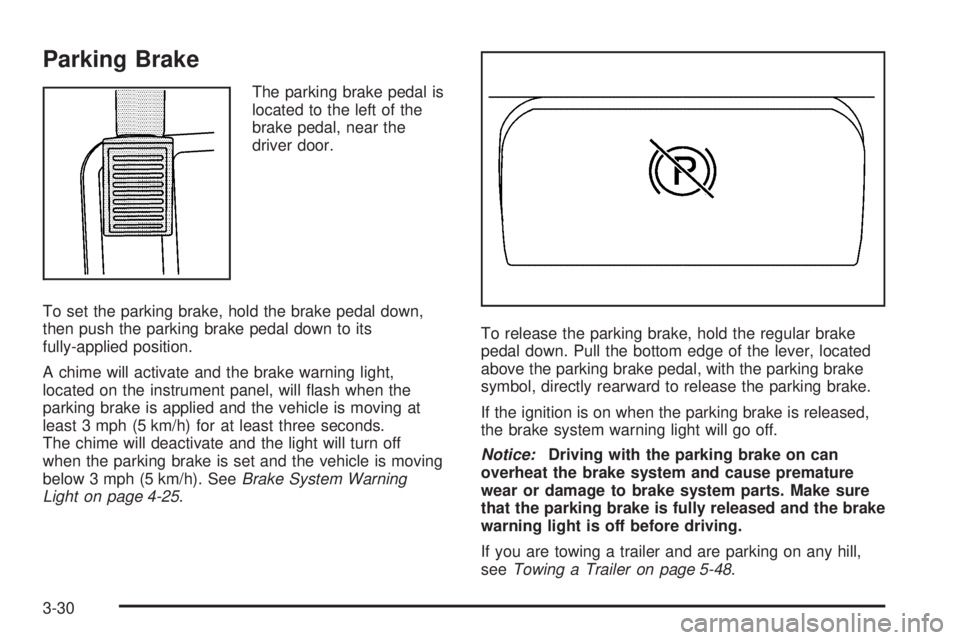
Light on page 4-25.To release the parking brake, hold the regular brake
pedal down. Pull the bottom edge of the lever, located
above the parking brake pedal, with the parking brake
symbol, directly rearward to release the parking brake.
If the ignition is on when the parking brake is released,
the brake system warning light will go off.
Notice:Driving with the parking brake on can
overheat the brake system and cause premature
wear or damage to brake system parts. Make sure
that the parking brake is fully released and the brake
warning light is off before driving.
If you are towing a trailer and are parking on any hill,
seeTowing a Trailer on page 5-48.
3-30
Page 153 of 448

Instrument Panel Overview...............................4-3
Hazard Warning Flashers................................4-3
Horn .............................................................4-3
Tilt Wheel.....................................................4-3
Turn Signal/Multifunction Lever.........................4-4
Turn and Lane-Change Signals........................4-4
Headlamp High/Low-Beam Changer..................4-5
Flash-to-Pass.................................................4-5
Windshield Wipers..........................................4-5
Windshield Washer.........................................4-6
Cruise Control................................................4-7
Exterior Lamps.............................................4-10
Headlamps on Reminder................................4-11
Daytime Running Lamps (DRL).......................4-11
Automatic Headlamp System..........................4-12
Fog Lamps ..................................................4-12
Exterior Cargo Lamps....................................4-13
Instrument Panel Brightness...........................4-13
Dome Lamp .................................................4-13
Dome Lamp Override....................................4-14
Exit Lighting.................................................4-14
Electric Power Management...........................4-14
Battery Run-Down Protection..........................4-15
Accessory Power Outlet(s).............................4-15
Ashtray(s) and Cigarette Lighter......................4-16Climate Controls............................................4-16
Climate Control System.................................4-16
Outlet Adjustment.........................................4-18
Warning Lights, Gages, and Indicators............4-18
Instrument Panel Cluster................................4-19
Speedometer and Odometer...........................4-20
Trip Odometer..............................................4-20
Tachometer.................................................4-20
Safety Belt Reminders...................................4-21
Airbag Readiness Light.................................
.4-22
Passenger Airbag Status Indicator...................4-23
Charging System Light..................................4-24
Up-Shift Light...............................................4-24
Brake System Warning Light..........................4-25
Antilock Brake System (ABS) Warning Light.....4-26
StabiliTrak
®/Traction Control System (TCS)
Warning Light...........................................4-26
Engine Coolant Temperature Gage..................4-27
Tire Pressure Light.......................................4-28
Malfunction Indicator Lamp.............................4-28
Oil Pressure Light.........................................4-31
Security Light...............................................4-32
Cruise Control Light......................................4-32
Highbeam On Light.......................................4-32
Fuel Gage...................................................4-32
Section 4 Instrument Panel
4-1
Page 154 of 448

Driver Information Center (DIC).......................4-33
DIC Operation and Displays...........................4-33
DIC Warnings and Messages.........................4-37
Audio System(s).............................................4-42
Setting the Clock..........................................4-43
Radio(s)......................................................4-43
Using an MP3..............................................4-56XM Radio Messages.....................................4-60
Theft-Deterrent Feature..................................4-61
Radio Reception...........................................4-61
Fixed Mast Antenna......................................4-63
XM™ Satellite Radio Antenna System.............4-63
Chime Level Adjustment................................4-63
Section 4 Instrument Panel
4-2
Page 155 of 448

Instrument Panel Overview
Hazard Warning Flashers
|(Hazard Warning Flasher):Press this button
located on the instrument panel, to make the front and
rear turn signal lamps flash on and off. This warns
others that you are having trouble.
Press
|again to turn the flashers off.
The turn signals do not work while the hazard warning
flashers are on.
Horn
To sound the horn, press the horn symbol on the
steering wheel pad.
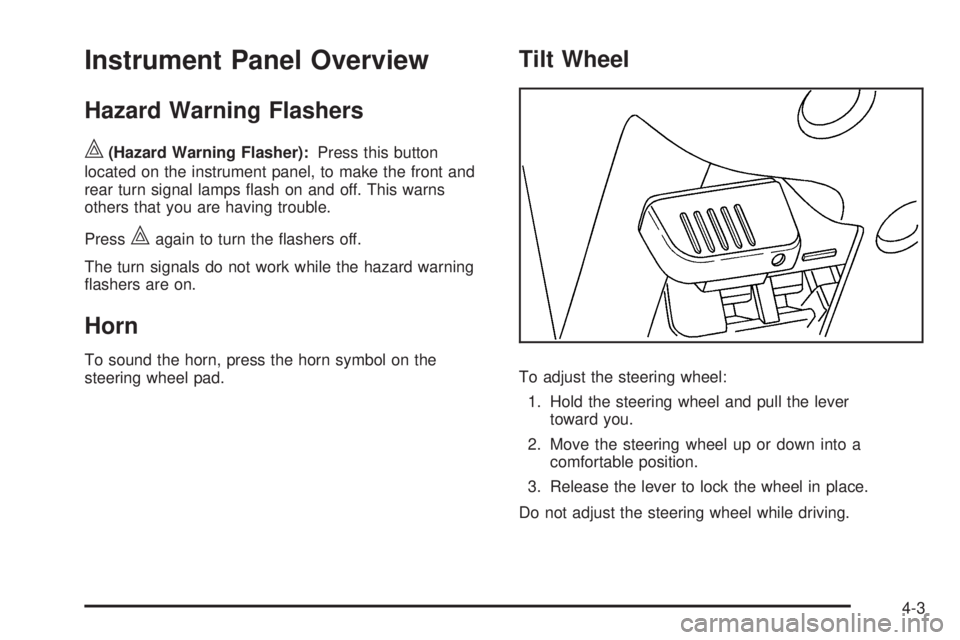
Tilt Wheel
To adjust the steering wheel:
1. Hold the steering wheel and pull the lever
toward you.
2. Move the steering wheel up or down into a
comfortable position.
3. Release the lever to lock the wheel in place.
Do not adjust the steering wheel while driving.
4-3
Page 156 of 448

Turn Signal/Multifunction Lever
The lever on the left side of the steering column
includes the following:
G: Turn and Lane Change Signals
53: Headlamp High/Low-Beam Changer
N: Windshield Wipers
L: Windshield Washer
J: Cruise Control
Flash-to-Pass.
Information for these features is on the pages following.
Turn and Lane-Change Signals
An arrow on the instrument
panel cluster flashes in the
direction of the turn or
lane change.
Move the lever all the way up or down to signal a turn.
Raise or lower the lever until the arrow starts to flash
to signal a lane change. Hold it there until the lane
change is complete.
The lever returns to its starting position when it is
released.
If after signaling a turn or a lane change the arrows
flash rapidly or do not come on, a signal bulb may be
burned out.
Have the bulbs replaced. If the bulb is not burned out,
check the fuse. For bulb replacement, seeTaillamps,
Turn Signal, Stoplamps and Back-up Lamps on
page 6-53. For a blown fuse or circuit breaker,
seeFuses and Circuit Breakers on page 6-111.
4-4
Page 157 of 448

Turn Signal On Chime
If a turn signal is left on for more than 3/4 of a mile
(1.2 km), a chime will sound at each flash of the turn
signal and the message TURN SIGNAL will also appear
in the DIC. To turn the chime and message off, move
the turn signal lever to the off position.
See “TURN SIGNAL” underDIC Warnings and
Messages on page 4-37for more information.
Headlamp High/Low-Beam Changer
23Headlamp High/Low Beam Changer:Push
the turn signal/multifunction lever away from you to turn
the high beams on.
Pull the lever towards you to return to low beams.
This indicator light turns on in the instrument panel
cluster when the high beam headlamps are on.
Flash-to-Pass
This feature lets you use the high-beam headlamps to
signal a driver in front of you that you want to pass.
It works even if the headlamps are in the automatic
position.
To use it, pull the turn signal lever toward you, then
release it.
If the headlamps are in the automatic position or on
low beam, the high-beam headlamps will turn on.
They will stay on as long as the lever is held toward
you. The high-beam indicator on the instrument
panel cluster will come on. Release the lever to
return to normal operation.
Windshield Wipers
The windshield wiper controls are located on the
multifunction lever. They are controlled by turning
the band with this
zsymbol.
The windshield wipers work in all ignition positions,
except off. This includes the Retained Access Power
mode. SeeRetained Accessory Power (RAP) on
page 3-18.
4-5