2010 FORD F750 clutch
[x] Cancel search: clutchPage 110 of 274
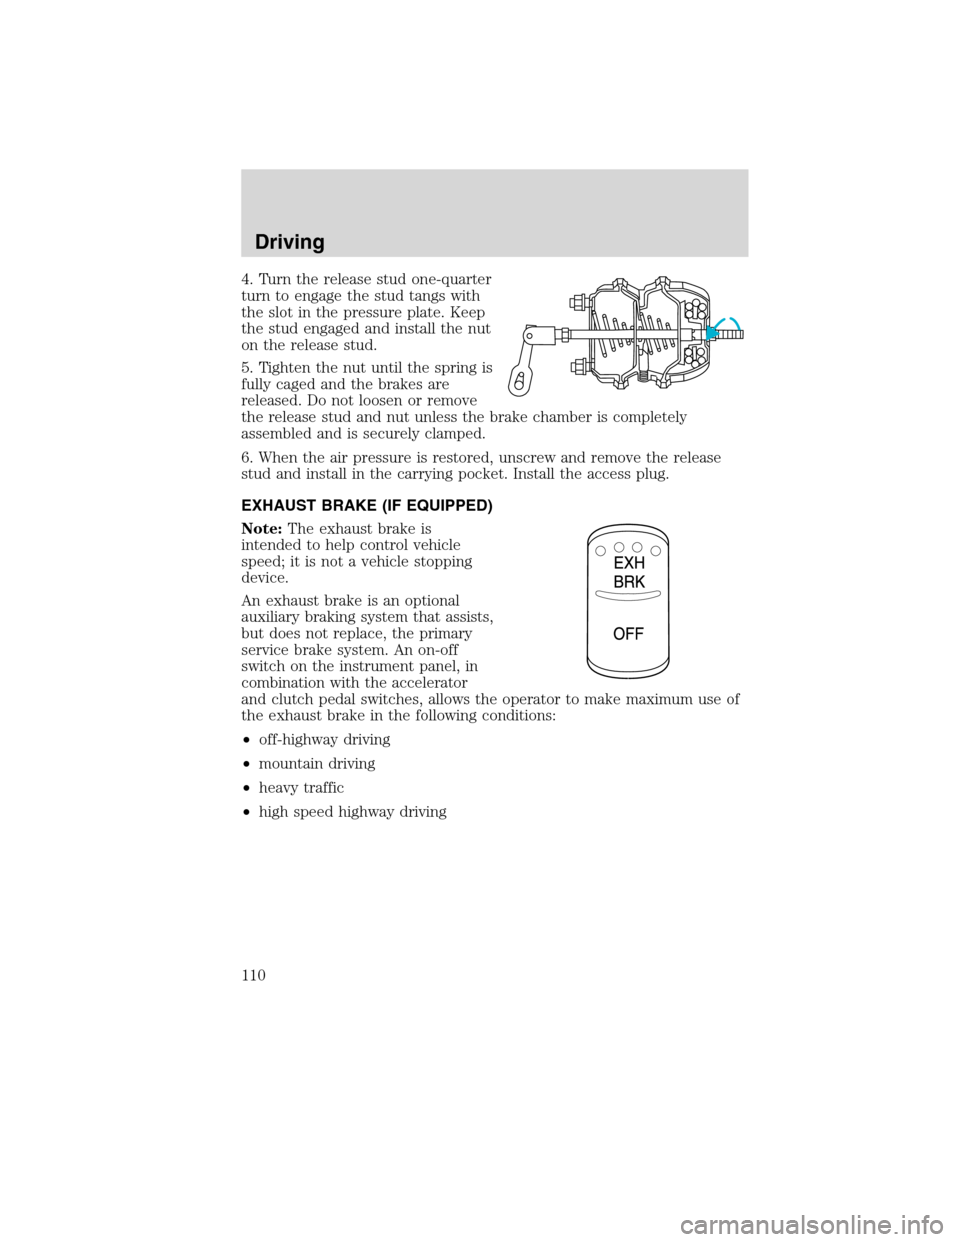
4. Turn the release stud one-quarter
turn to engage the stud tangs with
the slot in the pressure plate. Keep
the stud engaged and install the nut
on the release stud.
5. Tighten the nut until the spring is
fully caged and the brakes are
released. Do not loosen or remove
the release stud and nut unless the brake chamber is completely
assembled and is securely clamped.
6. When the air pressure is restored, unscrew and remove the release
stud and install in the carrying pocket. Install the access plug.
EXHAUST BRAKE (IF EQUIPPED)
Note:The exhaust brake is
intended to help control vehicle
speed; it is not a vehicle stopping
device.
An exhaust brake is an optional
auxiliary braking system that assists,
but does not replace, the primary
service brake system. An on-off
switch on the instrument panel, in
combination with the accelerator
and clutch pedal switches, allows the operator to make maximum use of
the exhaust brake in the following conditions:
•off-highway driving
•mountain driving
•heavy traffic
•high speed highway driving
Driving
110
2010 F-650/750(f67)
Supplement(supplement), 1st Printing
USA(fus)
Page 112 of 274
Note:Engine speed has a major influence of retarding performance.
When engine speed is maintained at the maximum allowable level, the
exhaust brake will operate at peak performance.
WARNING:The exhaust brake is not recommended for use on
slippery or low traction road surfaces. Under these conditions a
loss of vehicle control could occur.
Exhaust brake operating characteristics
When you remove your feet from both the accelerator and clutch pedals
and the exhaust brake switch is in the on position, the exhaust brake is
activated. The following conditions should exist if the brake is operating
properly:
•A slight change in the sound of the engine when the exhaust brake is
activated.
•Engine temperature remains in the normal operating range.
•Road speed usually decreases when the exhaust brake is applied
during a descent, except when the vehicle is carrying a heavy load or
the grade is extremely steep. In these instances, you may need to
apply the service brakes occasionally.
•During a descent, the tachometer usually shows a drop in RPM
depending on the grade and the vehicle load.
•Do not expect a retarding effect similar to sudden hard application of
the service brakes. The exhaust brake retards the vehicle with a
smooth braking effect.
•Depending on the grade and vehicle load, you may or may not feel the
retarding force acting against your body when the brake is applied.
The brake’s retarding force is actually preventing the vehicle from
going much faster.
•Engine speed has a major effect on retarding performance, with higher
engine speeds permitting greater retarding ability.
•Engine brake performance is closely related to the type of
transmission your vehicle is equipped with. Downshifting of manual
transmission to the lowest gear possible, without exceeding the
maximum engine RPM limit, will maximize retarding performance.
Exhaust brakes will operate effectively with automatic transmissions,
but performance will vary with engine speed and the gear selected by
the transmission.
Driving
112
2010 F-650/750(f67)
Supplement(supplement), 1st Printing
USA(fus)
Page 124 of 274
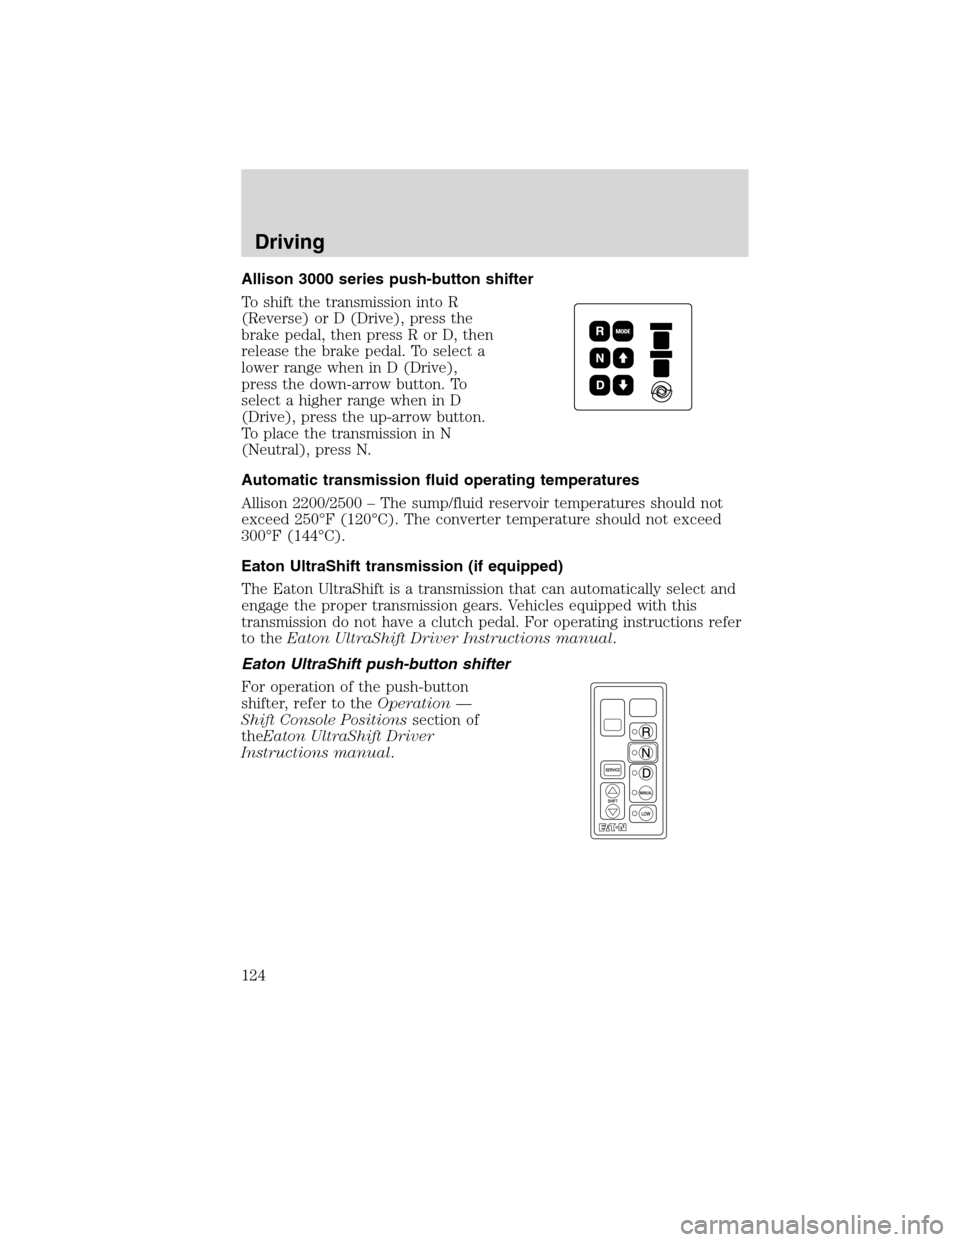
Allison 3000 series push-button shifter
To shift the transmission into R
(Reverse) or D (Drive), press the
brake pedal, then press R or D, then
release the brake pedal. To select a
lower range when in D (Drive),
press the down-arrow button. To
select a higher range when in D
(Drive), press the up-arrow button.
To place the transmission in N
(Neutral), press N.
Automatic transmission fluid operating temperatures
Allison 2200/2500 – The sump/fluid reservoir temperatures should not
exceed 250°F (120°C). The converter temperature should not exceed
300°F (144°C).
Eaton UltraShift transmission (if equipped)
The Eaton UltraShift is a transmission that can automatically select and
engage the proper transmission gears. Vehicles equipped with this
transmission do not have a clutch pedal. For operating instructions refer
to theEaton UltraShift Driver Instructions manual.
Eaton UltraShift push-button shifter
For operation of the push-button
shifter, refer to theOperation —
Shift Console Positionssection of
theEaton UltraShift Driver
Instructions manual.
Driving
124
2010 F-650/750(f67)
Supplement(supplement), 1st Printing
USA(fus)
Page 125 of 274
CLUTCH (IF EQUIPPED)
Do not ride or slip the clutch as this will cause unnecessary heat and
wear. Maintain the specified clutch adjustment to prolong its life and
regularly inspect the clutch control linkage for tightness. Refer to the
Scheduled Maintenance Guidechapter for other maintenance
information. When adjustment of the clutch is necessary, it is very
important that the work be performed properly or early clutch failure
may result and a costly clutch overhaul may become necessary. Clutch
work should only be performed by a qualified technician.
Engaging the clutch
•Always start in the proper gear.An empty vehicle can start in a
higher gear than a fully loaded vehicle. Starting in too high a gear can
cause clutch slippage and excessive heat and wear on the clutch. A
gear that will start the vehicle moving at idle speed is the correct gear.
If the engine has to be revved to get the vehicle going, the gear
selection is too high.
•Do not shift until the vehicle has reached the proper speed.
Upshifting before the vehicle has reached the proper speed can cause
clutch slippage and excessive heat and wear on the clutch.
•Never hold a vehicle on a grade with the clutch.This will cause
the clutch to slip and can actually burn up the clutch.
•Never coast with the clutch disengaged.The high RPM
(sometimes over 10,000), can actually burst the facing material of the
clutch.
•Never engage the clutch while coasting.Re-engaging the clutch
after coasting may not only cause a great shock to the clutch, but the
whole drivetrain. Internal engine damage and/or clutch and flywheel
failure can result from this.
If your vehicle’s transmission is equipped with a ceramic clutch, you
must start the vehicle moving in first gear and engage the clutch before
pressing the accelerator at idle. Also, don’t try to slip the clutch by
raising engine RPM and riding or feathering the clutch pedal since the
vehicle will experience erratic engagement. Erratic engagement can
cause the engine stalling and potential serious damage to the vehicle’s
driveline components.
Driving
125
2010 F-650/750(f67)
Supplement(supplement), 1st Printing
USA(fus)
Page 126 of 274
Clutch brake (vehicles equipped with a non-synchronized
transmission) - Vehicle stationary
A clutch brake is used to stop transmission input shaft rotation so that
the initial 1 (First) or R (Reverse) gear selection can be accomplished
when the vehicle is stationary and the engine is running at idle speed.
Clutch brake application occurs in the last inch (25 mm) of clutch pedal
travel.
When using the clutch brake, fully press the clutch pedal and shift the
transmission into 1 (First) or R (Reverse). If the transmission won’t go
into one of these gears, slowly release the clutch pedal while applying
light pressure on the transmission shift lever until it shifts into gear.
Note:After engagement of 1 (First) gear,do notuse the clutch brake
for upshifting or downshifting. If you do, clutch brake life will shorten
and gear selection shift efforts may increase.
Double-clutch procedures - vehicles equipped with a
non-synchronized transmission
In order to properly upshift or downshift, perform the following steps:
1. Press the clutch pedal to disengage the clutch.
2. Shift the transmission into neutral.
3. Release the clutch pedal.
If upshifting, wait until the engine speed matches the transmission
speed of the gear you are selecting.
If downshifting,accelerate the engine until the engine speed matches
the input speed of the gear you are selecting. Press the clutch pedal
immediately and shift into the desired gear, then release the clutch
pedal.
MANUAL TRANSMISSION OPERATION (IF EQUIPPED)
Note:Continued use of a damaged or worn clutch, prolonged clutch
slippage or downshifting at excessive speeds can result in a failure of the
engine, transmission or clutch components.
Note:To avoid premature clutch wear and failure, do not drive with
your foot resting on the clutch pedal or use it to hold the vehicle at a
standstill on an upgrade as when waiting for a traffic light.
Driving
126
2010 F-650/750(f67)
Supplement(supplement), 1st Printing
USA(fus)
Page 127 of 274

Manual transmission shift patterns
are displayed on either the shift
lever knob or the sun visor.
Study this information carefully before you drive the vehicle even though
you may be familiar with similar units. Do not attempt to drive the
vehicle without knowing the exact shift pattern of the transmission.
Consult your authorized dealer if any questions exist as to the shifting
instructions posted in your vehicle.
WARNING:Do not coast the vehicle with the clutch pedal
pressed or with the transmission in neutral. This practice could
result in loss of vehicle control.
Driving hints
The following driving hints are provided as a brief, general guide in
operating the different manual transmissions used in your vehicle.
•When shifting into 1 (First) or R (Reverse) with vehicle standing still,
quickly release and press the clutch pedal (if necessary to complete
gear engagement).
•Always use the lowest (or most appropriate) gear to start the vehicle.
•Always use a gear ratio low enough to allow the engine to operate
above the minimum engine operation speed range.
•Do not lug the engine.
•Do not slam or jerk the gearshift lever into gear.
•When more power is required, shift to a lower gear and accelerate the
engine near the governed speed.
Shifting with a synchronized transmission
With the clutch pedal pressed in, use 2 (Second) gear synchronizer to
stop the clutch disc rotation; this allows smooth engagement of 1 (First)
or R (Reverse). To complete the gear engagement, it may be necessary
to apply light pressure to the gearshift lever during initial engagement of
the clutch. It takes a second or two to match gear speeds; steady
R 1 3 5
4
6 2
Driving
127
2010 F-650/750(f67)
Supplement(supplement), 1st Printing
USA(fus)
Page 128 of 274
pressure on the gearshift lever will help the synchronizer perform its job
more quickly. If the gearshift lever is forced into position, this action
defeats the purpose of the synchronizer by causing gear clash.
Shifting with a non-synchronized transmission
Refer toClutch brakeandDouble clutch proceduresin theClutch
section of this chapter.
Operating the Eaton FS-5205A 5–speed transmission
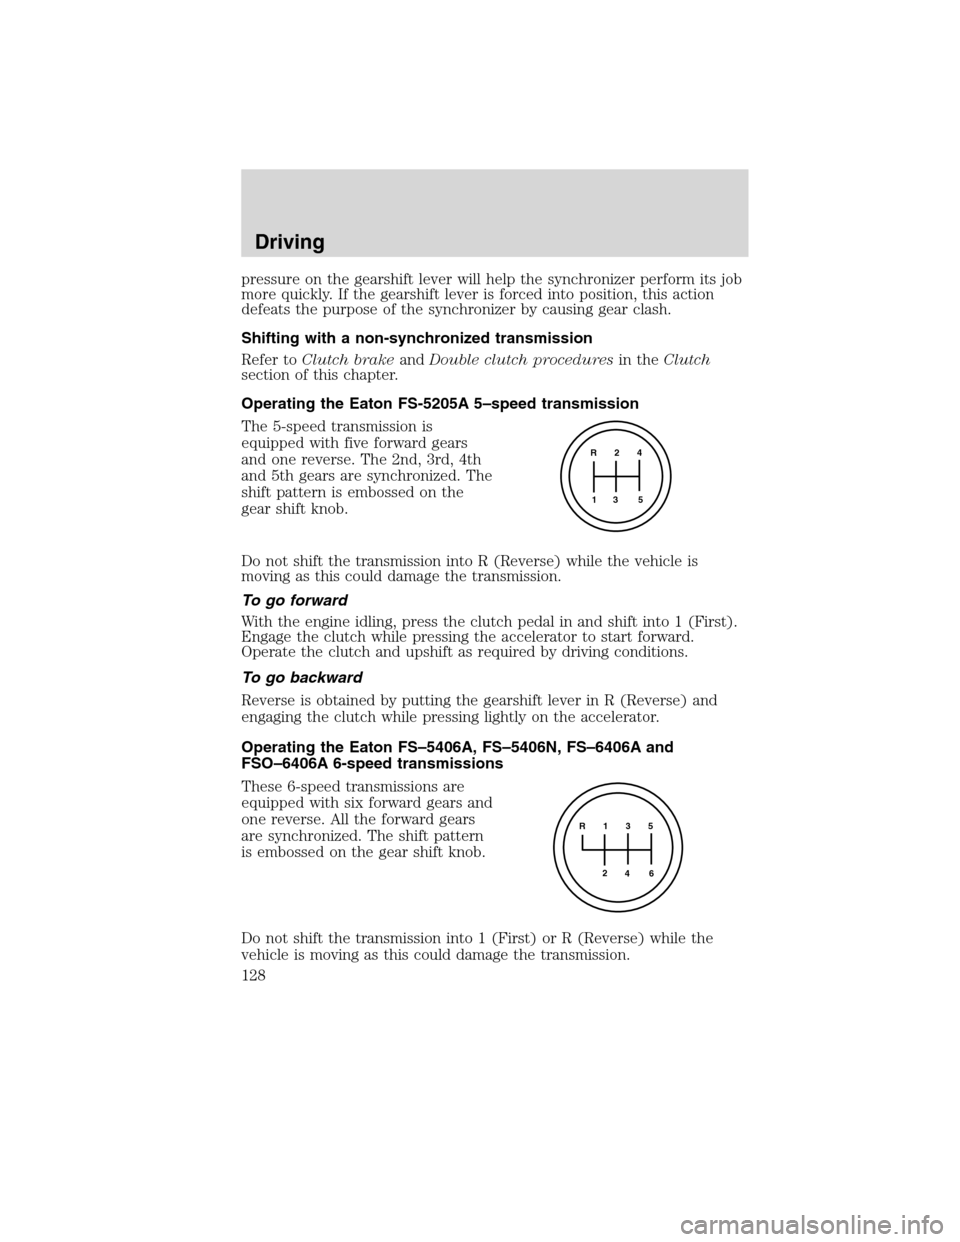
The 5-speed transmission is
equipped with five forward gears
and one reverse. The 2nd, 3rd, 4th
and 5th gears are synchronized. The
shift pattern is embossed on the
gear shift knob.
Do not shift the transmission into R (Reverse) while the vehicle is
moving as this could damage the transmission.
To go forward
With the engine idling, press the clutch pedal in and shift into 1 (First).
Engage the clutch while pressing the accelerator to start forward.
Operate the clutch and upshift as required by driving conditions.
To go backward
Reverse is obtained by putting the gearshift lever in R (Reverse) and
engaging the clutch while pressing lightly on the accelerator.
Operating the Eaton FS–5406A, FS–5406N, FS–6406A and
FSO–6406A 6-speed transmissions
These 6-speed transmissions are
equipped with six forward gears and
one reverse. All the forward gears
are synchronized. The shift pattern
is embossed on the gear shift knob.
Do not shift the transmission into 1 (First) or R (Reverse) while the
vehicle is moving as this could damage the transmission.
R 2 4
3 5 1
R 1 3 5
4
6 2
Driving
128
2010 F-650/750(f67)
Supplement(supplement), 1st Printing
USA(fus)
Page 129 of 274
To go forward
With the engine idling, press the clutch pedal in and shift into 1 (First).
Engage the clutch while pressing the accelerator to start forward.
Operate the clutch and upshift as required by driving conditions.
To go backward
Reverse is obtained by putting the gearshift lever in R (Reverse) and
engaging the clutch while pressing lightly on the accelerator.
Operating the Spicer ES56-7B and ES066-7B 7-speed
transmissions
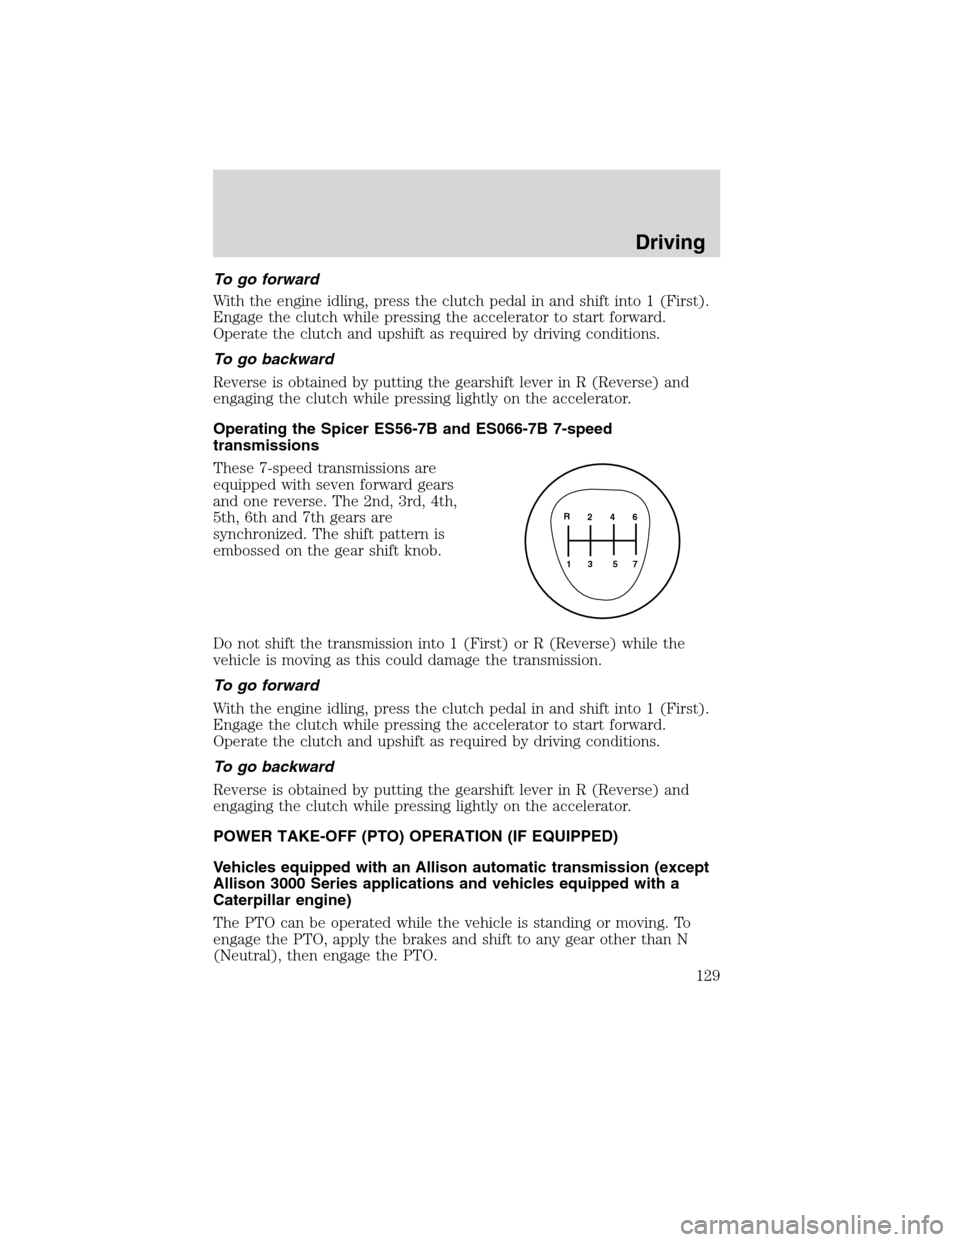
These 7-speed transmissions are
equipped with seven forward gears
and one reverse. The 2nd, 3rd, 4th,
5th, 6th and 7th gears are
synchronized. The shift pattern is
embossed on the gear shift knob.
Do not shift the transmission into 1 (First) or R (Reverse) while the
vehicle is moving as this could damage the transmission.
To go forward
With the engine idling, press the clutch pedal in and shift into 1 (First).
Engage the clutch while pressing the accelerator to start forward.
Operate the clutch and upshift as required by driving conditions.
To go backward
Reverse is obtained by putting the gearshift lever in R (Reverse) and
engaging the clutch while pressing lightly on the accelerator.
POWER TAKE-OFF (PTO) OPERATION (IF EQUIPPED)
Vehicles equipped with an Allison automatic transmission (except
Allison 3000 Series applications and vehicles equipped with a
Caterpillar engine)
The PTO can be operated while the vehicle is standing or moving. To
engage the PTO, apply the brakes and shift to any gear other than N
(Neutral), then engage the PTO.
2 4 6
3 5 71 R
Driving
129
2010 F-650/750(f67)
Supplement(supplement), 1st Printing
USA(fus)