2010 FORD F450 manual transmission
[x] Cancel search: manual transmissionPage 288 of 408
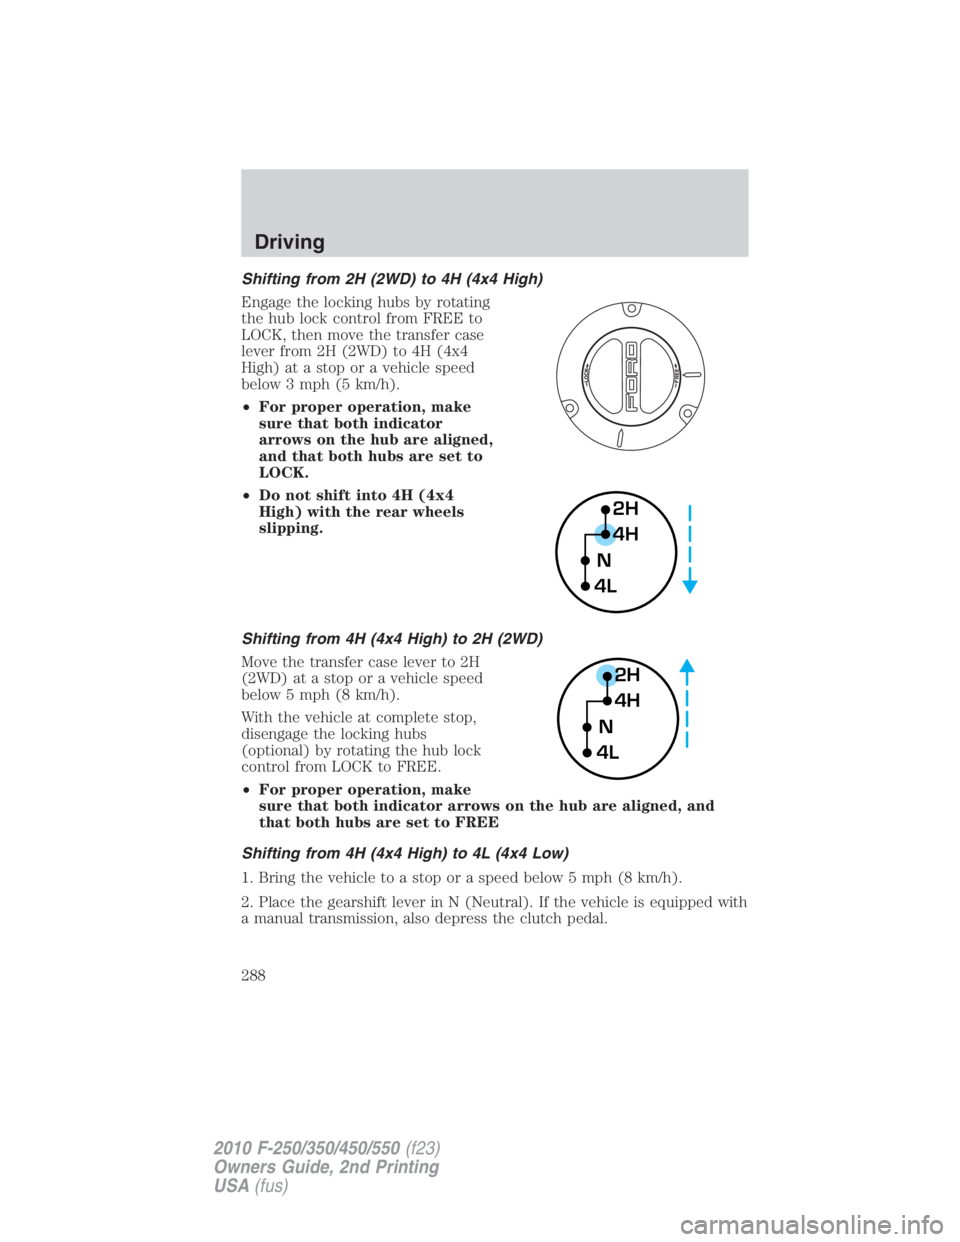
Shifting from 2H (2WD) to 4H (4x4 High)
Engage the locking hubs by rotating
the hub lock control from FREE to
LOCK, then move the transfer case
lever from 2H (2WD) to 4H (4x4
High) at a stop or a vehicle speed
below 3 mph (5 km/h).
• For proper operation, make
sure that both indicator
arrows on the hub are aligned,
and that both hubs are set to
LOCK.
• Do not shift into 4H (4x4
High) with the rear wheels
slipping.
Shifting from 4H (4x4 High) to 2H (2WD)
Move the transfer case lever to 2H
(2WD) at a stop or a vehicle speed
below 5 mph (8 km/h).
With the vehicle at complete stop,
disengage the locking hubs
(optional) by rotating the hub lock
control from LOCK to FREE.
• For proper operation, make
sure that both indicator arrows on the hub are aligned, and
that both hubs are set to FREE
Shifting from 4H (4x4 High) to 4L (4x4 Low)
1. Bring the vehicle to a stop or a speed below 5 mph (8 km/h).
2. Place the gearshift lever in N (Neutral). If the vehicle is equipped with
a manual transmission, also depress the clutch pedal. 2H
4H
4L N
2H
4H
4L NDriving
288
2010 F-250/350/450/550 (f23)
Owners Guide, 2nd Printing
USA (fus)
Page 289 of 408
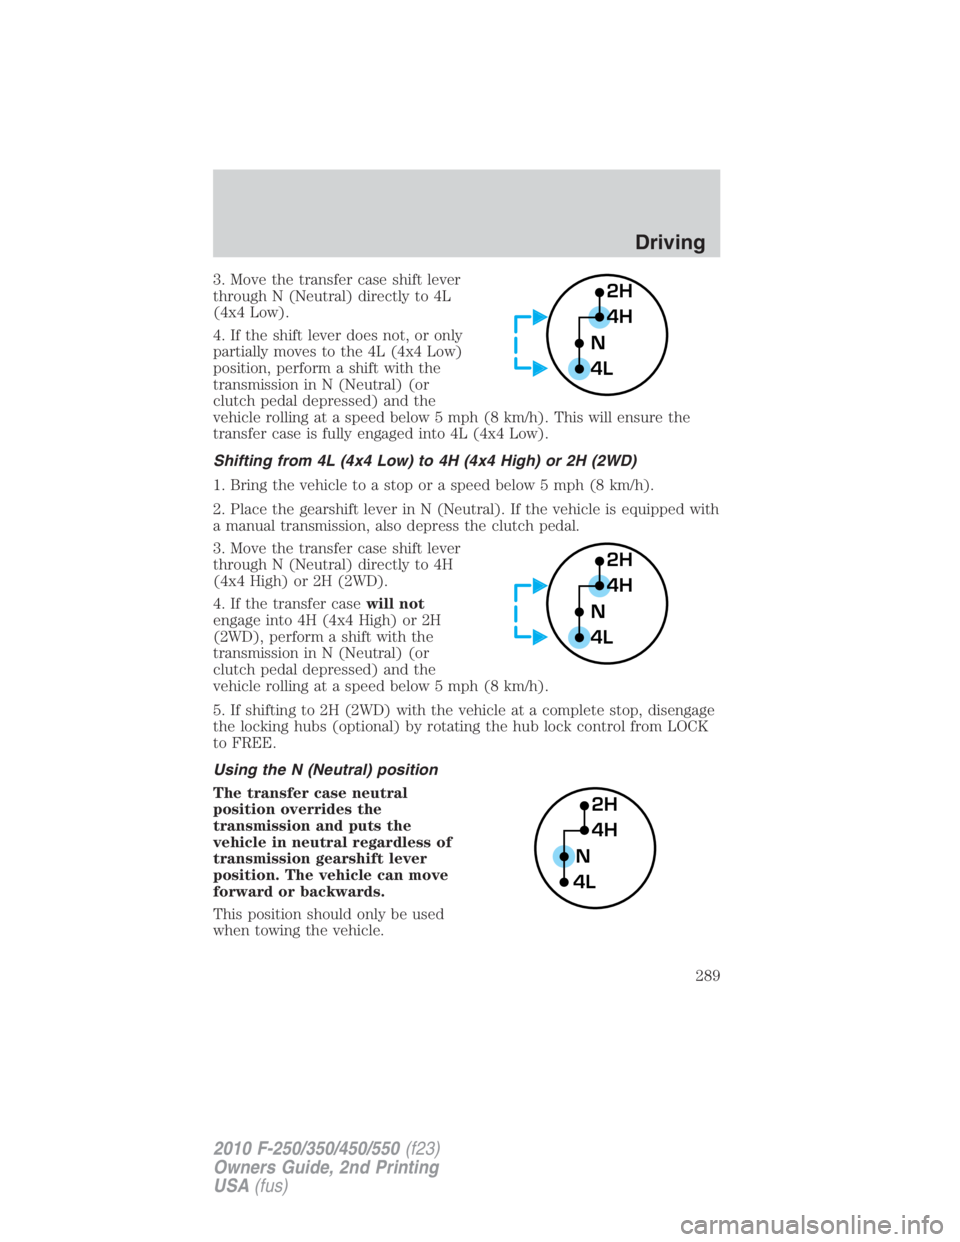
3. Move the transfer case shift lever
through N (Neutral) directly to 4L
(4x4 Low).
4. If the shift lever does not, or only
partially moves to the 4L (4x4 Low)
position, perform a shift with the
transmission in N (Neutral) (or
clutch pedal depressed) and the
vehicle rolling at a speed below 5 mph (8 km/h). This will ensure the
transfer case is fully engaged into 4L (4x4 Low).
Shifting from 4L (4x4 Low) to 4H (4x4 High) or 2H (2WD)
1. Bring the vehicle to a stop or a speed below 5 mph (8 km/h).
2. Place the gearshift lever in N (Neutral). If the vehicle is equipped with
a manual transmission, also depress the clutch pedal.
3. Move the transfer case shift lever
through N (Neutral) directly to 4H
(4x4 High) or 2H (2WD).
4. If the transfer case will not
engage into 4H (4x4 High) or 2H
(2WD), perform a shift with the
transmission in N (Neutral) (or
clutch pedal depressed) and the
vehicle rolling at a speed below 5 mph (8 km/h).
5. If shifting to 2H (2WD) with the vehicle at a complete stop, disengage
the locking hubs (optional) by rotating the hub lock control from LOCK
to FREE.
Using the N (Neutral) position
The transfer case neutral
position overrides the
transmission and puts the
vehicle in neutral regardless of
transmission gearshift lever
position. The vehicle can move
forward or backwards.
This position should only be used
when towing the vehicle. 2H
4H
4L N
2H
4H
4L N
2H
4H
4L NDriving
289
2010 F-250/350/450/550 (f23)
Owners Guide, 2nd Printing
USA (fus)
Page 291 of 408
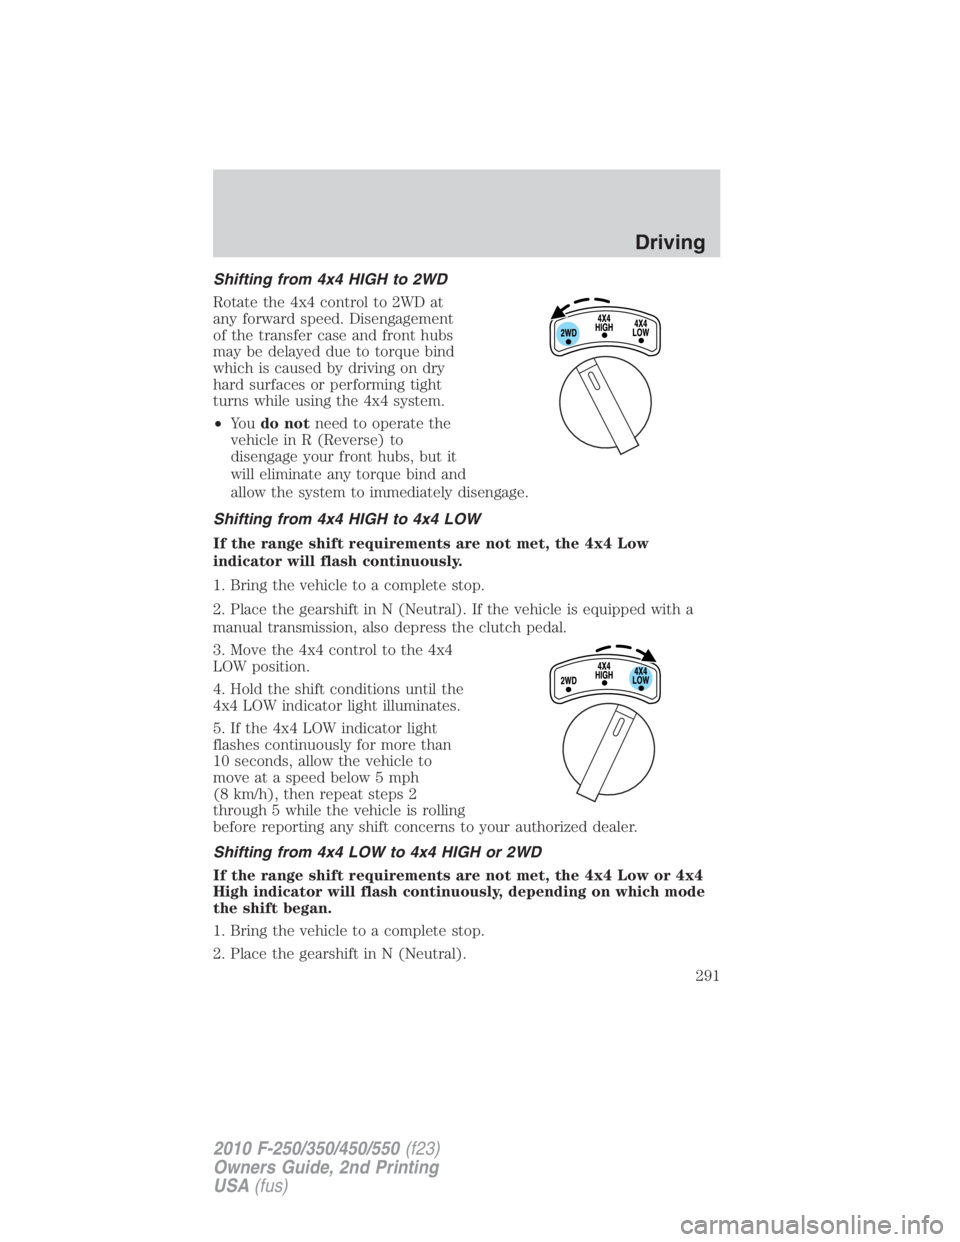
Shifting from 4x4 HIGH to 2WD
Rotate the 4x4 control to 2WD at
any forward speed. Disengagement
of the transfer case and front hubs
may be delayed due to torque bind
which is caused by driving on dry
hard surfaces or performing tight
turns while using the 4x4 system.
• Yo u do not need to operate the
vehicle in R (Reverse) to
disengage your front hubs, but it
will eliminate any torque bind and
allow the system to immediately disengage.
Shifting from 4x4 HIGH to 4x4 LOW
If the range shift requirements are not met, the 4x4 Low
indicator will flash continuously.
1. Bring the vehicle to a complete stop.
2. Place the gearshift in N (Neutral). If the vehicle is equipped with a
manual transmission, also depress the clutch pedal.
3. Move the 4x4 control to the 4x4
LOW position.
4. Hold the shift conditions until the
4x4 LOW indicator light illuminates.
5. If the 4x4 LOW indicator light
flashes continuously for more than
10 seconds, allow the vehicle to
move at a speed below 5 mph
(8 km/h), then repeat steps 2
through 5 while the vehicle is rolling
before reporting any shift concerns to your authorized dealer.
Shifting from 4x4 LOW to 4x4 HIGH or 2WD
If the range shift requirements are not met, the 4x4 Low or 4x4
High indicator will flash continuously, depending on which mode
the shift began.
1. Bring the vehicle to a complete stop.
2. Place the gearshift in N (Neutral). Driving
291
2010 F-250/350/450/550 (f23)
Owners Guide, 2nd Printing
USA (fus)
Page 295 of 408
the driveline. Therefore, the vehicle is free to roll even if the automatic
transmission is in P (Park) or the manual transmission is in gear. Do not
leave the vehicle unattended with the transfer case in the N (Neutral)
position. Always set the parking brake fully and turn off the ignition
when leaving the vehicle.
WARNING: Always set the parking brake fully and make sure
the gearshift is latched in P (Park). Turn the ignition to the off
position and remove the key whenever you leave your vehicle.
WARNING: If the parking brake is fully released, but the brake
warning lamp remains illuminated, the brakes may not be
working properly. See your authorized dealer.
4WD Systems
4WD (when you select a 4WD mode), uses all four wheels to power the
vehicle. This increases traction, enabling you to drive over terrain and
road conditions that a conventional two-wheel drive vehicle cannot.
Power is supplied to all four wheels through a transfer case. On 4WD
vehicles, the transfer case allows you to select 4WD when necessary.
Information on transfer case operation and shifting procedures can be
found in the Driving chapter. Information on transfer case maintenance
can be found in the Maintenance and Specifications chapter. You
should become thoroughly familiar with this information before you
operate your vehicle.
Normal characteristics
On some 4WD models, the initial shift from two-wheel drive to 4x4 while
the vehicle is moving can cause some momentary clunk and ratcheting
sounds. This is the front drivetrain coming up to speed and the
automatic locking hubs engaging and is not cause for concern.
Sand
When driving over sand, try to keep all four wheels on the most solid
area of the trail. Avoid reducing the tire pressures but shift to a lower
gear and drive steadily through the terrain. Apply the accelerator slowly
and avoid spinning the wheels.
Avoid excessive speed because vehicle momentum can work against you
and cause the vehicle to become stuck to the point that assistance may
be required from another vehicle. Remember, you may be able to back
out the way you came if you proceed with caution. Driving
295
2010 F-250/350/450/550 (f23)
Owners Guide, 2nd Printing
USA (fus)
Page 300 of 408
the transmission vent tube is submerged may allow water into the
transmission and cause internal transmission damage.
Once through the water, always dry the brakes by moving your
vehicle slowly while applying light pressure on the brake pedal.
Wet brakes do not stop the vehicle as quickly as dry brakes.
SNOWPLOWING
Ford recommends that the Super Duty F-Series used for snow removal
include the Snow Plow Package Option.
Installing the snowplow
Weight limits and guidelines for selecting and installing the snowplow can
be found in the Ford Truck Body Builders Layout Book, Snowplow
section, found at www.fleet.ford.com/truckbbas. A typical installation
affects the following:
• Certification to government safety laws such as occupant protection
and airbag deployment, braking, and lighting. Look for an “Alterer’s
Label” on the vehicle from the snowplow installer certifying that the
installation meets all applicable Federal Motor Vehicle Safety
Standards (FMVSS).
• The Total Accessory Reserve Capacity (TARC) is shown on the lower
right side of the vehicle’s Safety Compliance Certification Label. This
applies to Ford-completed vehicles of 10,000 lb. (4,536 kg) GVWR or
less. This is the weight of permanently-attached auxiliary equipment,
such as snowplow frame-mounting hardware, that can be added to the
vehicle and satisfy Ford compliance certification to FMVSS. Exceeding
this weight may require the auxiliary equipment installer additional
safety certification responsibility. The Front Accessory Reserve
Capacity (FARC) is added for customer convenience.
• Rear ballast weight behind the rear axle may be required to prevent
exceeding the FGAWR, and provide front-to-rear weight balance for
proper braking and steering.
• Front wheel toe may require re-adjustment to prevent premature
uneven tire wear. Specifications are found in the Ford Workshop
Manual.
• Headlight aim may require re-adjustment.
• The tire air pressures recommended for general driving are found on
the vehicle’s Safety Certification Label. The maximum cold inflation
pressure for the tire and associated load rating is imprinted on the tireDriving
300
2010 F-250/350/450/550 (f23)
Owners Guide, 2nd Printing
USA (fus)
Page 318 of 408
Stopping and securing the vehicle
WARNING: To help prevent the vehicle from moving when you
change a tire, be sure the parking brake is set, then block (in
both directions) the wheel that is diagonally opposite to the tire being
changed.
Refer to the instruction sheet (located in the glove box) for detailed tire
change instructions.
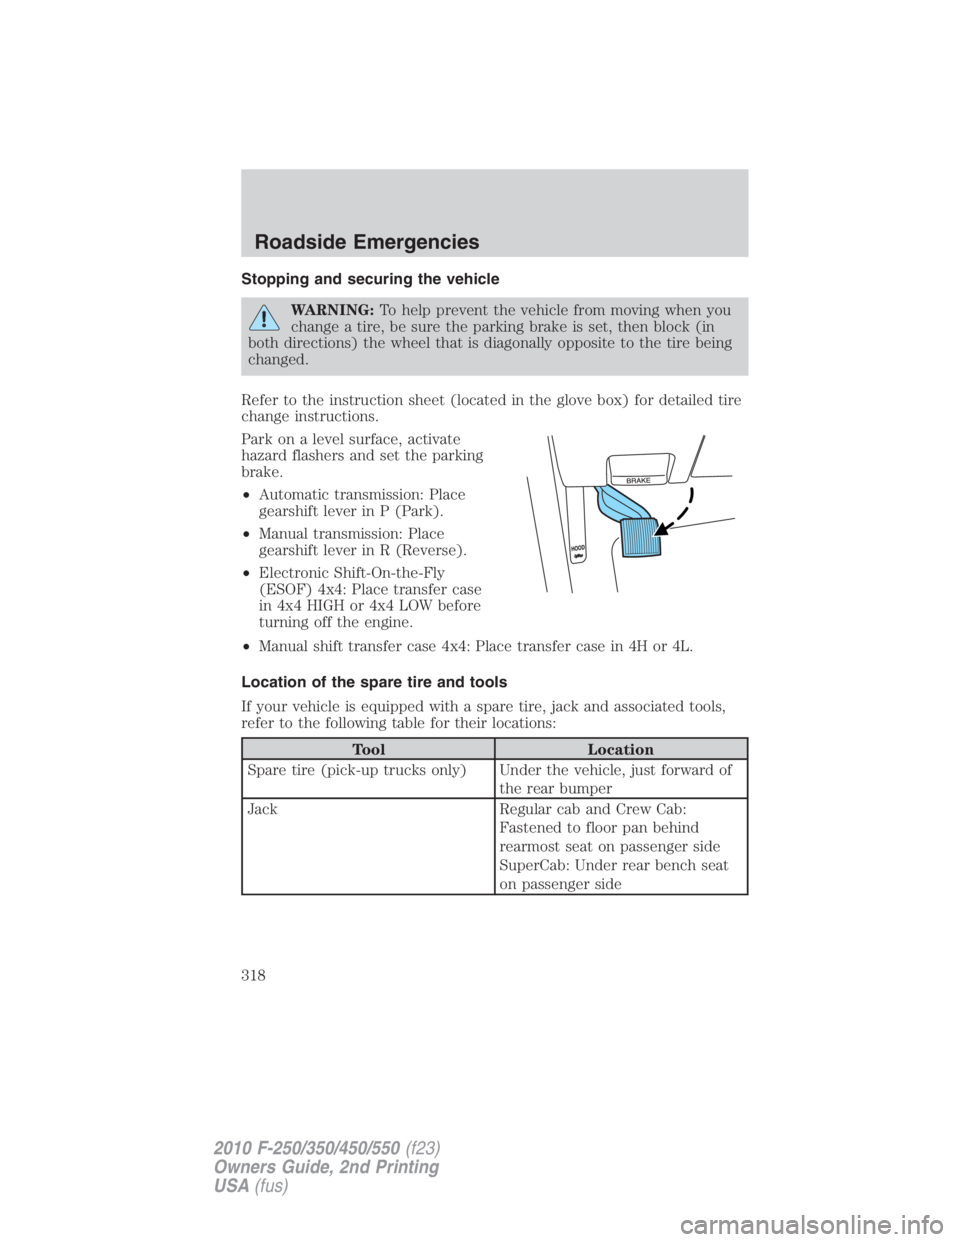
Park on a level surface, activate
hazard flashers and set the parking
brake.
• Automatic transmission: Place
gearshift lever in P (Park).
• Manual transmission: Place
gearshift lever in R (Reverse).
• Electronic Shift-On-the-Fly
(ESOF) 4x4: Place transfer case
in 4x4 HIGH or 4x4 LOW before
turning off the engine.
• Manual shift transfer case 4x4: Place transfer case in 4H or 4L.
Location of the spare tire and tools
If your vehicle is equipped with a spare tire, jack and associated tools,
refer to the following table for their locations:
Tool Location
Spare tire (pick-up trucks only) Under the vehicle, just forward of
the rear bumper
Jack Regular cab and Crew Cab:
Fastened to floor pan behind
rearmost seat on passenger side
SuperCab: Under rear bench seat
on passenger sideRoadside Emergencies
318
2010 F-250/350/450/550 (f23)
Owners Guide, 2nd Printing
USA (fus)
Page 320 of 408
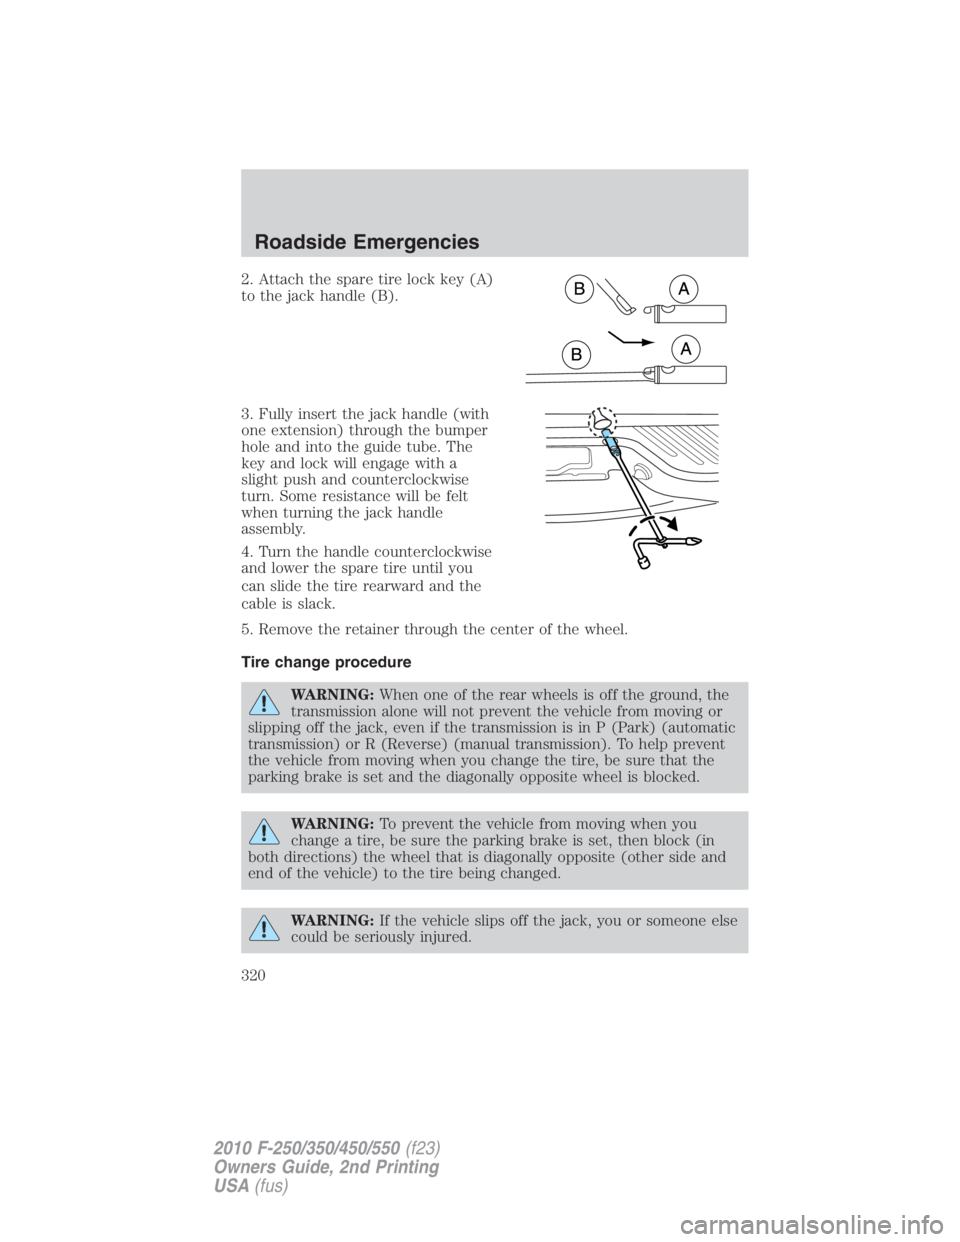
2. Attach the spare tire lock key (A)
to the jack handle (B).
3. Fully insert the jack handle (with
one extension) through the bumper
hole and into the guide tube. The
key and lock will engage with a
slight push and counterclockwise
turn. Some resistance will be felt
when turning the jack handle
assembly.
4. Turn the handle counterclockwise
and lower the spare tire until you
can slide the tire rearward and the
cable is slack.
5. Remove the retainer through the center of the wheel.
Tire change procedure
WARNING: When one of the rear wheels is off the ground, the
transmission alone will not prevent the vehicle from moving or
slipping off the jack, even if the transmission is in P (Park) (automatic
transmission) or R (Reverse) (manual transmission). To help prevent
the vehicle from moving when you change the tire, be sure that the
parking brake is set and the diagonally opposite wheel is blocked.
WARNING: To prevent the vehicle from moving when you
change a tire, be sure the parking brake is set, then block (in
both directions) the wheel that is diagonally opposite (other side and
end of the vehicle) to the tire being changed.
WARNING: If the vehicle slips off the jack, you or someone else
could be seriously injured.Roadside Emergencies
320
2010 F-250/350/450/550 (f23)
Owners Guide, 2nd Printing
USA (fus)
Page 337 of 408
Note: Towing an ESOF 4x4 vehicle with the front wheels on the ground
without disengaging the front hubs may cause damage to the automatic
transmission.
Note: Towing a 4x2 or an ESOF 4x4 vehicle with the rear wheels on the
ground for more than 50 miles (80 km) and/or in excess of 35 mph
(56 km/h) may cause damage to the automatic transmission.
Note: On Dual Rear Wheel (DRW) vehicles, an outer rear wheel must be
removed prior to using a wheel lift wrecker.
Ford Motor Company produces a towing manual for all authorized tow
truck operators. Have your tow truck operator refer to this manual for
proper hook-up and towing procedures for your vehicle.
If the vehicle is towed by other means or incorrectly, vehicle
damage may occur.
Emergency towing
In case of a roadside emergency with a disabled vehicle (without access
to wheel dollies, car hauling trailer, or flatbed transport vehicle) your
vehicle (regardless of transmission powertrain configuration) can be flat
towed (all wheels on the ground) under the following conditions:
• Vehicle is facing forward so that it is being towed in a forward
direction.
• Place the transmission in N (Neutral). Refer to Brake-shift interlock
in the Driving chapter for specific instructions if you cannot move the
gear shift lever into N (Neutral).
• Maximum speed is not to exceed 35 mph (56 km/h).
• Maximum distance is 50 miles (80 km). Roadside Emergencies
337
2010 F-250/350/450/550 (f23)
Owners Guide, 2nd Printing
USA (fus)