Page 318 of 408
Stopping and securing the vehicle
WARNING: To help prevent the vehicle from moving when you
change a tire, be sure the parking brake is set, then block (in
both directions) the wheel that is diagonally opposite to the tire being
changed.
Refer to the instruction sheet (located in the glove box) for detailed tire
change instructions.
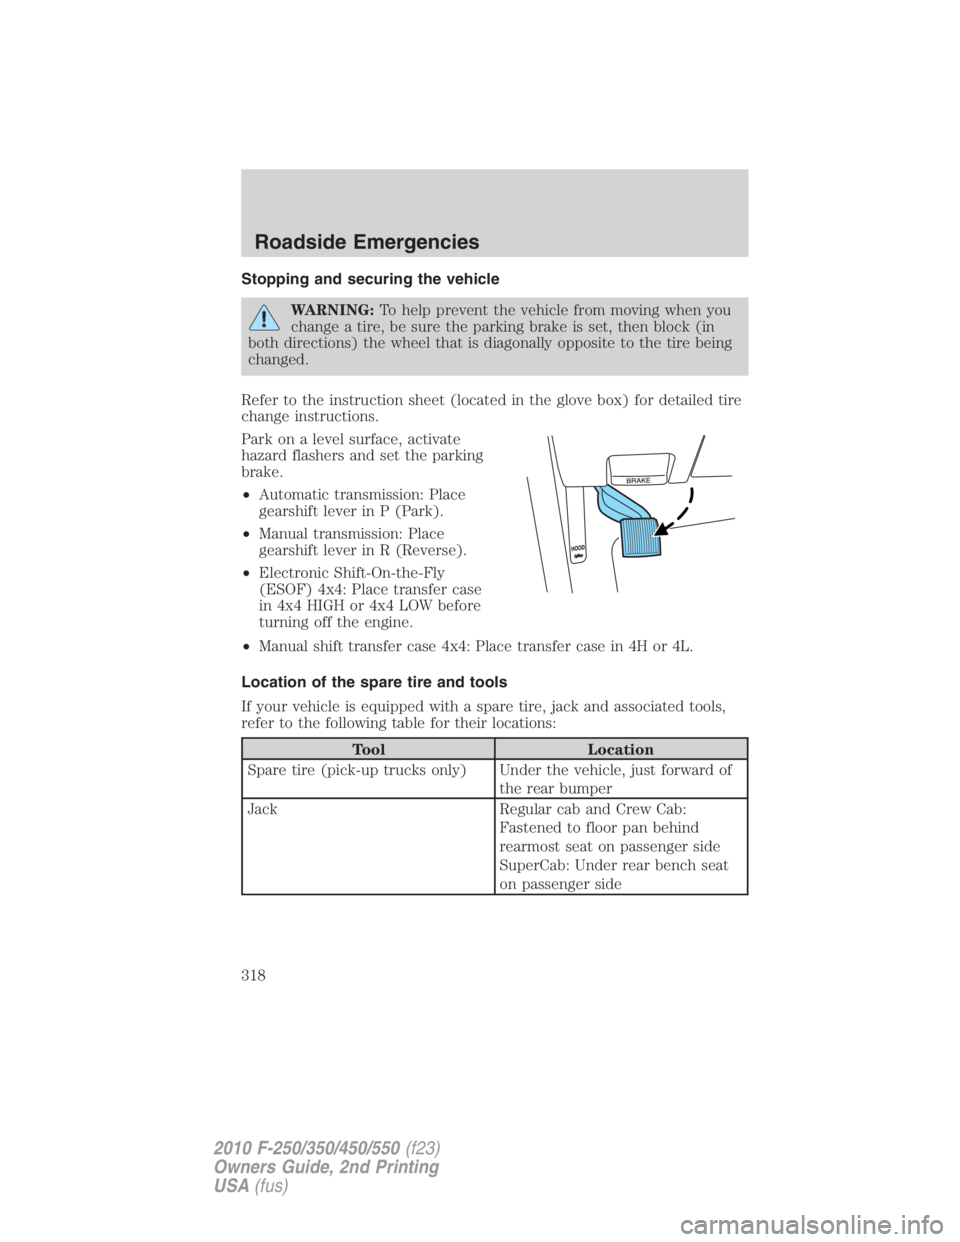
Park on a level surface, activate
hazard flashers and set the parking
brake.
• Automatic transmission: Place
gearshift lever in P (Park).
• Manual transmission: Place
gearshift lever in R (Reverse).
• Electronic Shift-On-the-Fly
(ESOF) 4x4: Place transfer case
in 4x4 HIGH or 4x4 LOW before
turning off the engine.
• Manual shift transfer case 4x4: Place transfer case in 4H or 4L.
Location of the spare tire and tools
If your vehicle is equipped with a spare tire, jack and associated tools,
refer to the following table for their locations:
Tool Location
Spare tire (pick-up trucks only) Under the vehicle, just forward of
the rear bumper
Jack Regular cab and Crew Cab:
Fastened to floor pan behind
rearmost seat on passenger side
SuperCab: Under rear bench seat
on passenger sideRoadside Emergencies
318
2010 F-250/350/450/550 (f23)
Owners Guide, 2nd Printing
USA (fus)
Page 320 of 408
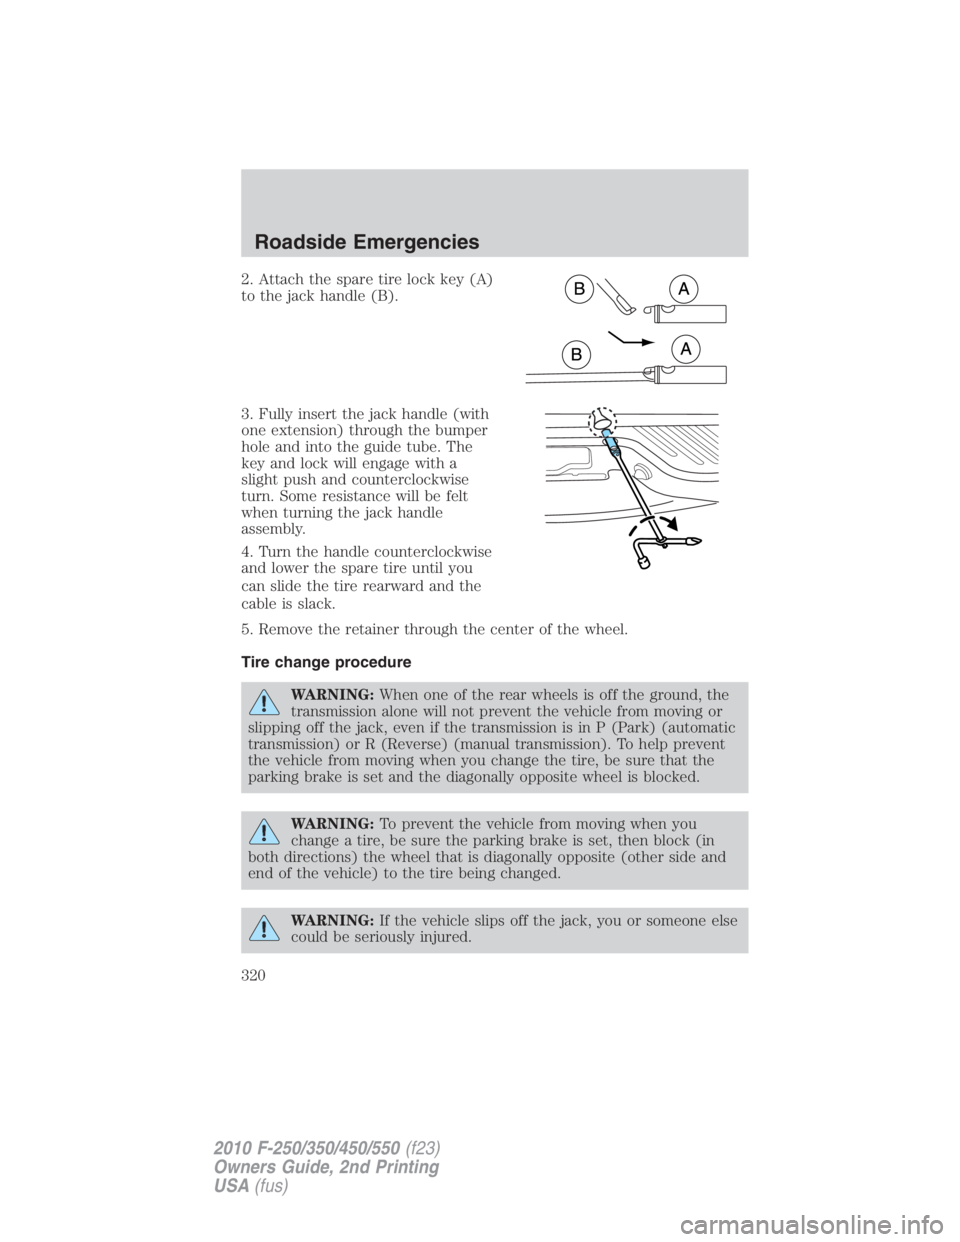
2. Attach the spare tire lock key (A)
to the jack handle (B).
3. Fully insert the jack handle (with
one extension) through the bumper
hole and into the guide tube. The
key and lock will engage with a
slight push and counterclockwise
turn. Some resistance will be felt
when turning the jack handle
assembly.
4. Turn the handle counterclockwise
and lower the spare tire until you
can slide the tire rearward and the
cable is slack.
5. Remove the retainer through the center of the wheel.
Tire change procedure
WARNING: When one of the rear wheels is off the ground, the
transmission alone will not prevent the vehicle from moving or
slipping off the jack, even if the transmission is in P (Park) (automatic
transmission) or R (Reverse) (manual transmission). To help prevent
the vehicle from moving when you change the tire, be sure that the
parking brake is set and the diagonally opposite wheel is blocked.
WARNING: To prevent the vehicle from moving when you
change a tire, be sure the parking brake is set, then block (in
both directions) the wheel that is diagonally opposite (other side and
end of the vehicle) to the tire being changed.
WARNING: If the vehicle slips off the jack, you or someone else
could be seriously injured.Roadside Emergencies
320
2010 F-250/350/450/550 (f23)
Owners Guide, 2nd Printing
USA (fus)
Page 331 of 408
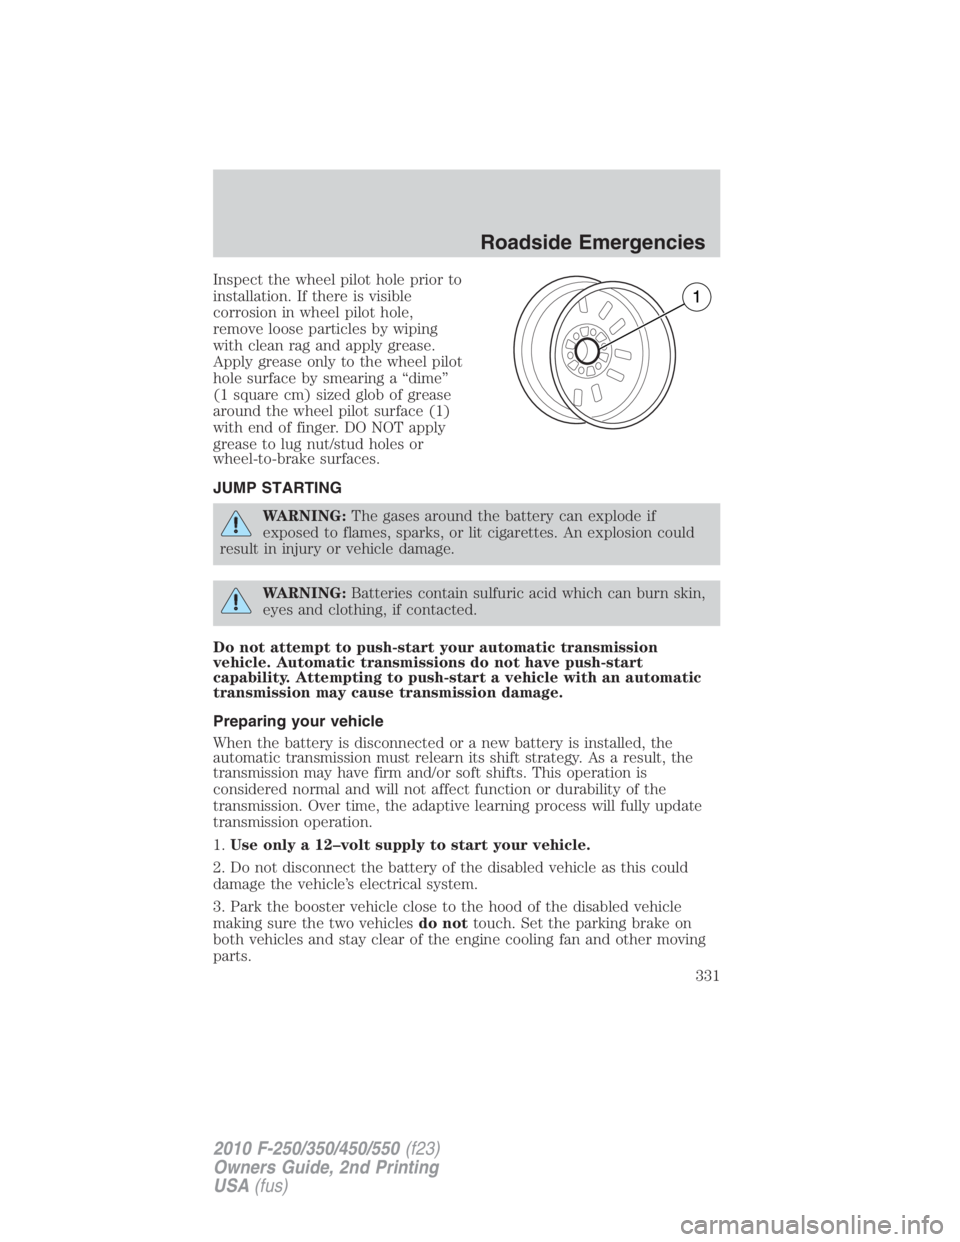
Inspect the wheel pilot hole prior to
installation. If there is visible
corrosion in wheel pilot hole,
remove loose particles by wiping
with clean rag and apply grease.
Apply grease only to the wheel pilot
hole surface by smearing a “dime”
(1 square cm) sized glob of grease
around the wheel pilot surface (1)
with end of finger. DO NOT apply
grease to lug nut/stud holes or
wheel-to-brake surfaces.
JUMP STARTING
WARNING: The gases around the battery can explode if
exposed to flames, sparks, or lit cigarettes. An explosion could
result in injury or vehicle damage.
WARNING: Batteries contain sulfuric acid which can burn skin,
eyes and clothing, if contacted.
Do not attempt to push-start your automatic transmission
vehicle. Automatic transmissions do not have push-start
capability. Attempting to push-start a vehicle with an automatic
transmission may cause transmission damage.
Preparing your vehicle
When the battery is disconnected or a new battery is installed, the
automatic transmission must relearn its shift strategy. As a result, the
transmission may have firm and/or soft shifts. This operation is
considered normal and will not affect function or durability of the
transmission. Over time, the adaptive learning process will fully update
transmission operation.
1. Use only a 12–volt supply to start your vehicle.
2. Do not disconnect the battery of the disabled vehicle as this could
damage the vehicle’s electrical system.
3. Park the booster vehicle close to the hood of the disabled vehicle
making sure the two vehicles do not touch. Set the parking brake on
both vehicles and stay clear of the engine cooling fan and other moving
parts. Roadside Emergencies
331
2010 F-250/350/450/550 (f23)
Owners Guide, 2nd Printing
USA (fus)
Page 337 of 408
Note: Towing an ESOF 4x4 vehicle with the front wheels on the ground
without disengaging the front hubs may cause damage to the automatic
transmission.
Note: Towing a 4x2 or an ESOF 4x4 vehicle with the rear wheels on the
ground for more than 50 miles (80 km) and/or in excess of 35 mph
(56 km/h) may cause damage to the automatic transmission.
Note: On Dual Rear Wheel (DRW) vehicles, an outer rear wheel must be
removed prior to using a wheel lift wrecker.
Ford Motor Company produces a towing manual for all authorized tow
truck operators. Have your tow truck operator refer to this manual for
proper hook-up and towing procedures for your vehicle.
If the vehicle is towed by other means or incorrectly, vehicle
damage may occur.
Emergency towing
In case of a roadside emergency with a disabled vehicle (without access
to wheel dollies, car hauling trailer, or flatbed transport vehicle) your
vehicle (regardless of transmission powertrain configuration) can be flat
towed (all wheels on the ground) under the following conditions:
• Vehicle is facing forward so that it is being towed in a forward
direction.
• Place the transmission in N (Neutral). Refer to Brake-shift interlock
in the Driving chapter for specific instructions if you cannot move the
gear shift lever into N (Neutral).
• Maximum speed is not to exceed 35 mph (56 km/h).
• Maximum distance is 50 miles (80 km). Roadside Emergencies
337
2010 F-250/350/450/550 (f23)
Owners Guide, 2nd Printing
USA (fus)
Page 355 of 408
SERVICE RECOMMENDATIONS
To help you service your vehicle, we provide scheduled maintenance
information which makes tracking routine service easy.
If your vehicle requires professional service, your authorized dealer can
provide the necessary parts and service. Check your Warranty
Guide/Customer Information Guide to find out which parts and
services are covered.
Use only recommended fuels, lubricants, fluids and service parts
conforming to specifications. Motorcraft � parts are designed and built to
provide the best performance in your vehicle.
PRECAUTIONS WHEN SERVICING YOUR VEHICLE
• Do not work on a hot engine.
• Make sure that nothing gets caught in moving parts.
• Do not work on a vehicle with the engine running in an enclosed
space, unless you are sure you have enough ventilation.
• Keep all open flames and other burning material (such as cigarettes)
away from the battery and all fuel related parts.
Working with the engine off
1. For vehicles equipped with an automatic transmission, set the parking
brake and shift to P (Park). For vehicles equipped with a manual
transmission, set the parking brake, press and hold the clutch pedal,
place the gearshift in 1 (First), and release the clutch pedal.
2. Turn off the engine and remove the key.
3. Block the wheels.
Working with the engine on
1. For vehicles equipped with an automatic transmission, set the parking
brake and shift to P (Park). For vehicles equipped with a manual
transmission, set the parking brake, press and hold the clutch pedal,
place the gearshift in N (Neutral), and release the clutch pedal.
2. Block the wheels.
WARNING: To reduce the risk of vehicle damage and/or
personal burn injuries, do not start your engine with the air
cleaner removed and do not remove it while the engine is running. Maintenance and Specifications
355
2010 F-250/350/450/550 (f23)
Owners Guide, 2nd Printing
USA (fus)
Page 357 of 408
IDENTIFYING COMPONENTS IN THE ENGINE COMPARTMENT
Refer to the 6.0 and 6.4 Liter Power Stroke Direct Injection Turbo
Diesel Owner’s Guide Supplement for diesel engine component
locations.
5.4L V8 gasoline engines
1. Windshield washer fluid reservoir
2. Battery
3. Transmission fluid dipstick (automatic transmission)
4. Engine oil filler cap
5. Engine oil dipstick
6. Power steering fluid reservoir
7. Brake fluid reservoir
8. Engine coolant reservoir
9. Air filter assembly
10. Power distribution box Maintenance and Specifications
357
2010 F-250/350/450/550 (f23)
Owners Guide, 2nd Printing
USA (fus)
Page 358 of 408
6.8L V10 gasoline engine
1. Windshield washer fluid reservoir
2. Battery
3. Automatic transmission fluid dipstick
4. Engine oil filler cap
5. Engine oil dipstick
6. Power steering fluid reservoir
7. Brake fluid reservoir
8. Engine coolant reservoir
9. Air filter assembly
10. Power distribution boxMaintenance and Specifications
358
2010 F-250/350/450/550 (f23)
Owners Guide, 2nd Printing
USA (fus)
Page 360 of 408
To prolong the life of the wiper blades, it is highly recommended to
scrape off the ice on the windshield before turning on the wipers. The
layer of ice has many sharp edges and can damage the micro edge of the
wiper rubber element.
ENGINE OIL
Checking the engine oil
Refer to the scheduled maintenance information for the appropriate
intervals for checking the engine oil.
1. Make sure the vehicle is on level ground.
2. Turn the engine off and wait 15 minutes for the oil to drain into the
oil pan.
3. Set the parking brake and ensure the gearshift is securely latched in P
(Park) (automatic transmission) or 1 (First) (manual transmission).
4. Open the hood. Protect yourself from engine heat.
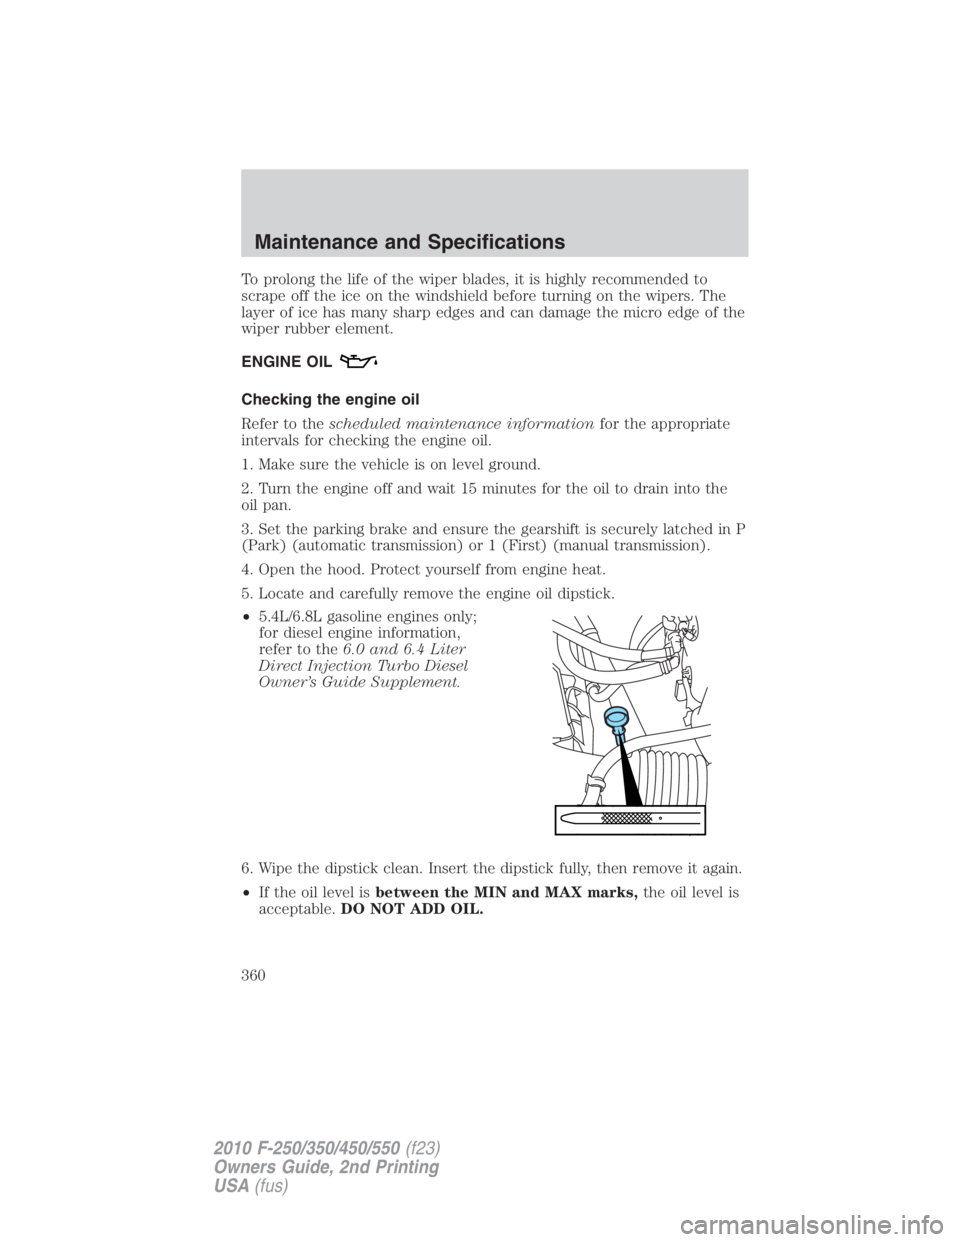
5. Locate and carefully remove the engine oil dipstick.
• 5.4L/6.8L gasoline engines only;
for diesel engine information,
refer to the 6.0 and 6.4 Liter
Direct Injection Turbo Diesel
Owner’s Guide Supplement.
6. Wipe the dipstick clean. Insert the dipstick fully, then remove it again.
• If the oil level is between the MIN and MAX marks, the oil level is
acceptable. DO NOT ADD OIL.Maintenance and Specifications
360
2010 F-250/350/450/550 (f23)
Owners Guide, 2nd Printing
USA (fus)