2010 FORD EXPEDITION remote control
[x] Cancel search: remote controlPage 71 of 420

Your vehicle may be equipped with a Family Entertainment System
(FES) which allows you to listen to audio CDs, MP3 discs, watch DVDs
and to plug in and play a variety of standard video game systems. The
DVD player is capable of playing standard DVDs, CDs, MP3s and is
compatible with CD-R/W, CD-R and certain CD-ROM media.
Please review this material to become familiar with the FES features and
controls as well as the very important safety information.
Note:Any notations or restrictions on individual DVD system controls
are applicable to the overhead controls as well as to duplicate controls
found on the remote control.
Quick start
Your Family Entertainment System includes a DVD system, two sets of
wireless infrared (IR) headphones and a wireless infrared (IR) remote
control.
Note:To disable the DVD rear-seat controls:
•If your vehicle is equipped with the navigation system, press the
MEDIA or RADIO hard button. Select the ’Rear Zone’ tab on the
touchscreen. Press the ’disabled’ button. (Press the ’enabled’ button to
turn the rear controls on again.)
•If your vehicle is equipped with an audio system, press the 3 and 5
preset buttons simultaneously. (Press again to enable the controls).
To play a DVD in the DVD system:
The DVD system can play DVD-Video, DVD-R, DVD-R/W discs as well as
audio CDs and video CDs. To ensure proper disc operation, check the
disc for finger prints, scratches and cleanliness. Clean with a soft cloth,
wiping from center to edge.
1. Ensure that the vehicle is on or the ignition is in accessory mode.
2. Insert a DVD into the system, label-side up to turn on the system. It
will load automatically.
3. Press the power button on the
DVD player, then press Play
to
begin to play the disc.
If a DVD is already loaded into the
system, press PLAY on the DVD
player.
Note:If sound can be heard, but no video is present, press VIDEO to
select the video source (DVD or aux-inputs).
Entertainment Systems
71
2010 Expedition(exd)
Owners Guide(own2002), 1st Printing
USA(fus)
Page 78 of 420
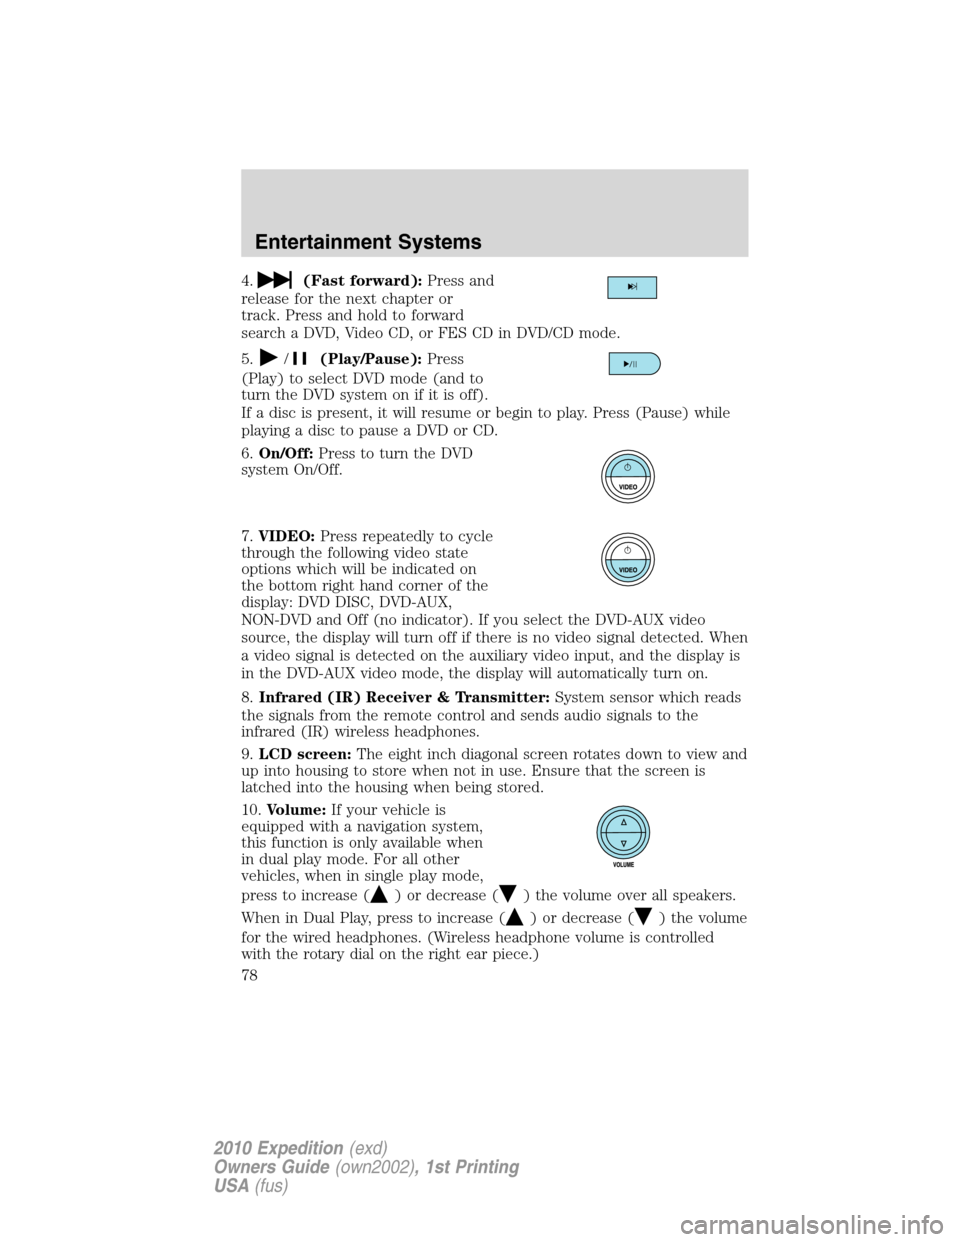
4.(Fast forward):Press and
release for the next chapter or
track. Press and hold to forward
search a DVD, Video CD, or FES CD in DVD/CD mode.
5.
/(Play/Pause):Press
(Play) to select DVD mode (and to
turn the DVD system on if it is off).
If a disc is present, it will resume or begin to play. Press (Pause) while
playing a disc to pause a DVD or CD.
6.On/Off:Press to turn the DVD
system On/Off.
7.VIDEO:Press repeatedly to cycle
through the following video state
options which will be indicated on
the bottom right hand corner of the
display: DVD DISC, DVD-AUX,
NON-DVD and Off (no indicator). If you select the DVD-AUX video
source, the display will turn off if there is no video signal detected. When
a video signal is detected on the auxiliary video input, and the display is
in the DVD-AUX video mode, the display will automatically turn on.
8.Infrared (IR) Receiver & Transmitter:System sensor which reads
the signals from the remote control and sends audio signals to the
infrared (IR) wireless headphones.
9.LCD screen:The eight inch diagonal screen rotates down to view and
up into housing to store when not in use. Ensure that the screen is
latched into the housing when being stored.
10.Volume:If your vehicle is
equipped with a navigation system,
this function is only available when
in dual play mode. For all other
vehicles, when in single play mode,
press to increase (
) or decrease () the volume over all speakers.
When in Dual Play, press to increase (
) or decrease () the volume
for the wired headphones. (Wireless headphone volume is controlled
with the rotary dial on the right ear piece.)
Entertainment Systems
78
2010 Expedition(exd)
Owners Guide(own2002), 1st Printing
USA(fus)
Page 80 of 420
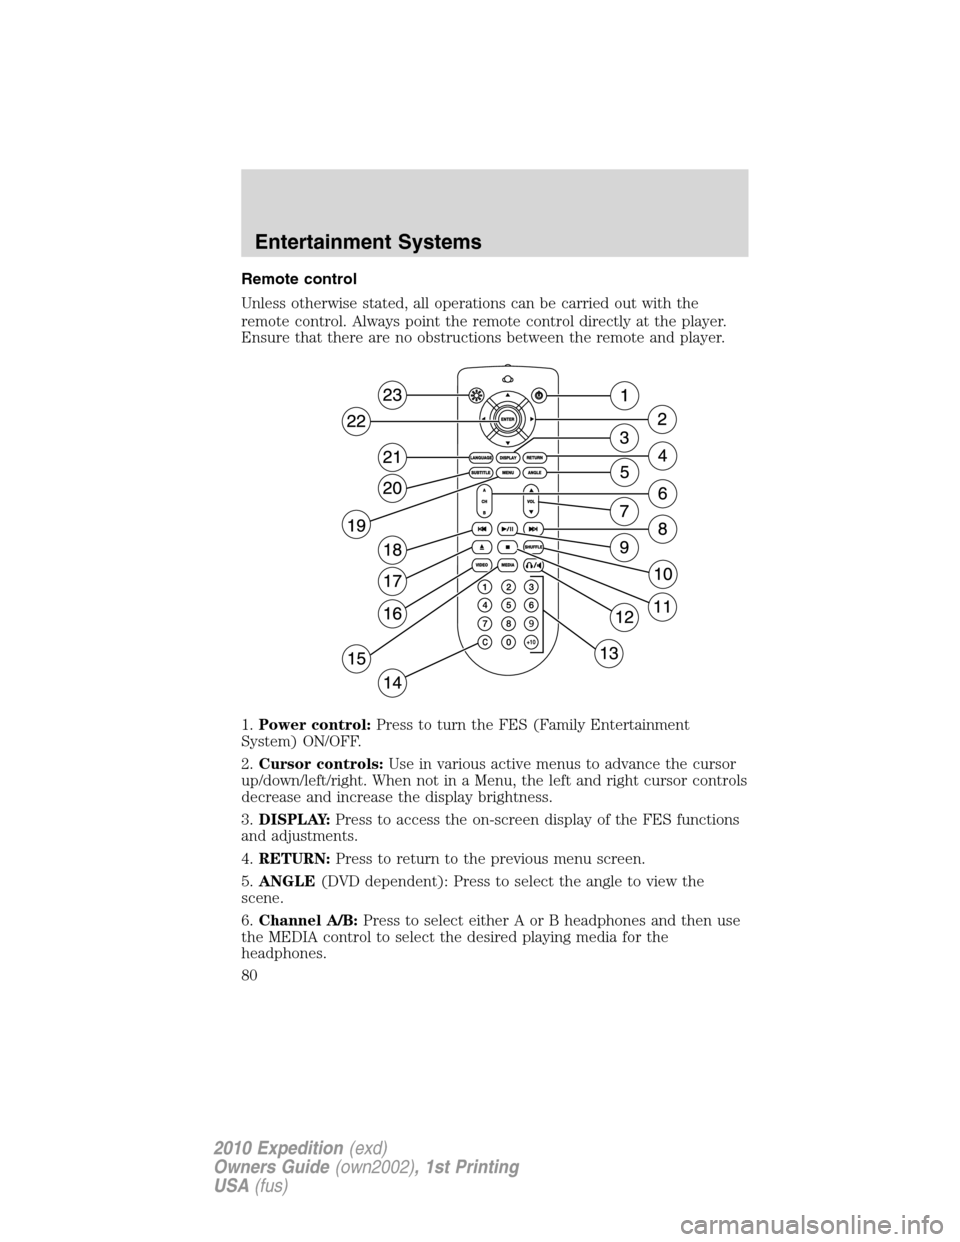
Remote control
Unless otherwise stated, all operations can be carried out with the
remote control. Always point the remote control directly at the player.
Ensure that there are no obstructions between the remote and player.
1.Power control:Press to turn the FES (Family Entertainment
System) ON/OFF.
2.Cursor controls:Use in various active menus to advance the cursor
up/down/left/right. When not in a Menu, the left and right cursor controls
decrease and increase the display brightness.
3.DISPLAY:Press to access the on-screen display of the FES functions
and adjustments.
4.RETURN:Press to return to the previous menu screen.
5.ANGLE(DVD dependent): Press to select the angle to view the
scene.
6.Channel A/B:Press to select either A or B headphones and then use
the MEDIA control to select the desired playing media for the
headphones.
Entertainment Systems
80
2010 Expedition(exd)
Owners Guide(own2002), 1st Printing
USA(fus)
Page 82 of 420
21.LANGUAGE(DVD dependent): Press to select the desired
language.
22.ENTER:Press to select the highlighted menu option.
23.ILLUMINATION: Press to illuminate the remote control and
backlight all of the buttons.
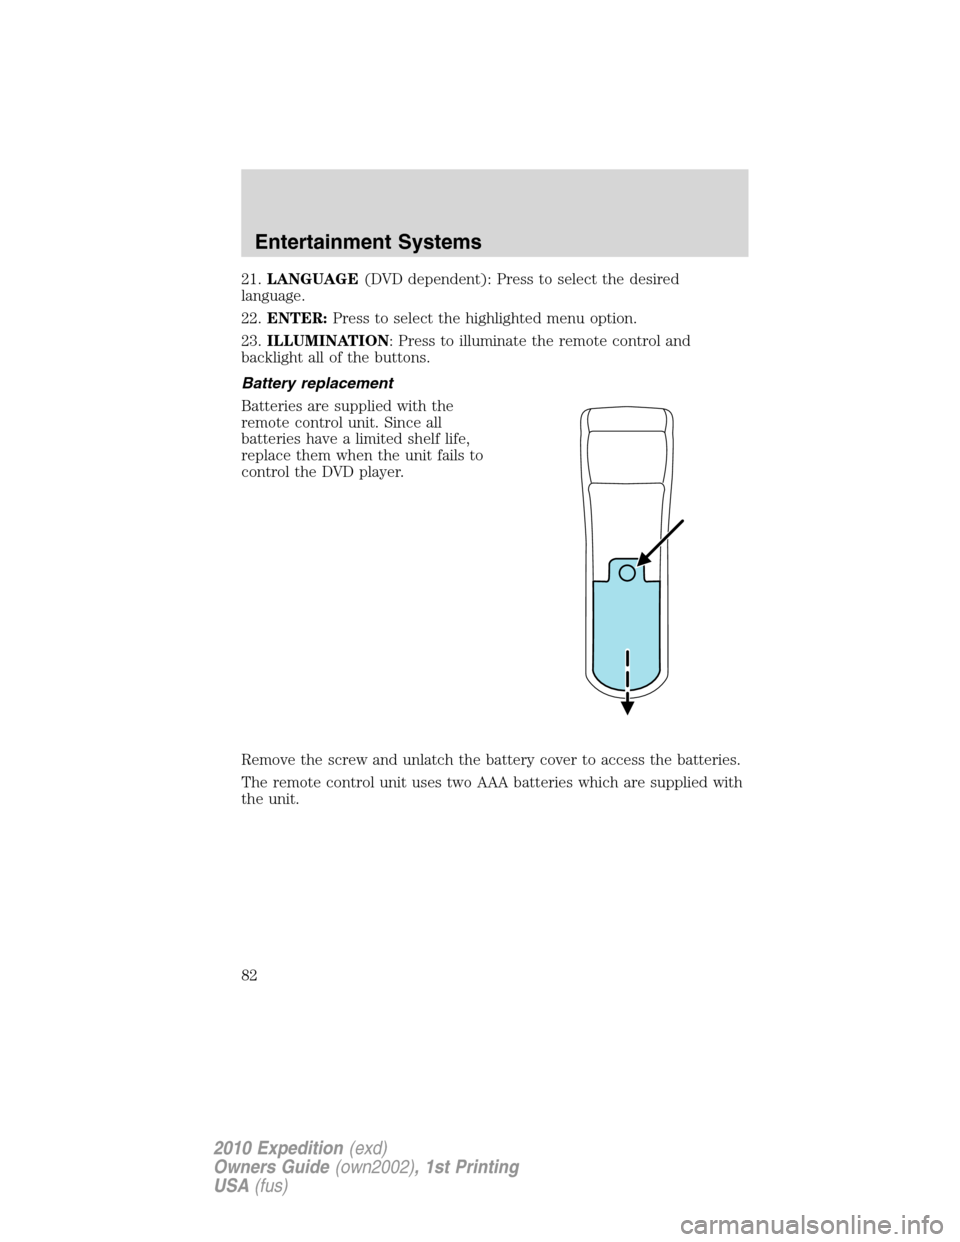
Battery replacement
Batteries are supplied with the
remote control unit. Since all
batteries have a limited shelf life,
replace them when the unit fails to
control the DVD player.
Remove the screw and unlatch the battery cover to access the batteries.
The remote control unit uses two AAA batteries which are supplied with
the unit.
Entertainment Systems
82
2010 Expedition(exd)
Owners Guide(own2002), 1st Printing
USA(fus)
Page 100 of 420
WARNING:The driver should not attempt to operate any
function of the DVD system while the vehicle is in motion. Give
full attention to driving and to the road. Pull off the road in a safe
place before inserting or extracting DVDs from the system. A remote
control is included in the system to allow the rear seat occupants to
operate the FES functions without distracting the driver.
Do not expose the liquid crystal display (LCD) flip-down screen
to direct sunlight or intensive ultraviolet rays for extensive
periods of time. Ultraviolet rays deteriorate the liquid crystal.
Be sure to review User Manuals for video games and video game
equipment when used as auxiliary inputs for your Family Entertainment
System (FES).
Do not operate video games or video equipment if the power cords
and/or cables are broken, split or damaged. Carefully place cords and/or
cables where they will not be stepped on or interfere with the operation
of seats and/or compartments.
Disconnect video games and video equipment power cords and/or cables
when not in use.
Avoid touching auxiliary input jacks with your fingers. Do not blow on
them or allow them to get wet or dirty.
Do not clean any part of the DVD player with benzene, lacquer thinner,
acetone, or any other solvent.
Federal Communication Commission (FCC) Compliance
Changes or modifications not approved by Ford Lincoln-Mercury could
void user’s authority to operate the equipment. This equipment has been
tested and found to comply with the limits for a Class B digital device,
pursuant to Part 15 of the FCC Rules. These limits are designed to
provide reasonable protection against harmful interference in a
residential installation. This equipment generates, uses and can radiate
radio frequency energy and, if not installed and used in accordance with
the instructions, may cause harmful interference and radio
communications.
However, there is no guarantee that interference will not occur in a
particular installation. If this equipment does cause harmful interference
to radio or television reception, which can be determined by turning the
equipment off and on, the user is encouraged to consult the dealer or an
experienced radio/TV technician for help.
Entertainment Systems
100
2010 Expedition(exd)
Owners Guide(own2002), 1st Printing
USA(fus)
Page 118 of 420
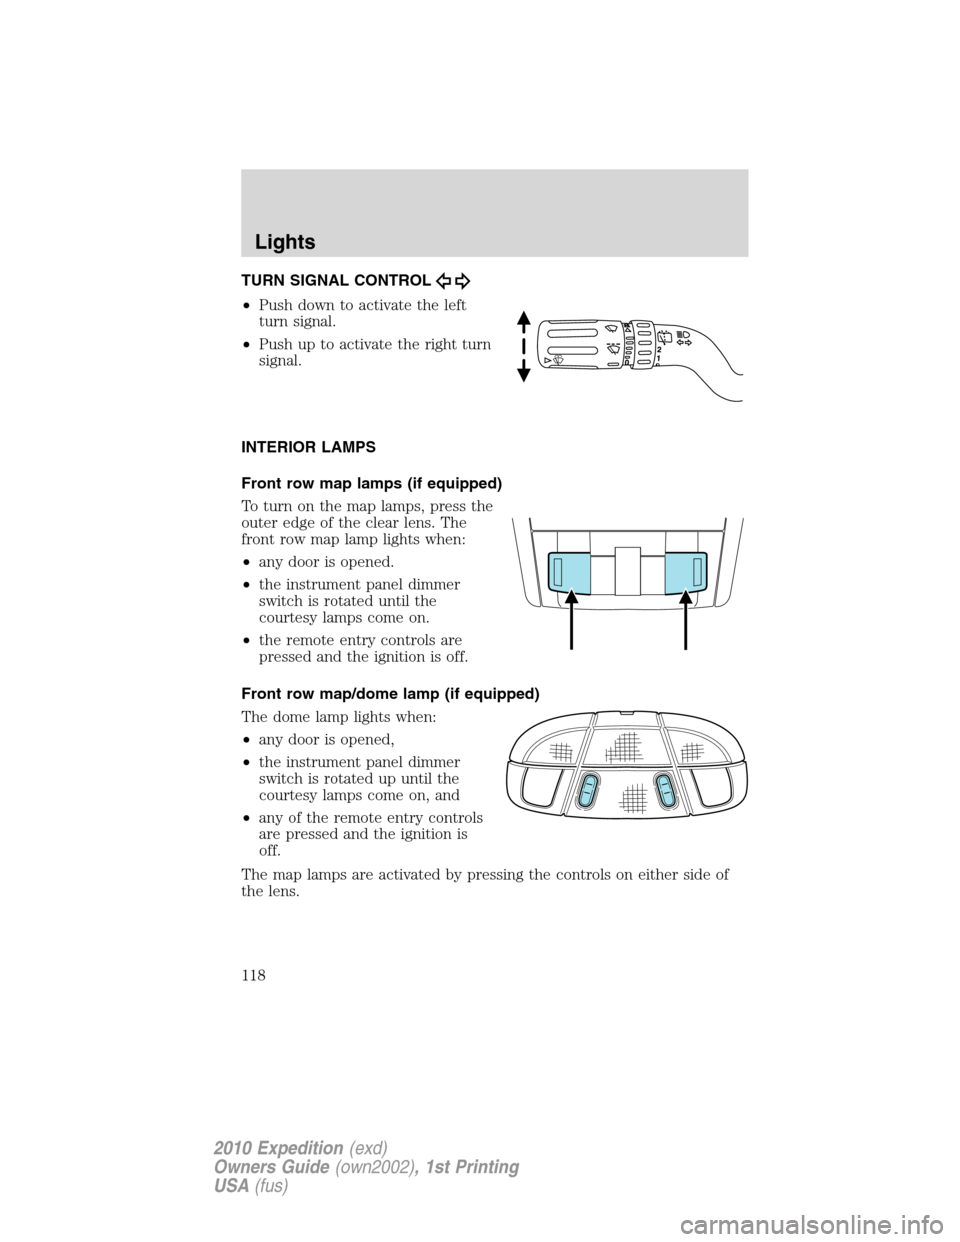
TURN SIGNAL CONTROL
•Push down to activate the left
turn signal.
•Push up to activate the right turn
signal.
INTERIOR LAMPS
Front row map lamps (if equipped)
To turn on the map lamps, press the
outer edge of the clear lens. The
front row map lamp lights when:
•any door is opened.
•the instrument panel dimmer
switch is rotated until the
courtesy lamps come on.
•the remote entry controls are
pressed and the ignition is off.
Front row map/dome lamp (if equipped)
The dome lamp lights when:
•any door is opened,
•the instrument panel dimmer
switch is rotated up until the
courtesy lamps come on, and
•any of the remote entry controls
are pressed and the ignition is
off.
The map lamps are activated by pressing the controls on either side of
the lens.
Lights
118
2010 Expedition(exd)
Owners Guide(own2002), 1st Printing
USA(fus)
Page 119 of 420
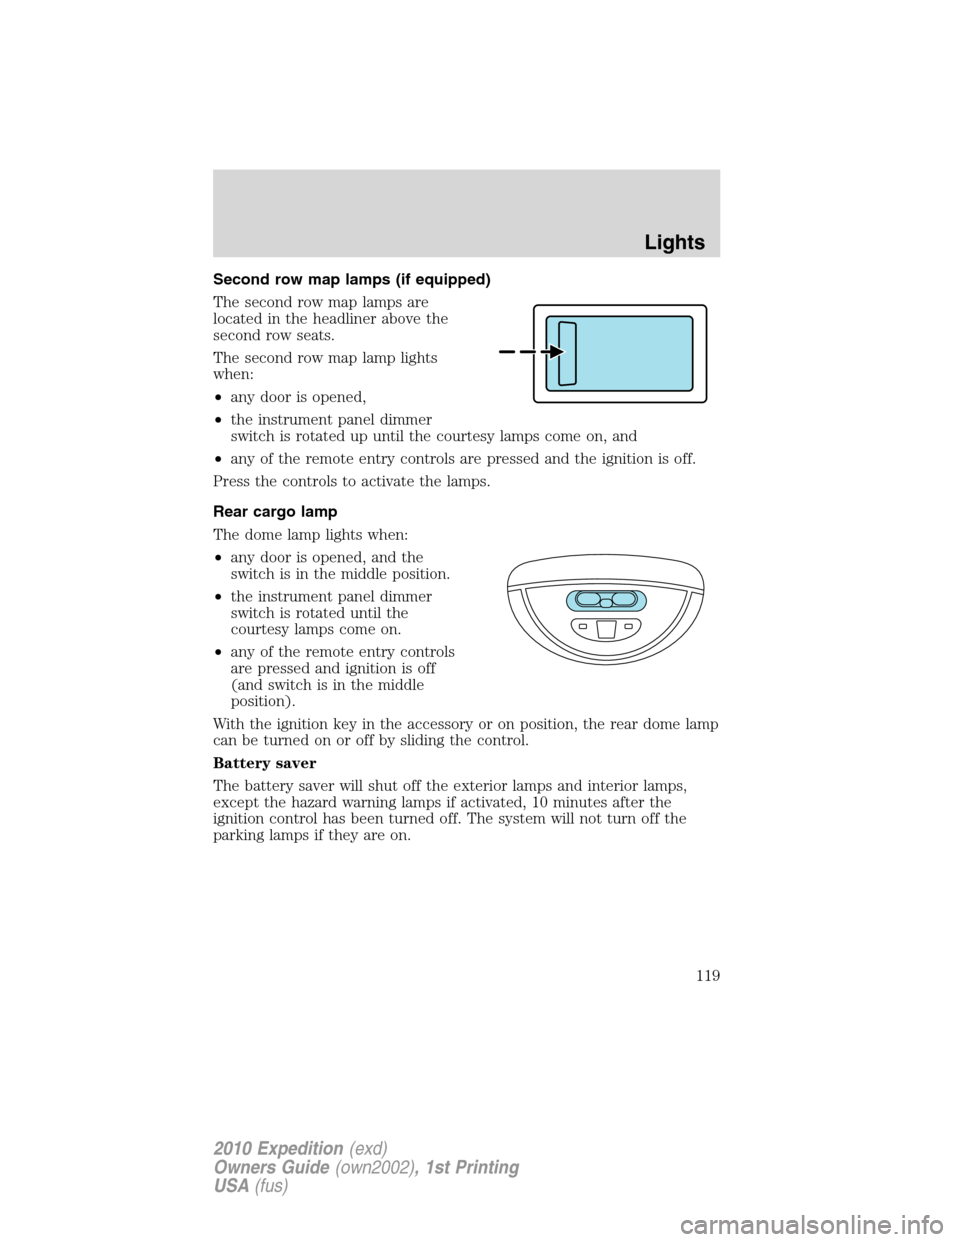
Second row map lamps (if equipped)
The second row map lamps are
located in the headliner above the
second row seats.
The second row map lamp lights
when:
•any door is opened,
•the instrument panel dimmer
switch is rotated up until the courtesy lamps come on, and
•any of the remote entry controls are pressed and the ignition is off.
Press the controls to activate the lamps.
Rear cargo lamp
The dome lamp lights when:
•any door is opened, and the
switch is in the middle position.
•the instrument panel dimmer
switch is rotated until the
courtesy lamps come on.
•any of the remote entry controls
are pressed and ignition is off
(and switch is in the middle
position).
With the ignition key in the accessory or on position, the rear dome lamp
can be turned on or off by sliding the control.
Battery saver
The battery saver will shut off the exterior lamps and interior lamps,
except the hazard warning lamps if activated, 10 minutes after the
ignition control has been turned off. The system will not turn off the
parking lamps if they are on.
Lights
119
2010 Expedition(exd)
Owners Guide(own2002), 1st Printing
USA(fus)
Page 135 of 420

EXTERIOR MIRRORS
Power side view mirrors
The ignition can be in any position to adjust the power side view mirrors.
To adjust your mirrors:
1. Rotate the control clockwise to
adjust the right mirror and rotate
the control counterclockwise to
adjust the left mirror.
2. Move the control in the direction
you wish to tilt the mirror.
3. Return to the center position to
lock mirrors in place.
Memory feature (if equipped)
The power side view mirror positions are saved when doing a memory
set function and can be recalled along with the vehicle personality
features when a memory position is selected through the remote entry
transmitter, keyless entry keypad or memory switch on the driver’s door.
Refer toSeatingin theSeating and Safety Restraintschapter.
Fold-away mirrors
Fold the side mirrors in carefully
before driving through a narrow
space, like an automatic car wash.
Powerfold mirrors (if equipped)
Rotate the 4–way adjustment switch
to the center position. Press the
switch down to auto fold in and
down again to auto fold back to
design position. Powerfold the side
mirrors in carefully when driving
through a narrow space, like an automatic car wash.
The mirrors may be moved inward/outward manually. If a mirror is
moved manually, it will need to be reset. To reset: with the switch in the
center position, press the switch down to fold the mirrors in and wait a
short period (eight seconds). An audible “click” will be heard indicating
re-synchronization. If the click is not heard, use the switch to fold the
mirrors out, then in, until the click is heard. After that, the mirrors will
operate to their normal positions until they are again moved manually.
POWER FOLD
Driver Controls
135
2010 Expedition(exd)
Owners Guide(own2002), 1st Printing
USA(fus)