Page 65 of 450

Here are some tips for getting the most out of your child
restraint:
•Before buying any restraint system, make sure that it
has a label certifying that it meets all applicable Safety
Standards. The manufacturer recommends that you
try a child restraint in the vehicle seats where you will
use it before you buy it.
•The restraint must be appropriate for your child’s
weight and height. Check the label on the restraint for
weight and height limits.
•Carefully follow the instructions that come with the
restraint. If you install the restraint improperly, it may
not work when you need it.
•The Extended Cab first, and Crew Cab second row
outside seating positions, have cinching latch plates.
These are designed to keep the lap portion tight
around the child restraint so that it is not necessary touse a locking clip. If the seat belt has a cinching latch
plate, pulling up on the shoulder portion of the
lap/shoulder belt will tighten the belt. The cinching
latch plate will keep the belt tight; however, any seat
belt system will loosen with time, so check the belt
occasionally and pull it tight, if necessary.
•Buckle the child into the restraint exactly as the
manufacturer’s instructions tell you.
•When your child restraint is not in use, secure it in the
vehicle with the seat belt or remove it from the vehicle.
Do not leave it loose in the vehicle. In a sudden stop or
collision, it could strike the occupants or seatbacks and
cause serious personal injury.
LATCH - Child Seat Anchorage System (Lower
Anchors and Tether for CHildren) — if equipped
Each vehicle is equipped with the child restraint anchor-
age system called LATCH, which stands for Lower
Anchors and Tethers for CHildren. The LATCH system
64 THINGS TO KNOW BEFORE STARTING YOUR VEHICLE
Page 72 of 450
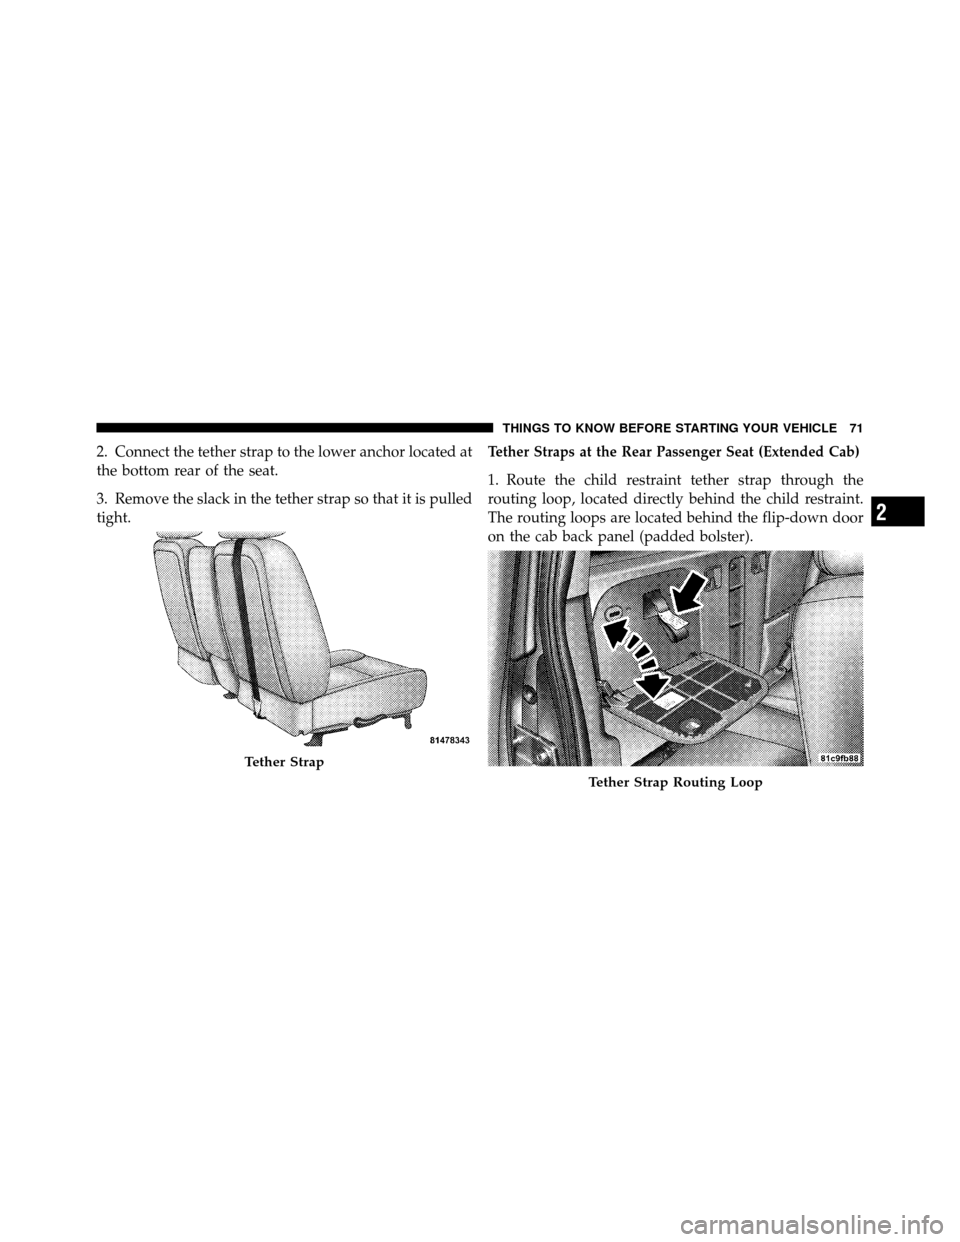
2. Connect the tether strap to the lower anchor located at
the bottom rear of the seat.
3. Remove the slack in the tether strap so that it is pulled
tight.Tether Straps at the Rear Passenger Seat (Extended Cab)
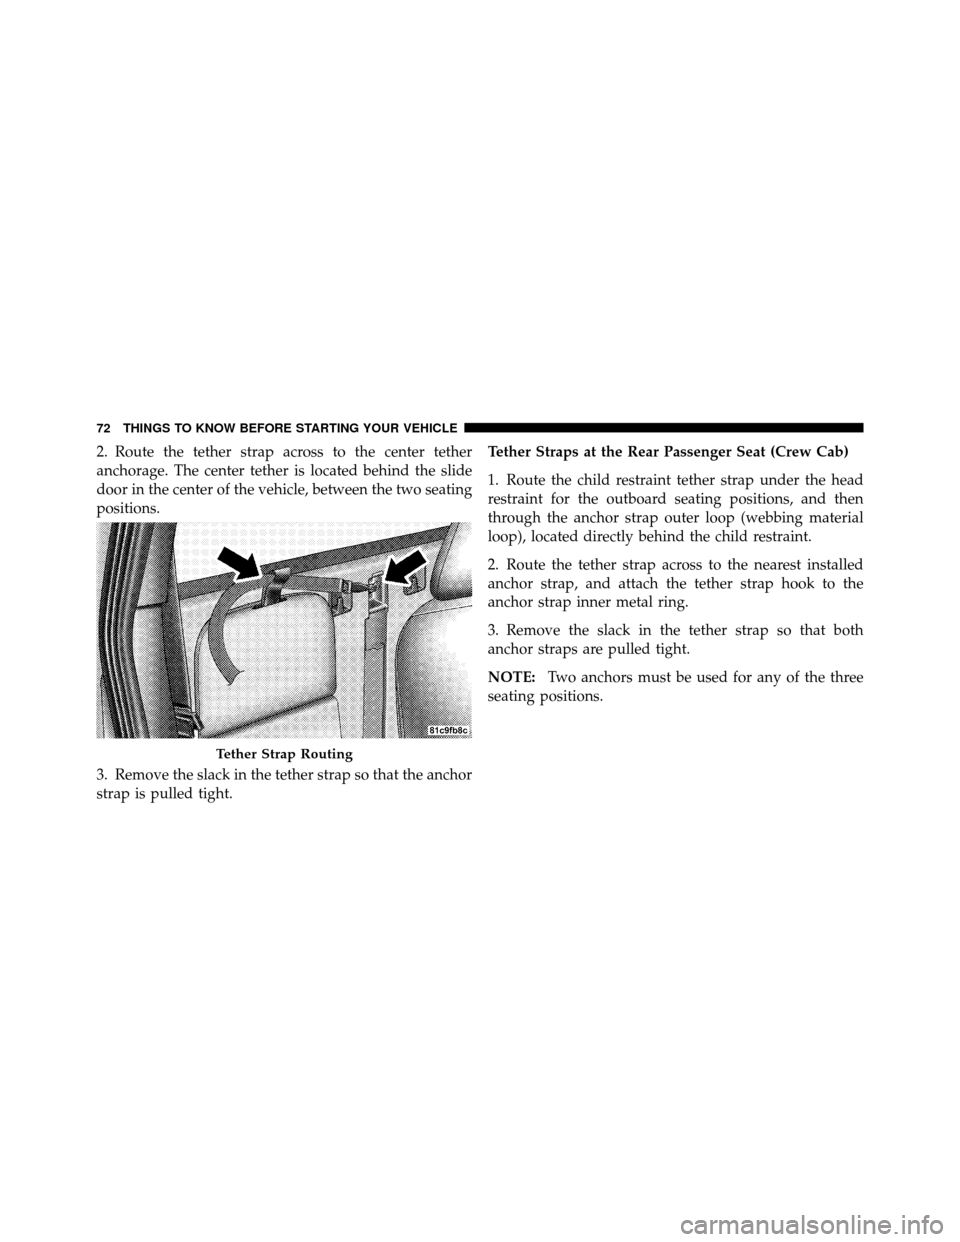
1. Route the child restraint tether strap through the
routing loop, located directly behind the child restraint.
The routing loops are located behind the flip-down door
on the cab back panel (padded bolster).
Tether Strap
Tether Strap Routing Loop
2
THINGS TO KNOW BEFORE STARTING YOUR VEHICLE 71
Page 73 of 450
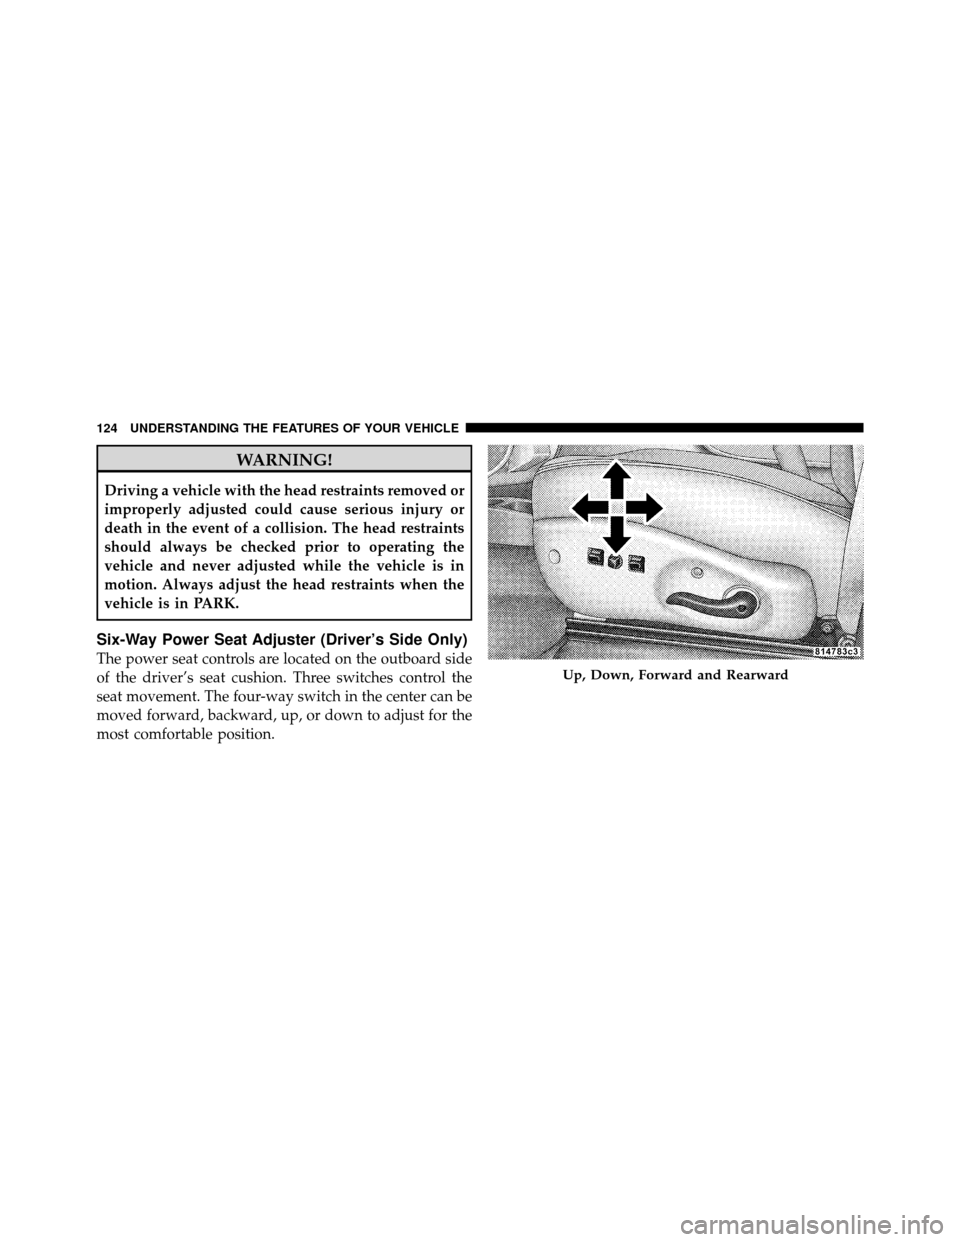
2. Route the tether strap across to the center tether
anchorage. The center tether is located behind the slide
door in the center of the vehicle, between the two seating
positions.
3. Remove the slack in the tether strap so that the anchor
strap is pulled tight.Tether Straps at the Rear Passenger Seat (Crew Cab)
1. Route the child restraint tether strap under the head
restraint for the outboard seating positions, and then
through the anchor strap outer loop (webbing material
loop), located directly behind the child restraint.
2. Route the tether strap across to the nearest installed
anchor strap, and attach the tether strap hook to the
anchor strap inner metal ring.
3. Remove the slack in the tether strap so that both
anchor straps are pulled tight.
NOTE:
Two anchors must be used for any of the three
seating positions.
Tether Strap Routing
72 THINGS TO KNOW BEFORE STARTING YOUR VEHICLE
Page 125 of 450
WARNING!
Driving a vehicle with the head restraints removed or
improperly adjusted could cause serious injury or
death in the event of a collision. The head restraints
should always be checked prior to operating the
vehicle and never adjusted while the vehicle is in
motion. Always adjust the head restraints when the
vehicle is in PARK.
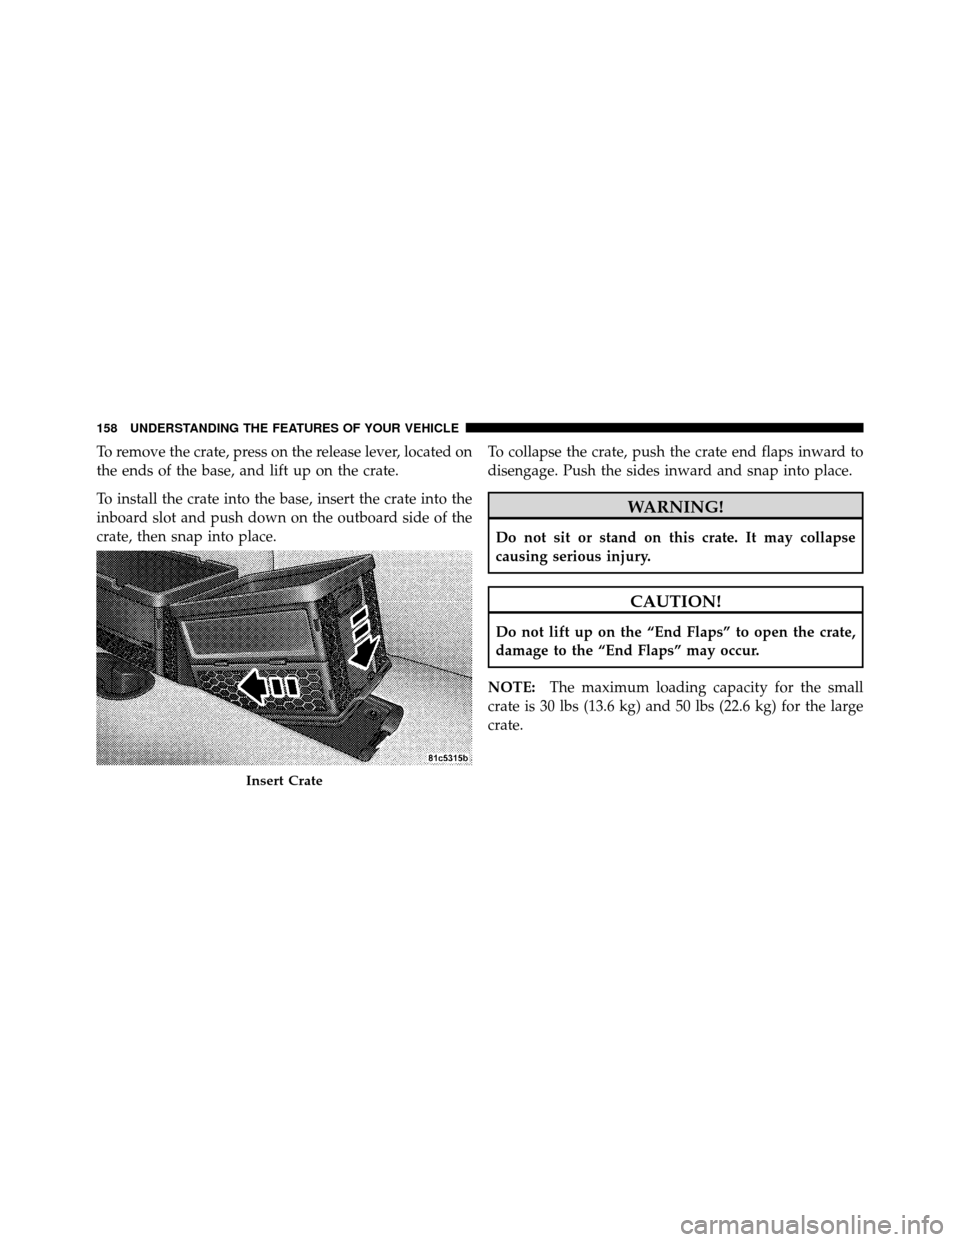
Six-Way Power Seat Adjuster (Driver’s Side Only)
The power seat controls are located on the outboard side
of the driver’s seat cushion. Three switches control the
seat movement. The four-way switch in the center can be
moved forward, backward, up, or down to adjust for the
most comfortable position.
Up, Down, Forward and Rearward
124 UNDERSTANDING THE FEATURES OF YOUR VEHICLE
Page 133 of 450
Plastic is not as scratch resistant as glass and therefore
different lens cleaning procedures must be followed.
To minimize the possibility of scratching the lenses and
reducing light output, avoid wiping with a dry cloth. To
remove road dirt, wash with a mild soap solution fol-
lowed by rinsing.
Do not use abrasive cleaning components, solvents, steel
wool or other abrasive materials to clean the lenses.
Daytime Running Lights — If Equipped
The headlights on your vehicle will illuminate when the
engine is started, the transmission is out of the PARK
position and the parking brake is released. This provides
a constant�lights on� condition until the ignition is
turned OFF. The lights illuminate at less than normal
intensity. If the parking brake is applied or the transmis-
sion is in the PARK position, the Daytime Running Lights
(DRL) will turn off.
Lights-on Reminder
If the headlights, parking lights, courtesy lights or cargo
lights are left on, after the ignition is turned OFF, a chime
will sound when the driver’s door is opened.
Fog Lights — If Equipped
The Fog Lights are turned on by placing the
headlight rotary control in the parking light or
headlight position and pushing on the headlight
rotary control. The fog lights will operate only when the
parking lights are on, or when the vehicle headlights are
on low beam. An indicator light located in the instrument
cluster will illuminate when the fog lights are on. The fog
lights will turn off when the switch is pushed a second
time, also when the headlight switch is rotated to the off
position, or the high beam is selected.
132 UNDERSTANDING THE FEATURES OF YOUR VEHICLE
Page 159 of 450
To remove the crate, press on the release lever, located on
the ends of the base, and lift up on the crate.
To install the crate into the base, insert the crate into the
inboard slot and push down on the outboard side of the
crate, then snap into place.To collapse the crate, push the crate end flaps inward to
disengage. Push the sides inward and snap into place.
WARNING!
Do not sit or stand on this crate. It may collapse
causing serious injury.
CAUTION!
Do not lift up on the “End Flaps” to open the crate,
damage to the “End Flaps” may occur.
NOTE: The maximum loading capacity for the small
crate is 30 lbs (13.6 kg) and 50 lbs (22.6 kg) for the large
crate.
Insert Crate
158 UNDERSTANDING THE FEATURES OF YOUR VEHICLE
Page 163 of 450
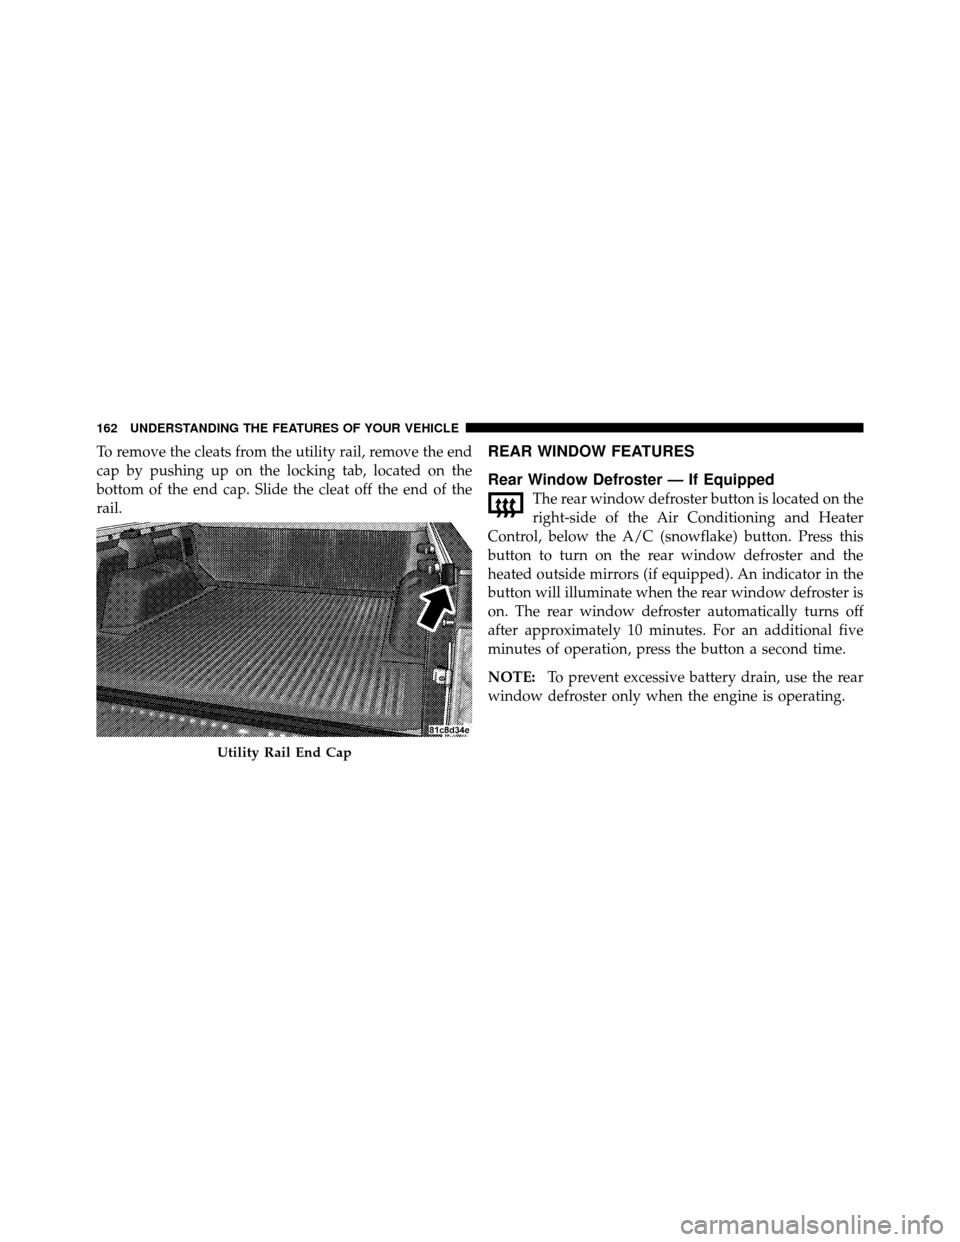
To remove the cleats from the utility rail, remove the end
cap by pushing up on the locking tab, located on the
bottom of the end cap. Slide the cleat off the end of the
rail.REAR WINDOW FEATURES
Rear Window Defroster — If Equipped
The rear window defroster button is located on the
right-side of the Air Conditioning and Heater
Control, below the A/C (snowflake) button. Press this
button to turn on the rear window defroster and the
heated outside mirrors (if equipped). An indicator in the
button will illuminate when the rear window defroster is
on. The rear window defroster automatically turns off
after approximately 10 minutes. For an additional five
minutes of operation, press the button a second time.
NOTE: To prevent excessive battery drain, use the rear
window defroster only when the engine is operating.
Utility Rail End Cap
162 UNDERSTANDING THE FEATURES OF YOUR VEHICLE
Page 165 of 450
SLIDE-IN CAMPERS
Camper Applications
Certain truck models are not recommended for slide-in
campers. To determine if your vehicle is excluded, please
refer to the Consumer Information Truck-Camper Load-
ing document, located in your Owner’s Manual packet or
available from your authorized dealer. For safety reasons,
follow all instructions on this important document.
General Information
The Manufacturer’s Warranty does not apply to body
modifications and special equipment, such as a camper
unit, heaters, stoves, refrigerators, etc., supplied by
manufacturers other than Chrysler LLC. For warranty
coverage and service on these items, contact the appli-
cable manufacturer.To mount a camper unit with an overhang, the tailgate
can be removed. Unlatch the tailgate and remove the
support cables from the retainer pins. Raise the right side
of the tailgate until the lower right side pivot clears the
hanger bracket. Then slide the tailgate to the right to
remove.
Carbon Monoxide Warning-Vehicles Equipped
With A Cap or Slide-In Campers
To avoid inhaling carbon monoxide, which is deadly, the
exhaust system on vehicles equipped with “Cap or
Slide-In Campers” should extend beyond the overhang-
ing camper compartment and be free of leaks.
164 UNDERSTANDING THE FEATURES OF YOUR VEHICLE