Page 280 of 450
Tire Loading and Tire Pressure
Tire Placard Location
NOTE:The proper cold tire inflation pressure is listed
on the driver’s side B-Pillar.
Tire and Loading Information Placard
This placard tells you important information about the:
1) number of people that can be carried in the vehicle
2) total weight your vehicle can carry
3) tire size designed for your vehicle
4) cold tire inflation pressures for the front, rear, and
spare tires.
Tire and Loading Information Placard
5
STARTING AND OPERATING 279
Page 332 of 450
WHAT TO DO IN EMERGENCIES
CONTENTS
�Hazard Warning Flasher ................ 332
� Jacking And Tire Changing ............... 333
▫ Jack Location ....................... 333
▫ Removing The Spare Tire ............... 335
▫ Tire Changing Procedure ............... 337
▫ Preparations ........................ 338
▫ Instructions ........................ 338
▫ To Stow The Flat Or Spare .............. 343�
Jump-Starting Procedures ................ 343
▫ Preparations For Jump-Start ............. 344
▫ Jump-Starting Procedure ............... 345
� Freeing A Stuck Vehicle ................. 347
� Emergency Tow Hooks — If Equipped ...... 348
� Towing A Disabled Vehicle ............... 349
▫ Four-Wheel Drive Vehicles .............. 349
▫ Two-Wheel Drive Vehicles .............. 350
6
Page 334 of 450
JACKING AND TIRE CHANGING
Jack Location
In this vehicle, the scissor jack and tire changing tools for
Extended Cab models are stowed in a compartment
under the rear passenger seat. Crew Cab model scissor
jack and tire changing tools are accessed by lifting up the
rear passenger seat.
The jack is secured in place by turning the jack screw
until the jack is secured into place.
A finger-operated helper tool is provided to assist re-
moval and stowage of the jack. This tool must be
removed to operate the jack for changing the spare tire.
Jack Stowage Location (Extended Cab)6
WHAT TO DO IN EMERGENCIES 333
Page 338 of 450
It is recommended that you stow the flat or spare to
avoid tangling the loose cable.
NOTE:The winch mechanism is designed for use with
the jack extension tube only. Use of an air wrench or other
power tools is not recommended and can damage the
winch.Tire Changing Procedure
WARNING!
Getting under a jacked-up vehicle is dangerous. The
vehicle could slip off the jack and fall on you. You
could be crushed. Never get any part of your body
under a vehicle that is on a jack. Never start or run
the engine while the vehicle is on a jack. If you need
to get under a raised vehicle, take it to a service center
where it can be raised on a lift.
Do not raise this vehicle using a bumper jack. The scissor
jack is designed as a tool for changing tires on this vehicle
only. It is not recommended that the jack be used for
service purposes or to lift more than one wheel at a time.
Spare Tire Stowage Location
6
WHAT TO DO IN EMERGENCIES 337
Page 342 of 450

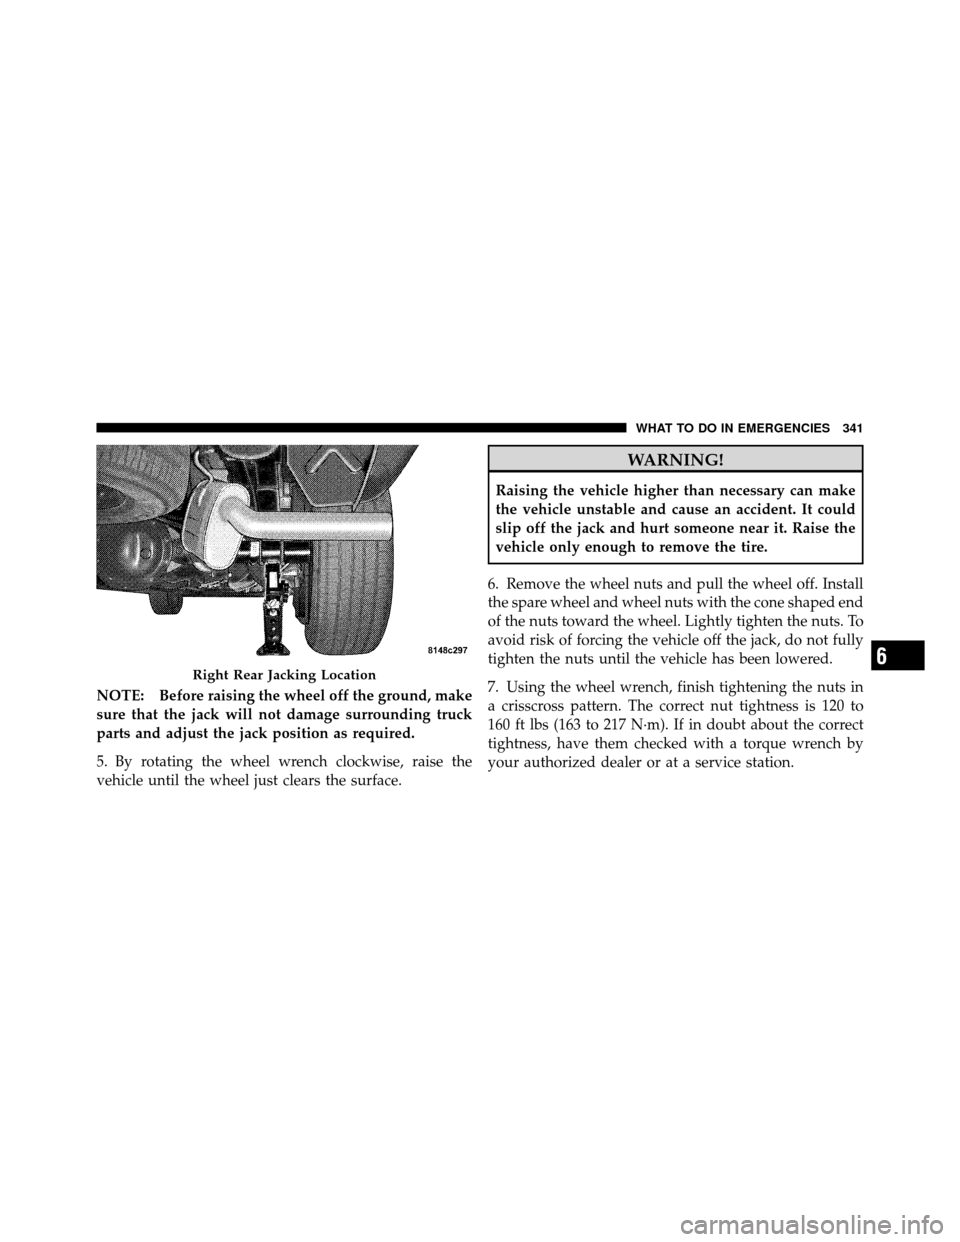
NOTE: Before raising the wheel off the ground, make
sure that the jack will not damage surrounding truck
parts and adjust the jack position as required.
5. By rotating the wheel wrench clockwise, raise the
vehicle until the wheel just clears the surface.
WARNING!
Raising the vehicle higher than necessary can make
the vehicle unstable and cause an accident. It could
slip off the jack and hurt someone near it. Raise the
vehicle only enough to remove the tire.
6. Remove the wheel nuts and pull the wheel off. Install
the spare wheel and wheel nuts with the cone shaped end
of the nuts toward the wheel. Lightly tighten the nuts. To
avoid risk of forcing the vehicle off the jack, do not fully
tighten the nuts until the vehicle has been lowered.
7. Using the wheel wrench, finish tightening the nuts in
a crisscross pattern. The correct nut tightness is 120 to
160 ft lbs (163 to 217 N·m). If in doubt about the correct
tightness, have them checked with a torque wrench by
your authorized dealer or at a service station.
Right Rear Jacking Location6
WHAT TO DO IN EMERGENCIES 341