Page 208 of 450
2. Touch the screen where “User Clock” is displayed, the
clock setting menu will appear on the screen.
3. When this feature is on, a check mark will appear in
the box next to the words “Daylight Savings.” Touch the
screen where the words “Daylight Savings” are dis-
played to change the current setting.
Show Time if Radio is Off
When selected, this feature will display the time of day
on the touch screen when the radio is turned off. Proceed
as follows to change the current setting:
1. Turn on the radio.
2. Touch the screen where the time is displayed.
3. Touch the screen where “User Clock” is displayed, the
clock setting menu will appear on the screen.
4. When this feature is on, a check mark will appear in
the box next to the words “Show Time if Radio is Off.”Touch the screen where the words “Show Time if Radio is
Off” are displayed to change the current setting.
Changing the Time Zone
1. Turn on the radio.
2. Touch the screen where the time is displayed.
3. Touch the screen where “User Clock” is displayed, the
clock setting menu will appear on the screen.
4. Touch the screen where the words “Set Time Zone” are
displayed. The time zone selection menu will appear on
the screen.
5. Select a time zone by touching the screen where your
selection appears. If you do not see a time zone that you
want to select, touch the screen where the word “Page” is
displayed to view additional time zones in the menu.
6. Touch the screen where the word “Save” is displayed.
4
UNDERSTANDING YOUR INSTRUMENT PANEL 207
Page 210 of 450
to seek up and the left switch to seek down. The radio
will remain tuned to the new station until you make
another selection. Holding either button will bypass
stations without stopping, until you release it.
TIME Button
Press the TIME button to alternate display of the time
and radio frequency.
Clock Setting Procedure
1. Press and hold the TIME button until the hours blink.
2. Adjust the hours by turning the right side TUNE/
SCROLL control knob.
3. After adjusting the hours, press the right side TUNE/
SCROLL control knob to set the minutes. The minutes
will begin to blink.4. Adjust the minutes using the right side TUNE/
SCROLL control knob. Press the TUNE/SCROLL control
knob to save time change.
5. To exit, press any button/knob, or wait five seconds.
RW/FF
Pressing the RW (Rewind) or FF (Fast Forward) buttons
causes the tuner to search for the next frequency in the
direction of the arrows. This feature operates in either
AM or FM frequencies.
TUNE Control
Turn the rotary TUNE/SCROLL control knob clockwise
to increase or counterclockwise to decrease the frequency.
Setting the Tone, Balance, and Fade
Push the rotary TUNE/SCROLL control knob and BASS
will display. Turn the TUNE/SCROLL control knob to
the right or left to increase or decrease the bass tones.
4
UNDERSTANDING YOUR INSTRUMENT PANEL 209
Page 219 of 450
to seek up and the left switch to seek down. The radio
will remain tuned to the new station until you make
another selection. Holding either button will bypass
stations without stopping until you release it.
Voice Command System (Radio) — If Equipped
Refer to “Voice Command” in “Understanding The Fea-
tures If Your Vehicle”.
Voice Command Button Uconnect™ Phone — If
Equipped
Press this button to operate the Uconnect™ Phone feature
(if equipped). Refer to “Uconnect™ Phone” in “Under-
standing The Features If Your Vehicle”.
If your vehicle is not equipped with or this feature is not
available on your vehicle, a “Not Equipped With
Uconnect” message will display on the radio screen.
Phone Button Uconnect™ Phone — If Equipped
Press this button to operate the Uconnect™ Phone feature
(if equipped). Refer to “Uconnect™ Phone” in “Under-
standing The Features If Your Vehicle”.
If your vehicle is not equipped with or this feature is not
available on your vehicle, a “Not Equipped With
Uconnect” message will display on the radio screen.
TIME Button
Press the TIME button to alternate display of the time
and radio frequency.
Clock Setting Procedure
1. Press and hold the TIME button until the hours blink.
2. Adjust the hours by turning the right side TUNE/
SCROLL control knob.
218 UNDERSTANDING YOUR INSTRUMENT PANEL
Page 220 of 450
3. After adjusting the hours, press the right side TUNE/
SCROLL control knob to set the minutes. The minutes
will begin to blink.
4. Adjust the minutes using the right side TUNE/
SCROLL control knob. Press the TUNE/SCROLL control
knob to save time change.
5. To exit, press any button/knob or wait five seconds.
The clock can also be set by pressing the SETUP button.
For vehicles equipped with satellite radio, press the
SETUP button, use the TUNE/SCROLL control to select
SET CLOCK, and then follow the above procedure,
starting at Step 2. For vehicles not equipped with satellite
radio, press the SETUP button and then follow the above
procedure, starting at Step 2.INFO Button
Press the INFO button for an RDS station (one with call
letters displayed). The radio will return a Radio Text
message broadcast from an FM station (FM mode only).
RW/FF
Pressing the RW (Rewind) or FF (Fast Forward) buttons
causes the tuner to search for the next frequency in the
direction of the arrows. This feature operates in either
AM or FM frequencies.
TUNE Control
Turn the rotary TUNE/SCROLL control knob clockwise
to increase or counterclockwise to decrease the frequency.
Setting the Tone, Balance, and Fade
Push the rotary TUNE/SCROLL control knob and BASS
will display. Turn the TUNE/SCROLL control knob to
the right or left to increase or decrease the bass tones.
4
UNDERSTANDING YOUR INSTRUMENT PANEL 219
Page 445 of 450
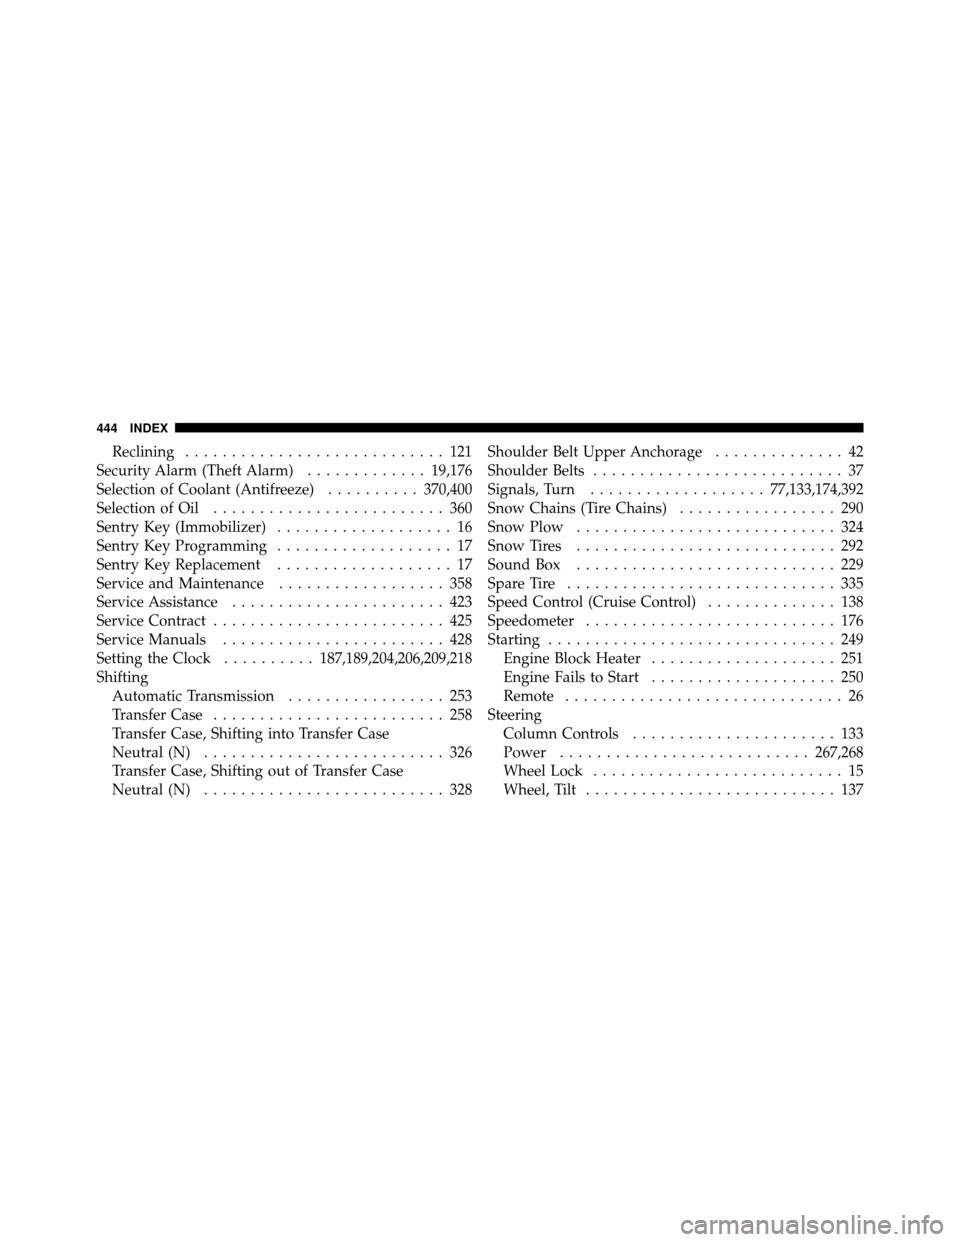
Reclining............................ 121
Security Alarm (Theft Alarm) .............19,176
Selection of Coolant (Antifreeze) ..........370,400
Selection of Oil ......................... 360
Sentry Key (Immobilizer) ................... 16
Sentry Key Programming ................... 17
Sentry Key Replacement ................... 17
Service and Maintenance .................. 358
Service Assistance ....................... 423
Service Contract ......................... 425
Service Manuals ........................ 428
Setting the Clock ..........187,189,204,206,209,218
Shifting Automatic Transmission ................. 253
Transfer Case ......................... 258
Transfer Case, Shifting into Transfer Case
Neutral (N) .......................... 326
Transfer Case, Shifting out of Transfer Case
Neutral (N) .......................... 328 Shoulder Belt Upper Anchorage
.............. 42
Shoulder Belts ........................... 37
Signals, Turn ................... 77,133,174,392
Snow Chains (Tire Chains) ................. 290
Snow Plow ............................ 324
Snow Tires ............................ 292
Sound Box ............................ 229
Spare Tire ............................. 335
Speed Control (Cruise Control) .............. 138
Speedometer ........................... 176
Starting ............................... 249
Engine Block Heater .................... 251
Engine Fails to Start .................... 250
Remote .............................. 26
Steering Column Controls ...................... 133
Power ........................... 267,268
Wheel Lock ........................... 15
Wheel, Tilt ........................... 137
444 INDEX