Page 27 of 448

2. Remove and replace the battery. Avoid touching the
new battery with your fingers. Skin oils may cause
battery deterioration. If you touch a battery, clean it with
rubbing alcohol.
3. To assemble the RKE transmitter case, snap the two
halves together.
General Information
This device complies with part 15 of FCC rules and with
RS-210 of Industry Canada. Operation is subject to the
following conditions:
1. This device may not cause harmful interference.
2. This device must accept any interference that may be
received including interference that may cause undesired
operation.
NOTE:Changes or modifications not expressly ap-
proved by the party responsible for compliance could
void the user’s authority to operate the equipment. If your RKE transmitter fails to operate from a normal
distance, check for these two conditions.
1. Weak battery in the RKE transmitter. The expected life
of battery is five years.
2. Closeness to a radio transmitter such as a radio station
tower, airport transmitter, military base, and some mobile
or CB radios.REMOTE START SYSTEM — IF EQUIPPED
This system uses the Remote Keyless Entry
(RKE) transmitter to start the engine conve-
niently from outside the vehicle while still
maintaining security. The system has a range of
approximately 300 ft (91 m).
NOTE: The vehicle must be equipped with an auto-
matic transmission to be equipped with Remote Start.
26 THINGS TO KNOW BEFORE STARTING YOUR VEHICLE
Page 83 of 448

Safety Checks You Should Make Inside the
Vehicle
Seat Belts
Inspect the belt system periodically, checking for cuts,
frays, and loose parts. Damaged parts must be replaced
immediately. Do not disassemble or modify the system.
Front seat belt assemblies must be replaced after a
collision. Rear seat belt assemblies must be replaced after
a collision if they have been damaged (i.e., bent retractor,
torn webbing, etc.). If there is any question regarding belt
or retractor condition, replace the belt.
Airbag Warning Light
The light should come on and remain on for four to eight
seconds as a bulb check when the ignition switch is first
turned ON. If the light is not lit during starting, see your
authorized dealer. If the light stays on, flickers, or comes
on while driving, have the system checked by an autho-
rized dealer.
Defroster
Check operation by selecting the defrost mode and place
the blower control on high speed. You should be able to
feel the air directed against the windshield. See your
authorized dealer for service if your defroster is
inoperable.
Floor Mat Safety Information
Always use floor mats designed to fit the foot well of
your vehicle. Use only floor mats that leave the pedal
area unobstructed and that are firmly secured so that
they cannot slip out of position and interfere with the
pedals or impair safe operation of your vehicle in other
ways.
82 THINGS TO KNOW BEFORE STARTING YOUR VEHICLE
Page 142 of 448
Inside the Chill Zone�is a vent which, when opened,
allows either air conditioned or fresh air to flow into the
Chill Zone� compartment. Depending on ambient tem-
perature and A/C setting, the compartment can keep
beverages cool.
For Chill Zone� to operate properly, door must remain
closed while vehicle is in operation.
Shut off the Chill Zone� when not in use, by closing the
vent inside. This will prevent cool air from entering the
passenger compartment when in heat mode.
NOTE: The use of the Chill Zone� storage compartment
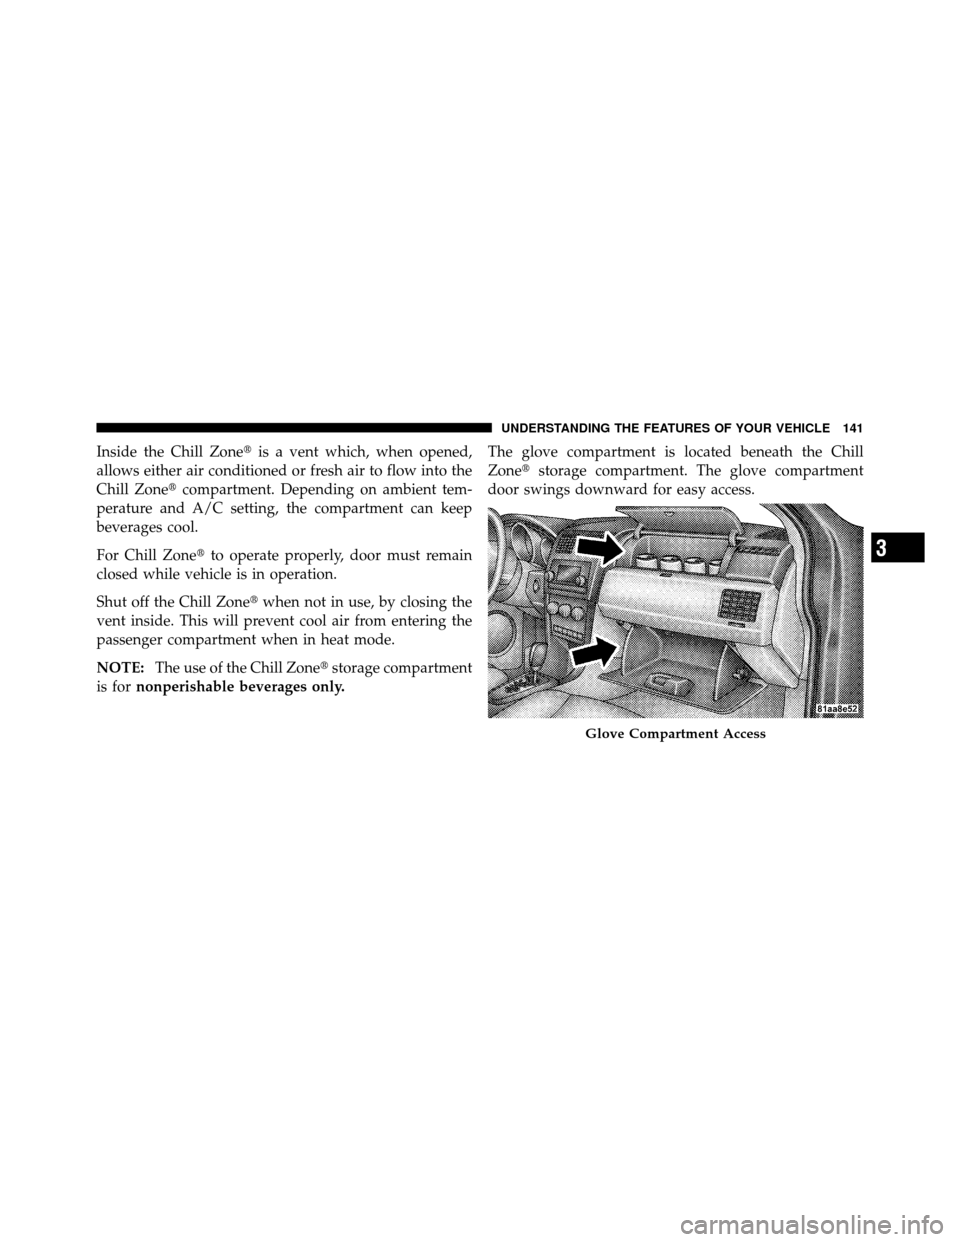
is for nonperishable beverages only. The glove compartment is located beneath the Chill
Zone�
storage compartment. The glove compartment
door swings downward for easy access.
Glove Compartment Access
3
UNDERSTANDING THE FEATURES OF YOUR VEHICLE 141
Page 147 of 448
�CD/DVD Disc Maintenance .............. 224
� Radio Operation And Cellular Phones ....... 224
� Climate Controls ...................... 224
▫ Manual Heating And Air Conditioning ..... 225▫
Automatic Temperature Control (ATC) —
If Equipped ........................ 229
▫ Operating Tips ...................... 235
146 UNDERSTANDING YOUR INSTRUMENT PANEL
Page 151 of 448

INSTRUMENT CLUSTER DESCRIPTIONS
1. Temperature Gauge
The temperature gauge shows engine coolant tempera-
ture. Any reading below the red area of the gauge shows
that the engine cooling system is operating properly. The
gauge pointer may show a higher than normal tempera-
ture when driving in hot weather, up mountain grades, in
heavy stop and go traffic, or when towing a trailer.
If the pointer rises to theH(red) mark, the instrument
cluster will sound a chime. Pull over and stop the vehicle.
Idle the vehicle with the air conditioner turned off until
the pointer drops back into the normal range. If the
pointer remains on the H(red) mark, turn the engine off
immediately and call for service.
There are steps that you can take to slow down an
impending overheat condition. If your air conditioning is
on, turn it off. The air conditioning system adds heat to
the engine cooling system and turning off the A/C removes this heat. You can also turn the Temperature
control to maximum heat, the Mode control to Floor and
the Fan control to High. This allows the heater core to act
as a supplement to the radiator and aids in removing heat
from the engine cooling system.
2. Fuel Door Reminder
This is a reminder that the Fuel Filler Door is
located on the left side of the vehicle.
3. Fuel Gauge
When the ignition switch is in the ON position, the
pointer will show the level of fuel remaining in the fuel
tank.
4. Speedometer
Indicates the vehicle speed in miles per hour (MPH) and
kilometers per hour (km/h).
150 UNDERSTANDING YOUR INSTRUMENT PANEL
Page 225 of 448

CD/DVD DISC MAINTENANCE
To keep a CD/DVD in good condition, take the following
precautions:
1. Handle the disc by its edge; avoid touching the
surface.
2. If the disc is stained, clean the surface with a soft cloth,
wiping from center to edge.
3. Do not apply paper or tape to the disc; avoid scratch-
ing the disc.
4. Do not use solvents such as benzene, thinner, cleaners,
or anti-static sprays.
5. Store the disc in its case after playing.
6. Do not expose the disc to direct sunlight.
7. Do not store the disc where temperatures may become
too high.NOTE:
If you experience difficulty in playing a particu-
lar disc, it may be damaged (i.e., scratched, reflective
coating removed, a hair, moisture or dew on the disc)
oversized, or have protection encoding. Try a known
good disc before considering disc player service.
RADIO OPERATION AND CELLULAR PHONES
Under certain conditions, the cellular phone being on in
your vehicle can cause erratic or noisy performance from
your radio. This condition may be lessened or eliminated
by relocating the cellular phone antenna. This condition
is not harmful to the radio. If your radio performance
does not satisfactorily “clear” by the repositioning of the
antenna, it is recommended that the radio volume be
turned down or off during cellular phone operation.
CLIMATE CONTROLS
The Air Conditioning and Heating System is designed to
make you comfortable in all types of weather.
224 UNDERSTANDING YOUR INSTRUMENT PANEL
Page 226 of 448
Manual Heating and Air Conditioning
The Manual Temperature Controls consist of a series of
outer rotary dials and inner push knobs.
Blower Control
Rotate this control to regulate the
amount of air forced through the ven-
tilation system in any mode. The
blower speed increases as you move
the control to the right from the “O”
(OFF) position. There are four blower
speeds.
NOTE: For vehicles equipped with Remote Start, the
climate controls will not function during Remote Start
operation if the blower control is left in the “O” (Off)
position.
Manual Temperature Control
4
UNDERSTANDING YOUR INSTRUMENT PANEL 225
Page 227 of 448

Temperature Control
Rotate this control to regulate the tem-
perature of the air inside the passenger
compartment. Rotating the dial left
into the blue area of the scale indicates
cooler temperatures while rotating
right into the red area indicates
warmer temperatures.
NOTE: If your air conditioning performance seems
lower than expected, check the front of the A/C con-
denser located in front of the radiator for an accumula-
tion of dirt or insects. Clean with a gentle water spray
from behind the radiator and through the condenser.
Fabric front fascia protectors may reduce airflow to the
condenser, reducing air conditioning performance.
Mode Control (Air Direction)
Rotate this control to choose from sev-
eral patterns of air distribution. You
can select either a primary mode as
identified by the symbols on the con-
trol, or a blend of two of these modes.
The closer the setting is to a particular
symbol, the more air distribution you
receive from that mode.
Panel Air is directed through the outlets in the instrument
panel. These outlets can be adjusted to direct airflow.
NOTE: The center instrument panel outlets can be
aimed so that they are directed toward the rear seat
passengers for maximum airflow to the rear.
Bi-Level Air is directed through the panel and floor outlets.
226 UNDERSTANDING YOUR INSTRUMENT PANEL