2010 CHRYSLER TOWN AND COUNTRY wheel
[x] Cancel search: wheelPage 3 of 92

INTRODUCTION/WELCOME
WELCOME FROM CHRYSLER
GROUPLLC ................ 2
CONTROLS AT A GLANCE
DRIVER COCKPIT.............4
INSTRUMENT CLUSTER .........6
GETTING STARTED
KEYFOB ..................8
THEFT ALARM..............9
SEATBELT ................10
CHILD RESTRAINTS ...........10
FRONTSEATS...............14
HEATEDSEATS..............16
TILT STEERING COLUMN ........17
ADJUSTABLE PEDALS ..........18
PROGRAMMABLE FEATURES ......18
OPERATING YOUR VEHICLE
TURN SIGNAL/WIPER/WASHER/HIGH
BEAMLEVER ...............21
HEADLIGHT SWITCH AND HALO
LIGHT SWITCH..............22
SPEED CONTROL LEVER ........23
ELECTRONIC RANGE SELECTION
(ERS)....................24
MANUAL CLIMATE CONTROLS .... 25
FRONT THREE ZONE MANUAL
CLIMATE CONTROLS .......... 25
FRONT THREE ZONE AUTOMATIC
TEMPERATURE CONTROLS (ATC) . . .27
PARKSENSE
®REAR PARK ASSIST . . 29
PARKVIEW®REAR BACK-UP
CAMERA ................. 29
REAR CROSS PATH WITH BLIND SPOT
MONITORING .............. 30
POWER SLIDING SIDE DOORS .... 30
STOW ’N GO
®SEATING .........31
SWIVEL N’ GO™ SEATING WITH
TABLE ...................32
THIRD ROW POWER RECLINER .....33
POWER LIFTGATE ........... 34
POWERSUNROOF ........... 34
WIND BUFFETING ............ 35
ELECTRONICS
NON-TOUCH-SCREEN RADIOS .... 36
TOUCH-SCREEN RADIOS ........ 38
STEERING WHEEL AUDIO
CONTROLS ............... 42
VIDEO ENTERTAINMENT SYSTEM
(VES)™.................. 42
UNIVERSAL CONSUMER
INTERFACE ............... 44 ELECTRONIC VEHICLE INFORMATION
CENTER (EVIC)
............. 44
UNIVERSAL GARAGE DOOR OPENER
(HOMELINK
®).............. 45
POWERINVERTER ........... 46
POWER OUTLETS ............ 47
UCONNECT™ PHONE .......... 47
VOICE COMMAND ............ 49
UTILITY
IN-FLOOR STORAGE – STOW N’ GO®.. 50
TRAILER TOWING WEIGHTS (MAXIMUM
TRAILER WEIGHT RATINGS) .......51
RECREATIONAL TOWING (BEHIND
MOTORHOME, ETC.) .......... 52
BRAKE/TRANSAXLE INTERLOCK
MANUAL OVERRIDE .......... 52
WHAT TO DO IN EMERGENCIES
24-HOUR TOWING ASSISTANCE
- U.S. ONLY............... 53
INSTRUMENT CLUSTER WARNING
LIGHTS .................. 53
IF YOUR ENGINE OVERHEATS .... 56
JACKING AND TIRE CHANGING .... 58
JUMP-STARTING ............ 62
TOWING A DISABLED VEHICLE .... 65
FREEING A STUCK VEHICLE ...... 66
EVENT DATA RECORDER (EDR) ....67
MAINTAINING YOUR VEHICLE
OPENING THE HOOD.......... 68
ADDING FUEL .............. 68
ENGINE COMPARTMENT ....... 70
FLUIDS AND CAPACITIES ........72
MAINTENANCE CHART .........73
FUSES ...................75
TIREPRESSURES.............79
WHEEL AND WHEEL TRIM CARE ....79
EXTERIOR BULBS ............ 80
CONSUMER ASSISTANCE
CHRYSLER GROUP LLC CUSTOMER
CENTER ..................81
CHRYSLER CANADA INC. CUSTOMER
CENTER ..................81
ASSISTANCE FOR THE HEARING
IMPAIRED .................81
PUBLICATIONS ORDERING .......81
REPORTING SAFETY DEFECTS IN
THE 50 UNITED STATES AND
WASHINGTON, D.C. ........... 82
TIREWARRANTY ............ 82
MOPAR ACCESSORIES
MOPAR®ACCESSORIES ........ 85
TABLE OF CONTENTS
Page 19 of 92

WARNING!
• Persons who are unable to feel pain to the skin because of advanced age,chronic illness, diabetes, spinal cord injury, medication, alcohol use, exhaustion
or other physical conditions must exercise care when using the seat heater. It
may cause burns even at low temperatures, especially if used for long periods of
time.
• Do not place anything on the seat that insulates against heat, such as a blanket or cushion. This may cause the seat heater to overheat. Sitting in a seat that has
been overheated could cause serious burns due to the increased surface
temperature of the seat.
CAUTION!
Repeated overheating of the seat could damage the heating element and/or
degrade the material of the seat.
TILT STEERING COLUMN
• The tilt steering column tilt lever is locatedbelow the steering wheel.
• Push down on the tilt lever to unlock the steering column.
• With one hand firmly on the steering wheel, move the steering column upward
or downward as desired.
• Pull upward on the tilt lever to lock the column firmly in place.
WARNING!
Do not adjust the steering wheel while driving. The tilt adjustment must be locked
while driving. Adjusting the steering wheel while driving or driving without the tilt
adjustment locked could cause the driver to lose control of the vehicle. Failure to
follow this warning may result in severe injury or death.
17
GETTING STARTED
Page 24 of 92

Rear Washer
• Rotate the center portion of the lever past the first detent to activate the rearwasher.
High Beams
• Push the lever away from you to activate the high beams.
• A high beam symbol will illuminate in the cluster to indicate the high beams are on.
NOTE: For safe driving, turn off high beams when oncoming traffic is present to
prevent headlight glare and as a courtesy to other motorists.
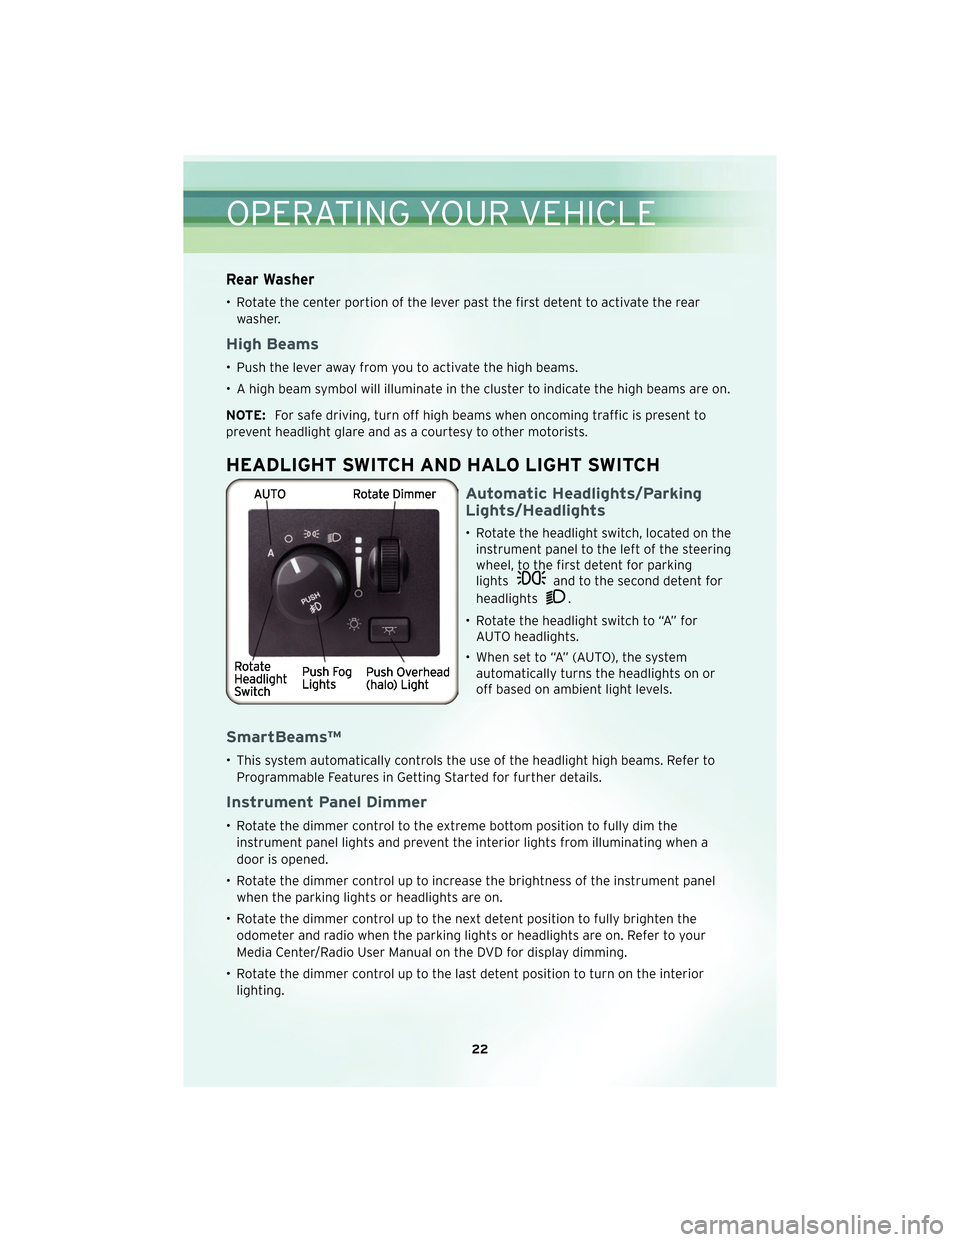
HEADLIGHT SWITCH AND HALO LIGHT SWITCH
Automatic Headlights/Parking
Lights/Headlights
• Rotate the headlight switch, located on the instrument panel to the left of the steering
wheel, to the first detent for parking
lights
and to the second detent for
headlights
.
• Rotate the headlight switch to “A” for AUTO headlights.
• When set to “A” (AUTO), the system automatically turns the headlights on or
off based on ambient light levels.
SmartBeams™
• This system automatically controls the use of the headlight high beams. Refer to
Programmable Features in Getting Started for further details.
Instrument Panel Dimmer
• Rotate the dimmer control to the extreme bottom position to fully dim theinstrument panel lights and prevent the interior lights from illuminating when a
door is opened.
• Rotate the dimmer control up to increase the brightness of the instrument panel when the parking lights or headlights are on.
• Rotate the dimmer control up to the next detent position to fully brighten the odometer and radio when the parking lights or headlights are on. Refer to your
Media Center/Radio User Manual on the DVD for display dimming.
• Rotate the dimmer control up to the last detent position to turn on the interior lighting.
OPERATING YOUR VEHICLE
22
Page 44 of 92

STEERING WHEEL AUDIO CONTROLS
• The remote audio controls are located onthe rear surface of the steering wheel.
Right Switch
• Press the switch up or down to increase ordecrease the volume.
• Press the button in the center to change modes AM/FM/CD/SAT.
Left Switch
• Press the switch up or down to search forthe next listenable station or select the
next or previous CD track.
• Press the button in the center to select the next preset station (radio) or to change CDs if equipped with a CD Changer.
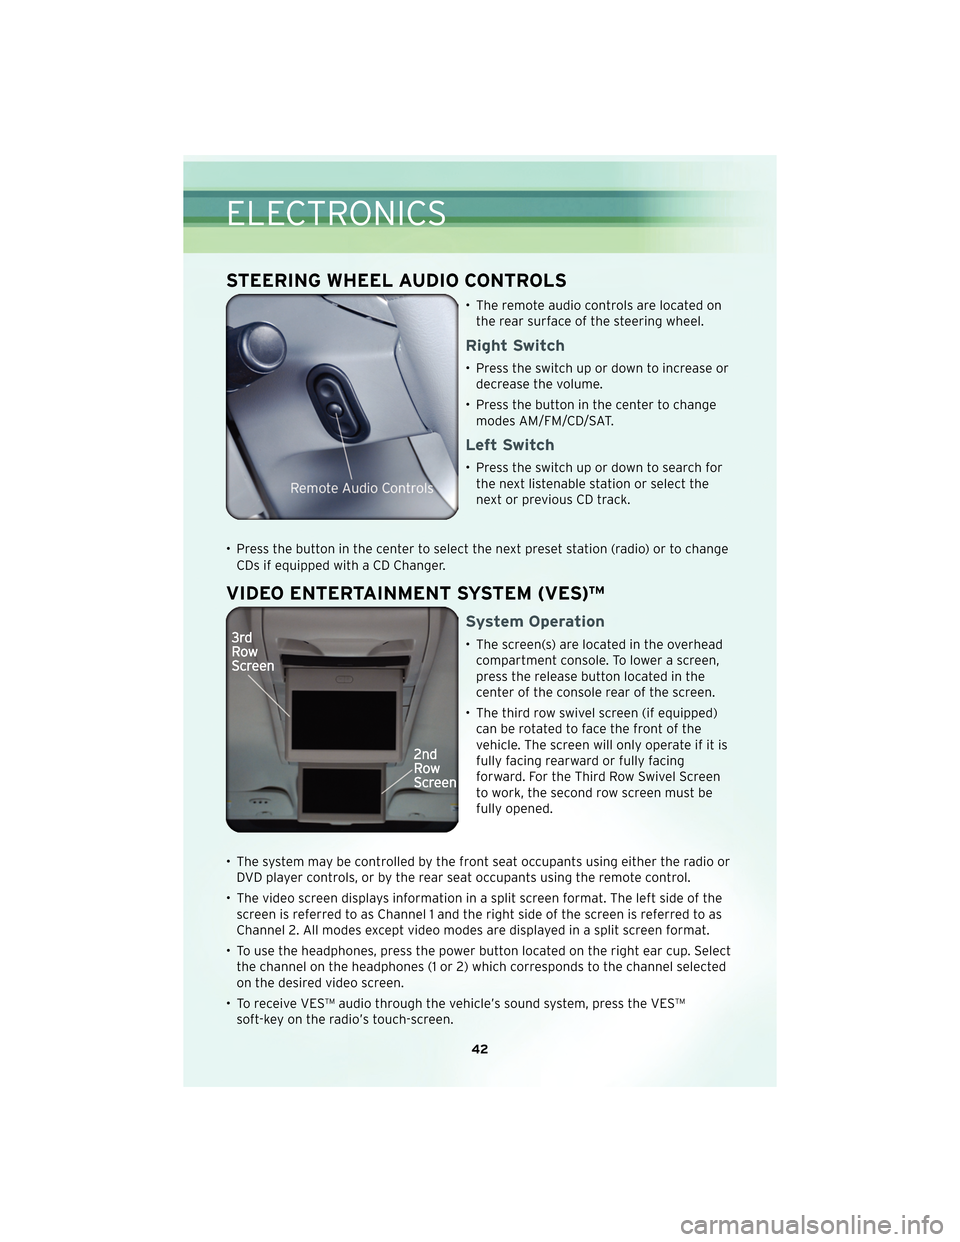
VIDEO ENTERTAINMENT SYSTEM (VES)™
System Operation
• The screen(s) are located in the overheadcompartment console. To lower a screen,
press the release button located in the
center of the console rear of the screen.
• The third row swivel screen (if equipped) can be rotated to face the front of the
vehicle. The screen will only operate if it is
fully facing rearward or fully facing
forward. For the Third Row Swivel Screen
to work, the second row screen must be
fully opened.
• The system may be controlled by the front seat occupants using either the radio or DVD player controls, or by the rear seat occupants using the remote control.
• The video screen displays information in a split screen format. The left side of the screen is referred to as Channel 1 and the right side of the screen is referred to as
Channel 2. All modes except video modes are displayed in a split screen format.
• To use the headphones, press the power button located on the right ear cup. Select the channel on the headphones (1 or 2) which corresponds to the channel selected
on the desired video screen.
• To receive VES™ audio through the vehicle’s sound system, press the VES™ soft-key on the radio’s touch-screen.
ELECTRONICS
42
Page 46 of 92

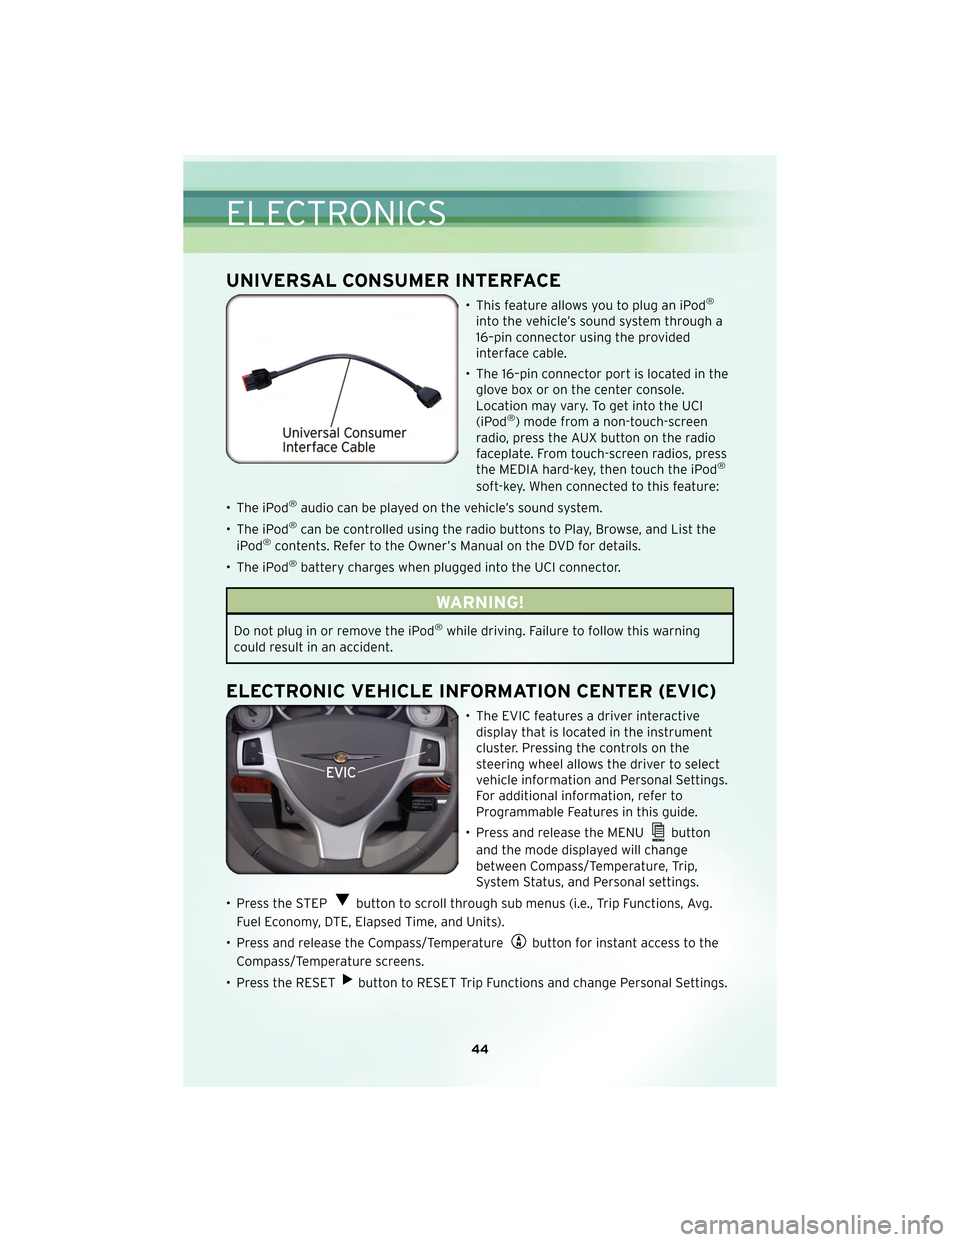
UNIVERSAL CONSUMER INTERFACE
• This feature allows you to plug an iPod®
into the vehicle’s sound system through a
16–pin connector using the provided
interface cable.
• The 16–pin connector port is located in the glove box or on the center console.
Location may vary. To get into the UCI
(iPod
®) mode from a non-touch-screen
radio, press the AUX button on the radio
faceplate. From touch-screen radios, press
the MEDIA hard-key, then touch the iPod
®
soft-key. When connected to this feature:
• The iPod
®audio can be played on the vehicle’s sound system.
• The iPod
®can be controlled using the radio buttons to Play, Browse, and List the
iPod®contents. Refer to the Owner’s Manual on the DVD for details.
• The iPod
®battery charges when plugged into the UCI connector.
WARNING!
Do not plug in or remove the iPod®while driving. Failure to follow this warning
could result in an accident.
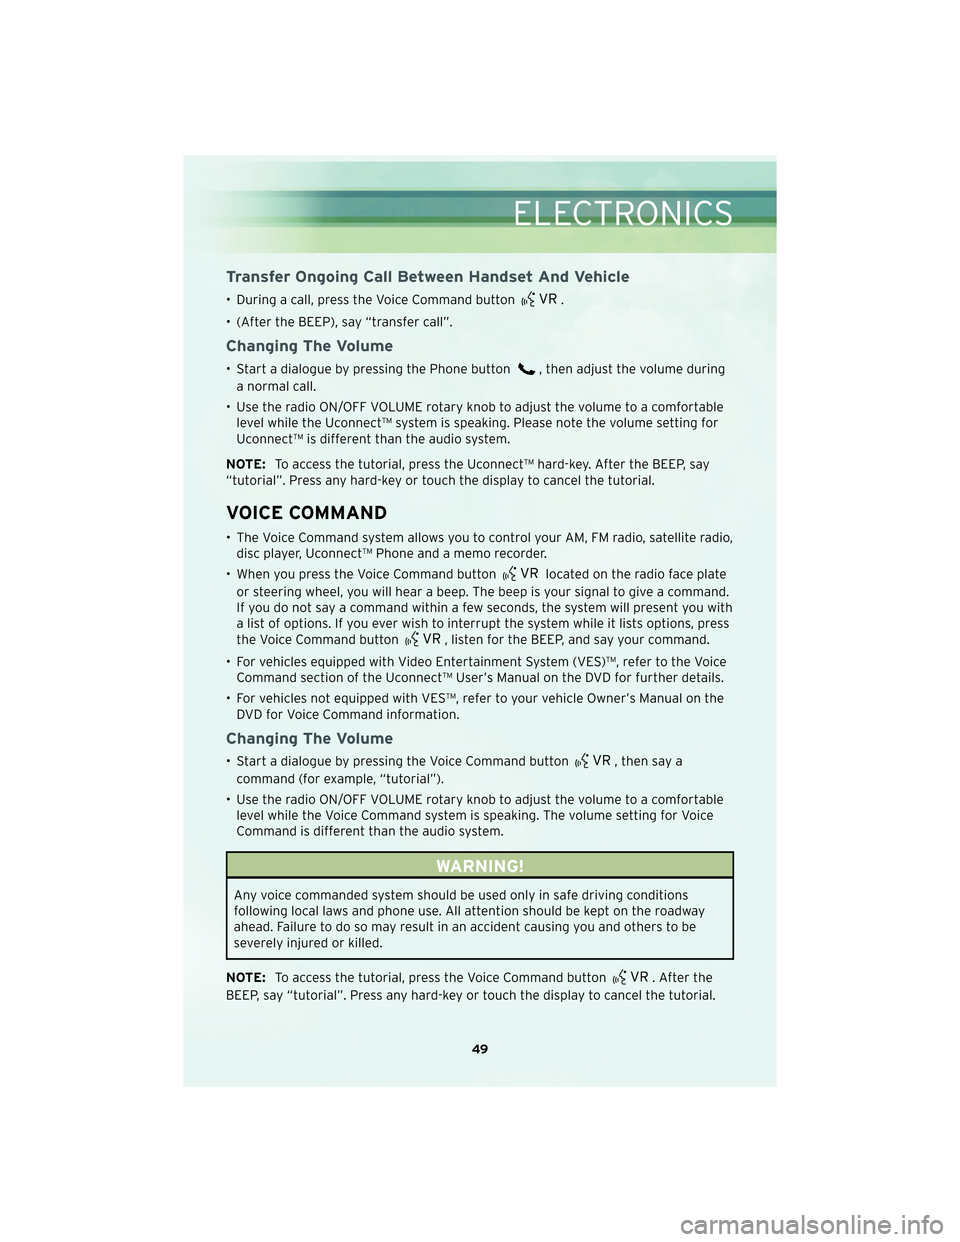
ELECTRONIC VEHICLE INFORMATION CENTER (EVIC)
• The EVIC features a driver interactive display that is located in the instrument
cluster. Pressing the controls on the
steering wheel allows the driver to select
vehicle information and Personal Settings.
For additional information, refer to
Programmable Features in this guide.
• Press and release the MENU
button
and the mode displayed will change
between Compass/Temperature, Trip,
System Status, and Personal settings.
• Press the STEP
button to scroll through sub menus (i.e., Trip Functions, Avg.
Fuel Economy, DTE, Elapsed Time, and Units).
• Press and release the Compass/Temperature
button for instant access to the
Compass/Temperature screens.
• Press the RESET
button to RESET Trip Functions and change Personal Settings.
ELECTRONICS
44
Page 51 of 92

Transfer Ongoing Call Between Handset And Vehicle
• During a call, press the Voice Command button.
• (After the BEEP), say “transfer call”.
Changing The Volume
• Start a dialogue by pressing the Phone button, then adjust the volume during
a normal call.
• Use the radio ON/OFF VOLUME rotary knob to adjust the volume to a comfortable level while the Uconnect™ system is speaking. Please note the volume setting for
Uconnect™ is different than the audio system.
NOTE: To access the tutorial, press the Uconnect™ hard-key. After the BEEP, say
“tutorial”. Press any hard-key or touch the display to cancel the tutorial.
VOICE COMMAND
• The Voice Command system allows you to control your AM, FM radio, satellite radio, disc player, Uconnect™ Phone and a memo recorder.
• When you press the Voice Command button
located on the radio face plate
or steering wheel, you will hear a beep. The beep is your signal to give a command.
If you do not say a command within a few seconds, the system will present you with
a list of options. If you ever wish to interrupt the system while it lists options, press
the Voice Command button
, listen for the BEEP, and say your command.
• For vehicles equipped with Video Entertainment System (VES)™, refer to the Voice Command section of the Uconnect™ User’s Manual on the DVD for further details.
• For vehicles not equipped with VES™, refer to your vehicle Owner’s Manual on the DVD for Voice Command information.
Changing The Volume
• Start a dialogue by pressing the Voice Command button, then say a
command (for example, “tutorial”).
• Use the radio ON/OFF VOLUME rotary knob to adjust the volume to a comfortable level while the Voice Command system is speaking. The volume setting for Voice
Command is different than the audio system.
WARNING!
Any voice commanded system should be used only in safe driving conditions
following local laws and phone use. All attention should be kept on the roadway
ahead. Failure to do so may result in an accident causing you and others to be
severely injured or killed.
NOTE: To access the tutorial, press the Voice Command button
. After the
BEEP, say “tutorial”. Press any hard-key or touch the display to cancel the tutorial.
49
ELECTRONICS
Page 54 of 92

RECREATIONAL TOWING
(BEHIND MOTORHOME,
ETC.)
CAUTION!
Towing this vehicle behind another
vehicle (flat-towing with all four
wheels on the ground) is not
recommended.
NOTE: If the vehicle requires towing,
make sure all four wheels are off the
ground.
BRAKE/TRANSAXLE
INTERLOCK MANUAL
OVERRIDE
• The manual override may be used in the event that the shift lever should
fail to move from PARK with the Key
Fob in the ON position and the brake
pedal pr essed.
• To operate the shift lock manual override, perform the following
steps: • Remove the cover located to the
top right of the shift lever in the
instrument panel.
• The override can be activated by pressing the white-colored tab,
which can be acc essedthrough
the hole in the instrument panel.
• While the override is pressed, the
shift lever can be moved out of
the PARK position without
pressing the brake pedal. After
operation, return the cover to its
original position.
• Have your vehicle inspected by your local authorized dealer immediately
if the shift lock manual override has
been used.
NOTE: If a malfunction occurs, the
system will trap the Key Fob in the
ignition cylinder to warn you that this
safety feature is inoperable. The
engine can be started and stopped, but
the Key Fob cannot be removed until
you obtain service.
UTILITY
52
Page 56 of 92

• When the malfunction indicator is illuminated, the system may not be able todetect or signal low tire pressure as intended. TPMS malfunctions may occur for a
variety of reasons, including the installation of replacement or alternate tires or
wheels on the vehicle that prevent the TPMS from functioning properly. Always
check the TPMS malfunction telltale after replacing one or more tires or wheels on
your vehicle, to ensure that the replacement or alternate tires and wheels allow the
TPMS to continue to function properly.
CAUTION!
The TPMS has been optimized for the original equipment tires and wheels. TPMS
pressures and warning have been established for the tire size equipped on your
vehicle. Undesirable system operation or sensor damage may result when using
replacement equipment that is not of the same size, type, and/or style.
Aftermarket wheels can cause sensor damage. Do not use tire sealant from a can,
or balance beads if your vehicle is equipped with a TPMS, as damage to the
sensors may result.
- Engine Temperature Warning Light
• This light warns of an overheated engine condition.
• If the light turns on or flashes continuously while driving, safely pull over and stopthe vehicle. If the A/C system is on, turn it off. Also, shift the transmission into
NEUTRAL and idle the vehicle. If the temperature reading does not return to
normal, turn the engine off immediately and call for service.
• We recommend that you do not operate the vehicle or engine damage will occur. Have the vehicle serviced immediately.
WARNING!
A hot engine cooling system is dangerous. You or others could be badly burned by
steam or boiling coolant. You may want to call an authorized dealership for service
if your vehicle overheats.
- Brake Warning Light
• The Brake Warning light illuminates when there is either a system malfunction orthe parking brake is applied. If the light is on and the parking brake is not applied, it
indicates a possible brake hydraulic malfunction, brake booster problem or an
Anti-Lock Brake System problem.
• We recommend you drive to the nearest service center and have the vehicle serviced immediately.
WHAT TO DO IN EMERGENCIES
54