2010 CHRYSLER TOWN AND COUNTRY ECO mode
[x] Cancel search: ECO modePage 318 of 538
Recirculation Control
When outside air contains smoke, odors, or
high humidity, or if rapid cooling is desired,
you may wish to recirculate interior air by
pressing the RECIRCULATION mode control
button. RECIRCULATION mode should only be used
temporarily. The recirculation symbol will illuminate in
the display when this button is selected. Push the button
a second time to turn off the RECIRCULATION mode
LED and allow outside air into the vehicle.
NOTE: In cold weather, use of the RECIRCULATION
mode may lead to excessive window fogging. The RE-
CIRCULATION mode is not allowed in the FLOOR, MIX
and DEFROST modes to improve window clearing op-
eration. Recirculation will be disabled automatically if
these modes are selected.
Rear Automatic Temperature Control (ATC) — If
Equipped
The Rear ATC System has floor air outlets at the rear of
the right side sliding door, and overhead outlets at each
outboard rear seating position. The system provides
heated air through the floor outlets or cool, dehumidified
air through the headliner outlets.
The REAR SYSTEM control for the Rear ATC System is
on the front lower ATC panel located on the instrument
panel.
Pressing the REAR LOCK button for the Rear ATC
System from the front lower ATC panel, illuminates a
LOCK symbol in the rear display. The rear temperature
and air source are controlled from the front lower ATC
panel.
Rear second row occupants can only adjust the rear ATC
control when the REAR LOCK button is turned off.
4
UNDERSTANDING YOUR INSTRUMENT PANEL 317
Page 321 of 538
When rear controls are locked by the front system, the
LOCK symbol on the temperature knob is illuminated
and any rear overhead adjustments are ignored.
Rear Mode Control
Auto Mode
The rear system automatically maintains the correct
mode and comfort level desired by the rear seat occu-
pants.
Headliner ModeAir comes from the outlets in the headliner. Each of
these outlets can be individually adjusted to direct
the flow of air. Moving the air vanes of the outlets to one
side will shut off the airflow.
Bi-Level Mode Air comes from both the headliner outlets and the
floor outlets. NOTE:
In many temperature positions, the BI-LEVEL
mode is designed to provide cooler air out of the head-
liner outlets and warmer air from the floor outlets.
Floor Mode Air comes from the floor outlets.
Summer Operation
The engine cooling system in air conditioned vehicles
must be protected with a high-quality antifreeze coolant
to provide proper corrosion protection and to protect
against engine overheating. A solution of 50% ethylene
glycol antifreeze coolant and 50% water is recommended.
Refer to “Maintenance Procedures” in “Maintaining Your
Vehicle” for proper coolant selection.
320 UNDERSTANDING YOUR INSTRUMENT PANEL
Page 322 of 538
Winter Operation
To ensure the best possible heater and defroster perfor-
mance, make sure the engine cooling system is function-
ing properly and the proper amount, type, and concen-
tration of coolant is used. Refer to “Maintenance
Procedures” in “Maintaining Your Vehicle” for proper
coolant selection. Use of the air RECIRCULATION mode
during Winter months is not recommended, because it
may cause window fogging.
Vacation/Storage
Before you store your vehicle, or keep it out of service
(i.e., vacation) for two weeks or more, run the air
conditioning system at idle for about five minutes, in
fresh air with the blower setting on high. This will ensure
adequate system lubrication to minimize the possibility
of compressor damage when the system is started again.
Window Fogging
Vehicle windows tend to fog on the inside in mild, rainy
and/or humid weather. To clear the windows, select
DEFROST or MIX mode and increase the front blower
speed. Do not use the RECIRCULATION mode without
A/C for long periods, as fogging may occur.
Outside Air Intake
Make sure the air intake, located directly in front of the
windshield, is free of obstructions such as leaves. Leaves
collected in the air intake may reduce airflow, and if they
enter the plenum they could plug the water drains. In
Winter months make sure the air intake is clear of ice,
slush and snow.4
UNDERSTANDING YOUR INSTRUMENT PANEL 321
Page 336 of 538
NEUTRAL
This range is used when vehicle is standing for pro-
longed periods with engine running. Engine may be
started in this range. Set the parking brake if you must
leave the vehicle.
WARNING!
Do not coast in NEUTRAL and never turn off the
ignition to coast down a hill. These are unsafe
practices that limit your response to changing traffic
or road conditions. You might lose control of the
vehicle and have an accident.
DRIVE – Six-Speed Transmission
This range should be used for most city and highway
driving. It provides the smoothest upshifts, downshifts,
and best fuel economy. However, use the Electronic
Range Select (ERS) mode by moving the lever—/+and
select the “5” range when frequent transmission shiftingoccurs while using the DRIVE range, such as when
operating the vehicle under heavy loading conditions,
(i.e., in hilly terrain, traveling into strong head winds or
while towing heavy trailers). Under these conditions,
using the “5” range will improve performance and
extend transmission life by reducing excessive shifting
and heat buildup.
DRIVE – Four-Speed Transmission
This range should be used for most city and highway
driving. It provides the smoothest upshifts, downshifts,
and best fuel economy. However, select the “3” range
when frequent transmission shifting occurs while using
the DRIVE range, such as when operating the vehicle
under heavy loading conditions, (i.e., in hilly terrain,
traveling into strong head winds or while towing heavy
trailers). Under these conditions, using the “3” range will
improve performance and extend transmission life by
reducing excessive shifting and heat buildup.5
STARTING AND OPERATING 335
Page 337 of 538
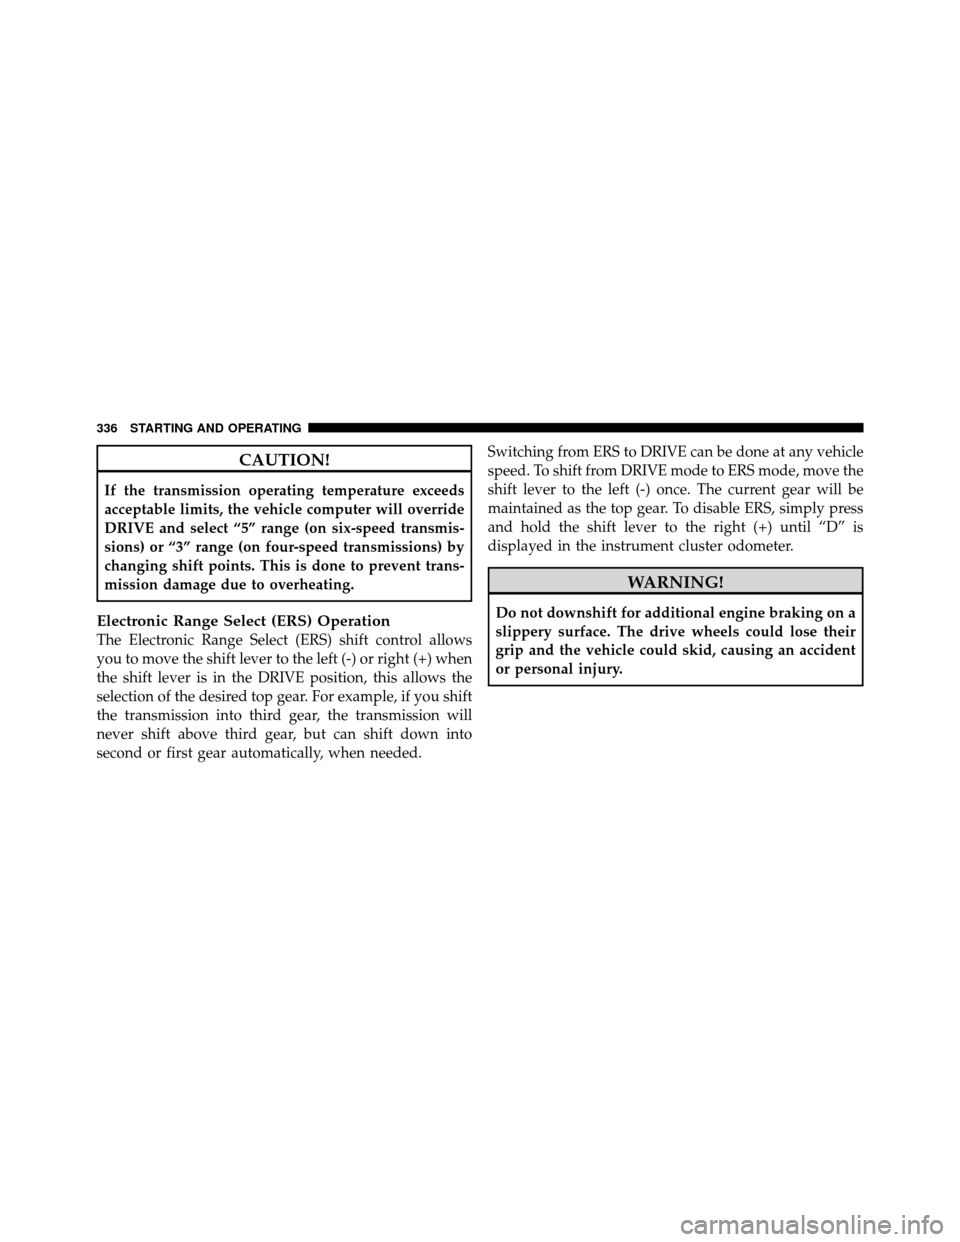
CAUTION!
If the transmission operating temperature exceeds
acceptable limits, the vehicle computer will override
DRIVE and select “5” range (on six-speed transmis-
sions) or “3” range (on four-speed transmissions) by
changing shift points. This is done to prevent trans-
mission damage due to overheating.
Electronic Range Select (ERS) Operation
The Electronic Range Select (ERS) shift control allows
you to move the shift lever to the left (-) or right (+) when
the shift lever is in the DRIVE position, this allows the
selection of the desired top gear. For example, if you shift
the transmission into third gear, the transmission will
never shift above third gear, but can shift down into
second or first gear automatically, when needed.Switching from ERS to DRIVE can be done at any vehicle
speed. To shift from DRIVE mode to ERS mode, move the
shift lever to the left (-) once. The current gear will be
maintained as the top gear. To disable ERS, simply press
and hold the shift lever to the right (+) until “D” is
displayed in the instrument cluster odometer.
WARNING!
Do not downshift for additional engine braking on a
slippery surface. The drive wheels could lose their
grip and the vehicle could skid, causing an accident
or personal injury.
336 STARTING AND OPERATING
Page 338 of 538
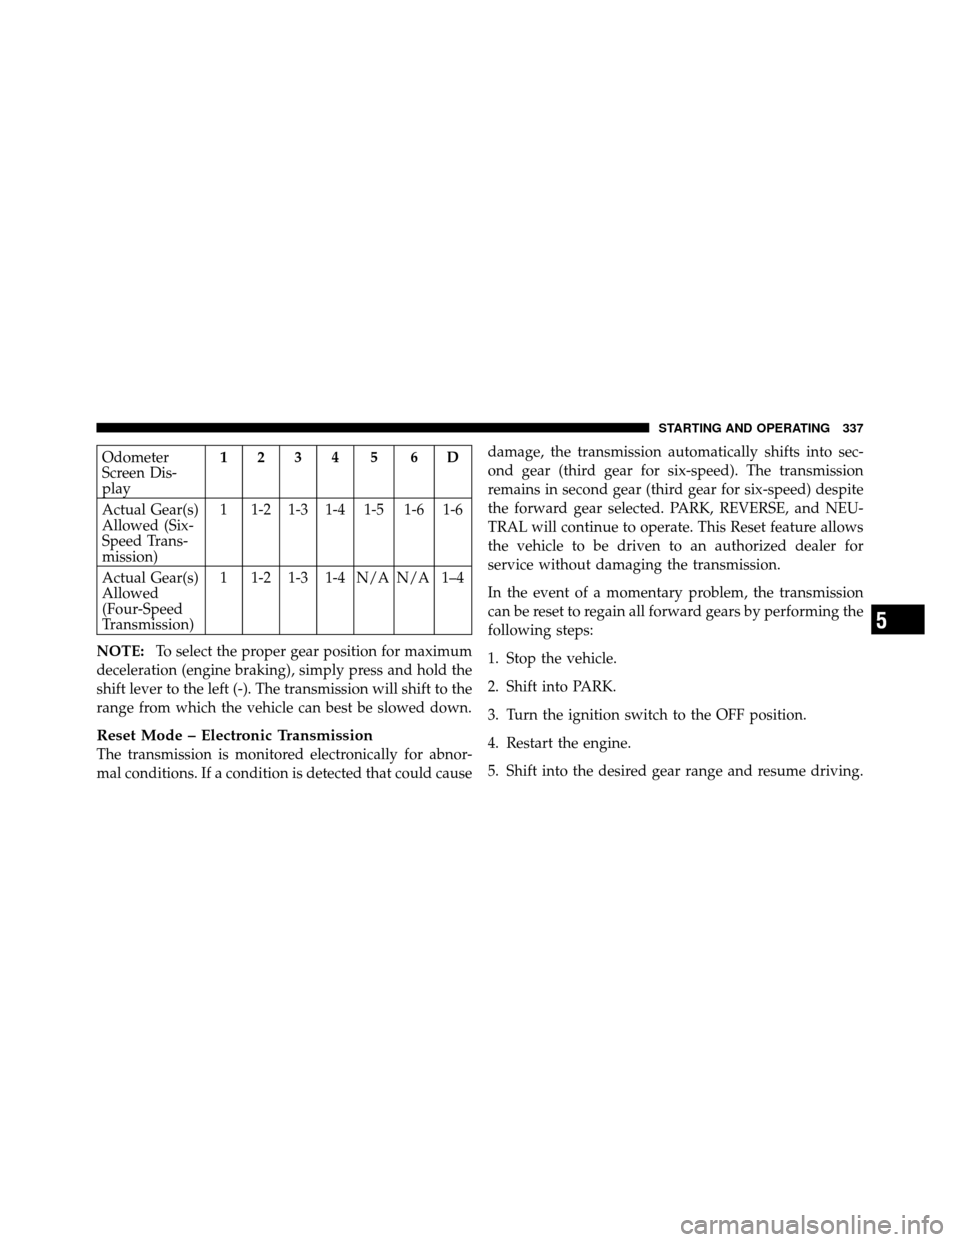
Odometer
Screen Dis-
play1234 5 6D
Actual Gear(s)
Allowed (Six-
Speed Trans-
mission) 1 1-2 1-3 1-4 1-5 1-6 1-6
Actual Gear(s)
Allowed
(Four-Speed
Transmission) 1 1-2 1-3 1-4 N/A N/A 1–4
NOTE: To select the proper gear position for maximum
deceleration (engine braking), simply press and hold the
shift lever to the left (-). The transmission will shift to the
range from which the vehicle can best be slowed down.
Reset Mode – Electronic Transmission
The transmission is monitored electronically for abnor-
mal conditions. If a condition is detected that could cause damage, the transmission automatically shifts into sec-
ond gear (third gear for six-speed). The transmission
remains in second gear (third gear for six-speed) despite
the forward gear selected. PARK, REVERSE, and NEU-
TRAL will continue to operate. This Reset feature allows
the vehicle to be driven to an authorized dealer for
service without damaging the transmission.
In the event of a momentary problem, the transmission
can be reset to regain all forward gears by performing the
following steps:
1. Stop the vehicle.
2. Shift into PARK.
3. Turn the ignition switch to the OFF position.
4. Restart the engine.
5. Shift into the desired gear range and resume driving.
5
STARTING AND OPERATING 337
Page 352 of 538
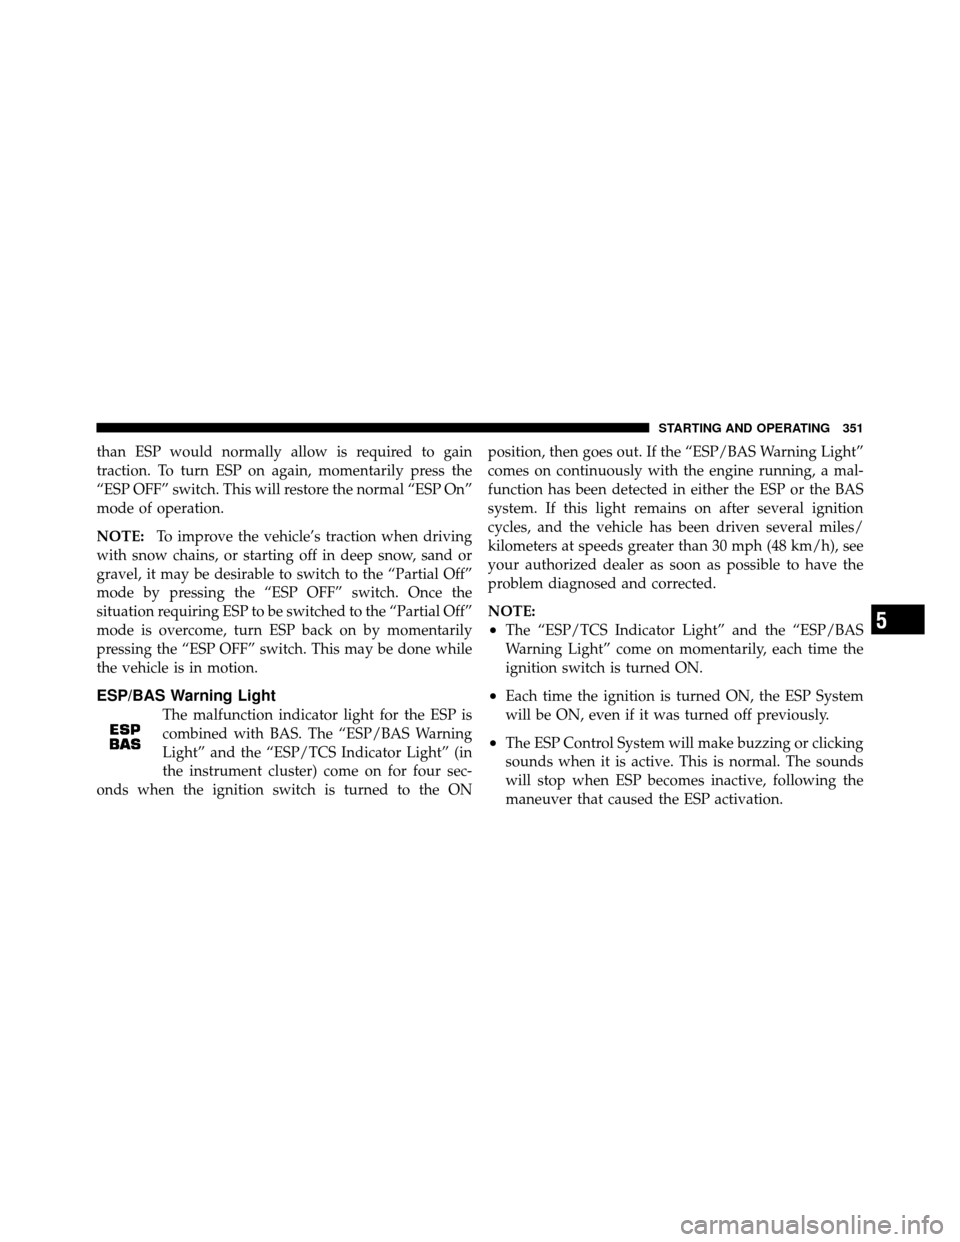
than ESP would normally allow is required to gain
traction. To turn ESP on again, momentarily press the
“ESP OFF” switch. This will restore the normal “ESP On”
mode of operation.
NOTE:To improve the vehicle’s traction when driving
with snow chains, or starting off in deep snow, sand or
gravel, it may be desirable to switch to the “Partial Off”
mode by pressing the “ESP OFF” switch. Once the
situation requiring ESP to be switched to the “Partial Off”
mode is overcome, turn ESP back on by momentarily
pressing the “ESP OFF” switch. This may be done while
the vehicle is in motion.
ESP/BAS Warning Light
The malfunction indicator light for the ESP is
combined with BAS. The “ESP/BAS Warning
Light” and the “ESP/TCS Indicator Light” (in
the instrument cluster) come on for four sec-
onds when the ignition switch is turned to the ON position, then goes out. If the “ESP/BAS Warning Light”
comes on continuously with the engine running, a mal-
function has been detected in either the ESP or the BAS
system. If this light remains on after several ignition
cycles, and the vehicle has been driven several miles/
kilometers at speeds greater than 30 mph (48 km/h), see
your authorized dealer as soon as possible to have the
problem diagnosed and corrected.
NOTE:
•The “ESP/TCS Indicator Light” and the “ESP/BAS
Warning Light” come on momentarily, each time the
ignition switch is turned ON.
•Each time the ignition is turned ON, the ESP System
will be ON, even if it was turned off previously.
•The ESP Control System will make buzzing or clicking
sounds when it is active. This is normal. The sounds
will stop when ESP becomes inactive, following the
maneuver that caused the ESP activation.
5
STARTING AND OPERATING 351
Page 413 of 538
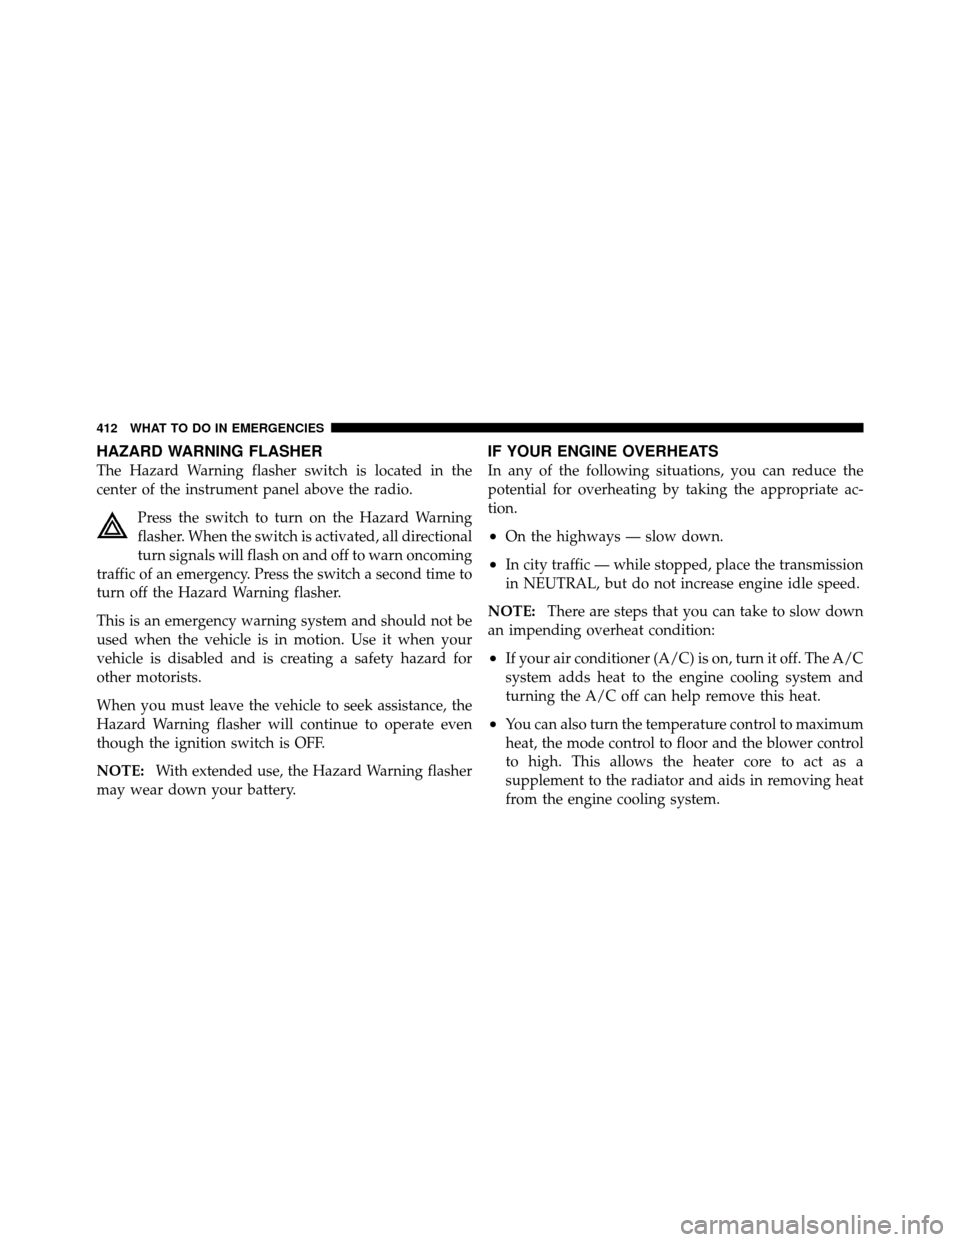
HAZARD WARNING FLASHER
The Hazard Warning flasher switch is located in the
center of the instrument panel above the radio.Press the switch to turn on the Hazard Warning
flasher. When the switch is activated, all directional
turn signals will flash on and off to warn oncoming
traffic of an emergency. Press the switch a second time to
turn off the Hazard Warning flasher.
This is an emergency warning system and should not be
used when the vehicle is in motion. Use it when your
vehicle is disabled and is creating a safety hazard for
other motorists.
When you must leave the vehicle to seek assistance, the
Hazard Warning flasher will continue to operate even
though the ignition switch is OFF.
NOTE: With extended use, the Hazard Warning flasher
may wear down your battery.
IF YOUR ENGINE OVERHEATS
In any of the following situations, you can reduce the
potential for overheating by taking the appropriate ac-
tion.
•On the highways — slow down.
•In city traffic — while stopped, place the transmission
in NEUTRAL, but do not increase engine idle speed.
NOTE: There are steps that you can take to slow down
an impending overheat condition:
•If your air conditioner (A/C) is on, turn it off. The A/C
system adds heat to the engine cooling system and
turning the A/C off can help remove this heat.
•You can also turn the temperature control to maximum
heat, the mode control to floor and the blower control
to high. This allows the heater core to act as a
supplement to the radiator and aids in removing heat
from the engine cooling system.
412 WHAT TO DO IN EMERGENCIES