2010 CHRYSLER SEBRING SEDAN ECO mode
[x] Cancel search: ECO modePage 212 of 436
turning the TUNE/SCROLL control knob within five sec-
onds will allow the program format type to be selected.
Toggle the MUSIC TYPE button again to select the music
type.
By pressing the SEEK button when the Music Type
function is active, the radio will be tuned to the next
channel with the same selected Music Type name.
If a preset button is activated while in the Music Type
(Program Type) mode, the Music Type mode will be
exited and the radio will tune to the preset channel.
SETUP Button
Pressing the SETUP button allows you to select the
following items:
•Display Sirius ID number — Press the AUDIO/
SELECT button to display the Sirius ID number. This
number is used to activate, deactivate, or change the
Sirius subscription.
SET Button – To Set the Pushbutton Memory
When you are receiving a channel that you wish to
commit to pushbutton memory, press the SET button.
The symbol SET 1 will now show in the display window.
Select the button (1-6) you wish to lock onto this channel
and press and release that button. If a button is not
selected within five seconds after pressing the SET but-
ton, the channel will continue to play but will not be
stored into pushbutton memory.
You may add a second channel to each pushbutton by
repeating the above procedure with this exception: Press
the SET button twice and SET 2 will show in the display
window. Each button can be set for SET 1 and SET 2. This
allows a total of 12 Satellite channels to be stored into
pushbutton memory. The channels stored in SET 2
memory can be selected by pressing the pushbutton
twice.
212 UNDERSTANDING YOUR INSTRUMENT PANEL
Page 216 of 436
Right-Hand Switch Functions
•
Press the top of the switch to increase the volume.
•Press the bottom of the switch to decrease the volume.
•Press the button in the center of the switch to change
modes (i.e., AM, FM, etc.).
Left-Hand Switch Functions for Radio Operation
•
Press the top of the switch to SEEK the next listenable
station up from the current setting.
•Press the bottom of the switch to SEEK the next
listenable station down from the current setting.
•Press the button in the center of the switch to tune to
the next preset that you have programmed.
Left-Hand Switch Functions for Media (i.e., CD)
Operation
•
Press the top of the switch once to listen to the next
track.
•Press the bottom of the switch once either to listen to
the beginning of the current track or to listen to the
beginning of the previous track if it is within one
second after the current track begins to play.
•Press the switch up or down twice to listen to the
second track, three times to listen to the third track,
and so forth.
•Press the button located in the center of the switch to
change to the next preset that you have programmed.
216 UNDERSTANDING YOUR INSTRUMENT PANEL
Page 220 of 436
Bi-LevelAir is directed through the panel and floor outlets.
NOTE: For all settings except full cold or full hot, there
is a difference in temperature between the upper and
lower outlets. The warmer air flows to the floor outlets.
This feature gives improved comfort during sunny but
cool conditions.
Floor Air is directed through the floor outlets with a
small amount flowing through the defrost and side
window demist outlets.
Mix Air is directed through the floor, defrost, and side
window demist outlets. This setting works best in
cold or snowy conditions that require extra heat to
the windshield. This setting is good for maintaining
comfort while reducing moisture on the windshield. Defrost
Air is directed through the windshield and side
window demist outlets. Use this mode with maxi-
mum blower and temperature settings for best wind-
shield and side window defrosting.
NOTE: The air conditioning compressor operates in
Mix, Defrost, or a blend of these modes, even if the Air
Conditioning (A/C) button is not pressed. This dehu-
midifies the air to help dry the windshield. To improve
fuel economy, use these modes only when necessary.
Recirculation Control Pressing the Recirculation Control button will
temporarily put the system in recirculation
mode (10 minutes). This can be used when
outside conditions such as smoke, odors, dust,
or high humidity are present. Activating recirculation
220 UNDERSTANDING YOUR INSTRUMENT PANEL
Page 221 of 436
will cause the LED in the control button to illuminate.
After ten minutes, the system will return to normal mode
function and the LED will turn off.
NOTE:
•Continuous use of the recirculation mode may make
the inside air stuffy and window fogging may occur.
Extended use of this mode is not recommended.
•The use of the recirculation mode in cold or damp
weather will cause windows to fog on the inside,
because of moisture buildup inside the vehicle. Select
the Outside Air position for maximum defogging.
•The A/C will engage automatically to prevent fogging
when the recirculation button is pressed and the mode
control is set to panel or Bi-Level.
•Recirculated air is not allowed in Floor, Mix or Defrost
modes. If the Recirculation button is depressed while
in any of these modes, the LED indicator will flash
several times then go out. Recirculation will be dis-
abled automatically is these modes are selected.
•The A/C can be deselected manually without disturb-
ing the mode control selection.
•When the ignition switch is turned to the LOCK
position, the recirculation feature will be cancelled.4
UNDERSTANDING YOUR INSTRUMENT PANEL 221
Page 222 of 436
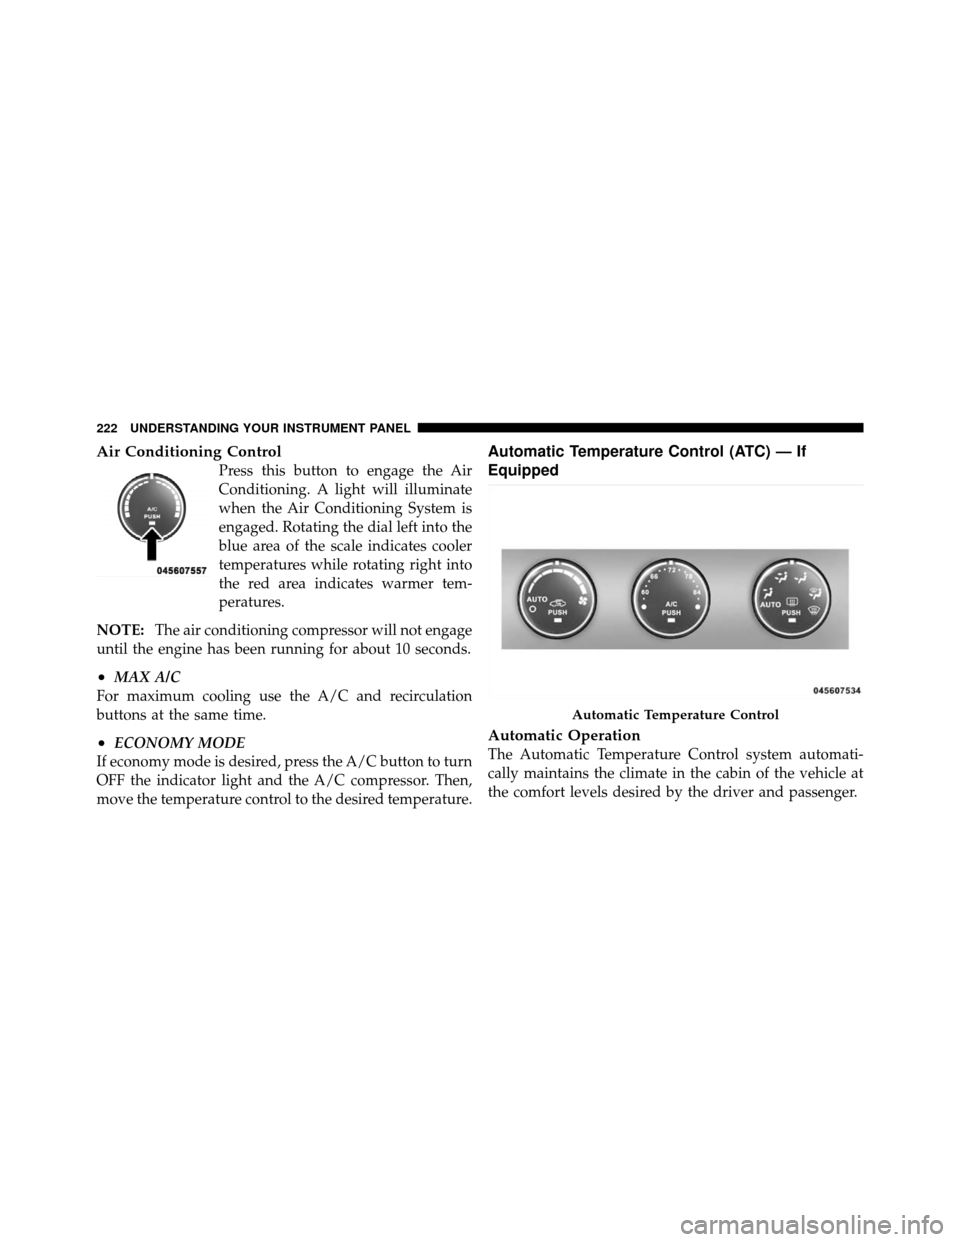
Air Conditioning Control
Press this button to engage the Air
Conditioning. A light will illuminate
when the Air Conditioning System is
engaged. Rotating the dial left into the
blue area of the scale indicates cooler
temperatures while rotating right into
the red area indicates warmer tem-
peratures.
NOTE: The air conditioning compressor will not engage
until the engine has been running for about 10 seconds.
•MAX A/C
For maximum cooling use the A/C and recirculation
buttons at the same time.
•ECONOMY MODE
If economy mode is desired, press the A/C button to turn
OFF the indicator light and the A/C compressor. Then,
move the temperature control to the desired temperature.
Automatic Temperature Control (ATC) — If
Equipped
Automatic Operation
The Automatic Temperature Control system automati-
cally maintains the climate in the cabin of the vehicle at
the comfort levels desired by the driver and passenger.
Automatic Temperature Control
222 UNDERSTANDING YOUR INSTRUMENT PANEL
Page 223 of 436

Operation of the system is quite simple.
1. Turn the Mode Control knob (on the right) and the
Blower Control knob (on the left) to AUTO.
NOTE:The AUTO position performs best for front seat
occupants only.
2. Dial in the temperature you would
like the system to maintain by rotating
the Temperature Control knob. Once
the comfort level is selected, the sys-
tem will maintain that level automati-
cally using the heating system. Should
the desired comfort level require air
conditioning, the system will automatically make the
adjustment. You will experience the greatest efficiency by simply
allowing the system to function automatically. Selecting
the “O” (OFF) position on the blower control stops the
system completely and closes the outside air intake.
72°F (22°C) is the recommended setting for maximum
comfort for the average person; however, this may vary.
NOTE:
•The temperature setting can be adjusted at anytime
without affecting automatic operation.
•Pressing the Air Conditioning Control button while in
AUTO mode will cause the LED in the control button
to flash three times and then turn off. This indicates
that the system is in AUTO mode and requesting the
air conditioning is not necessary.
4
UNDERSTANDING YOUR INSTRUMENT PANEL 223
Page 227 of 436
•Air Conditioner ControlPress this button to turn on the air
conditioning during manual operation
only. When the air conditioning is
turned on, cool dehumidified air will
flow through the outlets selected with
the Mode control dial. Press this but-
ton a second time to turn OFF the air
conditioning. An LED in the button illuminates when
manual compressor operation is selected.
•Recirculation Control
The system will automatically control recircu-
lation. However, pressing the Recirculation
Control button will temporarily put the system
in recirculation mode (ten minutes). This can
be used when outside conditions such as smoke, odors,
dust, or high humidity are present. Activating recircula-
tion will cause the LED in the control button to illumi-
nate. After ten minutes, the system will return to normal
AUTO mode function and the LED will turn off. NOTE:
•When the ignition switch is turned to the LOCK
position, the recirculation feature will be cancelled.
•In cold weather, use of the Recirculation mode may lead
to excessive window fogging. The Recirculation mode is
not allowed in the floor, defrost, or Mix mode in order to
improve window clearing. Recirculation will be dis-
abled automatically if these modes are selected.
•Extended use of recirculation may cause the windows
to fog. If the interior of the windows begins to fog,
press the Recirculation button to return to outside air.
Some temp/humidity conditions will cause captured
interior air to condense on windows and hamper
visibility. For this reason, the system will not allow
Recirculation to be selected while in floor, defrost, or
Mix mode. Attempting to use the recirculation while in
these modes will cause the LED in the control button
to blink and then turn off.
4
UNDERSTANDING YOUR INSTRUMENT PANEL 227
Page 228 of 436

•Most of the time, when in Automatic Operation, you can
temporarily put the system into Recirculation Mode by
pressing the Recirculation button. However, under cer-
tain conditions, while in Automatic Mode, the system is
blowing air out the defrost vents. When these conditions
are present, and the Recirculation button is pressed, the
indicator will flash and then turn off. This tells you that
you are unable to go into Recirculation Mode at this
time. If you would like the system to go into Recircula-
tion Mode, you must first move the Mode knob to Panel,
Mix and then press the Recirculation button. This fea-
ture reduces the possibility of window fogging.
Operating Tips
NOTE:Refer to the chart at the end of this section for
suggested control settings for various weather conditions.
Summer Operation
The engine cooling system in air-conditioned vehicles
must be protected with a high-quality antifreeze coolant to provide proper corrosion protection and to protect
against engine overheating. A solution of 50% ethylene
glycol antifreeze coolant and 50% water is recommended.
Refer to “Maintenance Procedures” in Section 7 of this
manual for proper coolant selection.
Winter Operation
Use of the air Recirculation Mode during winter months
is not recommended because it may cause window
fogging.
Vacation Storage
Anytime you store your vehicle, or keep it out of service
(i.e., vacation) for two weeks or more, run the air
conditioning system at idle for about five minutes in the
fresh air and high blower settings. This will ensure
adequate system lubrication to minimize the possibility
of compressor damage when the system is started again.
228 UNDERSTANDING YOUR INSTRUMENT PANEL