Page 37 of 444

Window Lockout Switch
The window lockout switch on the driver’s door allows
you to disable the window control on the other doors. To
disable the window controls on the other doors, press the
window LOCK button. To enable the window controls,
press the window control button again.
Wind Buffeting
Wind buffeting can be described as the perception of
pressure on the ears or a helicopter-type sound in the
ears. Your vehicle may exhibit wind buffeting with the
windows down, or the sunroof (if equipped) in certain
open or partially open positions. This is a normal occur-
rence and can be minimized. If the buffeting occurs with
the rear windows open, then open the front and rear
windows together to minimize the buffeting. If the
buffeting occurs with the sunroof open, then adjust the
sunroof opening to minimize the buffeting.
TRUNK LOCK AND RELEASE
Use the Remote Keyless Entry (RKE)
transmitter to open the trunk from
outside the vehicle. From inside the
vehicle the trunk lid can be released by
pressing the TRUNK RELEASE button
located on the instrument panel to the
left of the steering wheel.
Window Lockout Switch
36 THINGS TO KNOW BEFORE STARTING YOUR VEHICLE
Page 38 of 444

NOTE:The shift lever must be in PARK for this button
to operate.
To unlatch the trunk lid from outside the vehicle, press
and release the TRUNK button on the RKE transmitter
two times.
With the ignition ON, the word “deck” will display in
place of the odometer display indicating that the trunk is
open. The odometer display will reappear once the trunk
is closed or if the trip button is depressed.
With the ignition switch in the LOCK position or with the
key out, the word “deck” will display until the trunk is
closed.
On EVIC-equipped vehicles, the words “Trunk Ajar” will
display.TRUNK SAFETY WARNING
WARNING!
Do not allow children to have access to the trunk,
either by climbing into the trunk from outside, or
through the inside of the vehicle. Always close the
trunk lid when your vehicle is unattended. Once in
the trunk, young children may not be able to escape,
even if they entered through the rear seat. If trapped
in the trunk, children can die from suffocation or
heat stroke.2
THINGS TO KNOW BEFORE STARTING YOUR VEHICLE 37
Page 39 of 444
Trunk Internal Emergency Release
As a security measure, a Trunk Internal Emergency
Release lever is built into the trunk latching mechanism.
In the event of an individual being locked inside the
trunk, the trunk can be simply opened by pulling on the
glow-in-the-dark handle attached to the trunk latching
mechanism.
OCCUPANT RESTRAINTS
Some of the most important safety features in your
vehicle are the restraint systems. The following safety
features are standard on all vehicles:
•Three-point lap and shoulder belts for all seating
positions
•Advanced Front Airbags for driver and front passen-
ger
•Supplemental Active Head Restraints (AHR) located
on top of the front seats (integrated into the head
restraint)
•Supplemental Side Airbag Inflatable Curtains (SABIC)
for the driver and passengers seated next to a window
— if equipped
•Supplemental Seat-Mounted Side Airbags (SAB) — if
equipped
Trunk Internal Emergency Release
38 THINGS TO KNOW BEFORE STARTING YOUR VEHICLE
Page 40 of 444

•An energy-absorbing steering column and steering
wheel
•Knee bolsters/blockers for front seat occupants
•Front seat belts incorporate pretensioners to enhance
occupant protection by managing occupant energy
during an impact event — if equipped
•All seat belt systems (except the driver’s) include
Automatic Locking Retractors (ALRs), which lock the
seat belt webbing into position by extending the belt
all the way out and then adjusting the belt to the
desired length to restrain a child seat or secure a large
item in a seat — if equipped
If you will be carrying children too small for adult-sized
seat belts, the seat belts or the Lower Anchors and Tether
for CHildren (LATCH) feature also can be used to hold
infant and child restraint systems. For more information
on LATCH, see Lower Anchors and Tether for CHildren
(LATCH). NOTE:
The Advanced Front Airbags have a multistage
inflator design. This allows the airbag to have different
rates of inflation based on the severity and type of
collision.
Please pay close attention to the information in this
section. It tells you how to use your restraint system
properly, to keep you and your passengers as safe as
possible.
WARNING!
In a collision, you and your passengers can suffer
much greater injuries if you are not properly buckled
up. You can strike the interior of your vehicle or other
passengers, or you can be thrown out of the vehicle.
Always be sure you and others in your vehicle are
buckled up properly.
2
THINGS TO KNOW BEFORE STARTING YOUR VEHICLE 39
Page 41 of 444

Buckle up even though you are an excellent driver, even
on short trips. Someone on the road may be a poor driver
and cause a collision that includes you. This can happen
far away from home or on your own street.
Research has shown that seat belts save lives, and they
can reduce the seriousness of injuries in a collision. Some
of the worst injuries happen when people are thrown
from the vehicle. Seat belts reduce the possibility of
ejection and the risk of injury caused by striking the
inside of the vehicle.Everyone in a motor vehicle should
be belted at all times.
Lap/Shoulder Belts
All seating positions in your vehicle are equipped with
lap/shoulder belts.
The belt webbing retractor will lock only during very
sudden stops or collisions. This feature allows the shoul-
der part of the belt to move freely with you under normal conditions. However, in a collision the belt will lock and
reduce your risk of striking the inside of the vehicle or
being thrown out.
WARNING!
•Be sure everyone in your vehicle is in a seat and
using a seat belt properly.
•It is dangerous to ride in a cargo area, inside or
outside of a vehicle. In a collision, people riding in
these areas are more likely to be seriously injured
or killed.
•Wearing a seat belt incorrectly is dangerous. Seat
belts are designed to go around the large bones of
your body. These are the strongest parts of your
body and can take the forces of a collision the best.
(Continued)
40 THINGS TO KNOW BEFORE STARTING YOUR VEHICLE
Page 46 of 444

1. Position the latch plate as close as possible to the
anchor point.
2. At about 6 to 12 in (15 to 30 cm) above the latch plate,
grasp and twist the belt webbing 180 degrees to create a
fold that begins immediately above the latch plate.
3. Slide the latch plate upward over the folded webbing.
The folded webbing must enter the slot at the top of the
latch plate.
4. Continue to slide the latch plate up until it clears the
folded webbing.
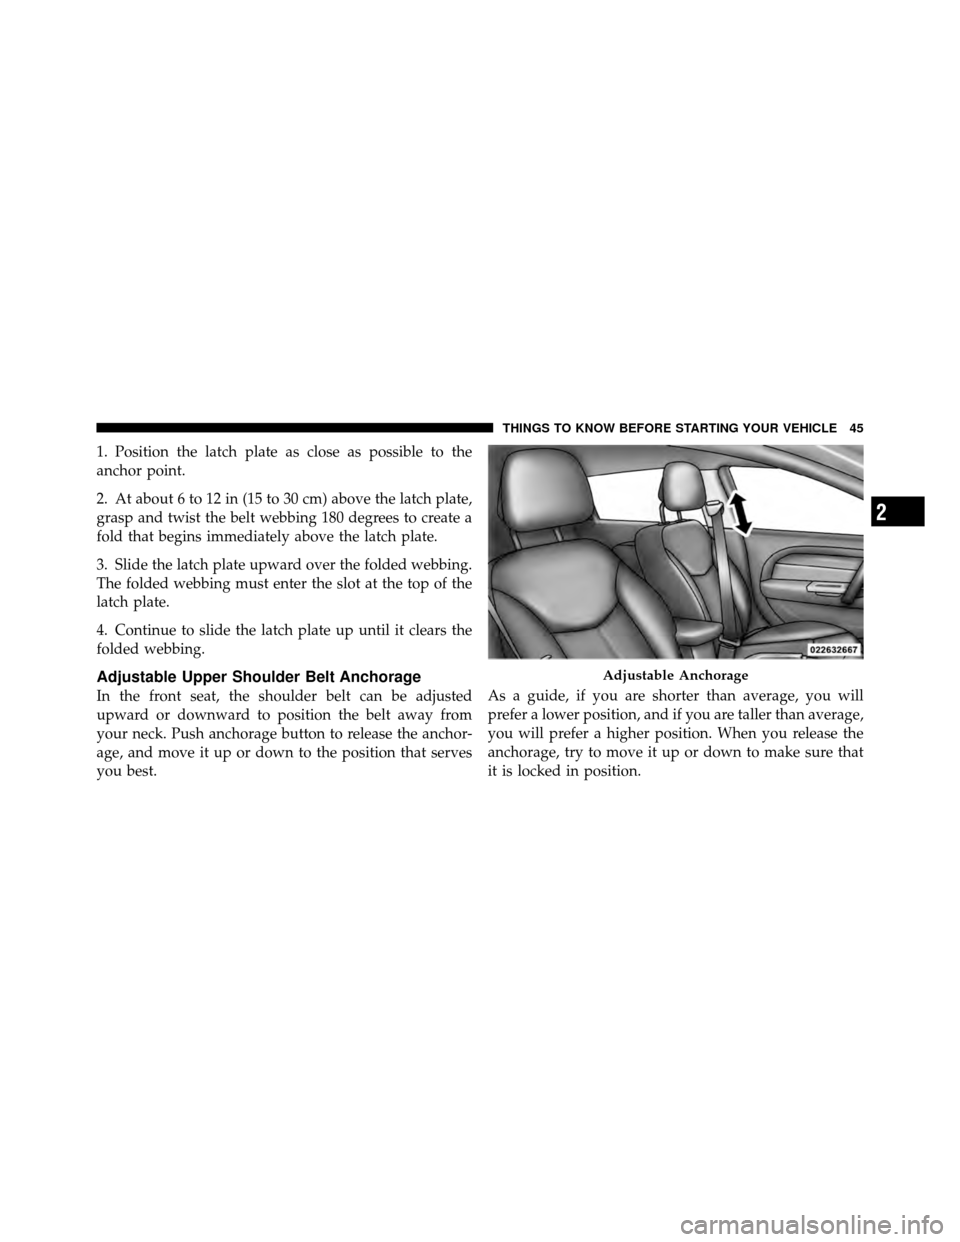
Adjustable Upper Shoulder Belt Anchorage
In the front seat, the shoulder belt can be adjusted
upward or downward to position the belt away from
your neck. Push anchorage button to release the anchor-
age, and move it up or down to the position that serves
you best.As a guide, if you are shorter than average, you will
prefer a lower position, and if you are taller than average,
you will prefer a higher position. When you release the
anchorage, try to move it up or down to make sure that
it is locked in position.
Adjustable Anchorage
2
THINGS TO KNOW BEFORE STARTING YOUR VEHICLE 45
Page 47 of 444

Rear Seat Belts
The shoulder belt anchorages of the rear three-point belts
are nonadjustable for outboard and center rear passen-
gers on sedans. The center belt is mounted to the rear
shelf panel and exits through a bezel in the panel.
Automatic Locking Retractors (ALR) Mode —
If Equipped
In this mode, the shoulder belt is automatically pre-
locked. The belt will still retract to remove any slack in
the shoulder belt. The Automatic Locking Mode is avail-
able on all passenger-seating positions with a combina-
tion lap/shoulder belt.
When To Use The Automatic Locking Mode
Use the Automatic Locking Mode anytime a child safety
seat is installed in a seating position that has a belt with
this feature. Children 12 years old and under should
always be properly restrained in the rear seat.
How To Engage The Automatic Locking Mode
1. Buckle the combination lap and shoulder belt.
2. Grasp the shoulder portion and pull downward until
the entire belt is extracted.
3. Allow the belt to retract. As the belt retracts, you will
hear a clicking sound. This indicates the safety belt is
now in the Automatic Locking Mode.
How To Disengage The Automatic Locking Mode
Unbuckle the combination lap/shoulder belt and allow it
to retract completely to disengage the Automatic Locking
Mode and activate the vehicle sensitive (emergency)
locking mode.
46 THINGS TO KNOW BEFORE STARTING YOUR VEHICLE
Page 50 of 444
1. Grasp the deployed AHR from the rear seat.
2. Position the hands on the top of the deployed AHR at
a comfortable position.3. Pull
downthenrearward towards the rear of the
vehicle then downto engage the locking mechanism.
Hand Positioning Points On AHR
1 — Downward Movement
2 — Rearward Movement
2
THINGS TO KNOW BEFORE STARTING YOUR VEHICLE 49