2010 CHRYSLER 300 steering wheel
[x] Cancel search: steering wheelPage 3 of 88

INTRODUCTION/WELCOME
WELCOME FROM CHRYSLER
GROUPLLC ................ 2
CONTROLS AT A GLANCE
DRIVER COCKPIT.............4
INSTRUMENT CLUSTER .........6
GETTING STARTED
KEYFOB ..................8
PASSIVEENTRY .............9
KEYLESSGO™ ..............11
THEFT ALARM..............12
SEATBELT ................12
CHILD RESTRAINTS ...........12
FRONTSEATS...............14
REARSEAT ................16
HEATEDSEATS..............17
ADJUSTABLE PEDALS ..........18
TILT / TELESCOPING STEERING
COLUMN ..................19
PROGRAMMABLE FEATURES ..... 20
OPERATING YOUR VEHICLE
TURN SIGNAL/WIPER/WASHER/HIGH
BEAMLEVER ...............22
HEADLIGHT SWITCH...........23
SPEED CONTROL LEVER ........24
MANUAL CLIMATE CONTROLS .....27
AUTOMATIC TEMPERATURE
CONTROLS(ATC)............ 28
POWERSUNROOF ........... 28
WIND BUFFETING ............ 29
ELECTRONICS
NON-TOUCH-SCREEN RADIOS .... 30
TOUCH-SCREEN RADIOS .........32
REMOTE AUDIO CONTROLS .......37
UNIVERSAL CONSUMER
INTERFACE ................37
ELECTRONIC VEHICLE INFORMATION
CENTER (EVIC) ............. 38
UNIVERSAL GARAGE DOOR
OPENER ................. 38
POWER OUTLET ............ 39
UCONNECT™ PHONE .......... 40 VOICE COMMAND
............ 42
UTILITY
TRAILER TOWING WEIGHTS (MAXIMUM
TRAILER WEIGHT RATINGS) ...... 43
RECREATIONAL TOWING (BEHIND
MOTORHOME, ETC.) .......... 44
BRAKE/TRANSMISSION INTERLOCK
MANUAL OVERRIDE .......... 44
WHAT TO DO IN EMERGENCIES
24 HOUR TOWING ASSISTANCE
- U.S. ONLY............... 46
INSTRUMENT CLUSTER WARNING
LIGHTS .................. 46
IF YOUR ENGINE OVERHEATS .... 49
JACKING, TIRE CHANGING AND
TIREFIT TIRE REPAIR ......... 50
JUMP-STARTING ............ 57
TOWING A DISABLED VEHICLE .... 60
FREEING A STUCK VEHICLE .......61
EVENT DATA RECORDER (EDR) . . . 62
MAINTAINING YOUR VEHICLE
OPENING THE HOOD .......... 64
ENGINE COMPARTMENT ....... 65
FLUIDS AND CAPACITIES ....... 69
MAINTENANCE CHART .........72
FUSES ...................74
TIREPRESSURES.............77
WHEEL AND WHEEL TRIM CARE ....78
EXTERIOR BULBS .............78
CONSUMER ASSISTANCE
CHRYSLER GROUP LLC CUSTOMER
CENTER ..................79
CHRYSLER CANADA INC. CUSTOMER
CENTER ..................79
ASSISTANCE FOR THE HEARING
IMPAIRED .................79
PUBLICATIONS ORDERING .......79
REPORTING SAFETY DEFECTS IN
THE 50 UNITED STATES AND
WASHINGTON, D.C. ........... 80
TIREWARRANTY ............ 80
MOPAR ACCESSORIES
MOPAR®ACCESSORIES ........ 83
TABLE OF CONTENTS
Page 21 of 88

TILT / TELESCOPING STEERING COLUMN
Manual - Tilt / Telescoping Steering Column
• The tilt/telescoping control handle islocated below the steering wheel at the
end of the steering column.
• Pull the handle rearward to unlock the steering column.
• To tilt the steering column, move the steering wheel upward or downward as
desired. To lengthen or shorten the
steering column, pull the steering wheel
outward or push it inward as desired.
• Push forward on the handle to lock the column firmly in place.
WARNING!
Do not adjust the steering wheel while driving. The tilt/telescoping adjustment
must be locked while driving. Adjusting the steering wheel while driving or driving
without the tilt/telescoping adjustment locked could cause the driver to lose
control of the vehicle. Failure to follow this warning may result in serious injury or
death.
Power - Tilt / Telescoping Steering Column
• The power tilt/telescoping steering lever is located below the turn signal/wiper/
washer/high beam lever on the steering
column.
• To tilt the steering column, move the power tilt/telescoping lever up or down as
desired. To lengthen or shorten the
steering column, pull the lever toward you
or push the lever away from you as
desired.
WARNING!
Moving the steering column while the vehicle is moving is dangerous. Without a
stable steering column, you could lose control of the vehicle and have an accident.
Adjust the column only while the vehicle is stopped.
19
GETTING STARTED
Page 39 of 88

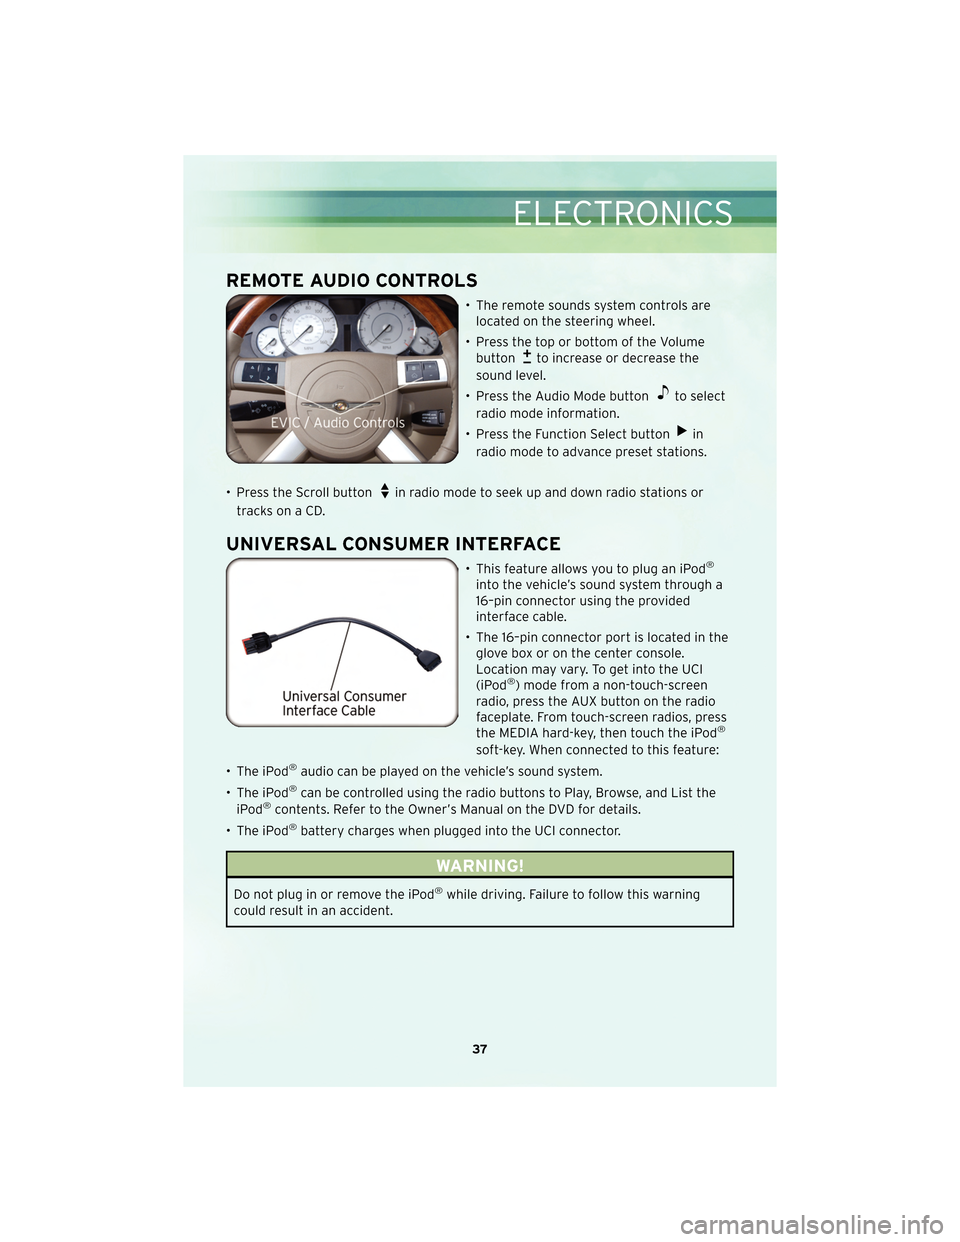
REMOTE AUDIO CONTROLS
• The remote sounds system controls arelocated on the steering wheel.
• Press the top or bottom of the Volume button
to increase or decrease the
sound level.
• Press the Audio Mode button
to select
radio mode information.
• Press the Function Select button
in
radio mode to advance preset stations.
• Press the Scroll button
in radio mode to seek up and down radio stations or
tracks on a CD.
UNIVERSAL CONSUMER INTERFACE
• This feature allows you to plug an iPod®
into the vehicle’s sound system through a
16–pin connector using the provided
interface cable.
• The 16–pin connector port is located in the glove box or on the center console.
Location may vary. To get into the UCI
(iPod
®) mode from a non-touch-screen
radio, press the AUX button on the radio
faceplate. From touch-screen radios, press
the MEDIA hard-key, then touch the iPod
®
soft-key. When connected to this feature:
• The iPod
®audio can be played on the vehicle’s sound system.
• The iPod
®can be controlled using the radio buttons to Play, Browse, and List the
iPod®contents. Refer to the Owner’s Manual on the DVD for details.
• The iPod
®battery charges when plugged into the UCI connector.
WARNING!
Do not plug in or remove the iPod®while driving. Failure to follow this warning
could result in an accident.
37
ELECTRONICS
Page 40 of 88

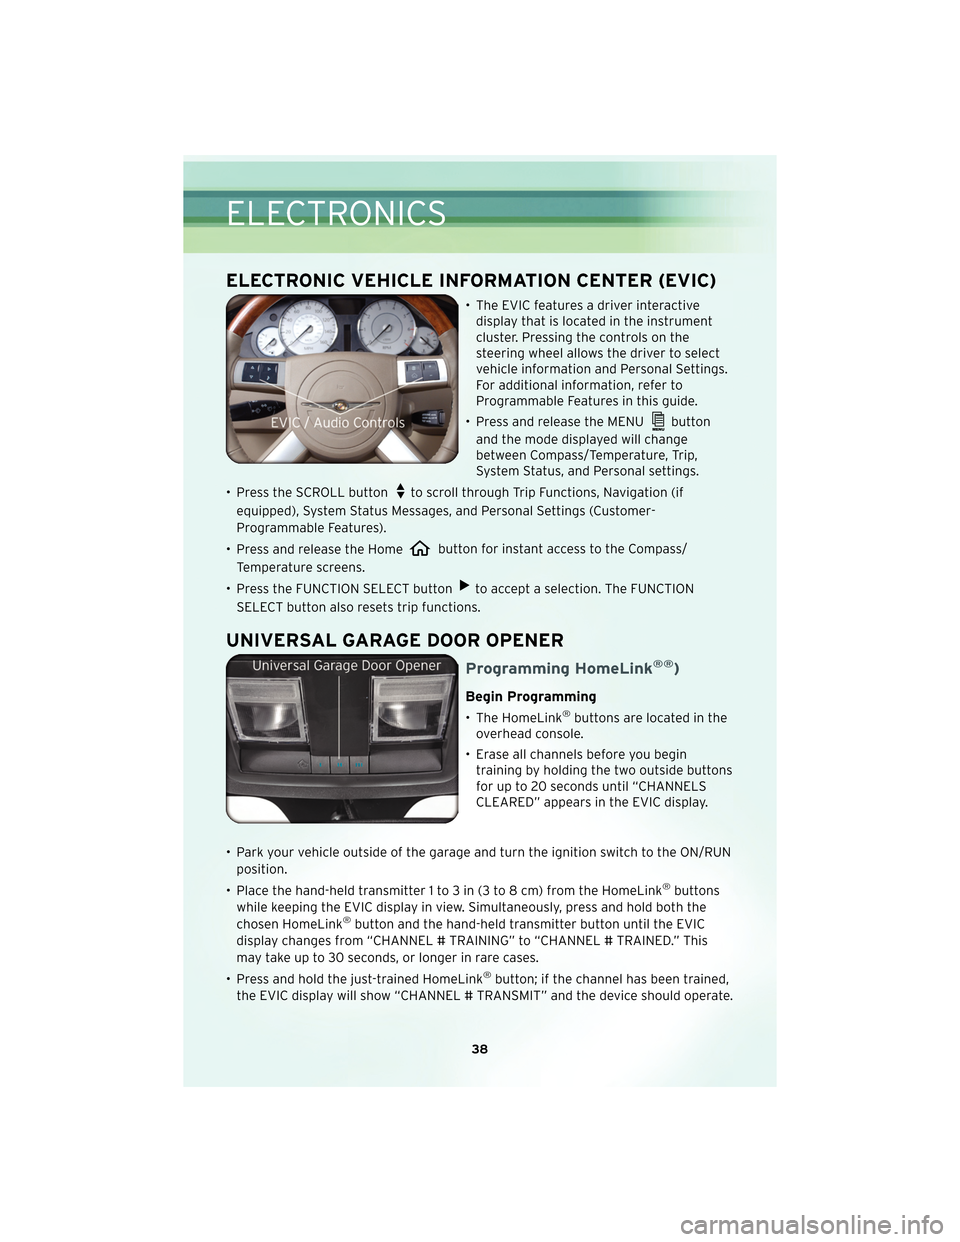
ELECTRONIC VEHICLE INFORMATION CENTER (EVIC)
• The EVIC features a driver interactivedisplay that is located in the instrument
cluster. Pressing the controls on the
steering wheel allows the driver to select
vehicle information and Personal Settings.
For additional information, refer to
Programmable Features in this guide.
• Press and release the MENU
button
and the mode displayed will change
between Compass/Temperature, Trip,
System Status, and Personal settings.
• Press the SCROLL button
to scroll through Trip Functions, Navigation (if
equipped), System Status Messages, and Personal Settings (Customer-
Programmable Features).
• Press and release the Home
button for instant access to the Compass/
Temperature screens.
• Press the FUNCTION SELECT button
to accept a selection. The FUNCTION
SELECT button also resets trip functions.
UNIVERSAL GARAGE DOOR OPENER
Programming HomeLink®®)
Begin Programming
• The HomeLink®buttons are located in the
overhead console.
• Erase all channels before you begin training by holding the two outside buttons
for up to 20 seconds until “CHANNELS
CLEARED” appears in the EVIC display.
• Park your vehicle outside of the garage and turn the ignition switch to the ON/RUN position.
• Place the hand-held transmitter 1 to 3 in (3 to 8 cm) from the HomeLink
®buttons
while keeping the EVIC display in view. Simultaneously, press and hold both the
chosen HomeLink
®button and the hand-held transmitter button until the EVIC
display changes from “CHANNEL # TRAINING” to “CHANNEL # TRAINED.” This
may take up to 30 seconds, or longer in rare cases.
• Press and hold the just-trained HomeLink
®button; if the channel has been trained,
the EVIC display will show “CHANNEL # TRANSMIT” and the device should operate.
ELECTRONICS
38
Page 57 of 88

• Continue to operate the pump until sealant is no longer flowing through the hose(typically takes 30 - 70 seconds). As the sealant flows through the Clear Sealant
Hose, the pressure gauge can read as high as 70 psi. The pressure gauge will
decrease quickly from approximately 70 psi to the actual tire pressure when the
sealant bottle is empty.
• The pump will start to inject air into the tire immediately after the sealant bottle is empty. Continue to operate the pump and inflate the tire to the pressure indicated
on the Tire and Loading Information label on the driver’s side door opening. Check
the tire pressure by looking at the pressure gauge.
NOTE: If the tire does not inflate to at least 26 psi pressure within 15 minutes, the
tire is too badly damaged. Do not attempt to drive the vehicle further. Call for
assistance.
• If the tire inflates to the recommended pressure or is at least 26 psi pressure within 15 minutes, press the Power button
to turn off the TIREFIT kit.
• Remove the Speed Limit sticker from the top of the Sealant Bottle and place the sticker on the steering wheel.
• Immediately disconnect the Clear Sealant Hose from the valve stem, reinstall the Yellow Cap on the fitting at the end of the hose, and place the TIREFIT kit in the
vehicle storage location. Quickly proceed to the next step.
CAUTION!
• The metal end fitting from the Power Plug and Cable may get hot after use andshould be handled carefully.
• Failure to reinstall the Yellow Cap on the fitting at the end of the Clear Sealant Hose can result in sealant contacting your skin, clothing, and the vehicle’s
interior. It can also result in sealan t contacting internal TIREFIT kit components
which may cause permanent damage to the kit.
• Immediately after injecting sealant and inflating the tire, drive the vehicle 5 mi (8 km) or 10 minutes to ensure distribution of the TIREFIT Sealant within the tire.
Do not exceed 55 mph (88 km/h).
• Pull over and repeat Preparations for Jacking or Tire Repair.
• Turn the Mode Select knob to the Air Mode position
.
• Connect the Black Air Pump Hose to the valve stem.
• Check the pressure in the tire by reading the Pressure Gauge.
NOTE: If tire pressure is less than 19 psi, the tire is too badly damaged. Do not
attempt to drive the vehicle further. Call for assistance.
• If the tire pressure is 19 psi or higher, press the Power button
and inflate the tire
to the pressure indicated on the Tire and Loading Information label on the driver’s
side door opening.
• Disconnect the TIREFIT kit from the valve stem and then reinstall the valve stem cap.
55
WHAT TO DO IN EMERGENCIES
Page 63 of 88

FREEING A STUCK VEHICLE
• If your vehicle becomes stuck in mud, sand or snow, it can often be moved by arocking motion. Turn your steering wheel right and left to clear the area around the
front wheels. Then, move the shift lever back and forth between REVERSE and 1st
gear. Using minimal accelerator pedal pressure to maintain the rocking motion,
without spinning the wheels, is most effective.
NOTE: If your vehicle is equipped with Electronic Stability Program (ESP) or
Traction Control
, turn the system off before attempting to “rock” the vehicle.
WARNING!
Fast spinning tires can be dangerous. Forces generated by excessive wheel speeds
may cause tire damage or failure. A tire could explode and injure someone. Do not
spin your vehicle’s wheels faster than 30 mph (48 km/h) when you are stuck. Do
not let anyone near a spinning wheel, no matter what the speed.
CAUTION!
• When “rocking” a stuck vehicle by moving between 1st and REVERSE, do not spin the wheels faster than 15 mph (24 km/h), or drivetrain damage may result.
• Revving the engine or spinning the wheels too fast may lead to transmission overheating and failure. It can also damage the tires. Do not spin the wheels
above 30 mph (48 km/h) while in gear (no transmission shifting occurring).
61
WHAT TO DO IN EMERGENCIES
Page 66 of 88

OPENING THE HOOD
• Pull the hood release lever located below the steering wheel at the base of theinstrument panel.
• Reach into the opening beneath the center of the hood and move the safety latch lever while lifting the hood at the same time.
WARNING!
Be sure the hood is fully latched before driving your vehicle. If the hood is not fully
latched, it could open when the vehicle is in motion and block your vision. Failure
to follow this warning could result in serious injury or death.
MAINTAINING YOUR VEHICLE
64