Page 158 of 465
 you can resume the
previous set speed. To do")
To Resume Speed
If you deactivated the Electronic Speed Control without
erasing the set speed from memory and your vehicle
speed is above 20 mph (32 km/h) you can resume the
previous set speed. To do so, push the lever upward to
RESUME ACCEL and release. Then remove your foot
from the accelerator pedal.
To Vary the Speed Setting
When the Electronic Speed Control is set, you can in-
crease speed by pushing up and holding the RESUME
ACCEL lever. If the lever is continually held in the
RESUME ACCEL position, the set speed will continue to
increase until the lever is released, then the new set speed
will be established.
Tapping the Electronic Speed Control lever to RESUME
ACCEL once will result in a 1 mph (1.6 km/h) speed
increase. Each time the lever is tapped speed increases, so
tapping the lever three times will increase speed by
3 mph (4.8 km/h), etc.To decrease speed while Electronic Speed Control is set,
push down and hold the lever in SET DECEL. If the lever
is continually held in the SET DECEL position, the set
speed will continue to until the lever is released. Release
the lever when the desired speed is reached, and a new
set speed will be established.
Tapping the Electronic Speed Control lever to SET DE-
CEL once will result in a 1 mph (1.6 km/h) speed
decrease. Each time the lever is tapped, speed decreases.
To Accelerate For Passing
Press the accelerator as you would normally. When the
pedal is released, the vehicle will return to the set speed.
Using Electronic Speed Control on Hills
NOTE:
The Electronic Speed Control system maintains
speed up and down hills. A slight speed change on
moderate hills is normal.
3
UNDERSTANDING THE FEATURES OF YOUR VEHICLE 157
Page 164 of 465
WARNING! (Continued)
•Before using the ParkSense�Rear Park Assist
system, it is strongly recommended that the ball
mount and hitch ball assembly is disconnected
from the vehicle when the vehicle is not used for
towing. Failure to do so can result in injury or
damage to vehicles or obstacles because the hitch
ball will be much closer to the obstacle than the
rear fascia when the warning display turns on the
single flashing arc and sounds the continuous
tone. Also, the ParkSense� sensors could detect
the ball mount and hitch ball assembly, depending
on its size and shape, giving a false indication that
an obstacle is behind the vehicle.
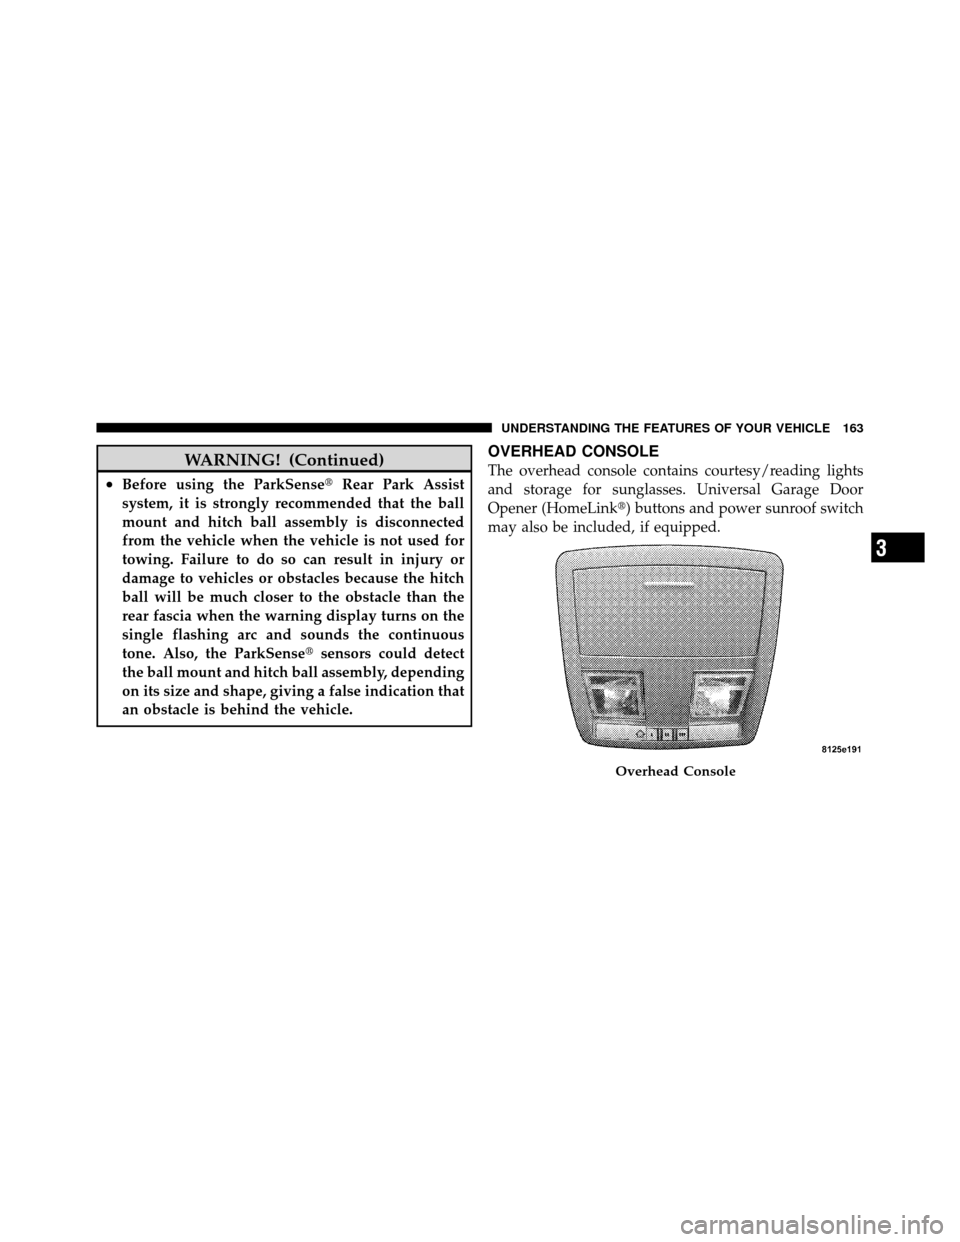
OVERHEAD CONSOLE
The overhead console contains courtesy/reading lights
and storage for sunglasses. Universal Garage Door
Opener (HomeLink�) buttons and power sunroof switch
may also be included, if equipped.
Overhead Console
3
UNDERSTANDING THE FEATURES OF YOUR VEHICLE 163
Page 165 of 465

Courtesy/Reading Lights
At the forward end of the console are two courtesy/
reading lights.
Press the lens to turn on the light. Press it a second time
to turn off the light.
These lights also turn on when a door is opened, when
the UNLOCK button on the Remote Keyless Entry (RKE)
transmitter is pressed, when the Passive Entry door
handle is used (refer to “Passive Entry” in “Things to
Know Before Starting Your Vehicle” for further informa-
tion) or when the dimmer control is turned fully upward,
past the second detent.
Sunglasses Storage
At the rear of the overhead console, a compartment is
provided for the storage of a pair of sunglasses.The storage compartment access is a
�push/push�design.
Push on the raised bar on the compartment door to open.
Push on the raised bar to close.
GARAGE DOOR OPENER — IF EQUIPPED
HomeLink� replaces up to three remote controls (hand-
held transmitters) that operate devices such as garage
door openers, motorized gates, lighting or home security
systems. The HomeLink� unit operates off your vehicle’s
battery.
The HomeLink� buttons are located in the overhead
console, and contain one, two or three dots/lines desig-
nating the different HomeLink� channels.
164 UNDERSTANDING THE FEATURES OF YOUR VEHICLE
Page 170 of 465

successfully accepted the frequency signal. The EVIC
display will change from “CHANNEL # TRAINING” to
“CHANNEL # TRAINED.”
If you unplugged the device for training, plug it back in
at this time.
Then proceed with Step 4 under “Programming
HomeLink�” earlier in this section.
Using HomeLink�
To operate, press and release the programmed
HomeLink�button. Activation will now occur for the
trained device (i.e., garage door opener, gate operator,
security system, entry door lock, home/office lighting,
etc.,). The handheld transmitter of the device may also be
used at any time.
Reprogramming A Single HomeLink� Button
To reprogram a channel that has been previously trained,
follow these steps: 1. Place the ignition in the RUN position.
2. Press and hold the desired HomeLink
�button for
20 seconds until the EVIC display states “CHANNEL #
TRAINING.” Do not release the button.
3. Without releasing the button, proceed with Program-
ming HomeLink� Step 2 and follow all remaining steps.
Security
It is advised to erase all channels before you sell or turn
in your vehicle.
To do this, press and hold the two outside buttons for
20 seconds until the EVIC message states “CHANNELS
CLEARED.” Note that all channels will be erased. Indi-
vidual channels cannot be erased.
The HomeLink�Universal Transceiver is disabled when
the Vehicle Security Alarm is active.
3
UNDERSTANDING THE FEATURES OF YOUR VEHICLE 169
Page 175 of 465
ELECTRICAL POWER OUTLETS
There are two 12 Volt (13 Amp) electrical power outlets
on this vehicle. Both of the power outlets are protected by
a fuse.
Insert cigar lighter or accessory plug into the power
outlets for use to ensure proper operation.
NOTE:
•To ensure proper operation a MOPAR�knob and
element must be used.
•Do not exceed the maximum power of 160 Watts (13
Amps) at 12 Volts. If the 160 Watt (13 Amp) power
rating is exceeded the fuse protecting the system will
need to be replaced. The 12 Volt power outlet next to the ash receiver tray has
power available only when the ignition is placed in the
ACC or RUN position.
Front Power Outlet
174 UNDERSTANDING THE FEATURES OF YOUR VEHICLE
Page 177 of 465

•Do not touch with wet hands.
•Close the lid when not in use and while driving
the vehicle.
•If this outlet is mishandled, it may cause an
electric shock and failure.
CAUTIO")
WARNING! (Continued)
•Do not touch with wet hands.
•Close the lid when not in use and while driving
the vehicle.
•If this outlet is mishandled, it may cause an
electric shock and failure.
CAUTION!
•Many accessories that can be plugged in draw
power from the vehicle’s battery even when not in
use (i.e., cellular phones, etc.). Eventually, if
plugged in long enough, the vehicle’s battery will
discharge sufficiently to degrade battery life
and/or prevent the engine from starting.(Continued)
CAUTION! (Continued)
•Accessories that draw higher power (i.e., coolers,
vacuum cleaners, lights, etc.) will degrade the
battery even more quickly. Only use these inter-
mittently and with greater caution.
•After the use of high power draw accessories or
long periods of the vehicle not being started (with
accessories still plugged in), the vehicle must be
driven a sufficient length of time to allow the
alternator to recharge the vehicle’s battery.
•Power outlets are designed for accessory plugs
only. Do not hang any type of accessory or acces-
sory bracket from the plug. Improper use of the
power outlet can cause damage.
176 UNDERSTANDING THE FEATURES OF YOUR VEHICLE
Page 188 of 465
INSTRUMENT PANEL FEATURES
1 — Air Outlet7 — Radio13 — Ignition Switch
2 — Instrument Cluster 8 — Climate Control14 — Hood Release
3 — Hazard Switch 9 — Heated Seat Switch*15 — Trunk Release Button
4 — Analog Clock 10 — Power Outlet16 — Headlight Switch
5 — Electronic Stability Program Off Button* 11 — Ash Tray* * If Equipped
6 — Glove Compartment 12 — Storage Compartment*
4
UNDERSTANDING YOUR INSTRUMENT PANEL 187
Page 190 of 465
 Indicator Light — If EquippedThis light will turn on when the electronic
speed control or Adaptive Cruise")
INSTRUMENT CLUSTER DESCRIPTIONS
1. Electronic Speed Control / Adaptive Cruise Control
(ACC) Indicator Light — If EquippedThis light will turn on when the electronic
speed control or Adaptive Cruise Control
(ACC) is ON.
2. Low Fuel Indicator Light This light will turn on and a single chime will
sound when the fuel level drops to approximately
1/8 tank.
3. Front Fog Light Indicator This indicator will illuminate when the front fog
lights are on.
4. Turn Signal Indicators The arrow will flash with the exterior turn signal
when the turn signal lever is operated. NOTE:•A continuous chime will sound if the vehicle is driven
more than 1 mile (1.6 km) with either turn signal on.
•Check for an inoperative outside light bulb if either
indicator flashes at a rapid rate.
5. Speedometer
Indicates vehicle speed.
6. Electronic Vehicle Information Center (EVIC)
Display / Odometer
The odometer shows the total distance the vehicle has
been driven. U.S. Federal regulations require that upon
transfer of vehicle ownership, the seller certify to the
purchaser the correct mileage that the vehicle has been
driven. If your odometer needs to be repaired or serviced,
the repair technician should leave the odometer reading
the same as it was before the repair or service. If s/he
cannot do so, then the odometer must be set at zero, and
a sticker must be placed in the door jamb stating what the
4
UNDERSTANDING YOUR INSTRUMENT PANEL 189
 electrical power outlets
on this vehicle. Both of the power outlets are protected by
a fuse.
Insert cigar lighter or accessory plug into the pow")
