Page 219 of 465
Each memory profile contains desired position settings
for the driver seat, side mirror, adjustable pedals (if
equipped), and power tilt and telescopic steering column
(if equipped), and a set of desired radio station presets.
When OFF is selected, only the memory switch on the
driver’s door panel will recall memory profiles. To make
your selection, press and release the FUNCTION SE-
LECT button until “ON” or “OFF” appears. Refer to
“Driver Memory Seat” in “Understanding The Features
Of Your Vehicle”.
“Sound Horn with Remote Key Lock”
When ON is selected, a short horn sound will occur when
the RKE transmitter LOCK button is pressed. This feature
may be selected with or without the flash lights on
lock/unlock feature. To make your selection, press and
release the FUNCTION SELECT button until “ON” or
“OFF” appears.
“Rain Sensing Intermittent Wipers”
When ON is selected, the system will automatically
activate the windshield wipers if it senses moisture on
the windshield. To make your selection, press and release
the FUNCTION SELECT button until “ON” or “OFF”
appears. When OFF is selected, the system reverts to the
standard intermittent wiper operation.
“Automatically Move Seat Back on Exit” — If
Equipped
This feature provides automatic driver seat positioning to
enhance driver mobility when entering and exiting the
vehicle. To make your selection, press and release the
FUNCTION SELECT button until “ON” or “OFF” ap-
pears.
NOTE:The seat will return to the memorized seat
location (if Recall Memory with Remote Key Unlock is set
to ON) when the RKE transmitter is used to unlock the
218 UNDERSTANDING YOUR INSTRUMENT PANEL
Page 261 of 465
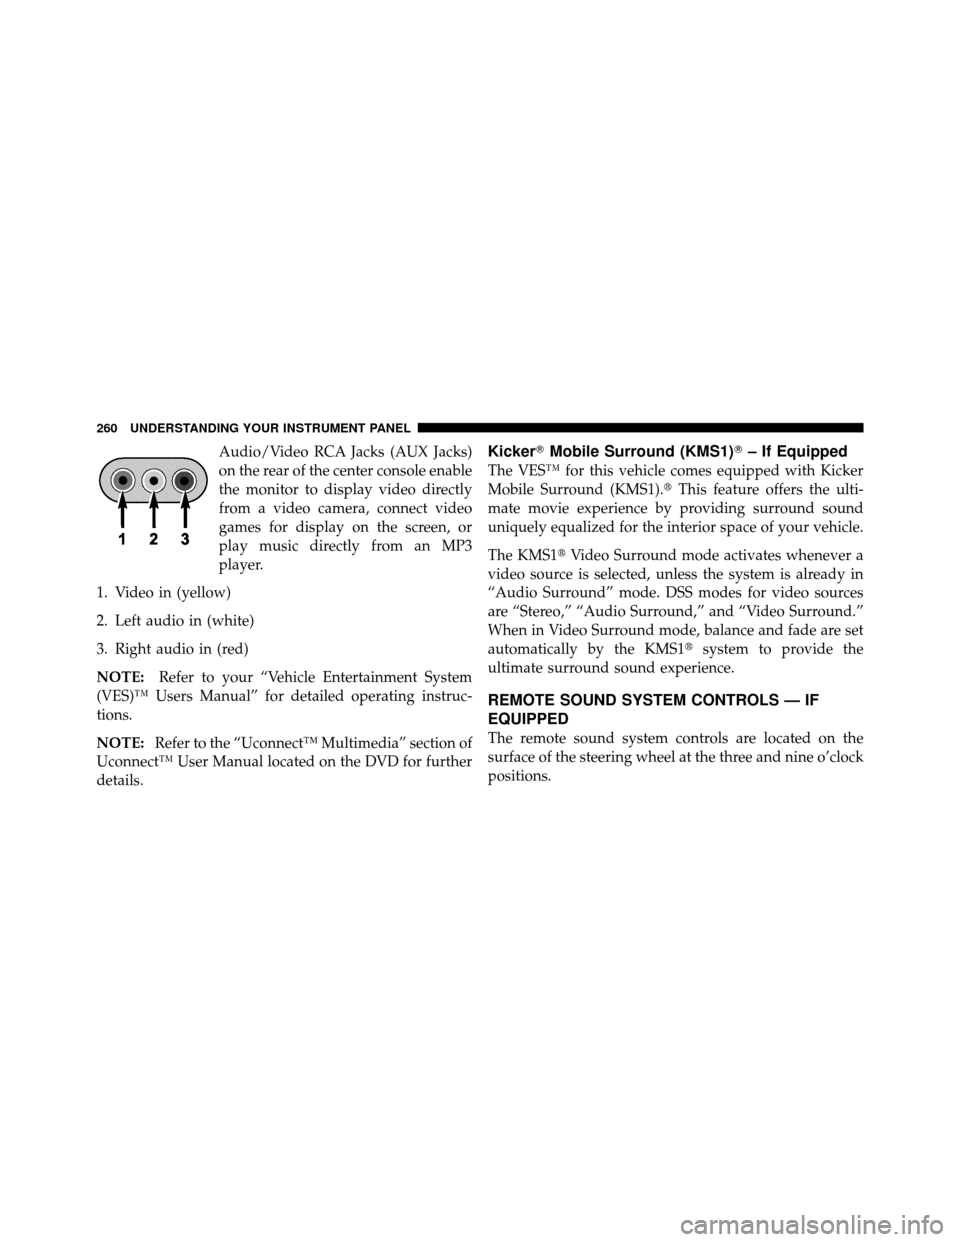
Audio/Video RCA Jacks (AUX Jacks)
on the rear of the center console enable
the monitor to display video directly
from a video camera, connect video
games for display on the screen, or
play music directly from an MP3
player.
1. Video in (yellow)
2. Left audio in (white)
3. Right audio in (red)
NOTE: Refer to your “Vehicle Entertainment System
(VES)™ Users Manual” for detailed operating instruc-
tions.
NOTE: Refer to the “Uconnect™ Multimedia” section of
Uconnect™ User Manual located on the DVD for further
details.Kicker� Mobile Surround (KMS1)� – If Equipped
The VES™ for this vehicle comes equipped with Kicker
Mobile Surround (KMS1).� This feature offers the ulti-
mate movie experience by providing surround sound
uniquely equalized for the interior space of your vehicle.
The KMS1� Video Surround mode activates whenever a
video source is selected, unless the system is already in
“Audio Surround” mode. DSS modes for video sources
are “Stereo,” “Audio Surround,” and “Video Surround.”
When in Video Surround mode, balance and fade are set
automatically by the KMS1� system to provide the
ultimate surround sound experience.
REMOTE SOUND SYSTEM CONTROLS — IF
EQUIPPED
The remote sound system controls are located on the
surface of the steering wheel at the three and nine o’clock
positions.
260 UNDERSTANDING YOUR INSTRUMENT PANEL
Page 262 of 465
Vehicles equipped with steering wheel-mounted buttons
are also equipped with the Electronic Vehicle Information
Center (EVIC). The EVIC features a driver-interactive
display which is located in the instrument cluster.The VOLUME button controls the sound level
of the sound system. Press the top of the
VOLUME button to increase the sound level.
Press the bottom of the VOLUME button to
decrease the sound level.
Press the AUDIO MODE button to select the
Compass/Temp/Audio screen. This screen
displays radio and media mode information
depending on which radio is in the vehicle.
If the Compass/Temp/Audio screen is already displayed
when the AUDIO MODE button is pressed, then the
mode will change (i.e. from AM to FM, to Media mode,
etc., depending on which radio is in the vehicle).
Remote Sound System Controls
VOLUME Button
AUDIOMODEButton
4
UNDERSTANDING YOUR INSTRUMENT PANEL 261
Page 273 of 465
▫Operation ......................... 289
▫ General Information .................. 290
� Driving On Slippery Surfaces ............. 290
▫ Acceleration ........................ 290
▫ Traction ........................... 291
� Driving Through Water ................. 291
▫ Flowing/Rising Water ................. 291
▫ Shallow Standing Water ............... 292
� Power Steering ....................... 293
▫ Power Steering Fluid Check ............. 294
� Parking Brake ........................ 295
� Brake System ........................ 297
▫ Anti-Lock Brake System ............... 298 �
Electronic Brake Control System ........... 300
▫ Anti-Lock Brake System (ABS) ........... 301
▫ Traction Control System (TCS) ........... 301
▫ Brake Assist System (BAS) .............. 302
▫ Electronic Stability Program (ESP) ........ 302
▫ Synchronizing ESP ................... 306
▫ ESP/BAS Malfunction Indicator Light And
ESP/TCS Indicator Light ............... 306
� Tire Safety Information ................. 307
▫ Tire Markings ....................... 307
▫ Tire Identification Number (TIN) ......... 311
▫ Tire Terminology And Definitions ......... 312
▫ Tire Loading And Tire Pressure .......... 313
272 STARTING AND OPERATING
Page 294 of 465
WARNING!
•Driving through standing water limits your vehi-
cle’s traction capabilities. Do not exceed 5 mph
(8 km/h) when driving through standing water.
•Driving through standing water limits your vehi-
cle’s braking capabilities, which increases stop-
ping distances. Therefore, after driving through
standing water, drive slowly and lightly press on
the brake pedal several times to dry the brakes.
•Getting water inside your vehicle’s engine can
cause it to lock up and stall out, and leave you
stranded.
•Failure to follow these warnings may result in
injuries that are serious or fatal to you, your
passengers, and others around you.
POWER STEERING
The standard power steering system will give you good
vehicle response and increased ease of maneuverability
in tight spaces. The system will provide mechanical
steering capability if power assist is lost.
If for some reason the power assist is interrupted, it will
still be possible to steer your vehicle. Under these condi-
tions, you will observe a substantial increase in steering
effort, especially at very low vehicle speeds and during
parking maneuvers.
NOTE:
•Increased noise levels at the end of the steering wheel
travel are considered normal and do not indicate that
there is a problem with the power steering system.
5
STARTING AND OPERATING 293
Page 295 of 465
•Upon initial start-up in cold weather, the power steer-
ing pump may make noise for a short amount of time.
This is due to the cold, thick fluid in the steering
system. This noise should be considered normal, and it
does not in any way damage the steering system.
WARNING!
Continued operation with reduced power steering
assist could pose a safety risk to yourself and others.
Service should be obtained as soon as possible.
CAUTION!
Prolonged operation of the steering system at the end
of the steering wheel travel will increase the steering
fluid temperature and it should be avoided when
possible. Damage to the power steering pump may
occur.
Power Steering Fluid Check
Checking the power steering fluid level at a defined
service interval is not required. The fluid should only be
checked if a leak is suspected, abnormal noises are
apparent, and/or the system is not functioning as antici-
pated. Coordinate inspection efforts through an autho-
rized dealer.
CAUTION!
Do not use chemical flushes in your power steering
system as the chemicals can damage your power
steering components. Such damage is not covered by
the New Vehicle Limited Warranty.
294 STARTING AND OPERATING
Page 296 of 465
WARNING!
Fluid level should be checked on a level surface and
with the engine off to prevent injury from moving
parts and to ensure accurate fluid level reading. Do
not overfill. Use only manufacturer’s recommended
power steering fluid.
If necessary, add fluid to restore to the proper indicated
level. With a clean cloth, wipe any spilled fluid from all
surfaces. Refer to “Fluids, Lubricants, and Genuine
Parts” in “Maintaining Your Vehicle” for further
information.
PARKING BRAKE
Before leaving the vehicle, make sure that the parking
brake is fully applied and place the shift lever in the
PARK position. The foot operated parking brake is located below the
lower left corner of the instrument panel. To apply the
park brake, firmly push the park brake pedal fully. To
release the parking brake, press the park brake pedal a
second time and let your foot up as you feel the brake
disengage.
Parking Brake
5
STARTING AND OPERATING 295
Page 300 of 465
WARNING!
•The Anti-Lock Brake System contains sophisti-
cated electronic equipment that may be suscep-
tible to interference caused by improperly in-
stalled or high output radio transmitting
equipment. This interference can cause possible
loss of anti-lock braking capability. Installation of
such equipment should be performed by qualified
professionals.
•Pumping of the anti-lock brakes will diminish
their effectiveness and may lead to an accident.
Pumping makes the stopping distance longer. Just
press firmly on your brake pedal when you need
to slow down or stop.(Continued)
WARNING! (Continued)
•The Anti-Lock Brake System (ABS) cannot prevent
the natural laws of physics from acting on the
vehicle, nor can it increase braking or steering
efficiency beyond that afforded by the condition
of the vehicle brakes and tires or the traction
afforded.
•The ABS cannot prevent accidents, including
those resulting from excessive speed in turns,
following another vehicle too closely, or hydro-
planing. Only a safe, attentive, and skillful driver
can prevent accidents.
•The capabilities of an ABS equipped vehicle must
never be exploited in a reckless or dangerous
manner, which could jeopardize the user’s safety
or the safety of others.
5
STARTING AND OPERATING 299