Page 64 of 465
covers the window. The airbag inflates in about 30 ms
(about one-quarter of the time that it takes to blink your
eyes) with enough force to injure you if you are not belted
and seated properly, or if items are positioned in the area
where the side curtain airbag inflates. This especially
applies to children. The side curtain airbag is only about
3-1/2 in (9 cm) thick when it is inflated.
Because airbag sensors estimate deceleration over time,
vehicle speed and damage are not good indicators of
whether or not an airbag should have deployed.
NOTE:In a rollover the pretensioners and/or SABIC
airbags may deploy on both sides of the vehicle.
Front and Side Impact Sensors
In front and side impacts, impact sensors can aid the
ORC in determining appropriate response to impact
events. Additional sensors in the ORC determine the
level of airbag deployment and provide verification.
Enhanced Accident Response System
In the event of an impact causing airbag deployment, if
the communication network remains intact, and the
power remains intact, depending on the nature of the
event the ORC will determine whether to have the
Enhanced Accident Response System perform the follow-
ing functions:
•Cut off fuel to the engine.
•Flash hazard lights as long as the battery has power or
until the ignition key is turned off.
•Turn on the interior lights, which remain on as long as
the battery has power, until the ignition key is re-
moved or the ignition switch is changed to OFF using
the Keyless Go Start/Stop button.
•Unlock the doors automatically.
2
THINGS TO KNOW BEFORE STARTING YOUR VEHICLE 63
Page 84 of 465
Periodic Safety Checks You Should Make Outside
the Vehicle
Tires
Examine tires for excessive tread wear and uneven wear
patterns. Check for stones, nails, glass, or other objects
lodged in the tread. Inspect the tread and sidewall for
cuts and cracks. Check the wheel nuts for tightness.
Check the tires (including spare) for proper pressure.
Lights
Have someone observe the operation of exterior lights
while you work the controls. Check turn signal and high
beam indicator lights on the instrument panel.
Door Latches
Check for positive closing, latching, and locking.
Fluid Leaks
Check area under vehicle after overnight parking for fuel,
engine coolant, oil, or other fluid leaks. Also, if gasoline
fumes are detected or if fuel, power steering fluid, or
brake fluid leaks are suspected, the cause should be
located and corrected immediately.2
THINGS TO KNOW BEFORE STARTING YOUR VEHICLE 83
Page 93 of 465
Tilt Mirror in Reverse
The Tilt Mirror in Reverse feature tilts the outside rear-
view mirrors downward when the ignition is placed in
the RUN position and the transmission is in REVERSE.
This feature provides the driver with a better view of the
ground and vehicle in the area of the rear tires when
backing up. The mirrors will move back to their previous
position when the transmission is shifted out of RE-
VERSE.
The Tilt Mirror in Reverse feature can be enabled or
disabled. Refer to “Electronic Vehicle Information Center
(EVIC)/Personal Settings (Customer-Programmable Fea-
tures)” in “Understanding Your Instrument Panel” for
further information.
Power Mirrors
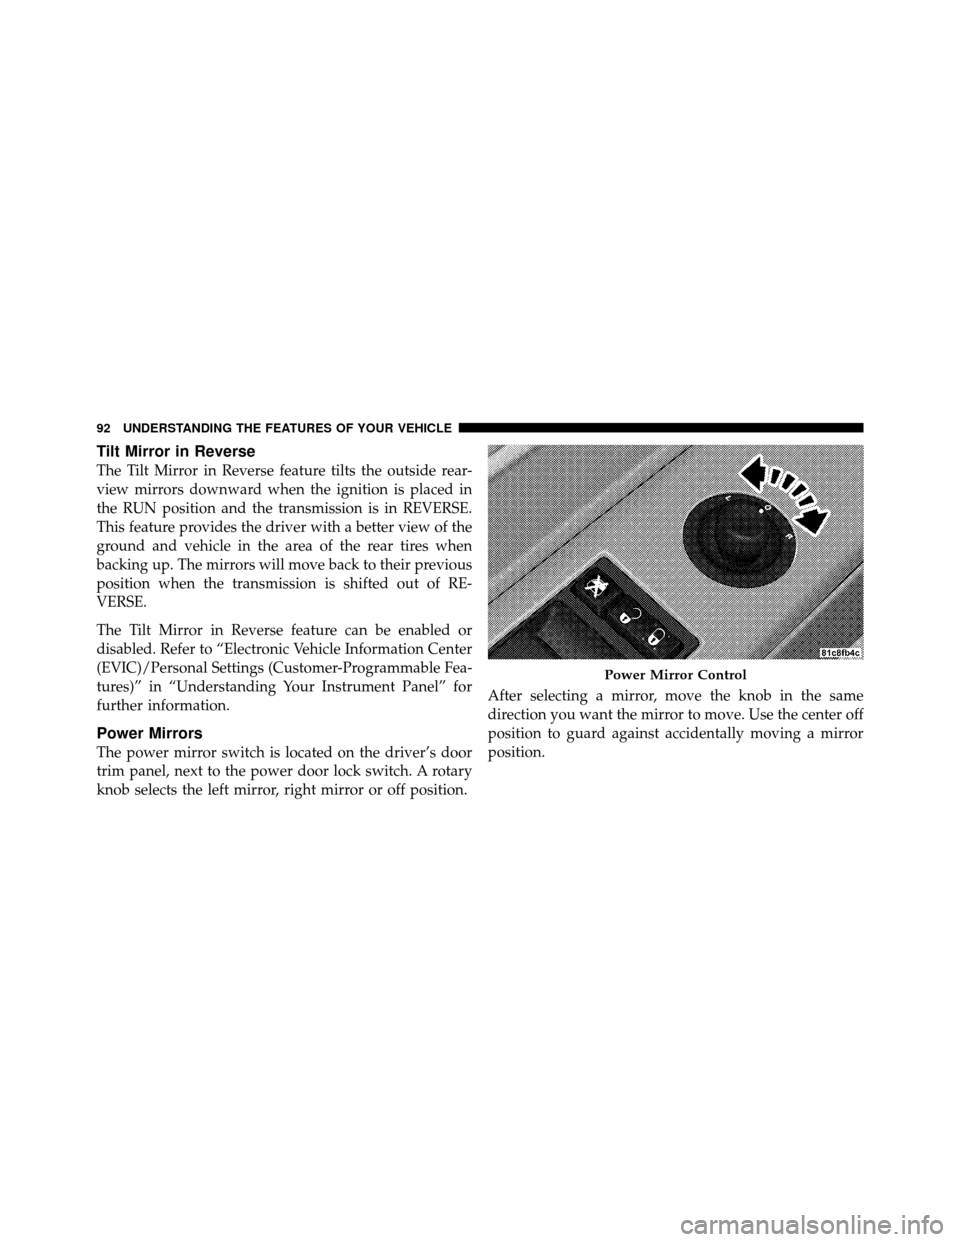
The power mirror switch is located on the driver’s door
trim panel, next to the power door lock switch. A rotary
knob selects the left mirror, right mirror or off position.After selecting a mirror, move the knob in the same
direction you want the mirror to move. Use the center off
position to guard against accidentally moving a mirror
position.
Power Mirror Control
92 UNDERSTANDING THE FEATURES OF YOUR VEHICLE
Page 139 of 465
NOTE:Your RKE transmitters can be unlinked to your
memory settings by pressing the SET (S) button followed
by the UNLOCK button on the RKE transmitter in Step 4
above.
Memory Position Recall
NOTE: The vehicle must be in PARK to recall memory
positions. If a recall is attempted when the vehicle is not
in PARK, a message will display in the EVIC.
To recall the memory settings for driver one, press
MEMORY button number 1 on the driver’s door or the
UNLOCK button on the RKE transmitter linked to
memory position 1.
To recall the memory setting for driver two, press
MEMORY button number 2 on the driver’s door or the
UNLOCK button on the RKE transmitter linked to
memory position 2. A recall can be cancelled by pressing any of the
MEMORY buttons (S, 1, or 2) on the driver’s door during
a recall. When a recall is cancelled, the driver seat, side
mirror, adjustable pedals, power tilt and telescopic steer-
ing column stop moving. A delay of one second will
occur before another recall can be selected.Easy Entry/Exit Seat (Available with Memory Seat
Only)
This feature provides automatic driver seat positioning to
enhance driver mobility when entering and exiting the
vehicle.
The distance the driver seat moves depends on where
you have the driver seat positioned when you remove the
Key Fob from the ignition (or change the ignition to OFF,
for vehicles equipped with Keyless Go™).
138 UNDERSTANDING THE FEATURES OF YOUR VEHICLE
Page 147 of 465
If either light remains on and does not flash, or there is a
very fast flash rate, check for a defective outside light
bulb. If an indicator fails to light when the lever is
moved, it would suggest that the indicator bulb is
defective.
NOTE:A “Turn Signal On” message will appear in the
EVIC and a continuous chime will sound if the vehicle is
driven more than 1 mile (1.6 km) with either turn signal
on.
Lane Change Assist
Tap the lever up or down once, without moving beyond
the detent, and the turn signal (right or left) will flash
three times then automatically turn off.
High/Low Beam Switch
Push the multifunction lever away from you to switch
the headlights to high beam. Pull the multifunction lever
toward you to switch the headlights back to low beam.
Flash-To-Pass
You can signal another vehicle with your headlights by
lightly pulling the multifunction lever toward you. This
will cause the headlights to turn on at high beam and
remain on until the multifunction lever is released.
Overhead Console Map/Reading Lights
These lights are mounted between the sun visors on the
overhead console. Each light is turned on by pressing the
lens. Press the lens a second time to turn off the light.
These lights also turn on when a door is opened, or when
the UNLOCK button on the Remote Keyless Entry (RKE)
transmitter is pressed, or when the dimmer control is
turned fully upward, past the second detent.
146 UNDERSTANDING THE FEATURES OF YOUR VEHICLE
Page 155 of 465
•The pedals can be adjusted while driving.
•The pedalscannotbe adjusted when the vehicle is in
REVERSE or when the Electronic Speed Control is on.
One of the following messages will display in the
Electronic Vehicle Information Center (EVIC) if a pedal
adjustment is attempted when the system is locked
out: “Adjustable Pedal Disabled — Cruise Control
Engaged” or “Adjustable Pedal Disabled — Vehicle In
Reverse.”
NOTE: For vehicles equipped with Driver Memory
Seat, you can use your Remote Keyless Entry (RKE)
transmitter or the memory switch on the driver’s door
trim panel to return the adjustable pedals to pre-
programmed positions. Refer to “Driver Memory Seat”
in “Understanding the Features of Your Vehicle” for
further information.
WARNING!
Do not adjust the pedals while the vehicle is moving.
You could lose control and have an accident. Always
adjust the pedals while the vehicle is parked.
CAUTION!
Do not place any article under the adjustable pedals
or impede its ability to move as it may cause damage
to the pedal controls. Pedal travel may become lim-
ited if movement is stopped by an obstruction in the
adjustable pedal’s path.
154 UNDERSTANDING THE FEATURES OF YOUR VEHICLE
Page 165 of 465
Courtesy/Reading Lights
At the forward end of the console are two courtesy/
reading lights.
Press the lens to turn on the light. Press it a second time
to turn off the light.
These lights also turn on when a door is opened, when
the UNLOCK button on the Remote Keyless Entry (RKE)
transmitter is pressed, when the Passive Entry door
handle is used (refer to “Passive Entry” in “Things to
Know Before Starting Your Vehicle” for further informa-
tion) or when the dimmer control is turned fully upward,
past the second detent.
Sunglasses Storage
At the rear of the overhead console, a compartment is
provided for the storage of a pair of sunglasses.The storage compartment access is a
�push/push�design.
Push on the raised bar on the compartment door to open.
Push on the raised bar to close.
GARAGE DOOR OPENER — IF EQUIPPED
HomeLink� replaces up to three remote controls (hand-
held transmitters) that operate devices such as garage
door openers, motorized gates, lighting or home security
systems. The HomeLink� unit operates off your vehicle’s
battery.
The HomeLink� buttons are located in the overhead
console, and contain one, two or three dots/lines desig-
nating the different HomeLink� channels.
164 UNDERSTANDING THE FEATURES OF YOUR VEHICLE
Page 170 of 465
successfully accepted the frequency signal. The EVIC
display will change from “CHANNEL # TRAINING” to
“CHANNEL # TRAINED.”
If you unplugged the device for training, plug it back in
at this time.
Then proceed with Step 4 under “Programming
HomeLink�” earlier in this section.
Using HomeLink�
To operate, press and release the programmed
HomeLink�button. Activation will now occur for the
trained device (i.e., garage door opener, gate operator,
security system, entry door lock, home/office lighting,
etc.,). The handheld transmitter of the device may also be
used at any time.
Reprogramming A Single HomeLink� Button
To reprogram a channel that has been previously trained,
follow these steps: 1. Place the ignition in the RUN position.
2. Press and hold the desired HomeLink
�button for
20 seconds until the EVIC display states “CHANNEL #
TRAINING.” Do not release the button.
3. Without releasing the button, proceed with Program-
ming HomeLink� Step 2 and follow all remaining steps.
Security
It is advised to erase all channels before you sell or turn
in your vehicle.
To do this, press and hold the two outside buttons for
20 seconds until the EVIC message states “CHANNELS
CLEARED.” Note that all channels will be erased. Indi-
vidual channels cannot be erased.
The HomeLink�Universal Transceiver is disabled when
the Vehicle Security Alarm is active.
3
UNDERSTANDING THE FEATURES OF YOUR VEHICLE 169
