Page 145 of 465

Also, dirt, film, and other obstructions on the windshield
or camera lens will cause the system to function
improperly.
Headlight Time Delay
This feature provides the safety of headlight illumination
for up to 90 seconds (programmable) when leaving your
vehicle in an unlit area.
To activate the delay feature, place the ignition in the OFF
position while the headlights are still on. Then, turn off
the headlights within 45 seconds. The delay interval
begins when the headlight switch is turned off.
If you turn on the headlights or parking lights, or place
the ignition to ON again, the system will cancel the delay.
If you turn the headlights off before the ignition, they will
turn off in the normal manner.NOTE:
The lights must be turned off within 45 seconds
of placing the ignition in OFF position to activate this
feature.
The Headlight delay time is programmable. Refer to
“Electronic Vehicle Information Center (EVIC)/
Customer-Programmable Features” in “Understanding
Your Instrument Panel” for further information.
Daytime Running Lights — If Equipped
The high beam headlights will come on as Daytime
Running Lights whenever the ignition is placed in the
ON position, the headlights are off, and the parking
brake is released. The headlight switch must be used for
normal nighttime driving.
Lights-On Reminder
If the headlights or parking lights are on after the ignition
is placed in the OFF position, a chime will sound to alert
the driver when the driver’s door is opened.
144 UNDERSTANDING THE FEATURES OF YOUR VEHICLE
Page 146 of 465

Fog Lights
The front fog light switch is built into the head-
light switch. To activate the front fog lights, turn
on the parking lights or the low beam headlights
and press the headlight switch. To turn off the front fog
lights, either press headlight switch again or turn off the
headlight switch.
An indicator light in the instrument cluster illuminates
when the fog lights are turned on.
NOTE: The fog lights will operate with the low beam
headlights or parking lights on. However, selecting the
high beam headlights will turn off the fog lights.
Multifunction Lever
The multifunction lever controls the operation of the turn
signals, headlight beam selection, and passing lights. The
lever is located on the left side of the steering column.
Turn Signals
Move the multifunction lever up or down and the arrows
on each side of the instrument cluster flash to show
proper operation of the front and rear turn signal lights.
Multifunction Lever
3
UNDERSTANDING THE FEATURES OF YOUR VEHICLE 145
Page 147 of 465

If either light remains on and does not flash, or there is a
very fast flash rate, check for a defective outside light
bulb. If an indicator fails to light when the lever is
moved, it would suggest that the indicator bulb is
defective.
NOTE:A “Turn Signal On” message will appear in the
EVIC and a continuous chime will sound if the vehicle is
driven more than 1 mile (1.6 km) with either turn signal
on.
Lane Change Assist
Tap the lever up or down once, without moving beyond
the detent, and the turn signal (right or left) will flash
three times then automatically turn off.
High/Low Beam Switch
Push the multifunction lever away from you to switch
the headlights to high beam. Pull the multifunction lever
toward you to switch the headlights back to low beam.
Flash-To-Pass
You can signal another vehicle with your headlights by
lightly pulling the multifunction lever toward you. This
will cause the headlights to turn on at high beam and
remain on until the multifunction lever is released.
Overhead Console Map/Reading Lights
These lights are mounted between the sun visors on the
overhead console. Each light is turned on by pressing the
lens. Press the lens a second time to turn off the light.
These lights also turn on when a door is opened, or when
the UNLOCK button on the Remote Keyless Entry (RKE)
transmitter is pressed, or when the dimmer control is
turned fully upward, past the second detent.
146 UNDERSTANDING THE FEATURES OF YOUR VEHICLE
Page 148 of 465

Interior Lights
The interior lights come on when a door is opened.
To protect the battery, the interior lights will turn off
automatically 10 minutes after the ignition is placed in
the OFF position. This will occur if the interior lights
were switched on manually or are on because a door isopen. This includes the glove box light, but not the trunk
light. To restore interior light operation, either place the
ignition in the ON position or cycle the light switch.
Dimmer Control
The dimmer control is part of the
headlight switch and is located on the
left side of the instrument panel. With
the parking lights or headlights on,
rotating the dimmer control upward
will increase the brightness of the in-
strument panel lights and, if so
equipped, the lighting in the door map pockets and
cupholders.
Dome Light Position
Rotate the dimmer control completely upward to the
second detent to turn on the interior lights. The interior
lights will remain on when the dimmer control is in this
position.
Overhead Console
3
UNDERSTANDING THE FEATURES OF YOUR VEHICLE 147
Page 149 of 465
Interior Light Defeat (OFF)
Rotate the dimmer control to the extreme bottom off
position. The interior lights will remain off when the
doors are open.
Parade Mode (Daytime Brightness Feature)
Rotate the dimmer control upward to the first detent.
This feature brightens all text displays such as the
odometer, EVIC, and radio when the parking lights or
headlights are on.
WINDSHIELD WIPERS AND WASHERS
The multifunction lever operates the windshield
wipers and washer when the ignition is placed in
the RUN position. The multifunction lever is
located on the left side of the steering column. Rotate the end of the multifunction lever to the first
detent past the intermittent settings for low-speed wiper
operation, or to the second detent past the intermittent
settings for high-speed wiper operation.Windshield Wiper/Washer Control
148 UNDERSTANDING THE FEATURES OF YOUR VEHICLE
Page 151 of 465
 to the first detent to activate a single wipe cycle
to clear off road mist or spray from a passing vehicle. The
wipers wil")
Mist Feature
Push the multifunction lever inward (toward the steering
column) to the first detent to activate a single wipe cycle
to clear off road mist or spray from a passing vehicle. The
wipers will continue to operate until you release the
multifunction lever.
Headlights On with Wipers
When this feature is active, the headlights will turn on
approximately 10 seconds after the wipers are turned on
if the headlight switch is placed in the AUTO position. In
addition, the headlights will turn off when the wipers are
turned off if they were turned on by this feature.
The Headlights On with Wipers feature can be enabled or
disabled. Refer to “Electronic Vehicle Information Center
(EVIC)/Personal Settings (Customer-Programmable Fea-
tures)” in “Understanding Your Instrument Panel” for
further information.
Rain Sensing Wipers
This feature senses moisture on the windshield and
automatically activates the wipers for the driver. This
feature is especially useful for road splash or over spray
from the windshield washers of the vehicle ahead. Rotate
the end of the multifunction lever to one of the six
intermittent wiper settings to activate this feature.
The sensitivity of the system is adjustable from the
multifunction lever. Wiper delay position 1 is the least
sensitive and wiper delay position 6 is the most sensitive.
Choose setting 3 or 4 for normal rain conditions. Choose
setting 2 or 1 if you desire less wiper sensitivity. Choose
setting 5 or 6 if you desire more sensitivity. The rain sense
wipers will automatically change between an intermit-
tent wipe, slow wipe and a fast wipe depending on the
amount of moisture that is sensed on the windshield.
Place the multifunction lever in the off position when not
using the system.
150 UNDERSTANDING THE FEATURES OF YOUR VEHICLE
Page 164 of 465
WARNING! (Continued)
•Before using the ParkSense�Rear Park Assist
system, it is strongly recommended that the ball
mount and hitch ball assembly is disconnected
from the vehicle when the vehicle is not used for
towing. Failure to do so can result in injury or
damage to vehicles or obstacles because the hitch
ball will be much closer to the obstacle than the
rear fascia when the warning display turns on the
single flashing arc and sounds the continuous
tone. Also, the ParkSense� sensors could detect
the ball mount and hitch ball assembly, depending
on its size and shape, giving a false indication that
an obstacle is behind the vehicle.
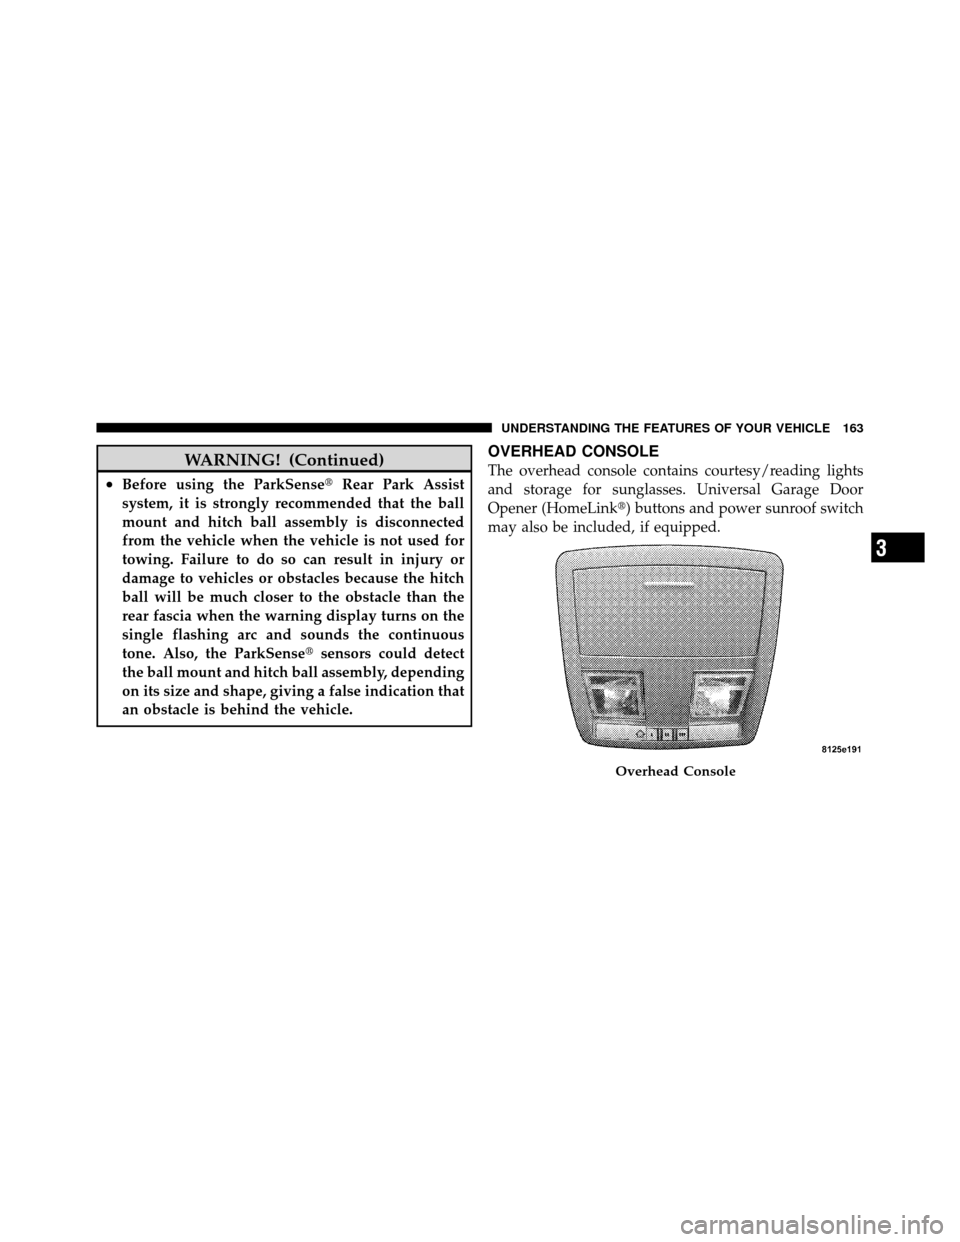
OVERHEAD CONSOLE
The overhead console contains courtesy/reading lights
and storage for sunglasses. Universal Garage Door
Opener (HomeLink�) buttons and power sunroof switch
may also be included, if equipped.
Overhead Console
3
UNDERSTANDING THE FEATURES OF YOUR VEHICLE 163
Page 165 of 465

Courtesy/Reading Lights
At the forward end of the console are two courtesy/
reading lights.
Press the lens to turn on the light. Press it a second time
to turn off the light.
These lights also turn on when a door is opened, when
the UNLOCK button on the Remote Keyless Entry (RKE)
transmitter is pressed, when the Passive Entry door
handle is used (refer to “Passive Entry” in “Things to
Know Before Starting Your Vehicle” for further informa-
tion) or when the dimmer control is turned fully upward,
past the second detent.
Sunglasses Storage
At the rear of the overhead console, a compartment is
provided for the storage of a pair of sunglasses.The storage compartment access is a
�push/push�design.
Push on the raised bar on the compartment door to open.
Push on the raised bar to close.
GARAGE DOOR OPENER — IF EQUIPPED
HomeLink� replaces up to three remote controls (hand-
held transmitters) that operate devices such as garage
door openers, motorized gates, lighting or home security
systems. The HomeLink� unit operates off your vehicle’s
battery.
The HomeLink� buttons are located in the overhead
console, and contain one, two or three dots/lines desig-
nating the different HomeLink� channels.
164 UNDERSTANDING THE FEATURES OF YOUR VEHICLE

Rotate the dimmer control to the extreme bottom off
position. The interior lights will remain off when the
doors are open.
Parade Mode (Daytime Brightness Feature)
Rotate t")