2010 CHRYSLER 300 SRT check engine
[x] Cancel search: check enginePage 194 of 465

Vehicles equipped with the Anti-Lock Brake System
(ABS), are also equipped with Electronic Brake Force
Distribution (EBD). In the event of an EBD failure, the
Brake Warning Light will turn on along with the ABS
Light. Immediate repair to the ABS system is required.
Operation of the Brake Warning Light can be checked by
turning the ignition switch from the OFF position to the
RUN position. The light should illuminate for approxi-
mately two seconds. The light should then turn off unless
the parking brake is applied or a brake fault is detected.
If the light does not illuminate, have the light inspected
by an authorized dealer.
The light also will turn on when the parking brake is
applied with the ignition switch in the RUN position.
NOTE:This light shows only that the parking brake is
applied. It does not show the degree of brake application. 13. Electronic Stability Program (ESP) / Traction
Control System (TCS) Indicator Light
If this indicator light flashes during accelera-
tion, ease up on the accelerator and apply as
little throttle as possible. Adapt your speed and
driving to the prevailing road conditions, and
do not switch off the Electronic Stability Program (ESP).
14. Temperature Gauge
The temperature gauge shows engine coolant tempera-
ture. Any reading within the normal range indicates that
the engine cooling system is operating satisfactorily.
The gauge pointer will likely indicate a higher tempera-
ture when driving in hot weather, up mountain grades,
or when towing a trailer. It should not be allowed to
exceed the upper limits of the normal operating range.
4
UNDERSTANDING YOUR INSTRUMENT PANEL 193
Page 196 of 465

16. High Beam LightThis light will turn on when the high beam
headlights are ON. Push the multifunction lever
away from the steering wheel to switch the headlights to
high beam.
17. Shift Lever Indicator
The Shift Lever Indicator is self-contained within the
instrument cluster. It displays the gear position of the
automatic transmission.
18. Seat Belt Reminder Light This light will turn on for five to eight seconds as
a bulb check when the ignition switch is first
placed in the RUN position. A chime will sound if
the driver’s seat belt is unbuckled during the bulb check.
The Seat Belt Warning Light will flash, or remain on
continuously, if the driver’s seat belt remains unbuckled
after the bulb check or when driving. Refer to “Occupant
Restraints” in “Things To Know Before Starting Your
Vehicle” for further information. 19. Vehicle Security Light — If Equipped
This light will flash at a fast rate for approxi-
mately 15 seconds, when the vehicle security
alarm is arming, and then will flash slowly
until the vehicle is disarmed.
20. Fuel Gauge
The pointer shows the level of fuel in the fuel tank when
the ignition switch is placed in the RUN position.
21. Electronic Throttle Control (ETC) Light This light will turn on briefly as a bulb check
when the ignition switch is placed in the RUN
position. This light will also turn on while the
engine is running if there is a problem with the
Electronic Throttle Control (ETC) system.
If the light comes on while the engine is running, safely
bring the vehicle to a complete stop as soon as possible,
place the shift lever in PARK, and cycle the ignition
through the ACC and RUN positions. The light should
4
UNDERSTANDING YOUR INSTRUMENT PANEL 195
Page 197 of 465

turn off. If the light remains lit with the engine running,
your vehicle will usually be drivable. However, see an
authorized dealer for service as soon as possible.
If the light is flashing when the engine is running,
immediate service is required. In this case, you may
experience reduced performance, an elevated/rough idle
or engine stall, and your vehicle may require towing.
Also, have the system checked by an authorized dealer if
the light does not come on during starting.
22. Tire Pressure Monitoring Telltale LightEach tire, including the spare (if provided),
should be checked monthly, when cold and
inflated to the inflation pressure recommended
by the vehicle manufacturer on the vehicle
placard or tire inflation pressure label. (If your vehicle
has tires of a different size than the size indicated on the
vehicle placard or tire inflation pressure label, you should
determine the proper tire inflation pressure for those
tires.) As an added safety feature, your vehicle has been
equipped with a Tire Pressure Monitoring System
(TPMS) that illuminates a low tire pressure telltale when
one or more of your tires is significantly under-inflated.
Accordingly, when the low tire pressure telltale illumi-
nates, you should stop and check your tires as soon as
possible, and inflate them to the proper pressure. Driving
on a significantly under-inflated tire causes the tire to
overheat and can lead to tire failure. Under-inflation also
reduces fuel efficiency and tire tread life, and may affect
the vehicle’s handling and stopping ability.
Please note that the TPMS is not a substitute for proper
tire maintenance, and it is the driver ’s responsibility to
maintain correct tire pressure, even if under-inflation has
not reached the level to trigger illumination of the TPMS
low tire pressure telltale.
196 UNDERSTANDING YOUR INSTRUMENT PANEL
Page 199 of 465

non-essential electrical devices or increase engine speed
(if at idle). If the charging system light remains on, it
means that the vehicle is experiencing a problem with the
charging system. Obtain SERVICE IMMEDIATELY. See
an authorized dealer.
If jump starting is required, refer to “Jump Starting
Procedures” in “What To Do In Emergencies”.
24. Malfunction Indicator Light (MIL)The Malfunction Indicator Light (MIL) is part of
an onboard diagnostic system called OBD. The
OBD system monitors engine and automatic
transmission control systems. The MIL will turn on when
the ignition is in the RUN position before engine start. If
the MIL does not come on when turning the key from
OFF to RUN, have the condition checked promptly. Certain conditions such as a loose or missing gas cap,
poor fuel quality, etc., may illuminate the MIL after
engine start. The vehicle should be serviced if the MIL
stays on through several of your typical driving cycles. In
most situations, the vehicle will drive normally and will
not require towing.
CAUTION!
Prolonged driving with the MIL on could cause
damage to the engine control system. It also could
affect fuel economy and drivability. If the MIL is
flashing, severe catalytic converter damage and
power loss will soon occur. Immediate service is
required.
198 UNDERSTANDING YOUR INSTRUMENT PANEL
Page 200 of 465

WARNING!
A malfunctioning catalytic converter, as referenced
above, can reach higher temperatures than in normal
operating conditions. This can cause a fire if you
drive slowly or park over flammable substances such
as dry plants or wood or cardboard, etc. This could
result in death or serious injury to the driver, occu-
pants or others.
25. Oil Pressure Warning Light This light indicates low engine oil pressure. The
light should turn on momentarily when the engine
is started. If the light turns on while driving, stop the
vehicle, and shut OFF the engine as soon as possible. A
single chime will sound when this light turns on. Do not operate the vehicle until the cause is corrected.
This light does not indicate how much oil is in the engine.
The engine oil level must be checked using the procedure
shown in “Maintaining Your Vehicle”.
ELECTRONIC VEHICLE INFORMATION CENTER
(EVIC)
The Electronic Vehicle Information Center (EVIC) fea-
tures a driver-interactive display that is located in the
instrument cluster.4
UNDERSTANDING YOUR INSTRUMENT PANEL 199
Page 289 of 465

temperature as well as vehicle speed. This feature im-
proves warm up time of the engine and transmission to
achieve maximum efficiency.
Temporary Transmission Limp Home Mode
The transmission is monitored for abnormal conditions.
If a condition is detected that could result in transmission
damage, the transmission will engage Limp Home Mode.
If vehicle acceleration worsens, or the transmission no
longer shifts, the transmission is most likely operating in
the Limp Home Mode. In this mode, the transmission
will remain in the current gear until the vehicle is
brought to a stop. After the vehicle has stopped, PARK,
REVERSE, and NEUTRAL will continue to operate. Sec-
ond gear will operate in the DRIVE position. The “Mal-
function Indicator Light (MIL)” may be illuminated.
A reset feature is available to allow the vehicle to be
driven to an authorized dealer for service. To reset the
transmission, use the following procedure:1. Stop the vehicle.
2. Move the shift lever into the PARK position.
3. Turn the engine off.
4. Wait approximately 10 seconds.
5. Restart the engine.
6. Move the shift lever to the desired range. If the
problem is no longer detected, the transmission will
return to normal operation.
NOTE:
Even if the transmission can be reset, we recom-
mend that you visit your authorized dealer at your
earliest possible convenience. Your authorized dealer has
diagnostic equipment to determine if the problem could
recur.
Have the transmission checked at your authorized dealer
as soon as possible.
288 STARTING AND OPERATING
Page 293 of 465

Shallow Standing Water
Although your vehicle is capable of driving through
shallow standing water, consider the following Caution
and Warning before doing so.
CAUTION!
•Always check the depth of the standing water
before driving through it. Never drive through
standing water that is deeper than the bottom of
the tire rims mounted on the vehicle.
•Determine the condition of the road or the path
that is under water and if there are any obstacles in
the way before driving through the standing wa-
ter.
•Do not exceed 5 mph (8 km/h) when driving
through standing water. This will minimize wave
effects.(Continued)
CAUTION! (Continued)
•Driving through standing water may cause dam-
age to your vehicle’s drivetrain components. Al-
ways inspect your vehicle’s fluids (i.e., engine oil,
transmission, axle, etc.) for signs of contamination
(i.e., fluid that is milky or foamy in appearance)
after driving through standing water. Do not con-
tinue to operate the vehicle if any fluid appears
contaminated, as this may result in further dam-
age. Such damage is not covered by the New
Vehicle Limited Warranty.
•Getting water inside your vehicle’s engine can
cause it to lock up and stall out, and cause serious
internal damage to the engine. Such damage is not
covered by the New Vehicle Limited Warranty.
292 STARTING AND OPERATING
Page 296 of 465

WARNING!
Fluid level should be checked on a level surface and
with the engine off to prevent injury from moving
parts and to ensure accurate fluid level reading. Do
not overfill. Use only manufacturer’s recommended
power steering fluid.
If necessary, add fluid to restore to the proper indicated
level. With a clean cloth, wipe any spilled fluid from all
surfaces. Refer to “Fluids, Lubricants, and Genuine
Parts” in “Maintaining Your Vehicle” for further
information.
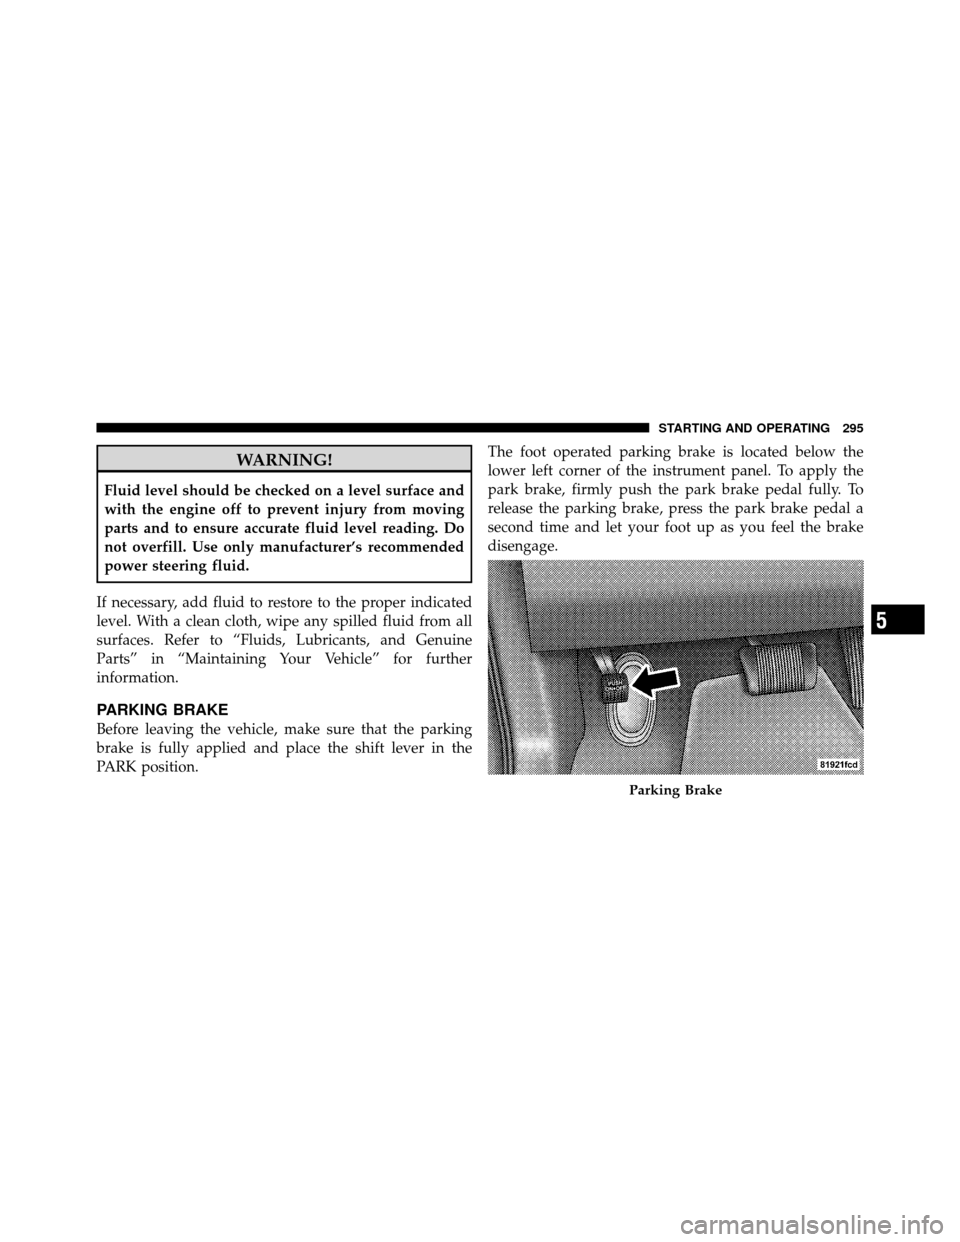
PARKING BRAKE
Before leaving the vehicle, make sure that the parking
brake is fully applied and place the shift lever in the
PARK position. The foot operated parking brake is located below the
lower left corner of the instrument panel. To apply the
park brake, firmly push the park brake pedal fully. To
release the parking brake, press the park brake pedal a
second time and let your foot up as you feel the brake
disengage.
Parking Brake
5
STARTING AND OPERATING 295