Page 99 of 538

Voice Command ButtonActual button location may vary with the ra-
dio. The individual buttons are described in the
“Operation” section.
The Uconnect™ Phone can be used with any Hands-Free
Profile certified Bluetooth� cellular phone. See the
Uconnect™ website for supported phones. If your cellu-
lar phone supports a different profile (e.g., Headset
Profile) you may not be able to use any Uconnect™
Phone features. Refer to your cellular service provider or
the phone manufacturer for details.
The Uconnect™ Phone is fully integrated with the vehi-
cle’s audio system. The volume of the Uconnect™ Phone
can be adjusted either from the radio volume control
knob or from the steering wheel radio control (right
switch), if so equipped. The radio display will be used for visual prompts from
the Uconnect™ Phone such as
�CELL�or caller ID on
certain radios.
Operation
Voice commands can be used to operate the Uconnect™
Phone and to navigate through the Uconnect™ Phone
menu structure. Voice commands are required after most
Uconnect™ Phone prompts. You will be prompted for a
specific command and then guided through the available
options.
•Prior to giving a voice command, one must wait for
the beep, which follows the �Ready�prompt or another
prompt.
•For certain operations, compound commands can be
used. For example, instead of saying �Setup�and then
�Phone Pairing,� the following compound command
can be said: �Setup Phone Pairing.�
98 UNDERSTANDING THE FEATURES OF YOUR VEHICLE
Page 155 of 538

The Rain Sensing system has protective features for the
wiper blades and arms. It will not operate under the
following conditions:
•Low Temperature Wipe Inhibit— The Rain Sensing
feature will not operate when the ignition is placed in
the RUN position, the vehicle is stationary and the
outside temperature is below 32°F (0°C), unless the
wiper control on the multifunction lever is moved, the
vehicle speed becomes greater than 0 mph (0 km/h) or
the outside temperature rises above freezing.
•Neutral Wipe Inhibit — The rain sensing feature will
not operate when the ignition is placed in the RUN
position, the transmission shift lever is in the NEU-
TRAL position and the vehicle speed is less than
5 mph (8 km/h), unless the wiper control on the
multifunction lever is moved or the shift lever is
moved out of the NEUTRAL position.
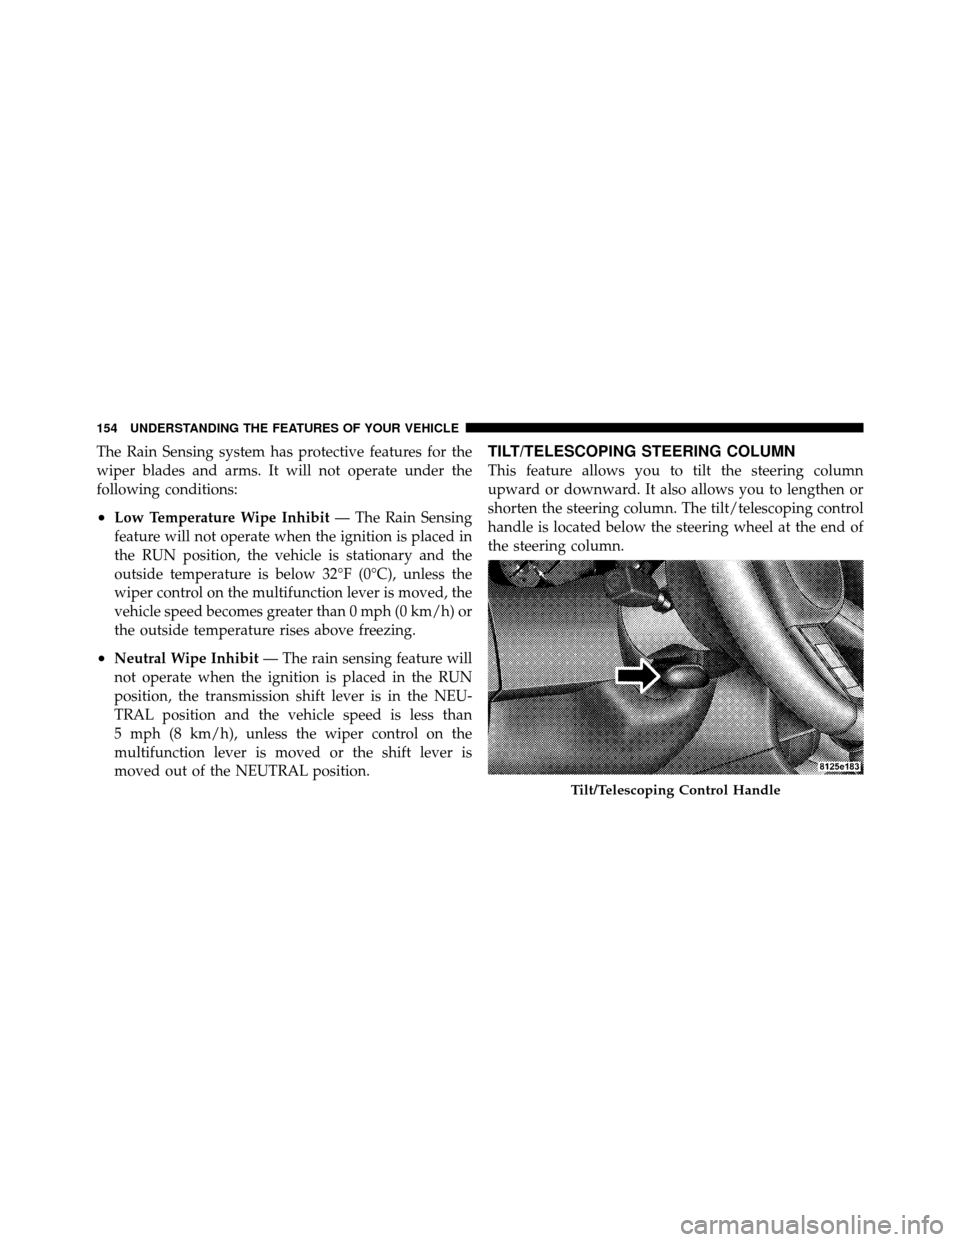
TILT/TELESCOPING STEERING COLUMN
This feature allows you to tilt the steering column
upward or downward. It also allows you to lengthen or
shorten the steering column. The tilt/telescoping control
handle is located below the steering wheel at the end of
the steering column.
Tilt/Telescoping Control Handle
154 UNDERSTANDING THE FEATURES OF YOUR VEHICLE
Page 156 of 538

To unlock the steering column, pull the control handle
outward. To tilt the steering column, move the steering
wheel upward or downward as desired. To lengthen or
shorten the steering column, pull the steering wheel
outward or push it inward as desired. To lock the steering
column in position, push the control handle inward until
fully engaged.
WARNING!
Do not adjust the steering column while driving.
Adjusting the steering column while driving or driv-
ing with the steering column unlocked, could cause
the driver to lose control of the vehicle. Be sure the
steering column is locked before driving your ve-
hicle. Failure to follow this warning may result in
serious injury or death.
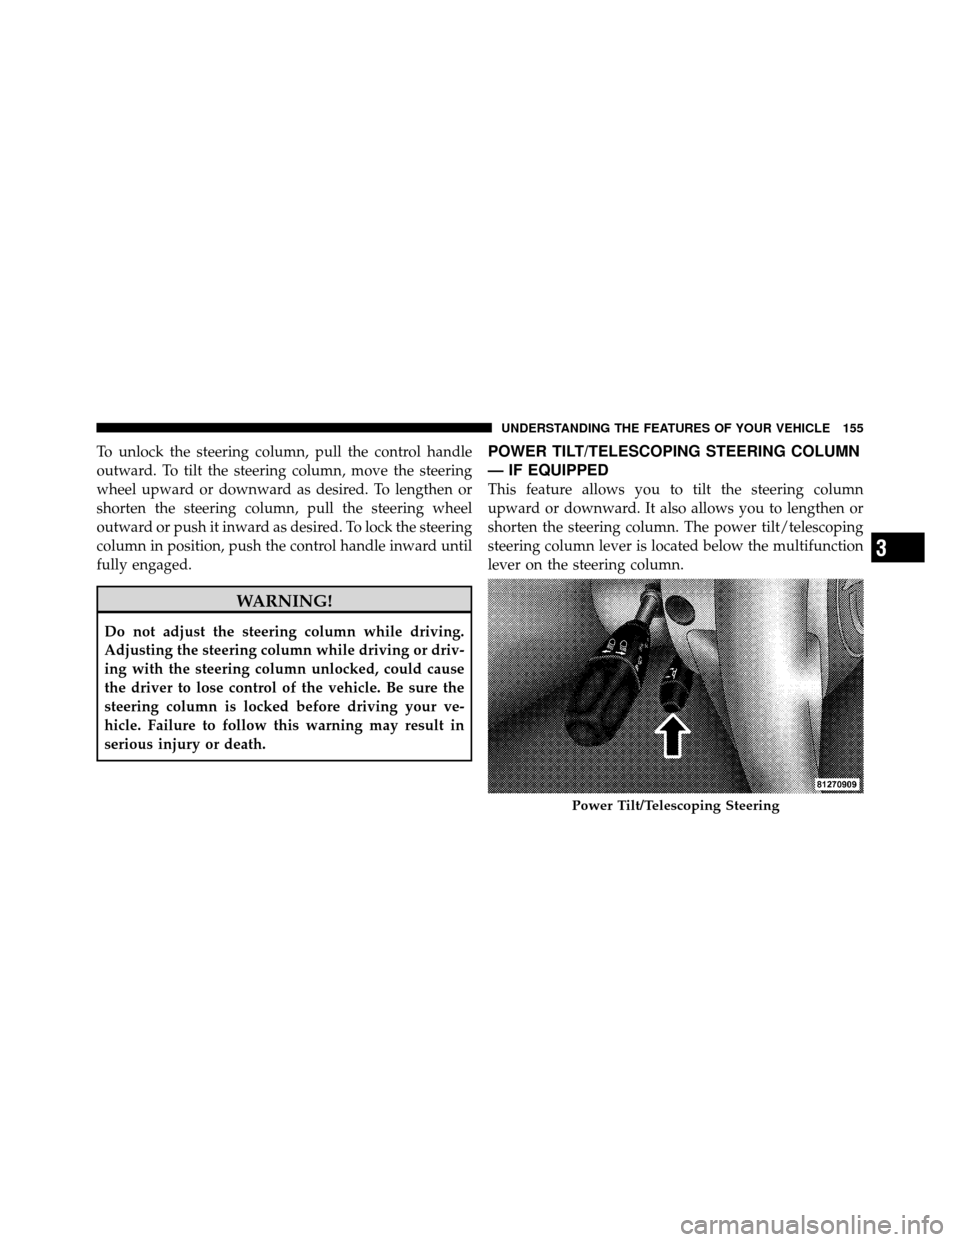
POWER TILT/TELESCOPING STEERING COLUMN
— IF EQUIPPED
This feature allows you to tilt the steering column
upward or downward. It also allows you to lengthen or
shorten the steering column. The power tilt/telescoping
steering column lever is located below the multifunction
lever on the steering column.
Power Tilt/Telescoping Steering
3
UNDERSTANDING THE FEATURES OF YOUR VEHICLE 155
Page 157 of 538

To tilt the steering column, move the lever up or down as
desired. To lengthen or shorten the steering column, pull
the lever toward you or push the lever away from you as
desired.
NOTE:For vehicles equipped with Driver Memory
Seat, you can use your Remote Keyless Entry (RKE)
transmitter or the memory switch on the driver’s door
trim panel to return the tilt/telescopic steering column to
pre-programmed positions. Refer to “Driver Memory
Seat” in this section.WARNING!
Do not adjust the steering column while driving.
Adjusting the steering column while driving or driv-
ing with the steering column unlocked, could cause
the driver to lose control of the vehicle. Be sure the
steering column is locked before driving your ve-
hicle. Failure to follow this warning may result in
serious injury or death.
ADJUSTABLE PEDALS — IF EQUIPPED
The adjustable pedals system is designed to allow a
greater range of driver comfort for steering wheel tilt and
seat position. This feature allows both the brake and
accelerator pedal to move toward or away from the
driver to provide improved position with the steering
wheel. The switch is located on the front side of the
driver’s seat cushion side shield.
156 UNDERSTANDING THE FEATURES OF YOUR VEHICLE
Page 159 of 538
CAUTION!
Do not place any article under the adjustable pedals
or impede its ability to move as it may cause damage
to the pedal controls. Pedal travel may become lim-
ited if movement is stopped by an obstruction in the
adjustable pedal’s path.
WARNING!
Do not adjust the pedals while the vehicle is moving.
You could lose control and have an accident. Always
adjust the pedals while the vehicle is parked.
ELECTRONIC SPEED CONTROL
When engaged, Electronic Speed Control takes over the
accelerator operation at speeds greater than 25 mph
(40 km/h).The Electronic Speed Control lever, located on the right-
side of the steering wheel, operates the system.
Electronic Speed Control Lever
158 UNDERSTANDING THE FEATURES OF YOUR VEHICLE
Page 161 of 538

NOTE:
•Electronic Speed Control will only function in 3rd, 4th,
or 5th gear when in the Autostick�mode (if
equipped).
•The Electronic Speed Control may not engage if a
different size tire is installed on one wheel, such as the
compact spare tire.
To Deactivate
The system will disable Electronic Speed Control without
erasing the memory if you:
•Softly tap the brake pedal.
•Press the brake pedal.
•Pull the Electronic Speed Control lever toward you
(CANCEL).
Pushing and releasing the ON/OFF button or turning the
ignition OFF erases the set speed from memory.
To Resume Speed
If you deactivated the Electronic Speed Control without
erasing the set speed from memory and your vehicle
speed is above 20 mph (32 km/h) you can resume the
previous set speed. To do so, push the lever upward to
RESUME ACCEL and release. Then remove your foot
from the accelerator pedal.
To Vary the Speed Setting
When the Electronic Speed Control is set, you can in-
crease speed by pushing up and holding the RESUME
ACCEL lever. If the lever is continually held in the
RESUME ACCEL position, the set speed will continue to
increase until the lever is released, then the new set speed
will be established.
Tapping the Electronic Speed Control lever to RESUME
ACCEL once will result in a 1 mph (1.6 km/h) speed
increase. Each time the lever is tapped speed increases, so
tapping the lever three times will increase speed by
3 mph (4.8 km/h), etc.
160 UNDERSTANDING THE FEATURES OF YOUR VEHICLE
Page 165 of 538
The Cruise Control system has two control modes:
•Adaptive Cruise Control mode for maintaining an
appropriate distance between vehicles.
•Normal (fixed speed) cruise control mode for cruising
at a constant preset speed. For additional information,
refer to “Normal (Fixed Speed) Cruise Control Mode”
in this section.Note:The system will not react to
preceding vehicles. Always be aware of the mode
selected.
You can change the mode by using the control lever. The
two control modes function differently. Always confirm
which mode is selected.
Adaptive Cruise Control (ACC) Operation
The speed control lever (located on the right side of the
steering wheel) operates the ACC system.
Activating Adaptive Cruise Control (ACC)
You can only activate ACC if the vehicle speed is above
25 mph (40 km/h).
1 — DISTANCE SETTING
2 — CANCEL
3 — RESUME/ACCEL
4 — ON/OFF/MODE
5 — SET/DECEL
164 UNDERSTANDING THE FEATURES OF YOUR VEHICLE
Page 173 of 538
Adaptive Cruise Control (ACC) Menu
The EVIC displays the current ACC system settings. The
EVIC is located in the upper part of the instrument
cluster between the speedometer and the tachometer. The
information it displays depends on ACC system status.Press the MENU button (located on the steer-
ing wheel) repeatedly until one of the follow-
ing displays in the EVIC:
CRUISE OFF
�When ACC is deactivated, the display will read
“CRUISE OFF.” ACC READY�When ACC is activated but the vehicle speed setting
has not been selected, the display will read “ACC
READY.”
Menu
Button
172 UNDERSTANDING THE FEATURES OF YOUR VEHICLE