Page 11 of 608

When the vehicle starts, the parking lamps will turn on
and remain on as long as the engine is running. The
doors will be locked and the climate control system may
come on.
The engine will continue to run for 10 minutes. Repeat
the steps for a 10-minute time extension. Remote start
can be extended only once.
Canceling a Remote Start
To cancel a remote start:
.Aim the RKE transmitter at the vehicle and press
and hold
/until the parking lamps turn off.
.Turn on the hazard warning flashers.
.Turn the ignition on and then back off.
See Remote Vehicle Start on page 3‑7.
Door Locks
There are several ways to lock and unlock the vehicle.
From outside, use the Remote Keyless Entry (RKE)
transmitter or the key in the driver door. From inside,
use the power door locks or the manual door locks.
To lock or unlock the door with the manual locks, push
down or pull up on the manual lock knob.
Power Door Locks
If available, these switches are located on the front
doors.
K:Press to unlock the doors.
Q:Remove the key from the ignition and press to lock
the doors.
For more information, see:
.Programmable Automatic Door Lockson
page 3‑11.
.Rear Door Security Locks on page 3‑11.
1-5
Page 17 of 608

Memory Features
This vehicle may have the memory package.
The controls for this
feature are located on
the driver door, and are
used to program and
recall memory settings
for the driver seat,
outside mirrors, and the
adjustable throttle and
brake pedal feature.
For more information, see Memory Seat, Mirrors, and
Pedals on page 2‑10.
Second Row Seats
If the vehicle has a 60/40 split bench or buckets seats,
the seat(s) can be folded for additional cargo space
or folded and tumbled for easy entry and exit to the
third row seats, if the vehicle has them. If the vehicle
has bucket seats, the seatbacks can be also be
reclined. These seats will have either the manual fold
and tumble feature or the automatic seat release fold
and tumble feature.
For more information, see 60/40 Split Bench Seat
on
page 2‑16or Bucket Seats on page 2‑21.
Third Row Seats
If the vehicle has a third row seat, the seatback(s)
can be folded and the entire seat can be tumbled,
or removed from the vehicle.
For detailed instructions, see Third Row Seat
on
page 2‑27.
1-11
Page 42 of 608
Pull the head restraint up to raise it. To lower the head
restraint, press the button, located on the top of the
seatback, and push the restraint down.
Push down on the head restraint after the button is
released to make sure that it is locked in place.
The head restraints are not designed to be removed.
The rear seat has head rests that can be adjusted up
and down.
Front Seats
Manual Seats
{WARNING:
You can lose control of the vehicle if you try to
adjust a manual driver's seat while the vehicle is
moving. The sudden movement could startle and
confuse you, or make you push a pedal when you
do not want to. Adjust the driver's seat only when
the vehicle is not moving.
If the vehicle has a manual seat, it can be moved
forward or rearward.
2-4
Page 49 of 608

If you use the remote keyless entry transmitter to enter
your vehicle and the remote recall memory feature is
on, automatic seat, adjustable mirror, and adjustable
pedal movements will occur. See“MEMORY SEAT
RECALL” underDIC Vehicle Customization (With DIC
Buttons)
on page 4‑71for more information.
To stop recall movement of the memory function at any
time, press one of the power seat controls, memory
buttons, power mirror buttons, or adjustable pedal
switch.
If something has blocked the driver ’s seat and/or the
adjustable pedals while recalling a memory position, the
driver ’s seat and/or the adjustable pedals recall may
stop working. If this happens, remove the obstruction
and press the appropriate control for the area that is not
responding for two seconds. Try recalling the memory
position again by pressing the appropriate memory
button. If the memory position is still not recalling, see
your dealer for service.
Easy Exit Seat
The control for this feature is located on the driver ’s
door panel between buttons 1 and 2.
With the vehicle in P (Park), the driver's seat exit
position can be recalled by pressing the exit button.
You will hear a single beep, and the driver ’s seat will
move back approximately 8 cm (3 in). To move the seat
back further, press the exit button again until the seat is
all the way back.
If the easy exit seat feature is programmed in the Driver
Information Center (DIC), automatic seat movement will
occur when the key is removed from the ignition. See
“EASY EXIT SEAT” underDIC Vehicle Customization
(With DIC Buttons)
on page 4‑71for more information.
The memory seat and easy exit features can also be
programmed using the DIC.
For programming information, see DIC Vehicle
Customization (With DIC Buttons) on page 4‑71.
2-11
Page 65 of 608
Returning the Seat(s) to the Sitting
Position
To return the seat to the sitting position, do the
following:1. Pull the seat down until it latches to the floor. The seatback cannot be raised if the seat is not latched
to the floor.
{WARNING:
If either seatback is not locked, it could move
forward in a sudden stop or crash. That could
cause injury to the person sitting there. Always
push and pull on the seatbacks to be sure they
are locked.
2. Lift the seatback and push it rearward. Push and pull on the seatback to make sure it is locked.
Third Row Seat
If the vehicle has a third row seat, the seatback(s)
can be folded and the entire seat can be tumbled,
or removed from the vehicle.
Folding the Seatback(s)
To fold the seatback, do the following:
1. Open the liftgate to access the controls for the seat.
2. Remove all items on the seat cushion.
Notice: Folding a rear seat with the safety belts
still fastened may cause damage to the seat or the
safety belts. Always unbuckle the safety belts and
return them to their normal stowed position before
folding a rear seat.
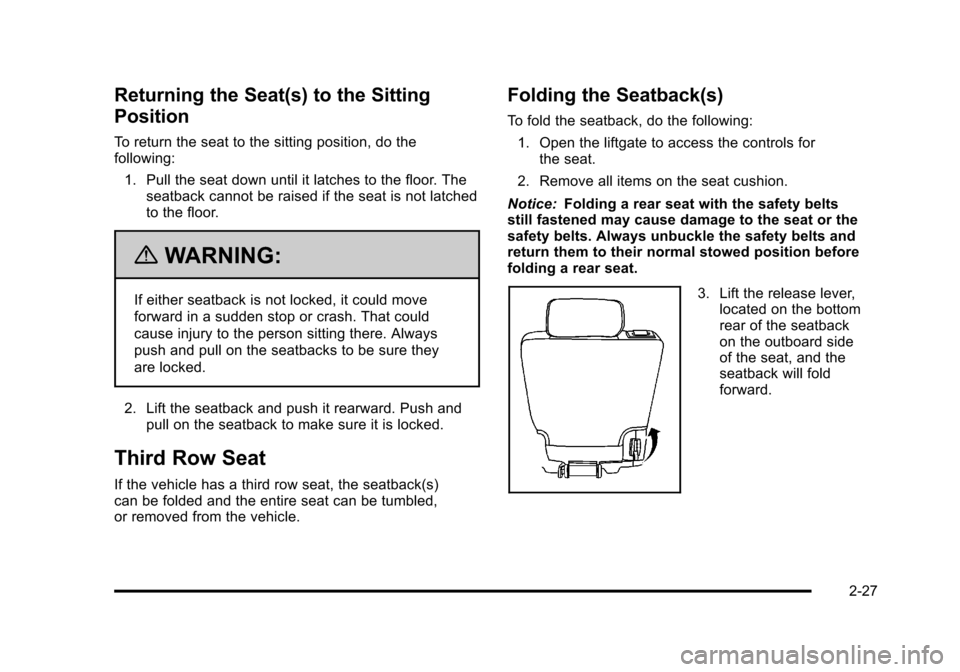
3. Lift the release lever, located on the bottom
rear of the seatback
on the outboard side
of the seat, and the
seatback will fold
forward.
2-27
Page 68 of 608

Removing the Third Row Seat
To remove the seat, do the following:1. Open the liftgate to access the controls for the seat.
2. Fold the seatback forward using the instructions listed under “Folding the Seatbacks” previously.
The seat cannot be removed unless the seatback
is folded.
3. Unlatch the seat from the floor by pulling
the carrying handle,
located at the rear of
the seat, rearward.
4. Roll the seat out of the vehicle. There is a track in the floor to guide the seat wheels out of the
vehicle.
Installing the Third Row Seat
To install the seat, do the following:
1. Open the liftgate to access the rear of the vehicle.
2. Slide the front outboard seat wheels into the track on the floor and roll the seat forward. The front
latches should lock into place. If the latches do not
lock, try tilting the rear of the seat upward slightly.
3. Lower the rear of the seat and push down on the seat to engage the rear floor latches.
{WARNING:
A seat that is not locked into place properly can
move around in a collision or sudden stop. People
in the vehicle could be injured. Be sure to lock the
seat into place properly when installing it.
2-30
Page 88 of 608

Safety Belt Pretensioners
This vehicle has safety belt pretensioners for front
outboard occupants. Although the safety belt
pretensioners cannot be seen, they are part of the
safety belt assembly. They can help tighten the safety
belts during the early stages of a moderate to severe
frontal, near frontal, or rear crash if the threshold
conditions for pretensioner activation are met. And,
if the vehicle has side impact airbags, safety belt
pretensioners can help tighten the safety belts in a
side crash or a rollover event.
Pretensioners work only once. If the pretensioners
activate in a crash, they will need to be replaced, and
probably other new parts for the vehicle's safety belt
system. SeeReplacing Restraint System Parts After a
Crash on page 2‑102.
Rear Safety Belt Comfort Guides
This vehicle may have rear shoulder belt comfort
guides. If not, they are available through your dealer.
The guides may provide added safety belt comfort for
older children who have outgrown booster seats and for
some adults. When installed and properly adjusted, the
comfort guide positions the belt away from the neck
and head. There is one guide, if equipped, for each outside
passenger position in the second row seat and the
third row, if the vehicle has one. Here is how to install
a comfort guide to the safety belt:Second Row
1. For the second row, remove the guide from its storage clip on the interior body.
2-50
Page 89 of 608
Third Row
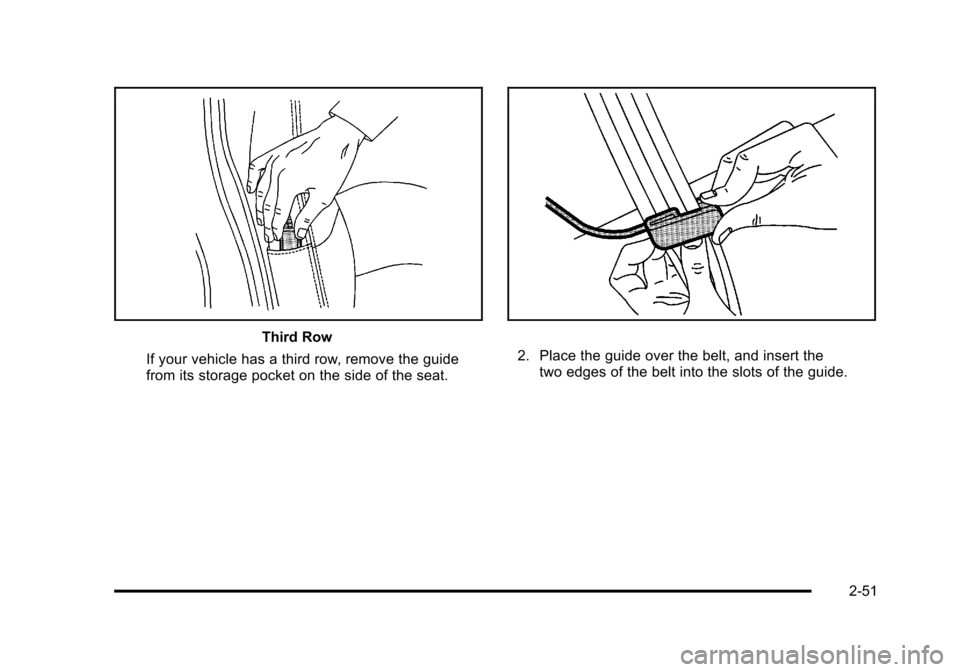
If your vehicle has a third row, remove the guide
from its storage pocket on the side of the seat.
2. Place the guide over the belt, and insert the two edges of the belt into the slots of the guide.
2-51