Page 291 of 608

AUTO DOOR LOCK
This feature allows you to select when the vehicle's
doors will automatically lock. SeeProgrammable
Automatic Door Locks
on page 3‑11for more
information.
Press the customization button until AUTO DOOR
LOCK appears on the DIC display. Press the set/reset
button once to access the settings for this feature. Then
press the customization button to scroll through the
following settings:
SHIFT OUT OF PARK (default): The doors will
automatically lock when the vehicle is shifted out of
P (Park).
AT VEHICLE SPEED: The doors will automatically lock
when the vehicle speed is above 8 mph (13 km/h) for
three seconds.
NO CHANGE: No change will be made to this feature.
The current setting will remain.
To select a setting, press the set/reset button while the
desired setting is displayed on the DIC.
AUTO DOOR UNLOCK
This feature allows you to select whether or not to turn
off the automatic door unlocking feature. It also allows
you to select which doors and when the doors will
automatically unlock. See Programmable Automatic
Door Locks
on page 3‑11for more information.
Press the customization button until AUTO DOOR
UNLOCK appears on the DIC display. Press the
set/reset button once to access the settings for this
feature. Then press the customization button to scroll
through the following settings:
OFF: None of the doors will automatically unlock.
DRIVER AT KEY OUT: Only the driver's door will
unlock when the key is taken out of the ignition.
DRIVER IN PARK: Only the driver's door will unlock
when the vehicle is shifted into P (Park) .
ALL AT KEY OUT: All of the doors will unlock when the
key is taken out of the ignition.
ALL IN PARK (default): All of the doors will unlock
when the vehicle is shifted into P (Park).
NO CHANGE: No change will be made to this feature.
The current setting will remain.
To select a setting, press the set/reset button while the
desired setting is displayed on the DIC.
4-73
Page 292 of 608

REMOTE DOOR LOCK
This feature allows you to select the type of feedback
you will receive when locking the vehicle with the
Remote Keyless Entry (RKE) transmitter. You will not
receive feedback when locking the vehicle with the RKE
transmitter if the doors are open. SeeRemote Keyless
Entry (RKE) System Operation
on page 3‑4for more
information.
Press the customization button until REMOTE DOOR
LOCK appears on the DIC display. Press the set/reset
button once to access the settings for this feature. Then
press the customization button to scroll through the
following settings:
OFF: There will be no feedback when you press the
lock button on the RKE transmitter.
LIGHTS ONLY: The exterior lamps will flash when you
press the lock button on the RKE transmitter.
HORN ONLY: The horn will sound on the second press
of the lock button on the RKE transmitter.
HORN & LIGHTS (default): The exterior lamps will
flash when you press the lock button on the RKE
transmitter, and the horn will sound when the lock
button is pressed again within five seconds of the
previous command. NO CHANGE:
No change will be made to this feature.
The current setting will remain.
To select a setting, press the set/reset button while the
desired setting is displayed on the DIC.
REMOTE DOOR UNLOCK
This feature allows you to select the type of feedback
you will receive when unlocking the vehicle with the
Remote Keyless Entry (RKE) transmitter. You will not
receive feedback when unlocking the vehicle with the
RKE transmitter if the doors are open. See Remote
Keyless Entry (RKE) System Operation
on page 3‑4for more information.
Press the customization button until REMOTE DOOR
UNLOCK appears on the DIC display. Press the set/
reset button once to access the settings for this feature.
Then press the customization button to scroll through
the following settings:
LIGHTS OFF: The exterior lamps will not flash when
you press the unlock button on the RKE transmitter.
LIGHTS ON (default): The exterior lamps will flash
when you press the unlock button on the RKE
transmitter.
NO CHANGE: No change will be made to this feature.
The current setting will remain.
To select a setting, press the set/reset button while the
desired setting is displayed on the DIC.
4-74
Page 293 of 608

DELAY DOOR LOCK
This feature allows you to select whether or not the
locking of the vehicle's doors and liftgate will be
delayed. When locking the doors and liftgate with the
power door lock switch and a door or the liftgate is
open, this feature will delay locking the doors and
liftgate until five seconds after the last door is closed.
You will hear three chimes to signal that the delayed
locking feature is in use. The key must be out of the
ignition for this feature to work. You can temporarily
override delayed locking by pressing the power door
lock switch twice. SeeDelayed Locking
on page 3‑11for more information.
Press the customization button until DELAY DOOR
LOCK appears on the DIC display. Press the set/reset
button once to access the settings for this feature. Then
press the customization button to scroll through the
following settings:
OFF:There will be no delayed locking of the vehicle's
doors.
ON (default): The doors will not lock until five seconds
after the last door or the liftgate is closed.
NO CHANGE: No change will be made to this feature.
The current setting will remain.
To select a setting, press the set/reset button while the
desired setting is displayed on the DIC.
EXIT LIGHTING
This feature allows you to select the amount of time you
want the exterior lamps to remain on when it is dark
enough outside. This happens after the key is turned
from ON/RUN to LOCK/OFF.
Press the customization button until EXIT LIGHTING
appears on the DIC display. Press the set/reset button
once to access the settings for this feature. Then press
the customization button to scroll through the following
settings:
OFF: The exterior lamps will not turn on.
30 SECONDS (default): The exterior lamps will stay on
for 30 seconds.
1 MINUTE: The exterior lamps will stay on for
one minute.
2 MINUTES: The exterior lamps will stay on for
two minutes.
NO CHANGE: No change will be made to this feature.
The current setting will remain.
To select a setting, press the set/reset button while the
desired setting is displayed on the DIC.
4-75
Page 388 of 608
Tire and Loading Information Label
Label Example
A vehicle specific Tire and Loading Information
label is attached to the center pillar (B-pillar).
With the driver's door open, you will find the
label attached below the door lock post (striker).The tire and loading information label shows the
number of occupant seating positions (A), and the
maximum vehicle capacity weight (B) in kilograms
and pounds.
The Tire and Loading Information label also
shows the size of the original equipment
tires (C) and the recommended cold tire inflation
pressures (D). For more information on tires and
inflation see
Tires
on page 6‑63andInflation - Tire
Pressure
on page 6‑72.
There is also important loading information on
the vehicle Certification/Tire label. It tells you the
Gross Vehicle Weight Rating (GVWR) and the
Gross Axle Weight Rating (GAWR) for the front
and rear axles. See “Certification/Tire Label” later
in this section.
5-30
Page 438 of 608

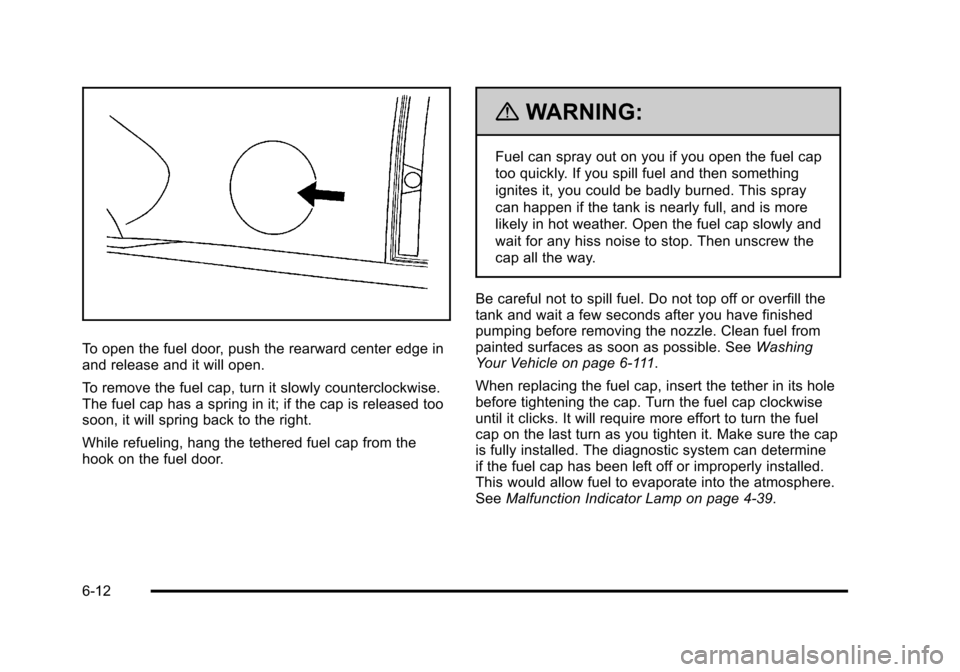
To open the fuel door, push the rearward center edge in
and release and it will open.
To remove the fuel cap, turn it slowly counterclockwise.
The fuel cap has a spring in it; if the cap is released too
soon, it will spring back to the right.
While refueling, hang the tethered fuel cap from the
hook on the fuel door.
{WARNING:
Fuel can spray out on you if you open the fuel cap
too quickly. If you spill fuel and then something
ignites it, you could be badly burned. This spray
can happen if the tank is nearly full, and is more
likely in hot weather. Open the fuel cap slowly and
wait for any hiss noise to stop. Then unscrew the
cap all the way.
Be careful not to spill fuel. Do not top off or overfill the
tank and wait a few seconds after you have finished
pumping before removing the nozzle. Clean fuel from
painted surfaces as soon as possible. See Washing
Your Vehicle on page 6‑111.
When replacing the fuel cap, insert the tether in its hole
before tightening the cap. Turn the fuel cap clockwise
until it clicks. It will require more effort to turn the fuel
cap on the last turn as you tighten it. Make sure the cap
is fully installed. The diagnostic system can determine
if the fuel cap has been left off or improperly installed.
This would allow fuel to evaporate into the atmosphere.
See Malfunction Indicator Lamp on page 4‑39.
6-12
Page 517 of 608
To access the spare tire, refer to the following graphics
and instructions:
A. Hoist Assembly
B. Hoist Shaft
C. Hoist Shaft Access Cover/Hole D. Jack Handle
Extensions
E. Wheel Wrench F. Hoist Cable G. Tire/Wheel Retainer
H. Spare Tire (Valve Stem Pointed Down)
I. Hoist Shaft Access Hole J. Hoist End of
Extension Tool
K. Spare Tire Lock
1. Open the hoist shaft access door (C) on the bumper to access the spare tire lock (K).
2. To remove the spare tire lock, insert the ignition key, turn it clockwise and then pull it straight out.
6-91
Page 544 of 608

Fuses and Circuit Breakers
If the vehicle is a Two-mode Hybrid, see the Two-mode
Hybrid manual for more information.
The wiring circuits in the vehicle are protected from
short circuits by a combination of fuses, circuit breakers
and fusible thermal links. This greatly reduces the
chance of fires caused by electrical problems.
Look at the silver-colored band inside the fuse. If the
band is broken or melted, replace the fuse. Be sure you
replace a bad fuse with a new one of the identical size
and rating.
If you ever have a problem on the road and don't
have a spare fuse, you can borrow one that has the
same amperage. Just pick some feature of your
vehicle that you can get along without–like the
radio or cigarette lighter –and use its fuse, if it is the
correct amperage. Replace it as soon as you can.
Instrument Panel Fuse Block
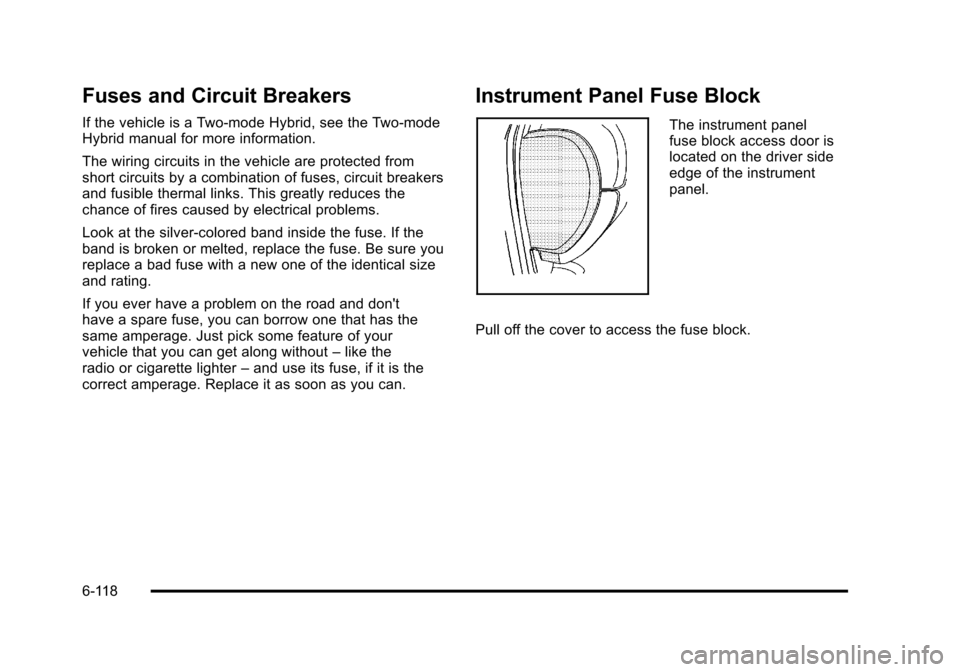
The instrument panel
fuse block access door is
located on the driver side
edge of the instrument
panel.
Pull off the cover to access the fuse block.
6-118
Page 545 of 608
The vehicle may not use all of the fuses shown.Fuses Usage
1 Rear Seats
2 Rear Accessory Power Outlet
3 Steering Wheel Controls Backlight
4 Driver Door Module
5 Dome Lamps, Driver Side Turn Signal
6 Driver Side Turn Signal, Stoplamp
7 Instrument Panel Back Lighting
FusesUsage
8Passenger Side Turn Signal,
Stoplamp
9 Passenger Door Module, Driver
Unlock
10 Power Door Lock 2 (Unlock Feature)
11 Power Door Lock 2 (Lock Feature)
12 Stoplamps, Center-High Mounted
Stoplamp
13 Rear Climate Controls
14 Power Mirror
15 Body Control Module (BCM)
16 Accessory Power Outlets
17 Interior Lamps
18 Power Door Lock 1 (Unlock Feature)
19 Rear Seat Entertainment
20 Ultrasonic Rear Parking Assist, Power
Liftgate
21 Power Door Lock 1 (Lock Feature)
22 Driver Information Center (DIC)
23 Rear Wiper
6-119