2010 CHEVROLET TAHOE fuel
[x] Cancel search: fuelPage 174 of 608

N (Neutral):In this position, the engine does not
connect with the wheels. To restart the engine when the
vehicle is already moving, use N (Neutral) only. Also,
use N (Neutral) when the vehicle is being towed.
{WARNING:
Shifting into a drive gear while the engine is
running at high speed is dangerous. Unless your
foot is firmly on the brake pedal, the vehicle could
move very rapidly. You could lose control and hit
people or objects. Do not shift into a drive gear
while the engine is running at high speed.
Notice: Shifting out of P (Park) or N (Neutral) with
the engine running at high speed may damage the
transmission. The repairs would not be covered by
the vehicle warranty. Be sure the engine is not
running at high speed when shifting the vehicle. D (Drive):
This position is for normal driving. It provides
the best fuel economy. If you need more power for
passing, and you are:
.Going less than about 35 mph (55 km/h), push the
accelerator pedal about halfway down.
.Going about 35 mph (55 km/h) or more, push the
accelerator all the way down.
By doing this, the vehicle shifts down to the next
gear and has more power.
D (Drive) can be used when towing a trailer, carrying a
heavy load, driving on steep hills, or for off-road driving.
You might want to shift the transmission to a lower gear
selection if the transmission shifts too often.
Downshifting the transmission in slippery road
conditions could result in skidding. See Skidding
under Loss of Control on page 5‑10.
3-34
Page 180 of 608

Automatic Transfer Case
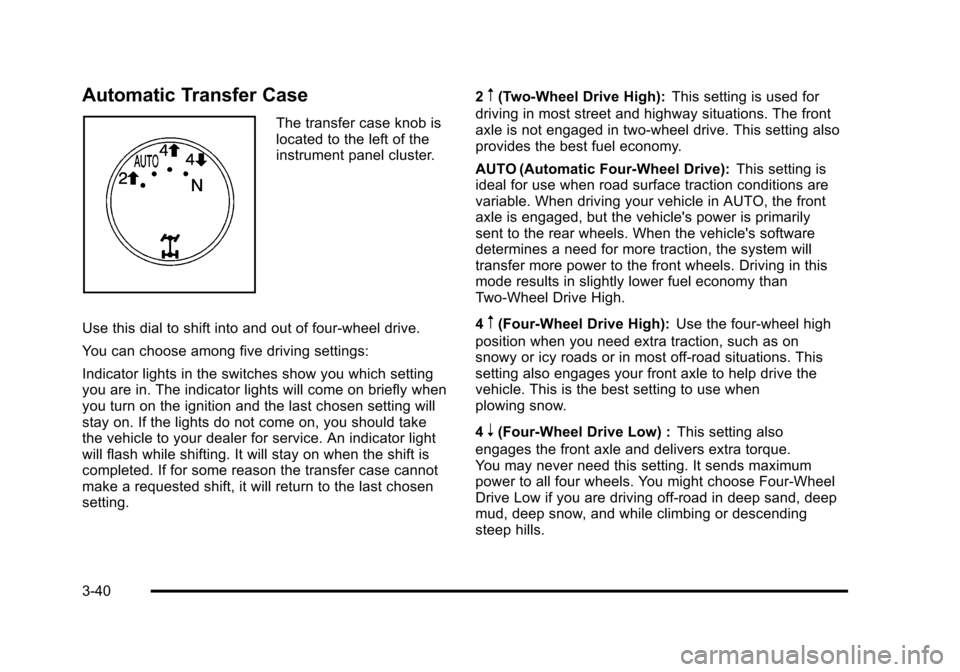
The transfer case knob is
located to the left of the
instrument panel cluster.
Use this dial to shift into and out of four-wheel drive.
You can choose among five driving settings:
Indicator lights in the switches show you which setting
you are in. The indicator lights will come on briefly when
you turn on the ignition and the last chosen setting will
stay on. If the lights do not come on, you should take
the vehicle to your dealer for service. An indicator light
will flash while shifting. It will stay on when the shift is
completed. If for some reason the transfer case cannot
make a requested shift, it will return to the last chosen
setting. 2
m(Two-Wheel Drive High):
This setting is used for
driving in most street and highway situations. The front
axle is not engaged in two-wheel drive. This setting also
provides the best fuel economy.
AUTO (Automatic Four-Wheel Drive): This setting is
ideal for use when road surface traction conditions are
variable. When driving your vehicle in AUTO, the front
axle is engaged, but the vehicle's power is primarily
sent to the rear wheels. When the vehicle's software
determines a need for more traction, the system will
transfer more power to the front wheels. Driving in this
mode results in slightly lower fuel economy than
Two-Wheel Drive High.
4
m(Four-Wheel Drive High): Use the four-wheel high
position when you need extra traction, such as on
snowy or icy roads or in most off-road situations. This
setting also engages your front axle to help drive the
vehicle. This is the best setting to use when
plowing snow.
4
n(Four-Wheel Drive Low) : This setting also
engages the front axle and delivers extra torque.
You may never need this setting. It sends maximum
power to all four wheels. You might choose Four-Wheel
Drive Low if you are driving off-road in deep sand, deep
mud, deep snow, and while climbing or descending
steep hills.
3-40
Page 185 of 608

Automatic Transfer Case
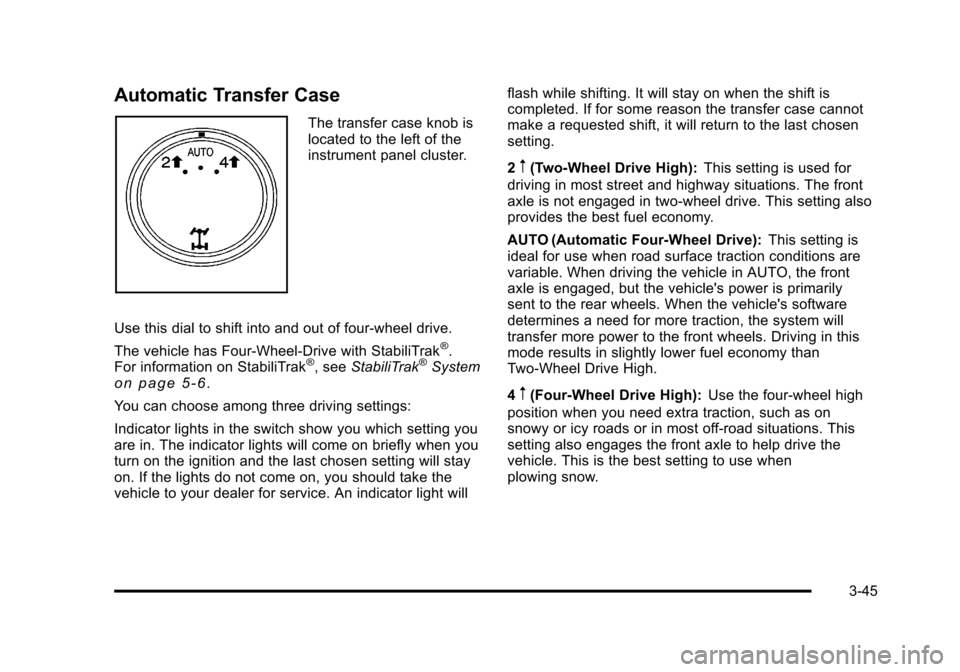
The transfer case knob is
located to the left of the
instrument panel cluster.
Use this dial to shift into and out of four-wheel drive.
The vehicle has Four-Wheel-Drive with StabiliTrak
®.
For information on StabiliTrak®, see StabiliTrak®Systemon page 5‑6.
You can choose among three driving settings:
Indicator lights in the switch show you which setting you
are in. The indicator lights will come on briefly when you
turn on the ignition and the last chosen setting will stay
on. If the lights do not come on, you should take the
vehicle to your dealer for service. An indicator light will flash while shifting. It will stay on when the shift is
completed. If for some reason the transfer case cannot
make a requested shift, it will return to the last chosen
setting.
2
m(Two-Wheel Drive High):
This setting is used for
driving in most street and highway situations. The front
axle is not engaged in two-wheel drive. This setting also
provides the best fuel economy.
AUTO (Automatic Four-Wheel Drive): This setting is
ideal for use when road surface traction conditions are
variable. When driving the vehicle in AUTO, the front
axle is engaged, but the vehicle's power is primarily
sent to the rear wheels. When the vehicle's software
determines a need for more traction, the system will
transfer more power to the front wheels. Driving in this
mode results in slightly lower fuel economy than
Two-Wheel Drive High.
4
m(Four-Wheel Drive High): Use the four-wheel high
position when you need extra traction, such as on
snowy or icy roads or in most off-road situations. This
setting also engages the front axle to help drive the
vehicle. This is the best setting to use when
plowing snow.
3-45
Page 220 of 608

Section 4 Instrument Panel
Tire Pressure Light . . . . . . . . . . . . . . . . . . . . . . . . . . . . 4-38
Malfunction Indicator Lamp . . . . . . . . . . . . . . . . . . . . 4-39
Oil Pressure Gauge . . . . . . . . . . . . . . . . . . . . . . . . . . . . 4-42
Oil Pressure Light . . . . . . . . . . . . . . . . . . . . . . . . . . . . . 4-43
Security Light . . . . . . . . . . . . . . . . . . . . . . . . . . . . . . . . . . 4-44
Fog Lamp Light . . . . . . . . . . . . . . . . . . . . . . . . . . . . . . . . 4-44
Cruise Control Light . . . . . . . . . . . . . . . . . . . . . . . . . . . 4-44
Highbeam On Light . . . . . . . . . . . . . . . . . . . . . . . . . . . . 4-44
Tow/Haul Mode Light . . . . . . . . . . . . . . . . . . . . . . . . . . 4-45
Fuel Gauge . . . . . . . . . . . . . . . . . . . . . . . . . . . . . . . . . . . . 4-45
Low Fuel Warning Light . . . . . . . . . . . . . . . . . . . . . . . . 4-46
Driver Information Center (DIC) . . . . . . . . . . . . . . . . . . 4-47
DIC Operation and Displays (With DIC Buttons) . . . . . . . . . . . . . . . . . . . . . . . . . . . . . . . . . . . . . 4-47
DIC Operation and Displays (Without DIC Buttons) . . . . . . . . . . . . . . . . . . . . . . . . . . . . . . . . . . . . . 4-55
DIC Compass . . . . . . . . . . . . . . . . . . . . . . . . . . . . . . . . . . 4-58
DIC Warnings and Messages . . . . . . . . . . . . . . . . . . 4-61
DIC Vehicle Customization (With DIC Buttons) . . . . . . . . . . . . . . . . . . . . . . . . . . . . . . . . . . . . . 4-71 Audio System(s)
. . . . . . . . . . . . . . . . . . . . . . . . . . . . . . . . . . 4-80
Setting the Clock . . . . . . . . . . . . . . . . . . . . . . . . . . . . . . 4-81
Radio(s) . . . . . . . . . . . . . . . . . . . . . . . . . . . . . . . . . . . . . . . 4-82
Using an MP3 (Radios with CD) . . . . . . . . . . . . . . . 4-99
Using an MP3 (Radios with CD and DVD) . . . . 4-106
XM Radio Messages . . . . . . . . . . . . . . . . . . . . . . . . . 4-113
Navigation/Radio System . . . . . . . . . . . . . . . . . . . . . 4-114
Bluetooth
®. . . . . . . . . . . . . . . . . . . . . . . . . . . . . . . . . . . . 4-114
Rear Seat Entertainment (RSE) System . . . . . . 4-125
Rear Seat Audio (RSA) . . . . . . . . . . . . . . . . . . . . . . . 4-134
Theft-Deterrent Feature . . . . . . . . . . . . . . . . . . . . . . 4-135
Audio Steering Wheel Controls . . . . . . . . . . . . . . . 4-136
Radio Reception . . . . . . . . . . . . . . . . . . . . . . . . . . . . . . 4-138
Rear Side Window Antenna . . . . . . . . . . . . . . . . . . 4-139
XM™ Satellite Radio Antenna System . . . . . . . . 4-139
4-2
Page 253 of 608

Voltmeter Gauge
When the engine is not
running, but the ignition is
on, this gauge shows the
battery's state of charge
in DC volts.
When the engine is running, the gauge shows the
condition of the charging system. The charging system
regulates voltage based on the state of the battery for
improved fuel economy and battery life. The gauge may
transition from a higher to lower or a lower to higher
reading, this is normal. Readings between the low and
high warning zones indicate the normal operating
range. The gauge may also read low during the fuel
economy mode, this is normal. Readings in the low warning zone may occur when a
large number of electrical accessories are operating
in the vehicle and the engine is left at an idle for an
extended period. This condition is normal since the
charging system is not able to provide full power at
engine idle. As engine speeds are increased, this
condition should correct itself as higher engine speeds
allow the charging system to create full power. If there
is a problem with the battery charging system, this light
will come on or the SERVICE BATTERY CHARGING
SYSTEM DIC message will display. See
DIC Warnings
and Messages
on page 4‑61and Charging System
Lighton page 4‑34for more information.
4-35
Page 257 of 608

When the Light is On Steady
This indicates that one or more of the tires is
significantly underinflated.
A tire pressure message in the Driver Information
Center (DIC), can accompany the light. SeeDriver
Information Center (DIC)
on page 4‑47for more
information. Stop and check the tires as soon as it is
safe to do so. If underinflated, inflate to the proper
pressure. See Inflation - Tire Pressure
on page 6‑72for more information.
When the Light Flashes First and Then is
On Steady
This indicates that there may be a problem with the
Tire Pressure Monitor System. The light flashes for
about a minute and stays on steady for the remainder
of the ignition cycle. This sequence repeats with every
ignition cycle. See Tire Pressure Monitor Operation
on
page 6‑74for more information.
Malfunction Indicator Lamp
Check Engine Light
A computer system called OBD II (On-Board
Diagnostics-Second Generation) monitors operation
of the fuel, ignition, and emission control systems.
It ensures that emissions are at acceptable levels for
the life of the vehicle, helping to produce a cleaner
environment.
This light should come on
when the ignition is on,
but the engine is not
running, as a check to
show it is working. If it
does not, have the vehicle
serviced by your dealer.
If the check engine light comes on and stays on, while
the engine is running, this indicates that there is an
OBD II problem and service is required.
4-39
Page 258 of 608

Malfunctions often are indicated by the system before
any problem is apparent. Being aware of the light can
prevent more serious damage to the vehicle. This
system assists the service technician in correctly
diagnosing any malfunction.
Notice:If the vehicle is continually driven with this
light on, after a while, the emission controls might
not work as well, the vehicle's fuel economy might
not be as good, and the engine might not run as
smoothly. This could lead to costly repairs that
might not be covered by the vehicle warranty.
Notice: Modifications made to the engine,
transmission, exhaust, intake, or fuel system of
the vehicle or the replacement of the original tires
with other than those of the same Tire Performance
Criteria (TPC) can affect the vehicle's emission
controls and can cause this light to come on.
Modifications to these systems could lead to costly
repairs not covered by the vehicle warranty. This
could also result in a failure to pass a required
Emission Inspection/Maintenance test. See
Accessories and Modifications on page 6‑4. This light comes on during a malfunction in one of
two ways:
Light Flashing:
A misfire condition has been detected.
A misfire increases vehicle emissions and could
damage the emission control system on the vehicle.
Diagnosis and service might be required.
To prevent more serious damage to the vehicle:
.Reduce vehicle speed.
.Avoid hard accelerations.
.Avoid steep uphill grades.
.If towing a trailer, reduce the amount of cargo
being hauled as soon as it is possible.
If the light continues to flash, when it is safe to do so,
stop the vehicle. Find a safe place to park the vehicle.
Turn the vehicle off, wait at least 10 seconds, and
restart the engine. If the light is still flashing, follow the
previous steps and see your dealer for service as soon
as possible.
4-40
Page 259 of 608

Light On Steady:An emission control system
malfunction has been detected on the vehicle.
Diagnosis and service might be required.
An emission system malfunction might be corrected by
doing the following:
.Make sure the fuel cap is fully installed. See Filling
the Tankon page 6‑11. The diagnostic system
can determine if the fuel cap has been left off or
improperly installed. A loose or missing fuel cap
allows fuel to evaporate into the atmosphere. A few
driving trips with the cap properly installed should
turn the light off.
.If the vehicle has been driven through a deep
puddle of water, the vehicle's electrical system
might be wet. The condition is usually corrected
when the electrical system dries out. A few driving
trips should turn the light off.
.Make sure to fuel the vehicle with quality fuel.
Poor fuel quality causes the engine not to run as
efficiently as designed and can cause: stalling
after start-up, stalling when the vehicle is changed
into gear, misfiring, hesitation on acceleration,
or stumbling on acceleration. These conditions
might go away once the engine is warmed up.
If one or more of these conditions occurs, change
the fuel brand used. It will require at least one full
tank of the proper fuel to turn the light off.
See Gasoline Octane on page 6‑7.
If none of the above have made the light turn off, your
dealer can check the vehicle. The dealer has the
proper test equipment and diagnostic tools to fix any
mechanical or electrical problems that might have
developed.
4-41